
Reno Recap: Primary Bathroom
This is the post I’ve looked forward to writing more than any other, and the reason is…it’s the last BIG project on our renovation plan! Sure, there are plenty of other little things to do, but from the giant to-do list we made when we first moved in 3 years ago…this is it! We’re done! I can hardly believe it.
The primary bath in this home was quite something. It had an odd layout with an asymmetrical vanity, three separate mirrors, and a shower with the original avocado colored tile from the 60s. It also oddly has an exterior door that goes out to the backyard (we think it was added in case a pool was ever added 🤷🏼♀️). This is what it looked like when we moved in. We immediately removed that amber divider because it was within inches of the toilet 😐

I’ve wanted to rip the room apart since day one and finally, this summer, it was time! We started this project in May and it took us about eight weeks to complete. This was a bit longer than we had anticipated, but we’ve learned that the summer months are the hardest for us to get things done (we had 54 days over 110º this year, so it makes sense). Thankfully, throughout those eight weeks, we had our beautiful guest bathroom to use!
Here’s what the room looked like right before we tore it apart:
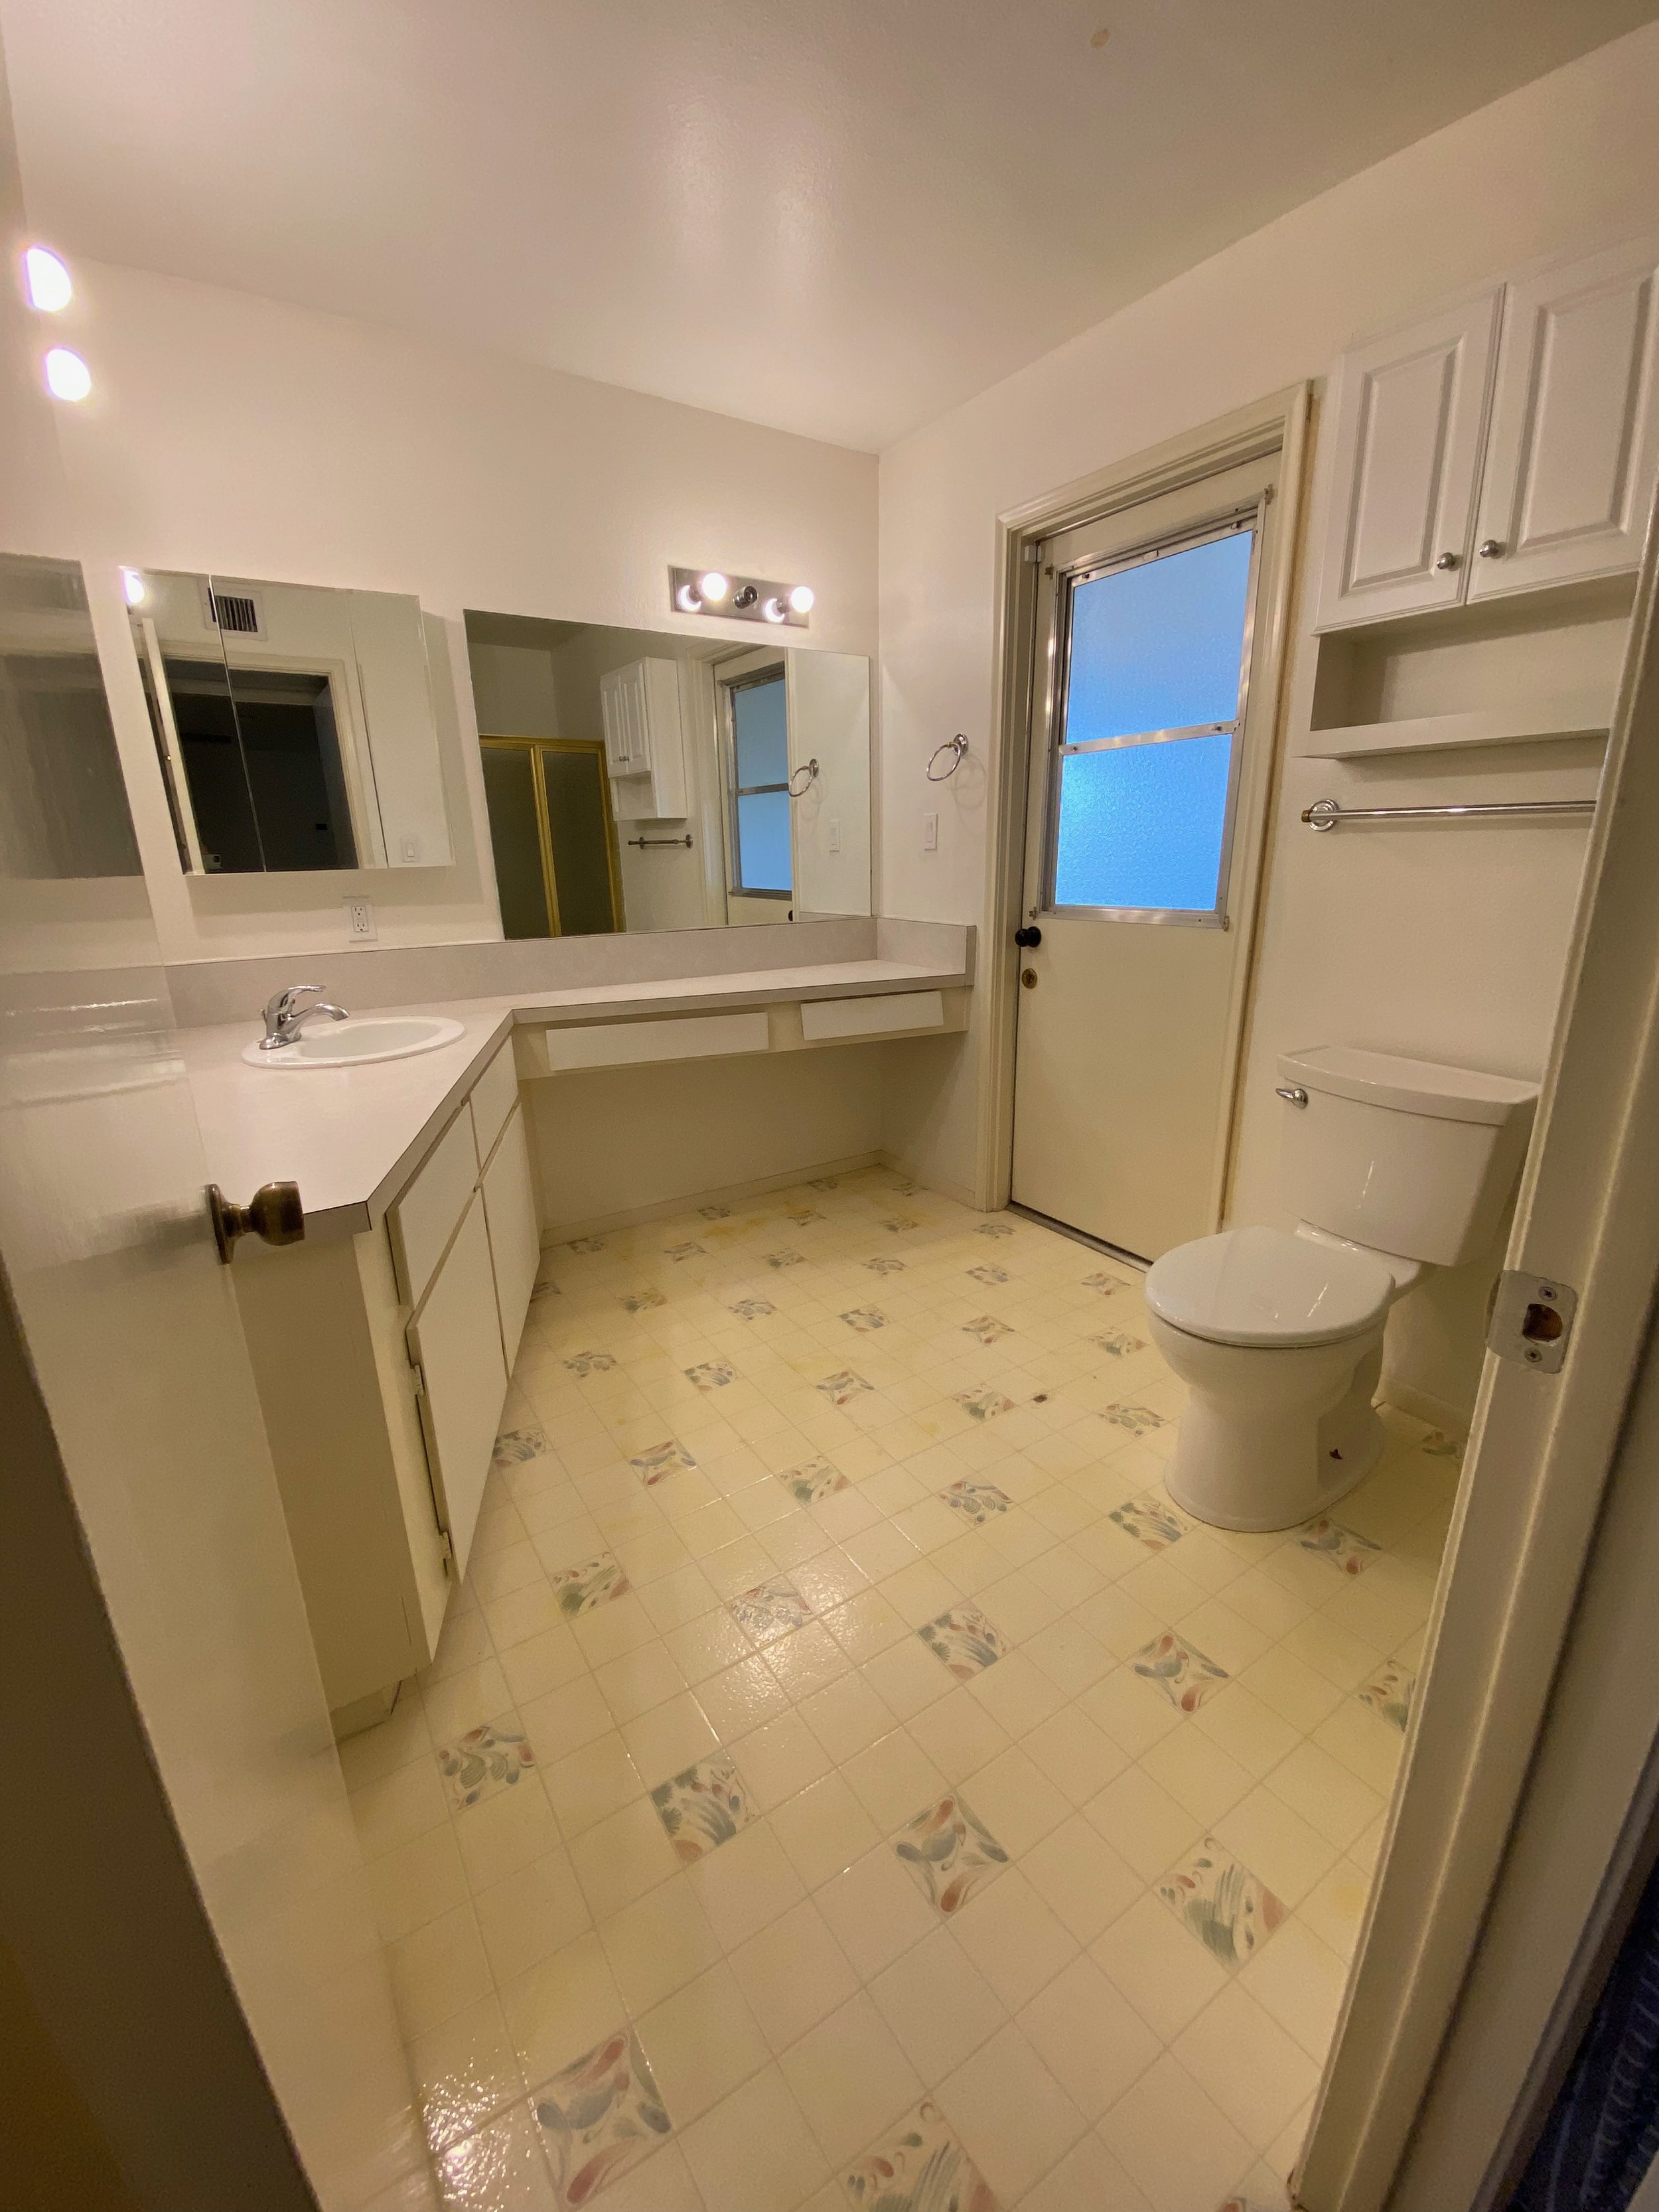


As you can tell, it was just really tired looking and in need of a lot of love. I’ve been dreaming about this space for so long and was starting to get overwhelmed with options. When this happens, I like to put together a moodboard to guide my choices. Here’s what I came up with before we began the project:
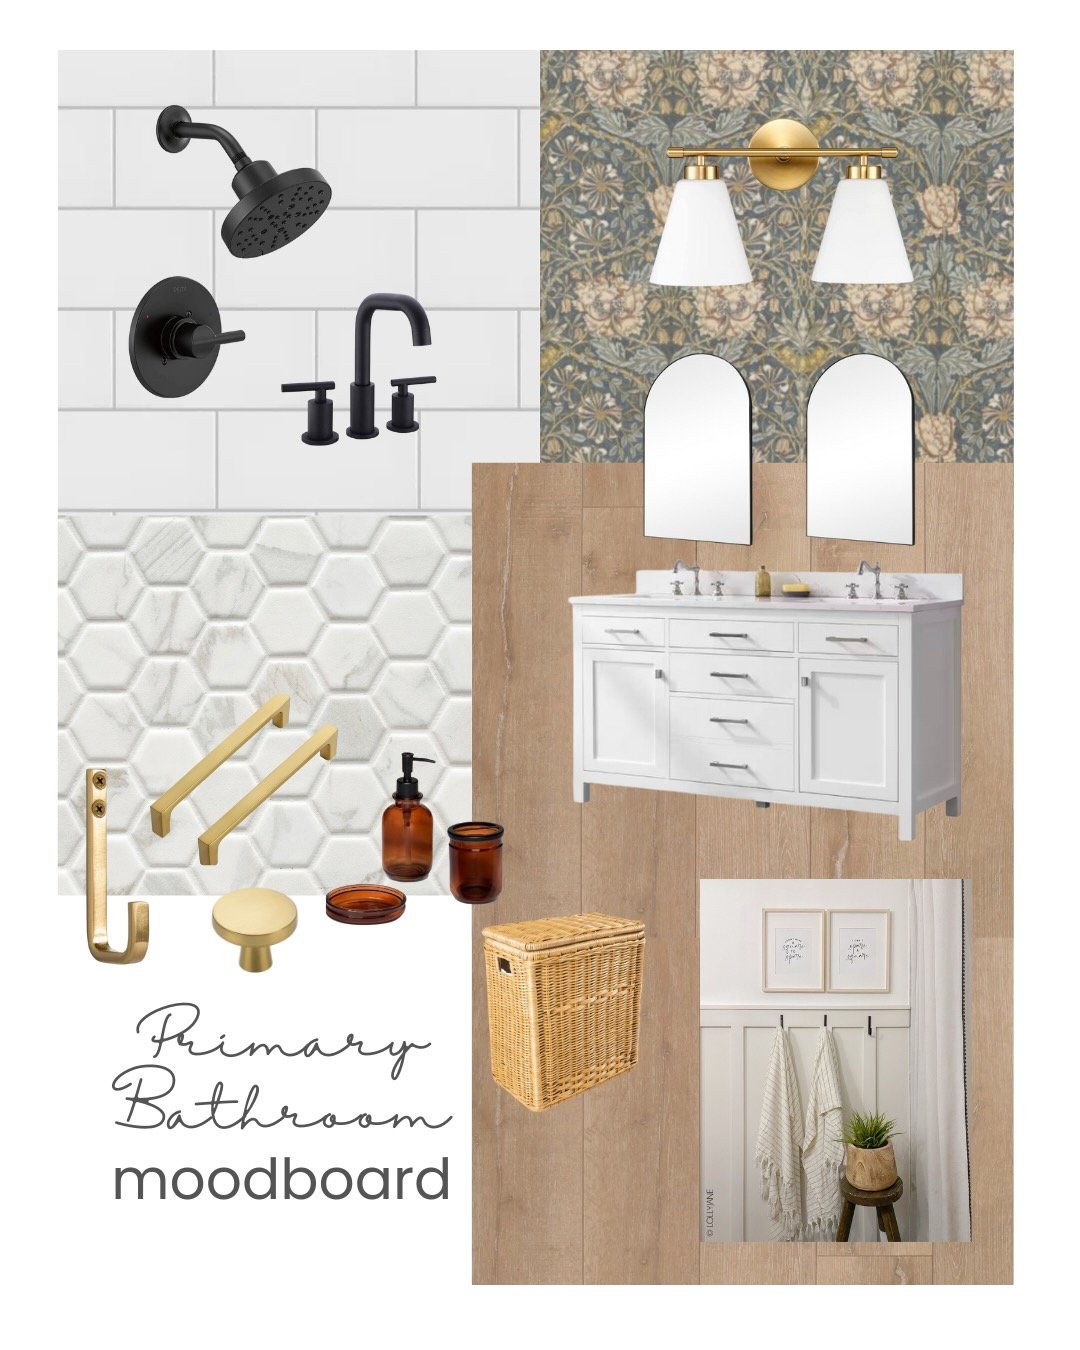
You can see that I was going for a modern traditional design in this room. I knew we wanted to run the same waterproof laminate into this room as we have in the rest of the house, so to contrast that I decided to go with a white vanity and bright white subway tile on the shower walls. I was excited to mix things up a bit and do a fun accent tile on the shower floor and a patterned wallpaper as well. Add in black fixtures and brushed gold hardware and voilà! Bathroom of my dreams.
Josh was happy to handle demolition and he was able to clear out the room in about a day. We were not sad to say goodbye to the funhouse mirrors or that green tile.

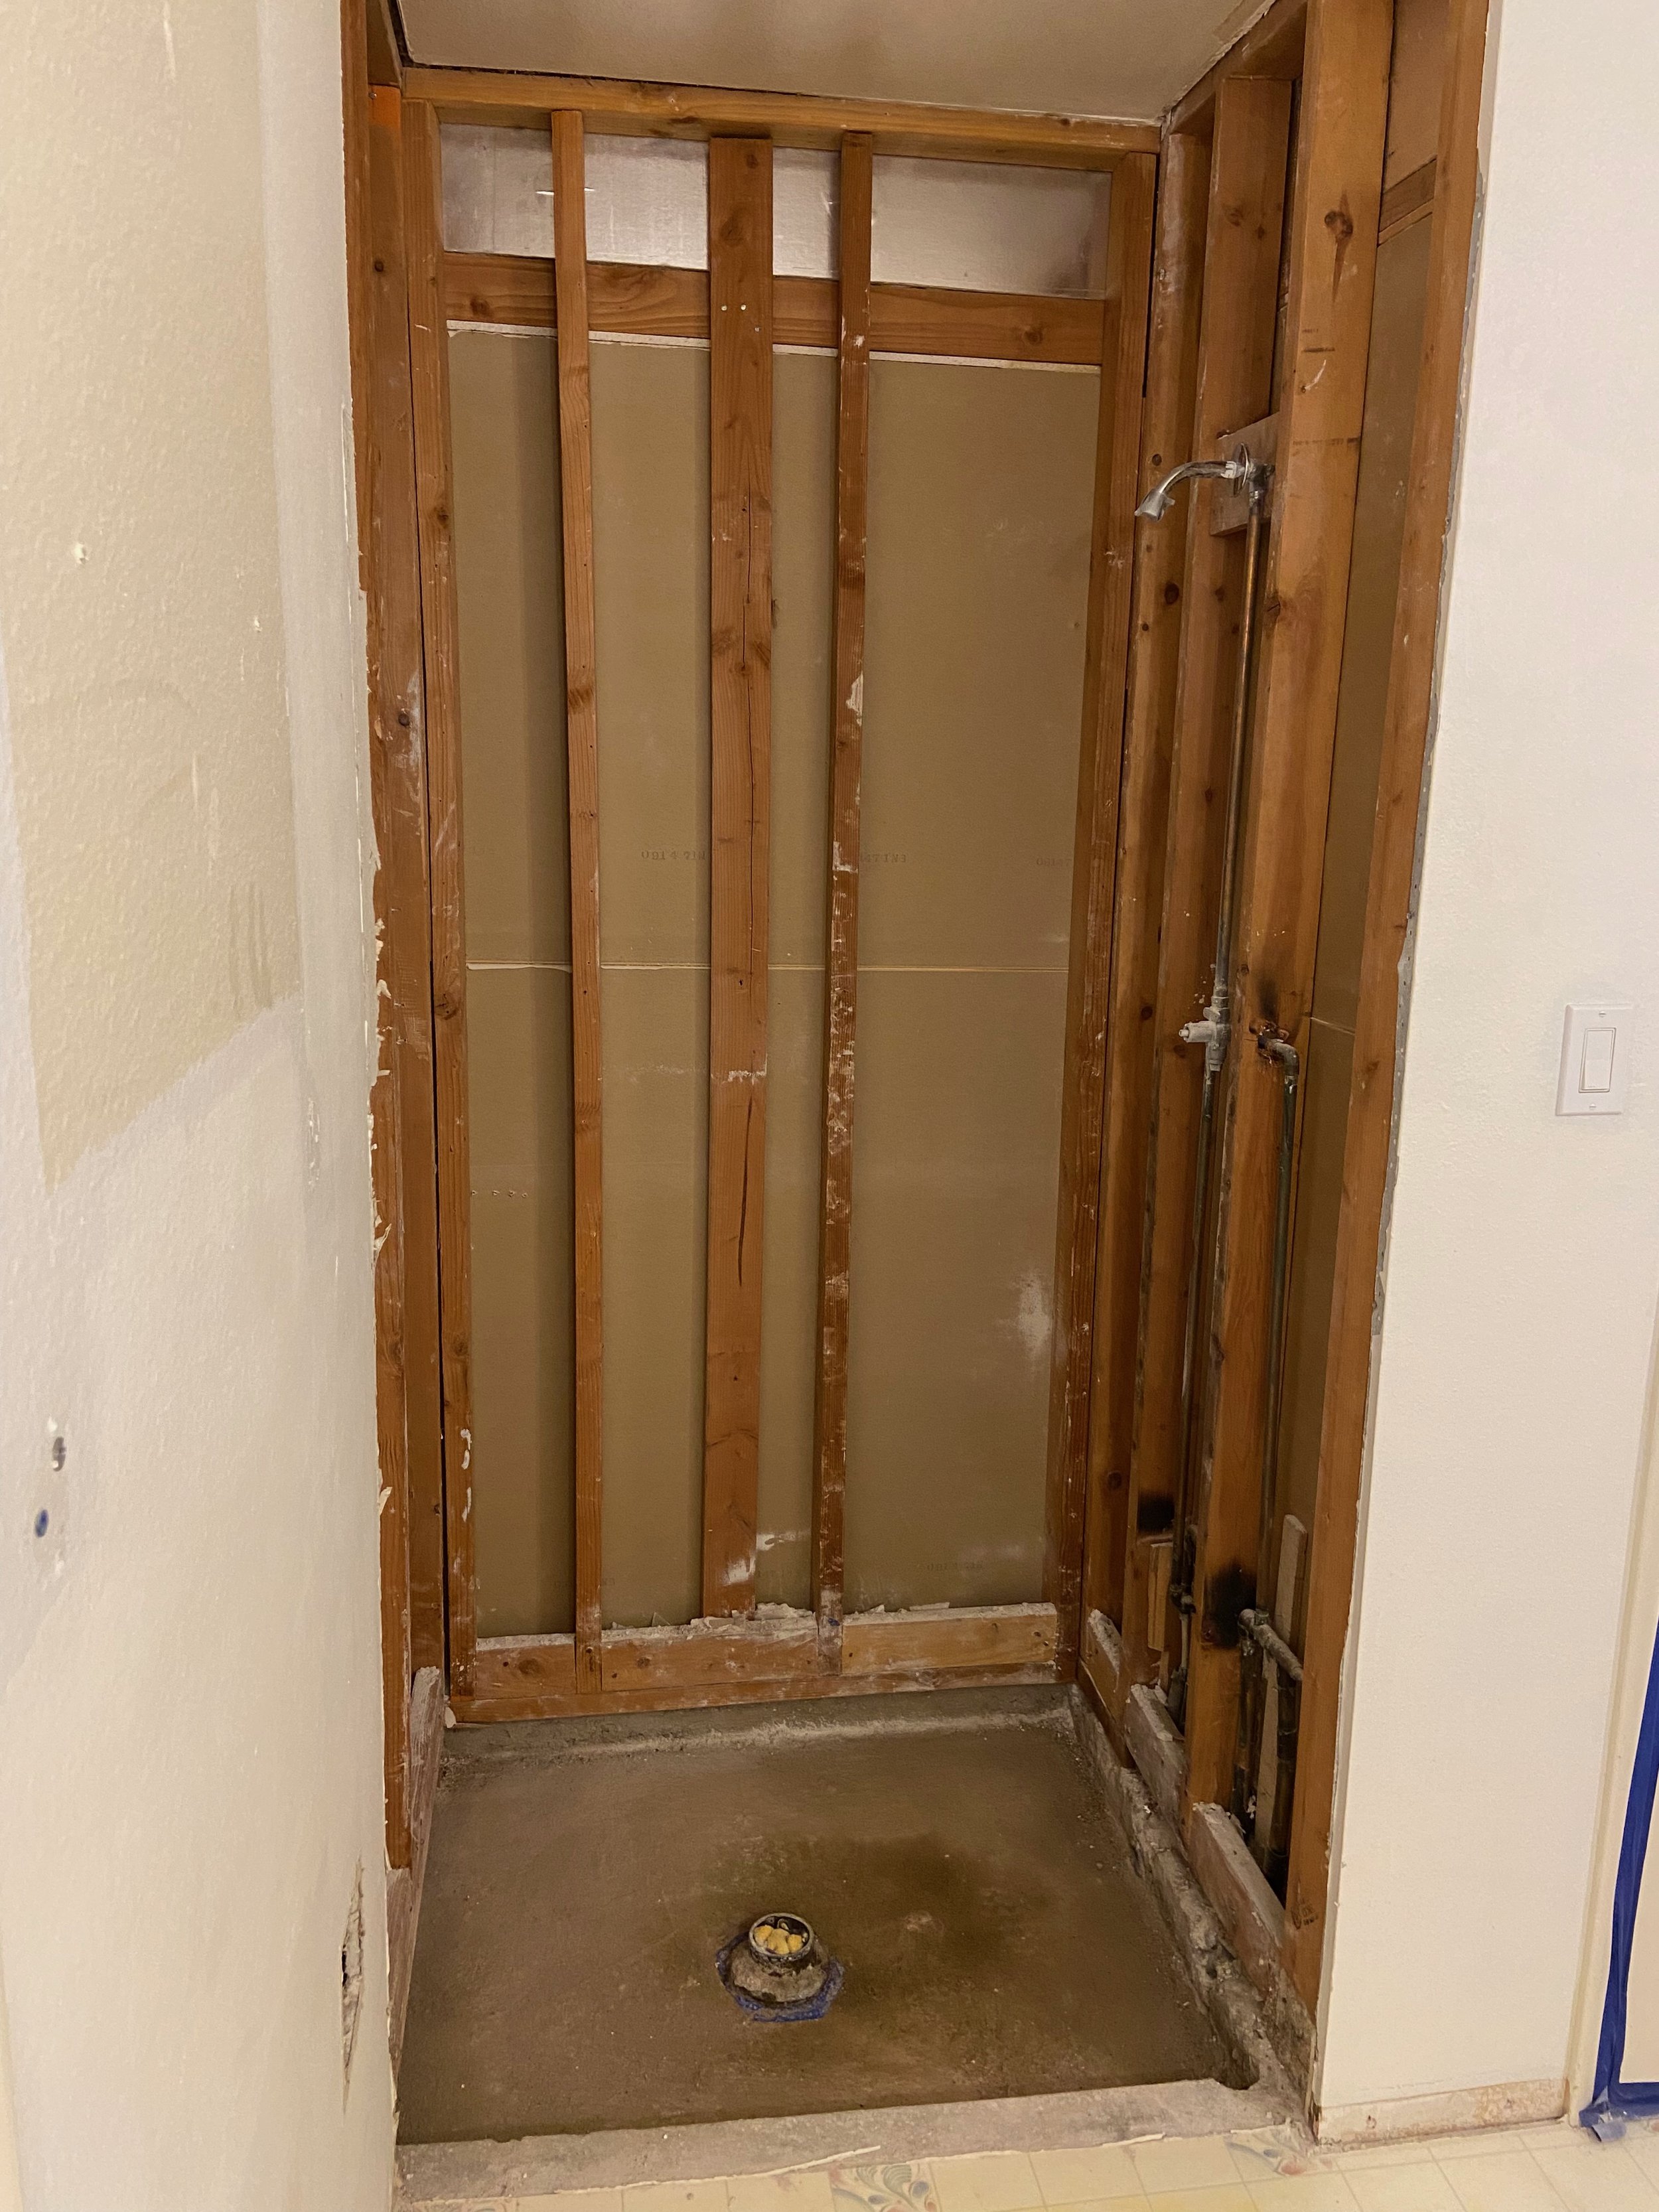
Once we got the shower torn apart, we realized that the drain was not centered in the base of the shower. We were planning to use this Schluter Kerdi shower system and to use the pre-formed tray that comes in the kit, we needed to have the drain as close to center as possible. We’d been having issues with the shower draining slowly anyway, so the first thing Josh did was jackhammer up a section of the floor to replace and recenter the drain (the whole drain was badly corroded, so I’m glad we did this!)
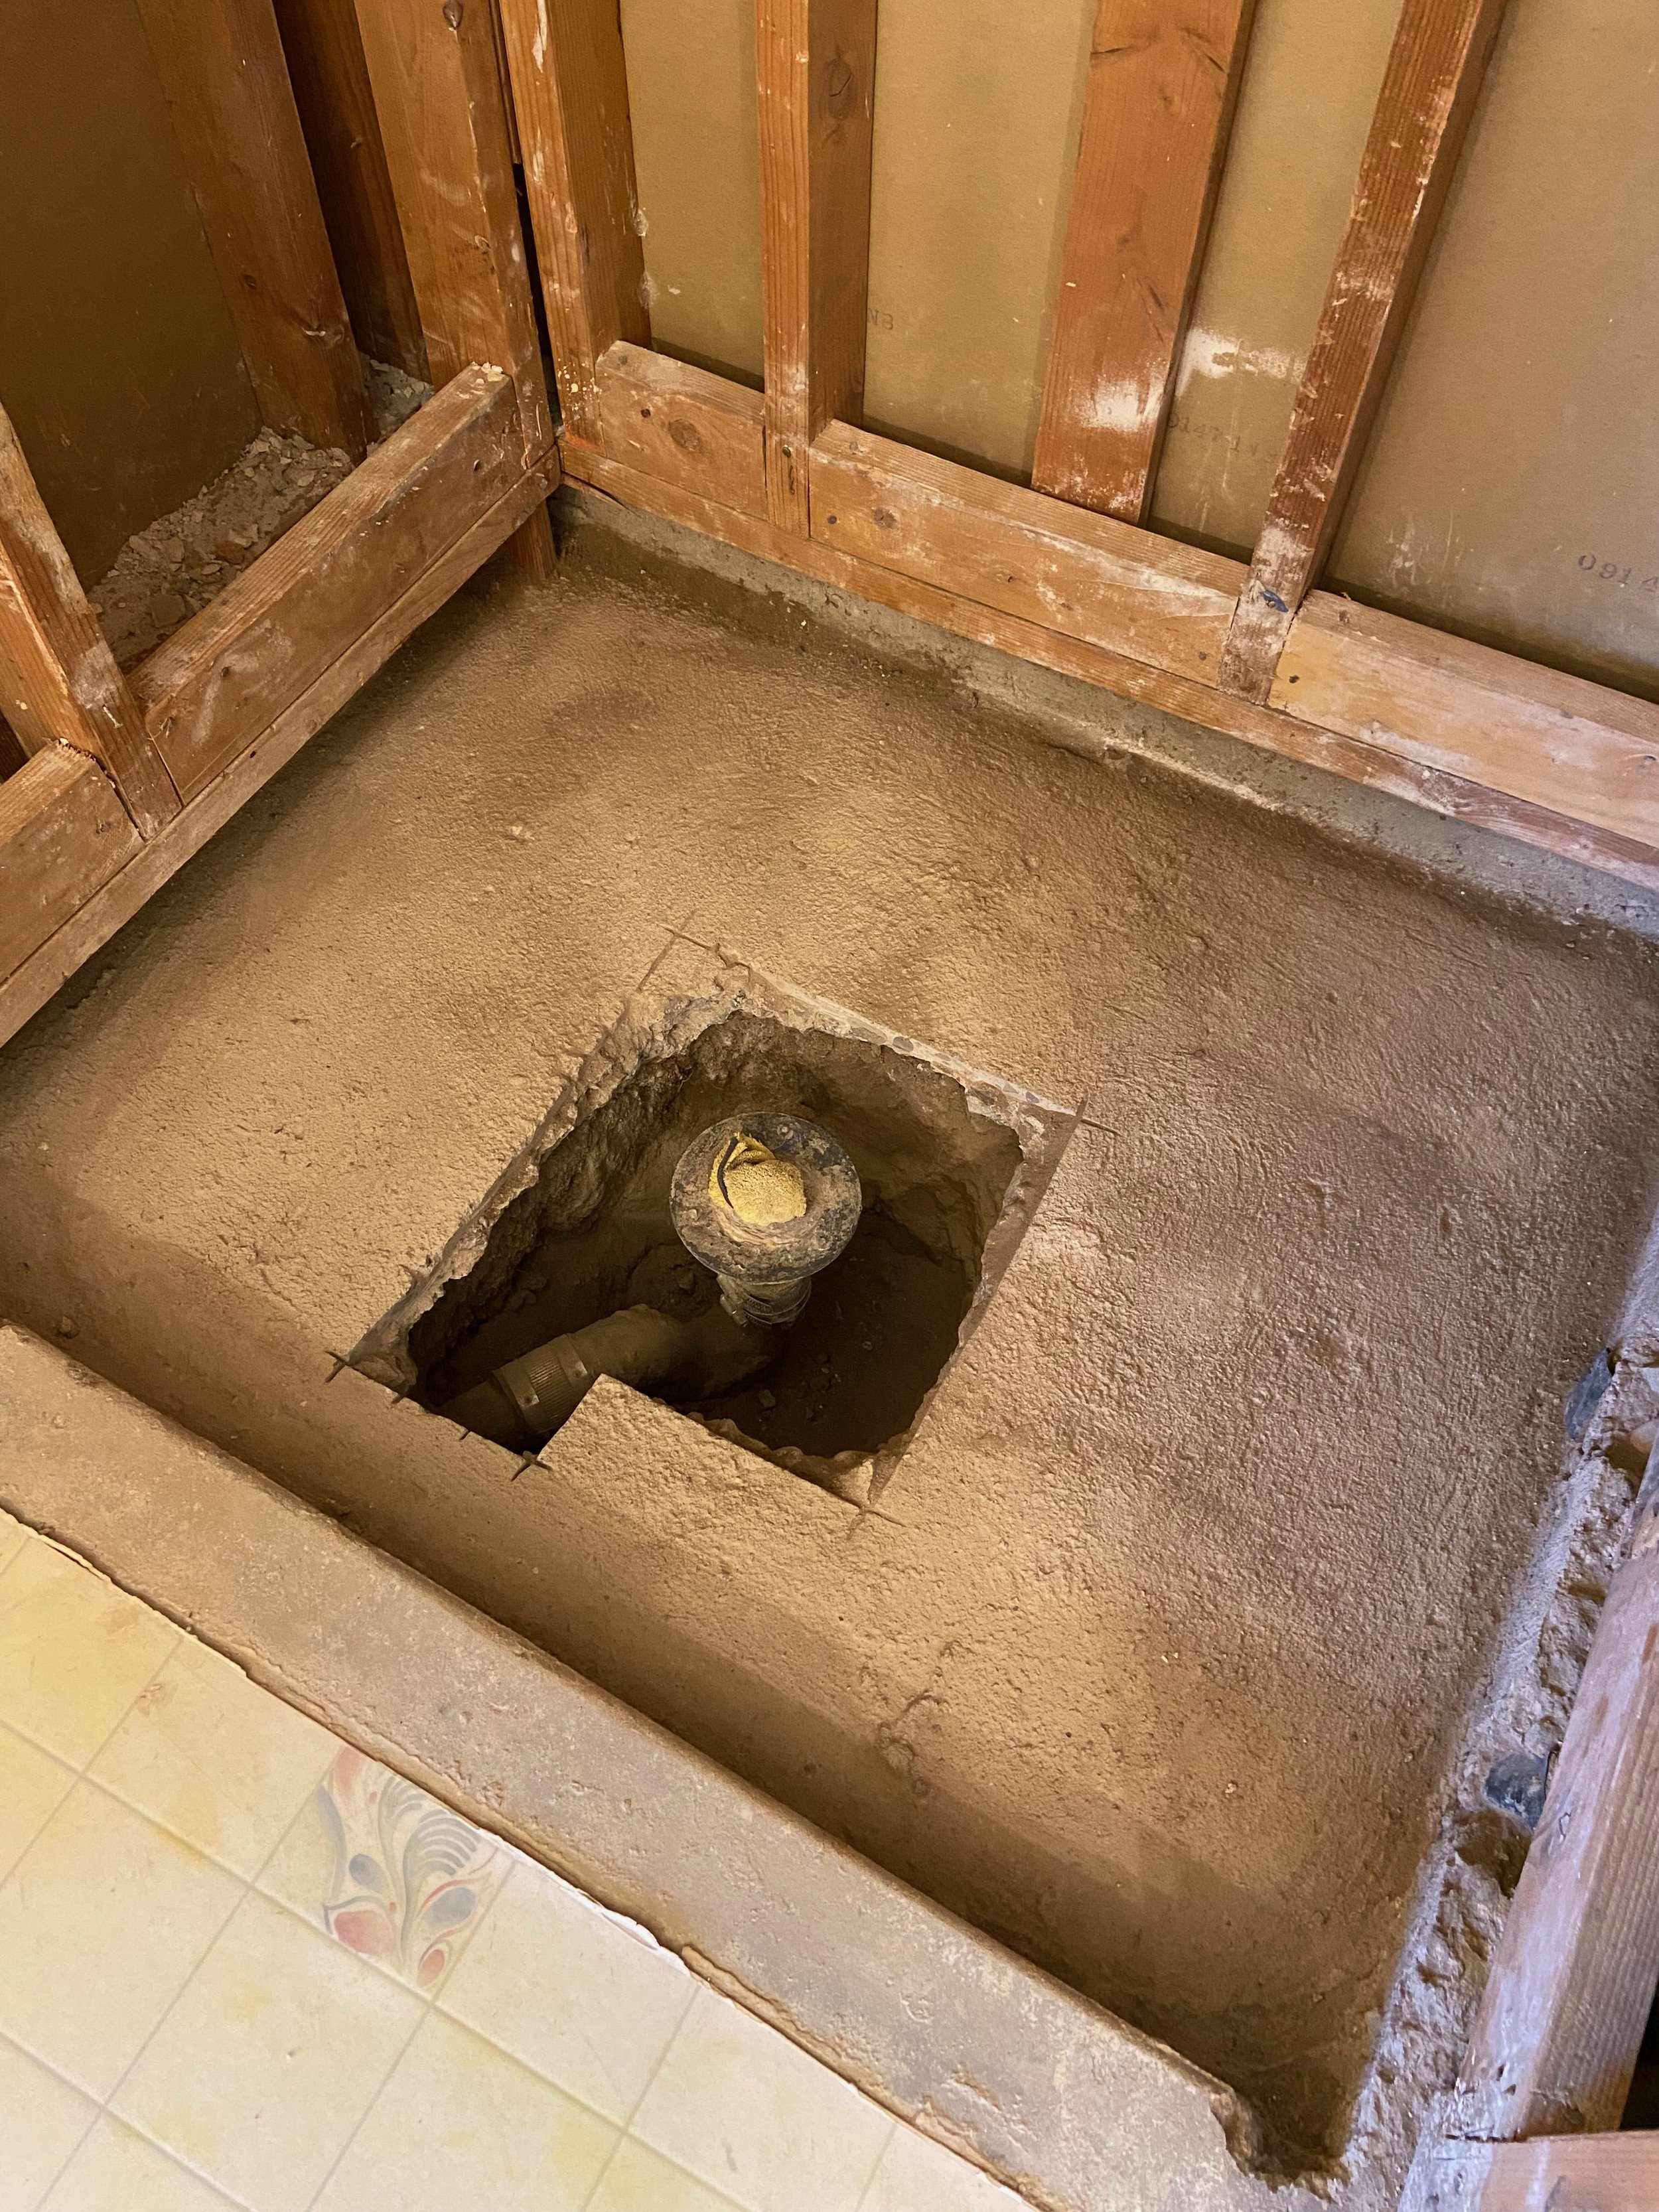
Once the drain was replaced, he poured new concrete in the hole he dug and then used a self leveling concrete to create a perfectly level base for the shower tray to sit on. He also replaced all of the water lines with new PEX lines and raised the shower head up about 12”.

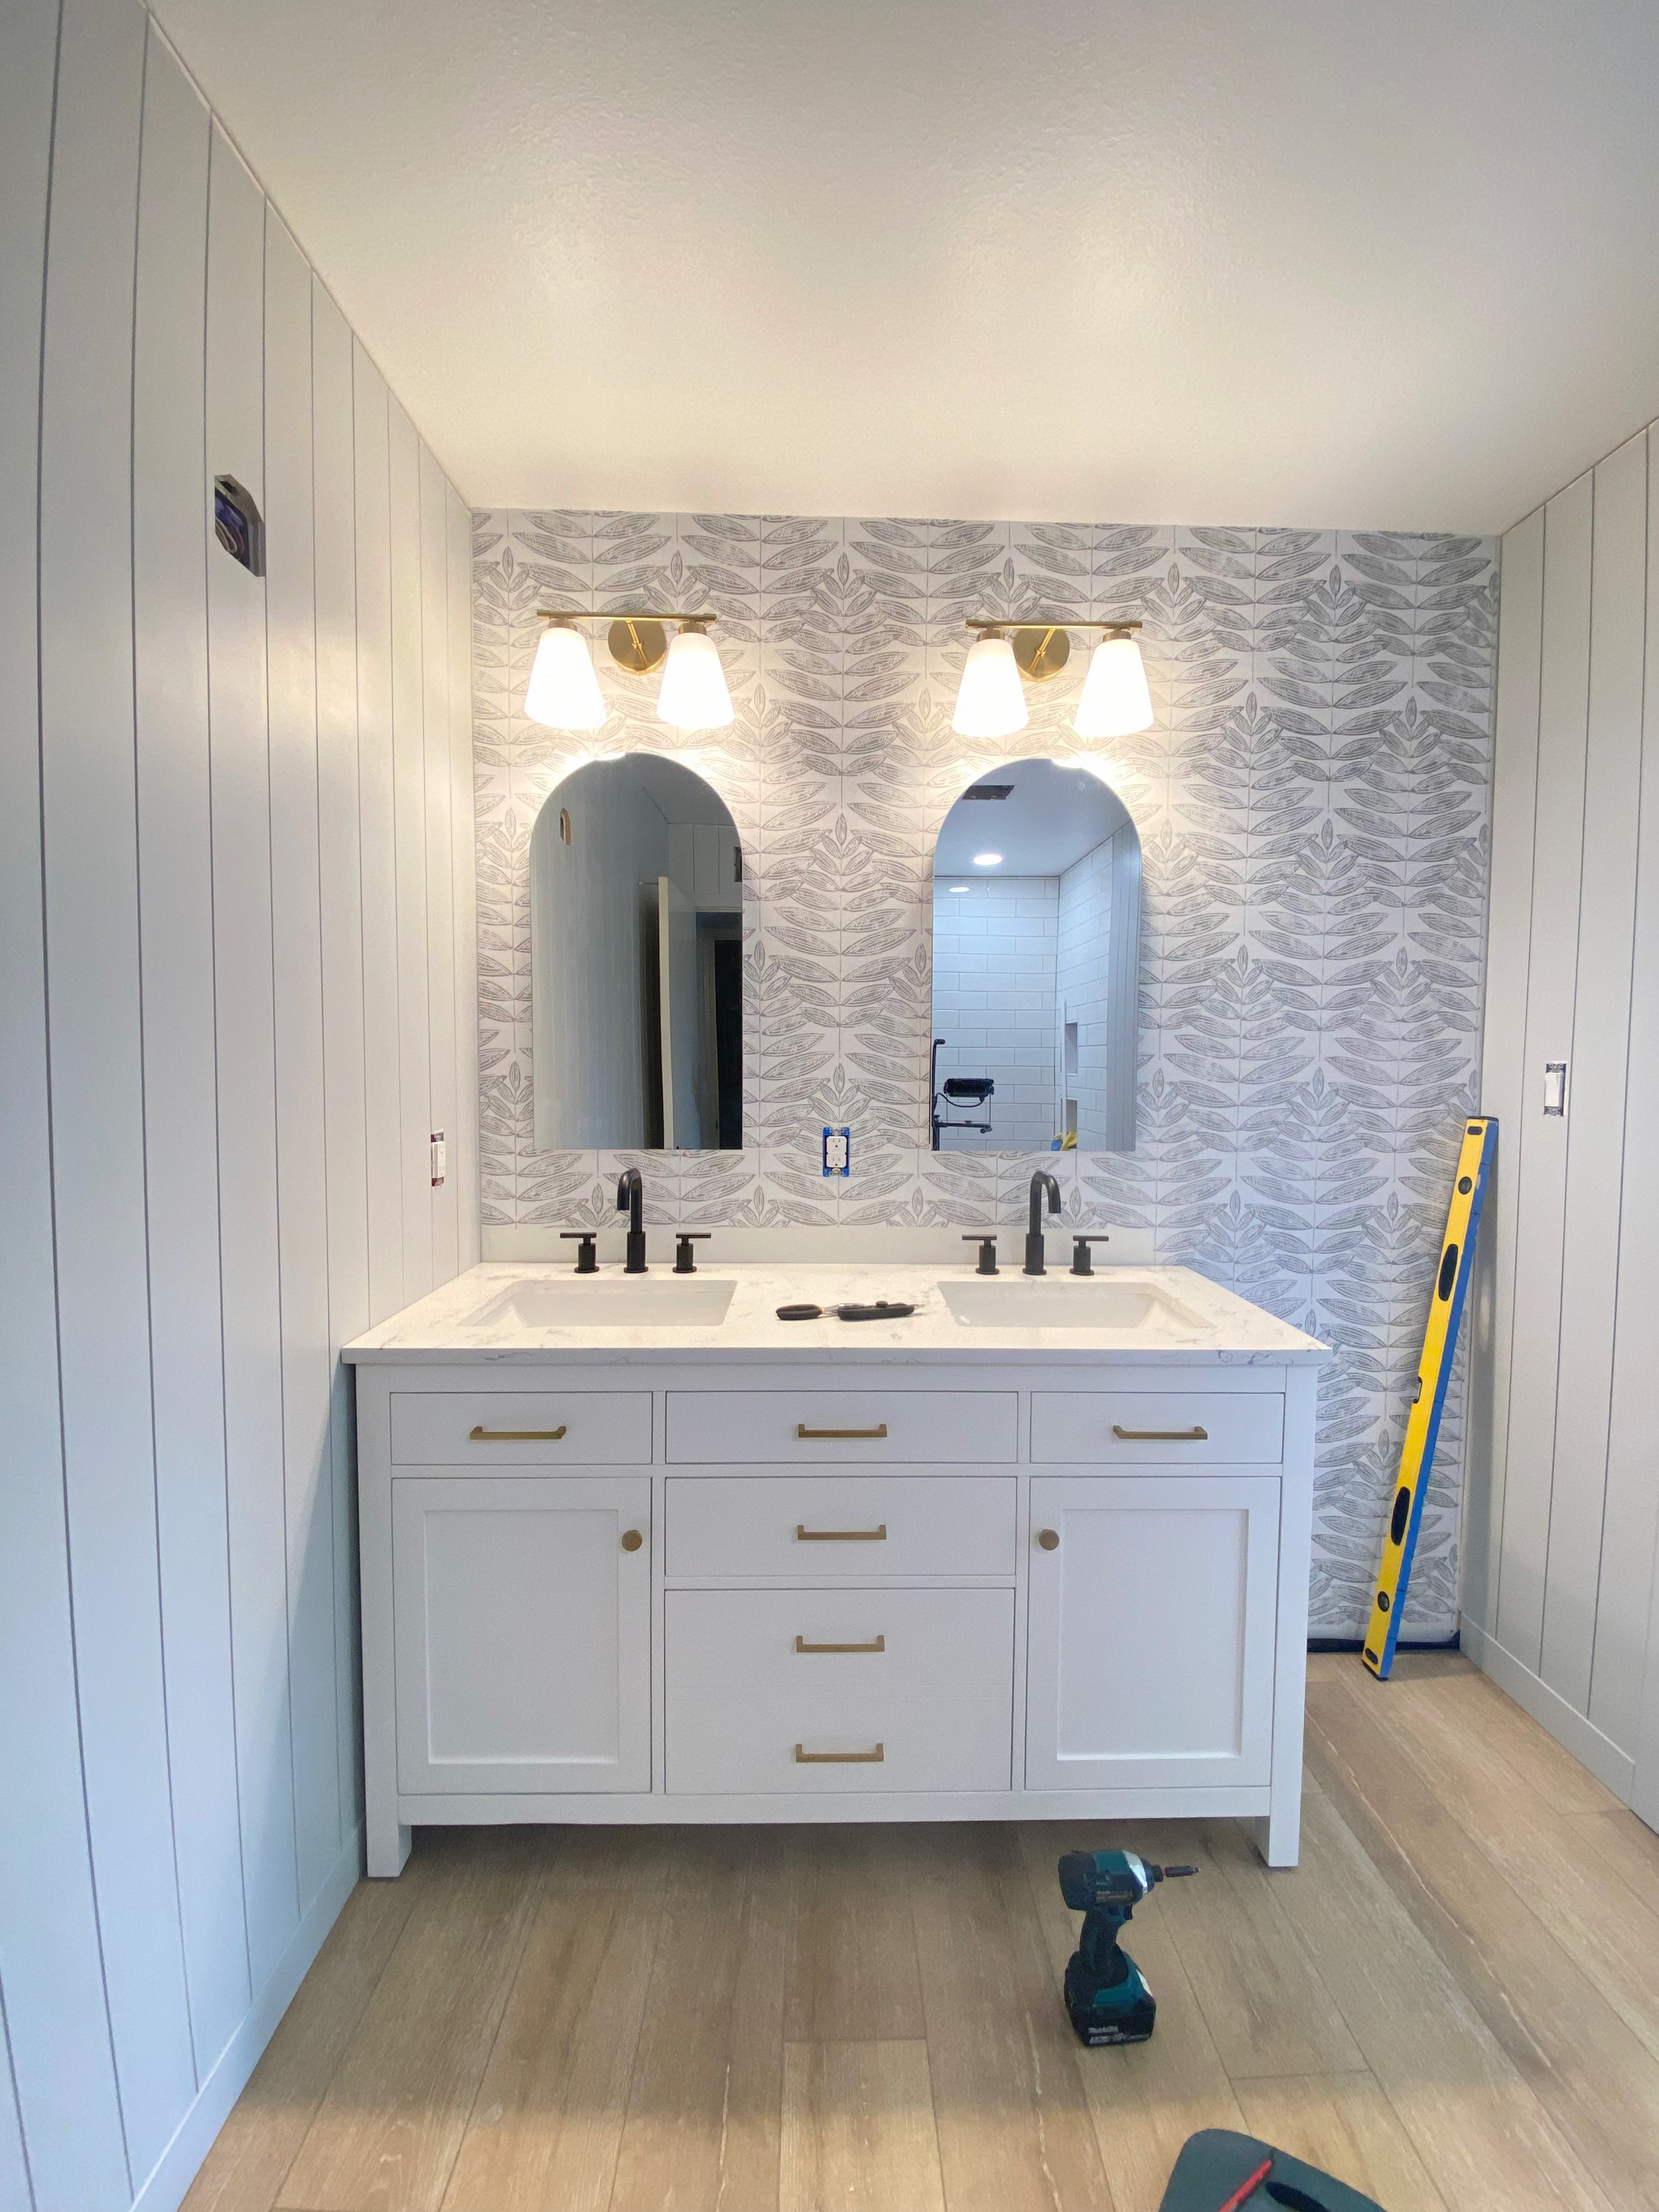
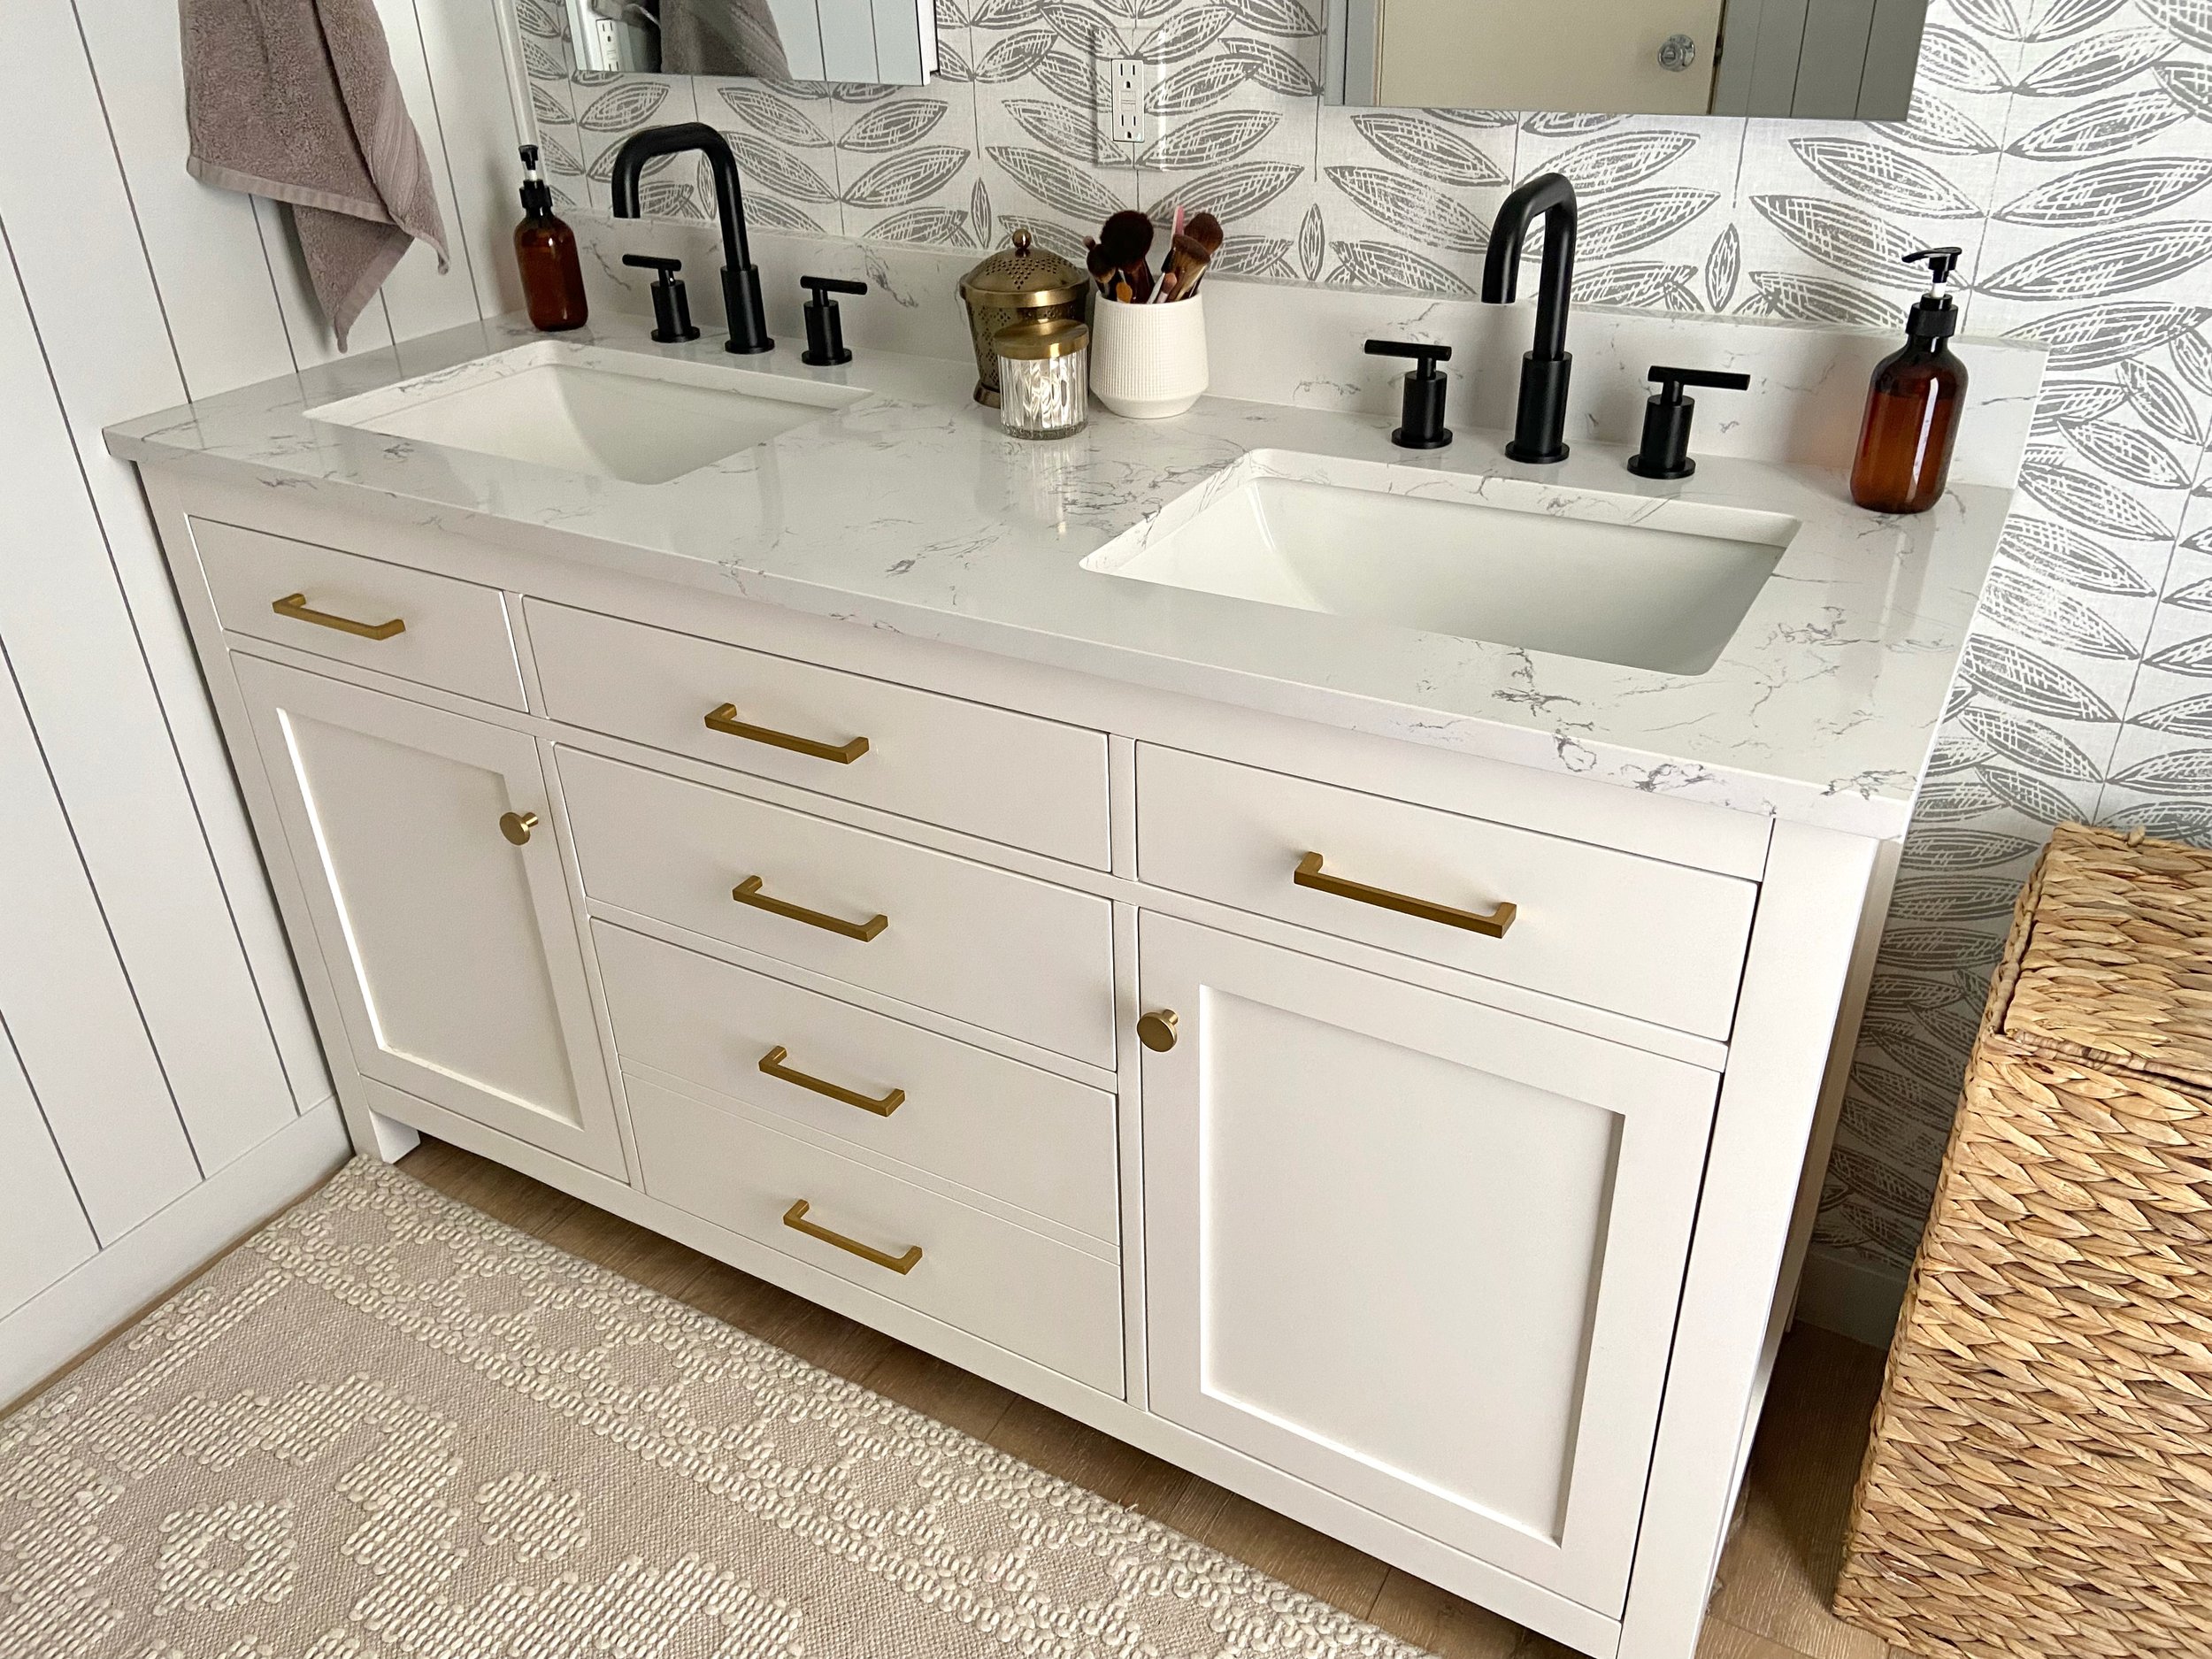
After that, Josh began prepping for the vanity installation. We had scored this beautiful 60” double sink vanity from Facebook Marketplace for $500 and now came time to figure out exactly where it was going (this is almost the same exact vanity as we have in our guest bath, it’s just like a cool older sister with two sinks)
I had originally thought that putting the vanity on the outside wall (the brick one you see in the image below) would be ideal layout wise, but we had no way of running the plumbing through that brick wall. The only other alternative was to place it on the wall to the left instead (under the light in the image below). However, once we got everything torn apart and measured where the vanity would sit on that wall, we realized how awkward it was going to feel. The door is to the left here and you would essentially walk right into the end of the vanity when you entered the room 😬 I did not love that idea.
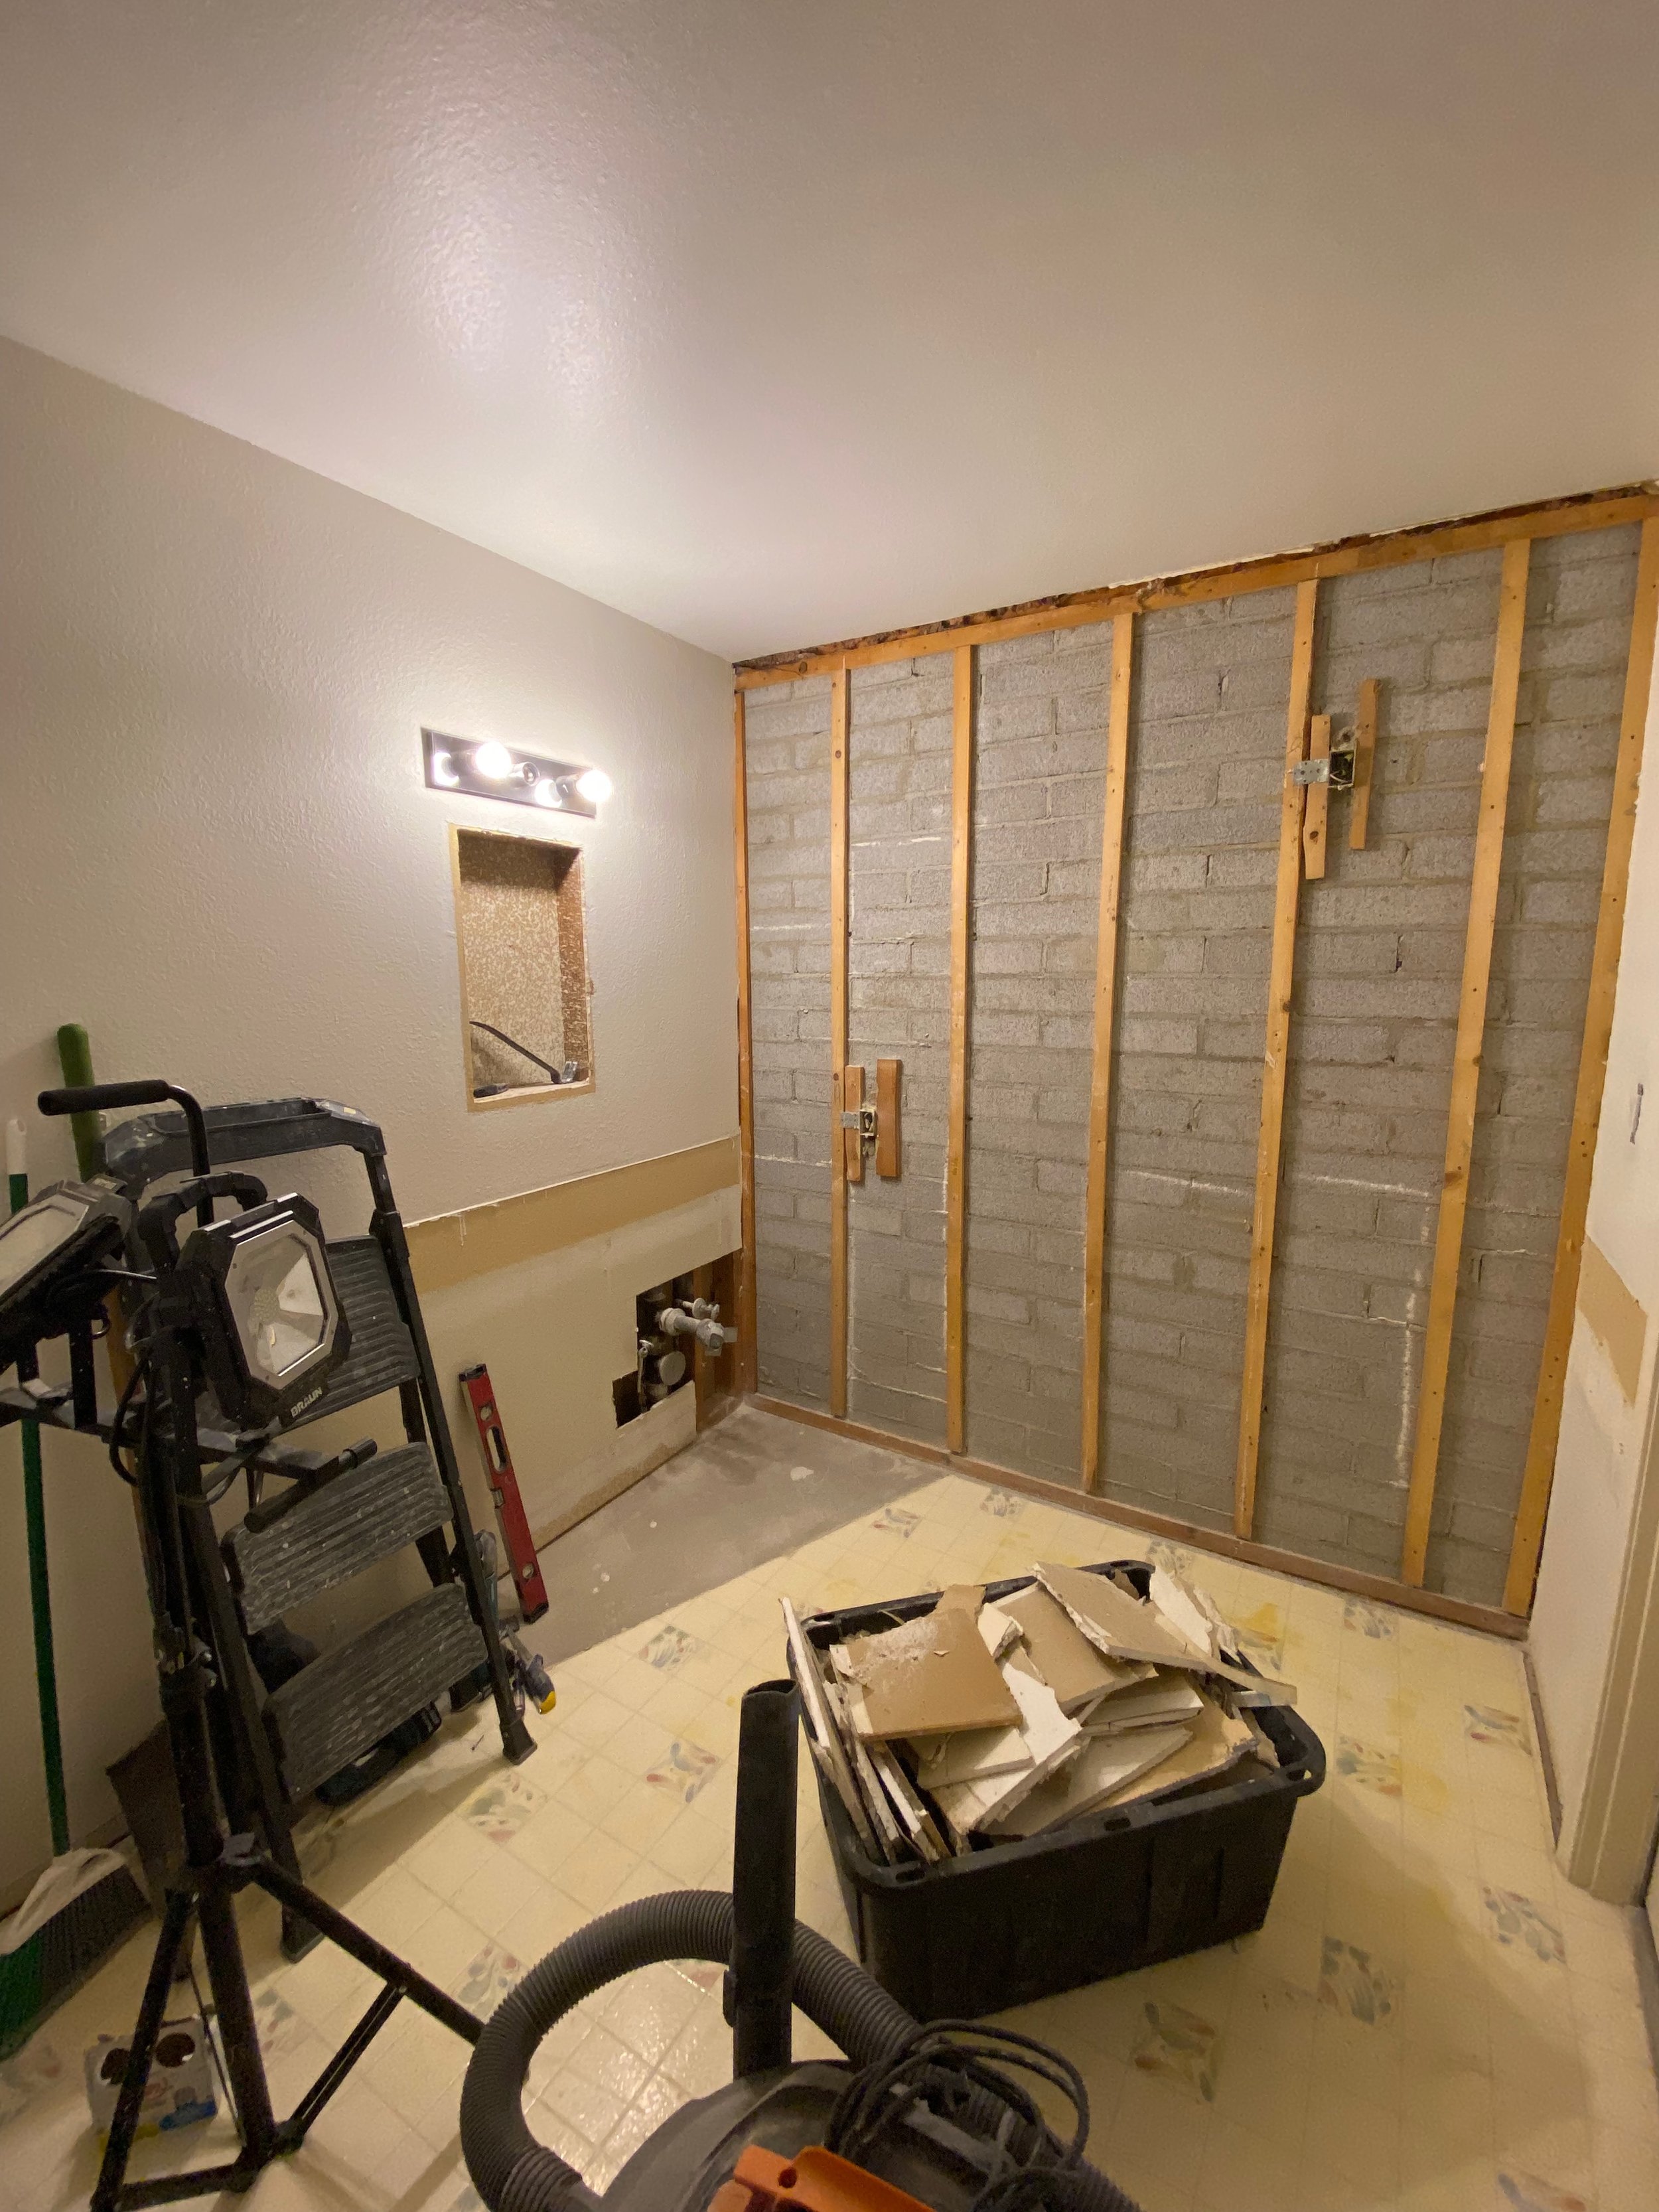
We called a plumber friend to come out and give us his opinion. He helped us figure out a way to make it work on the outside wall—we just needed to frame out a new wall in front of the brick to be able to run everything around that corner. Thankfully, it turned out to be a much easier process than either of us were expecting!
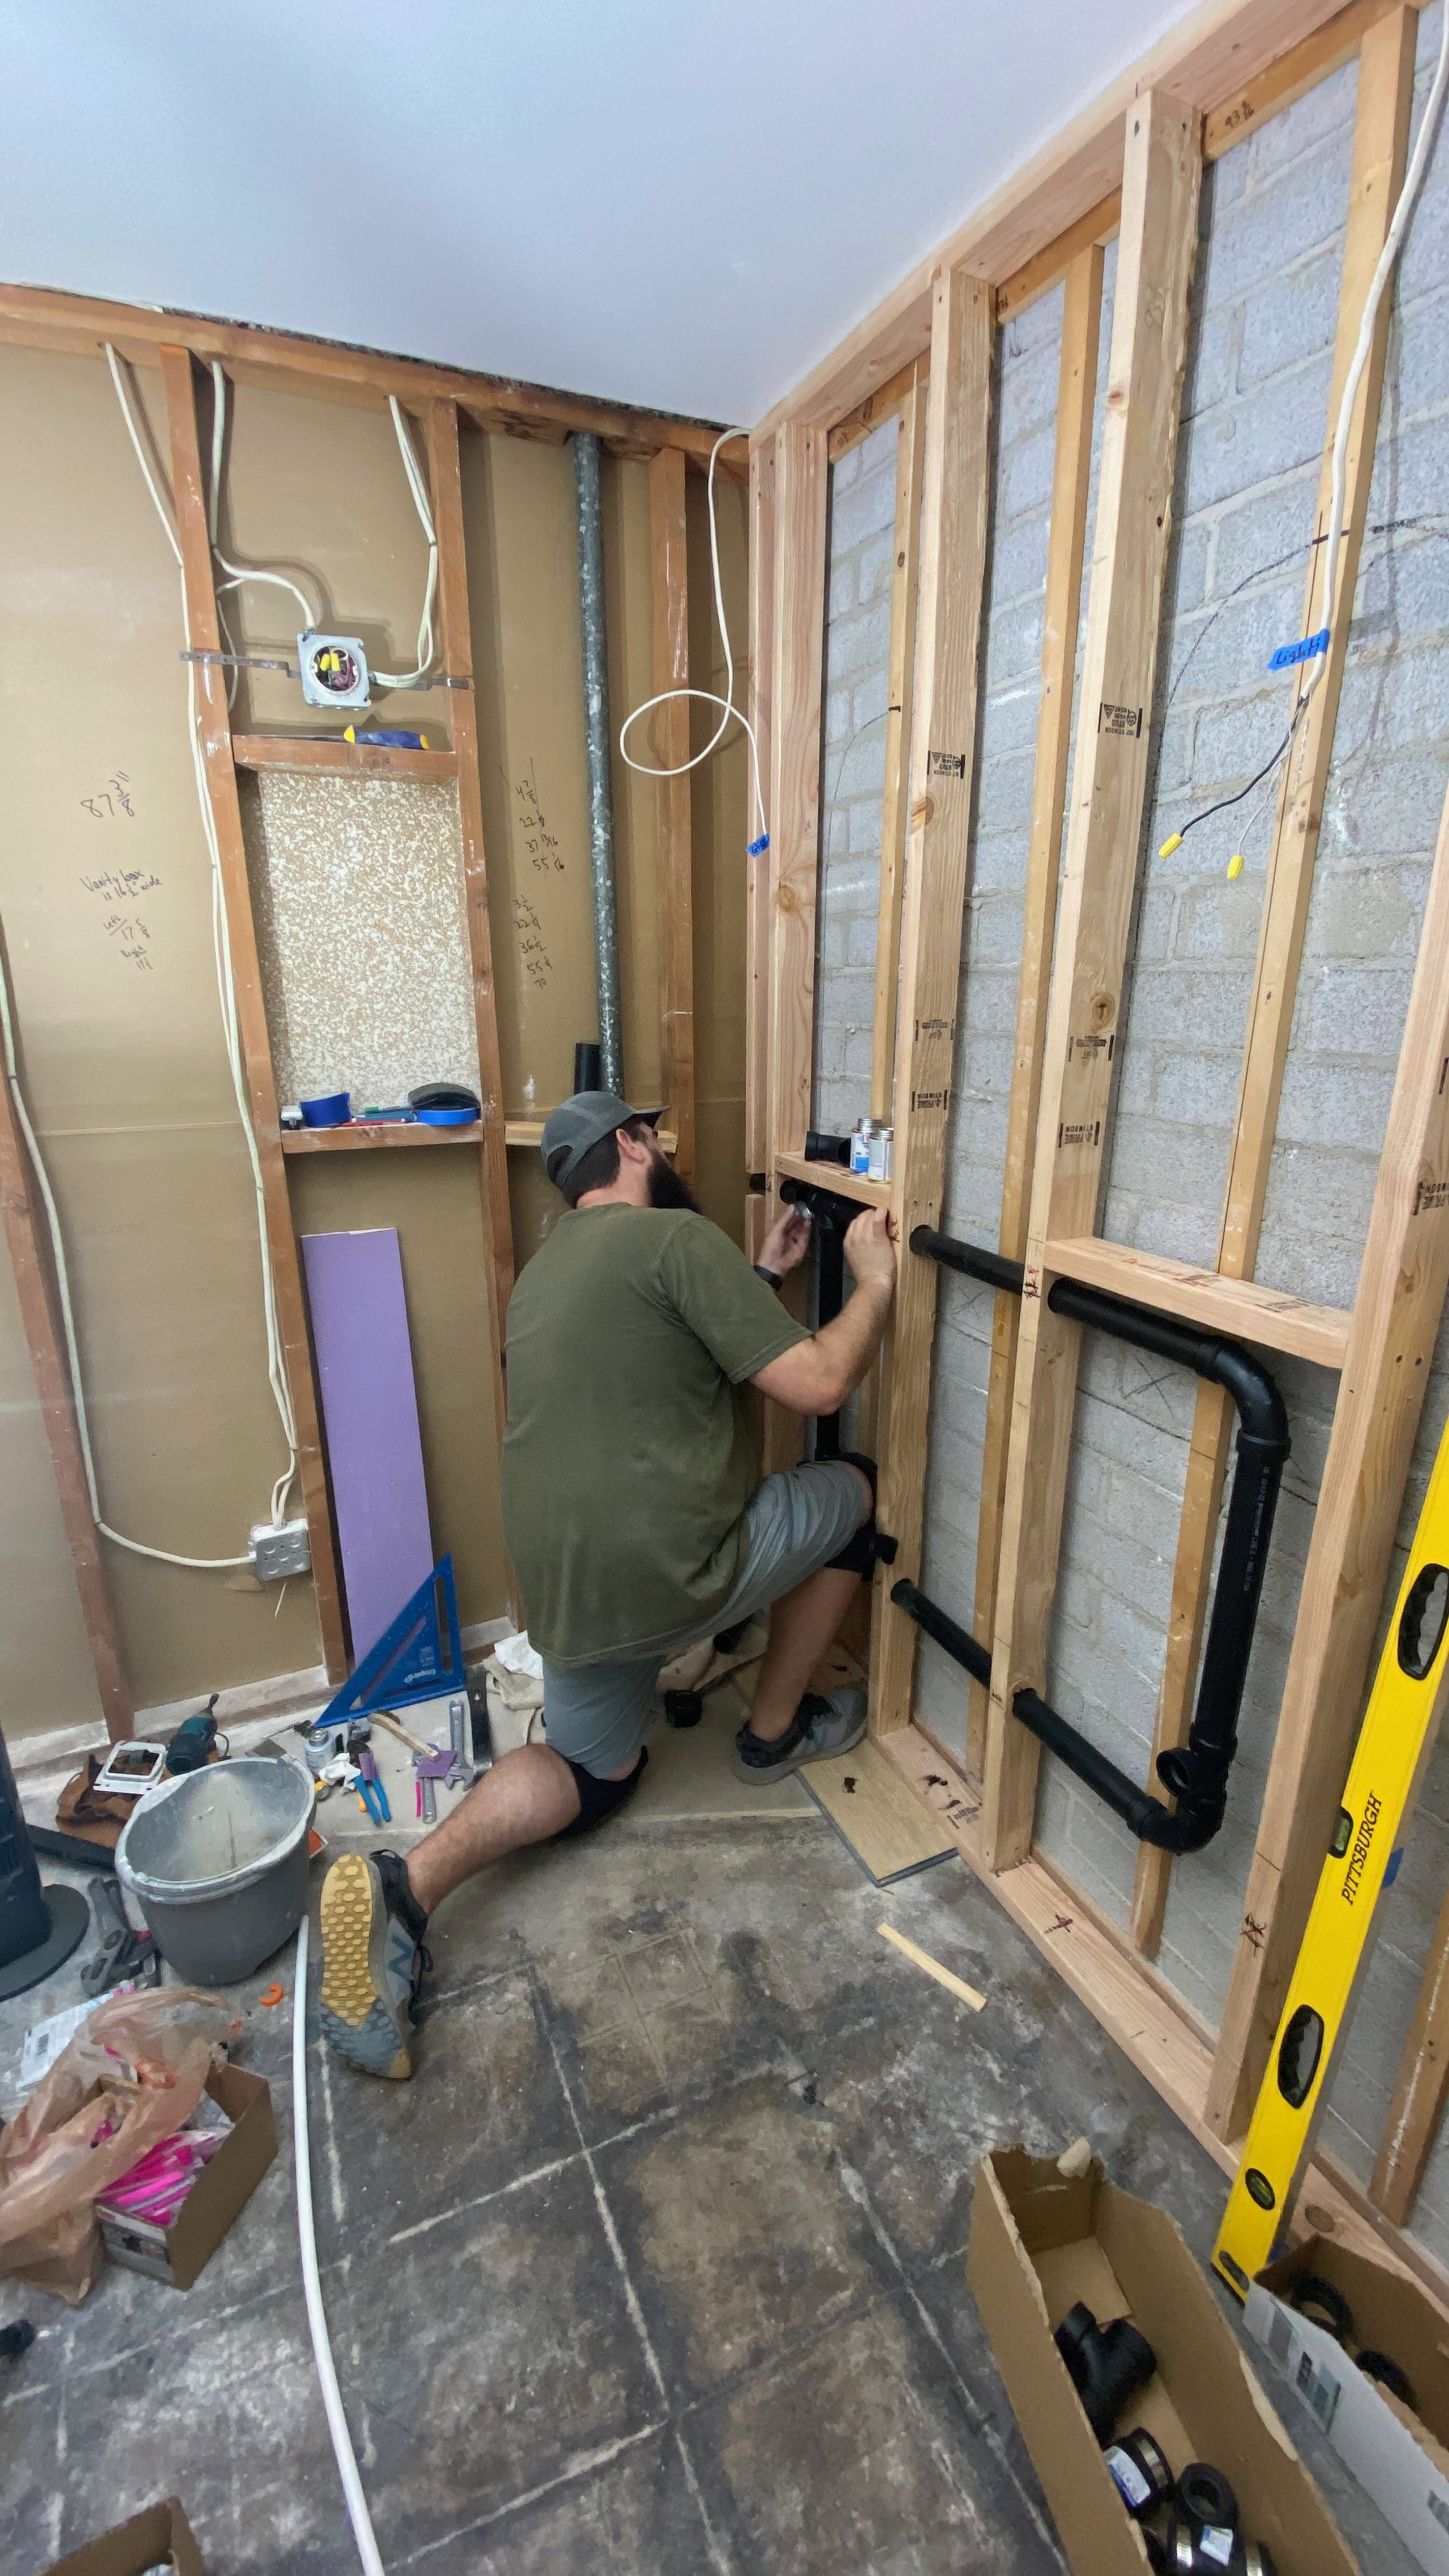
The new faux wall would also allow us to run electrical for lights and an outlet as well as install new medicine cabinet mirrors.
Once Josh got all the plumbing and electrical run, it was time to button everything up with new drywall.
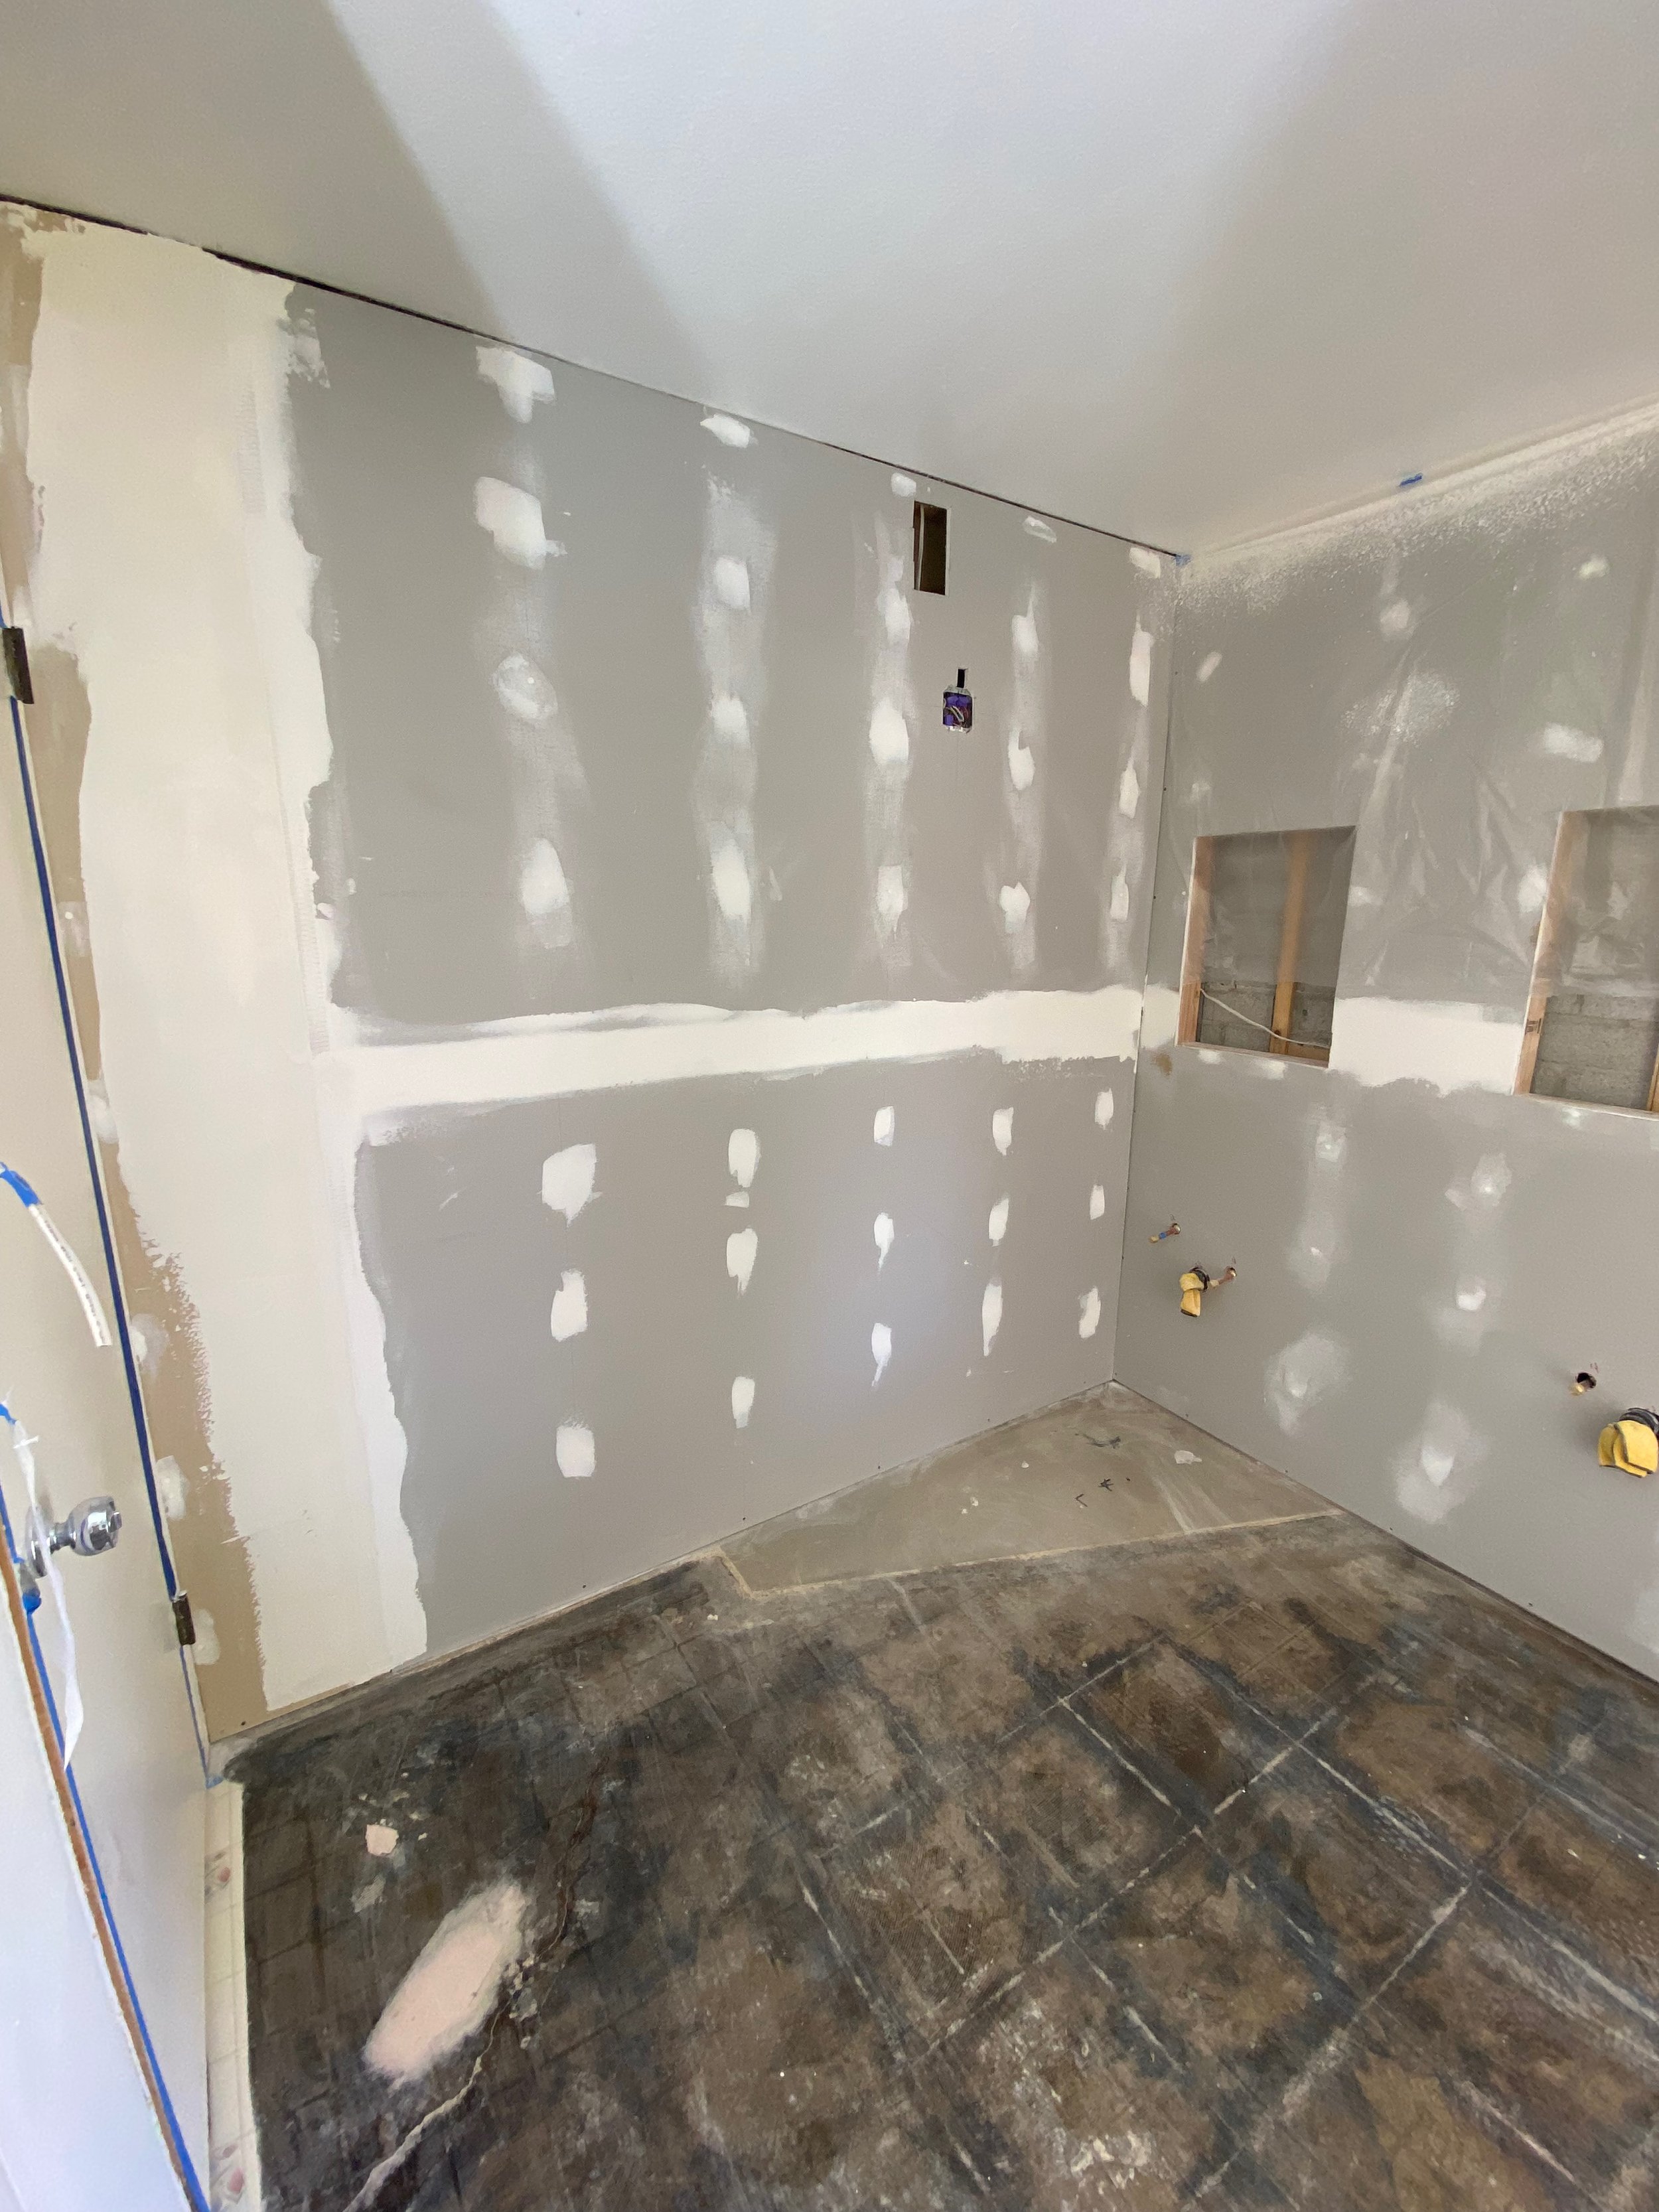

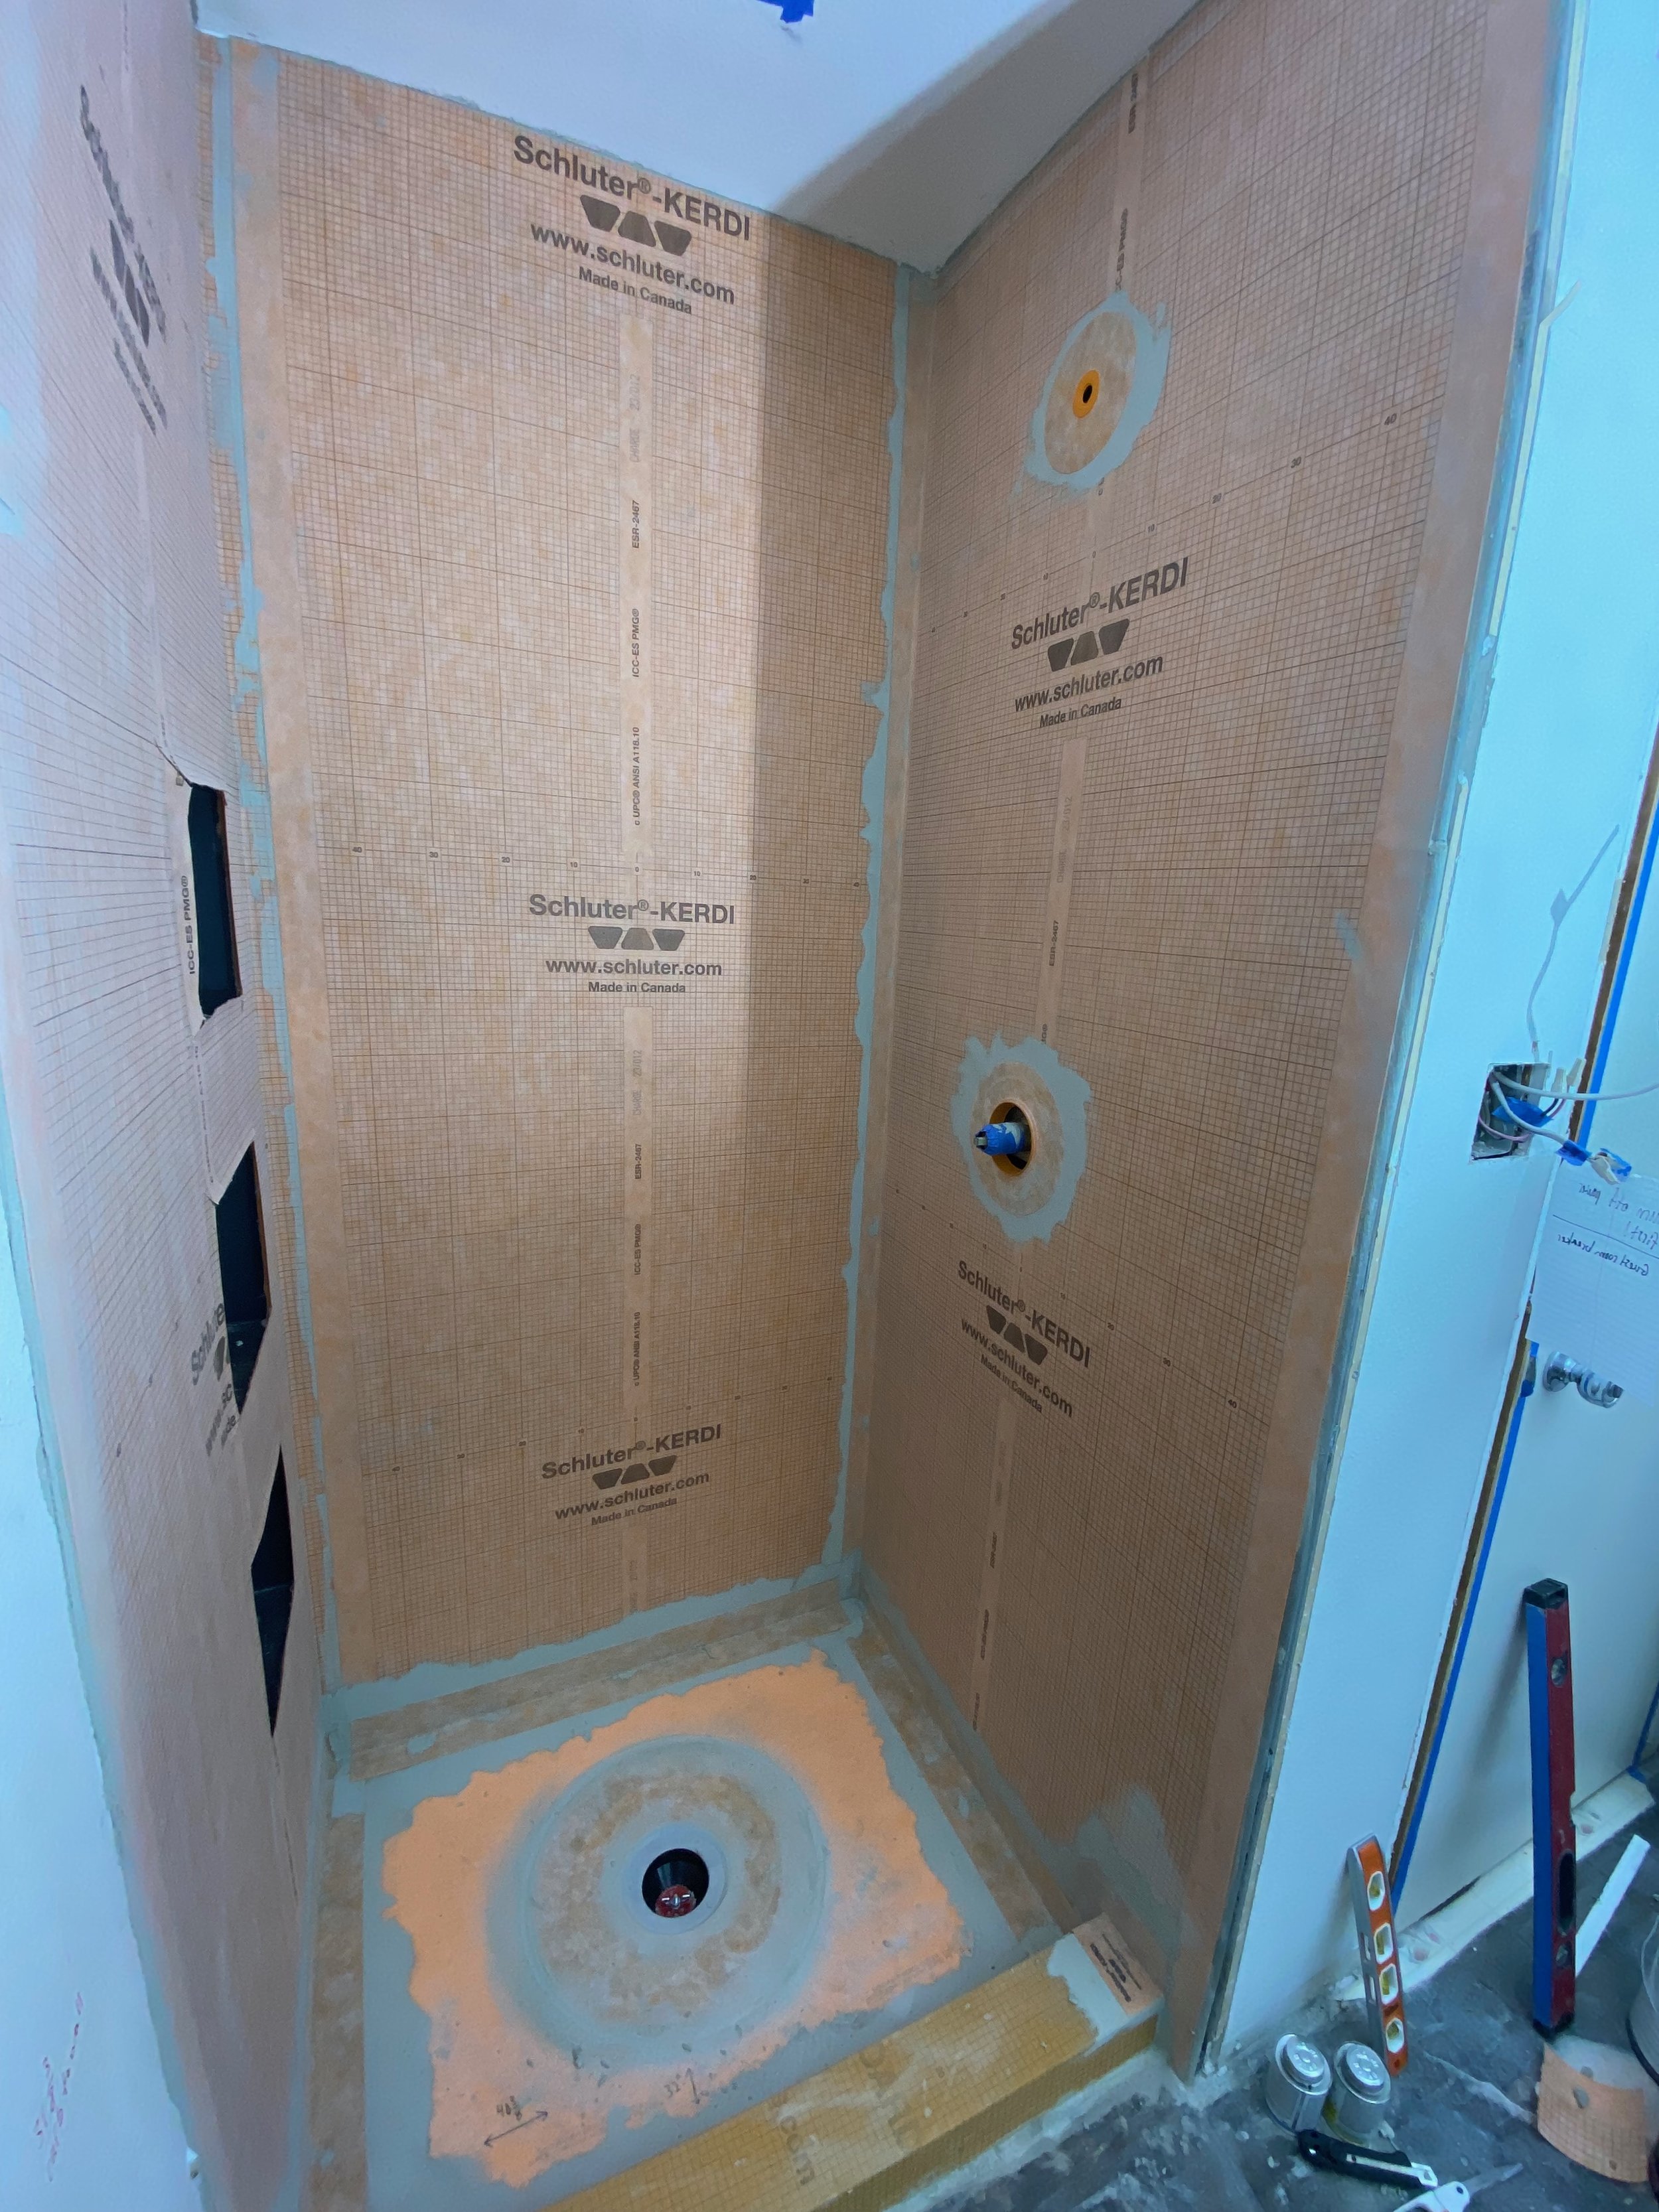
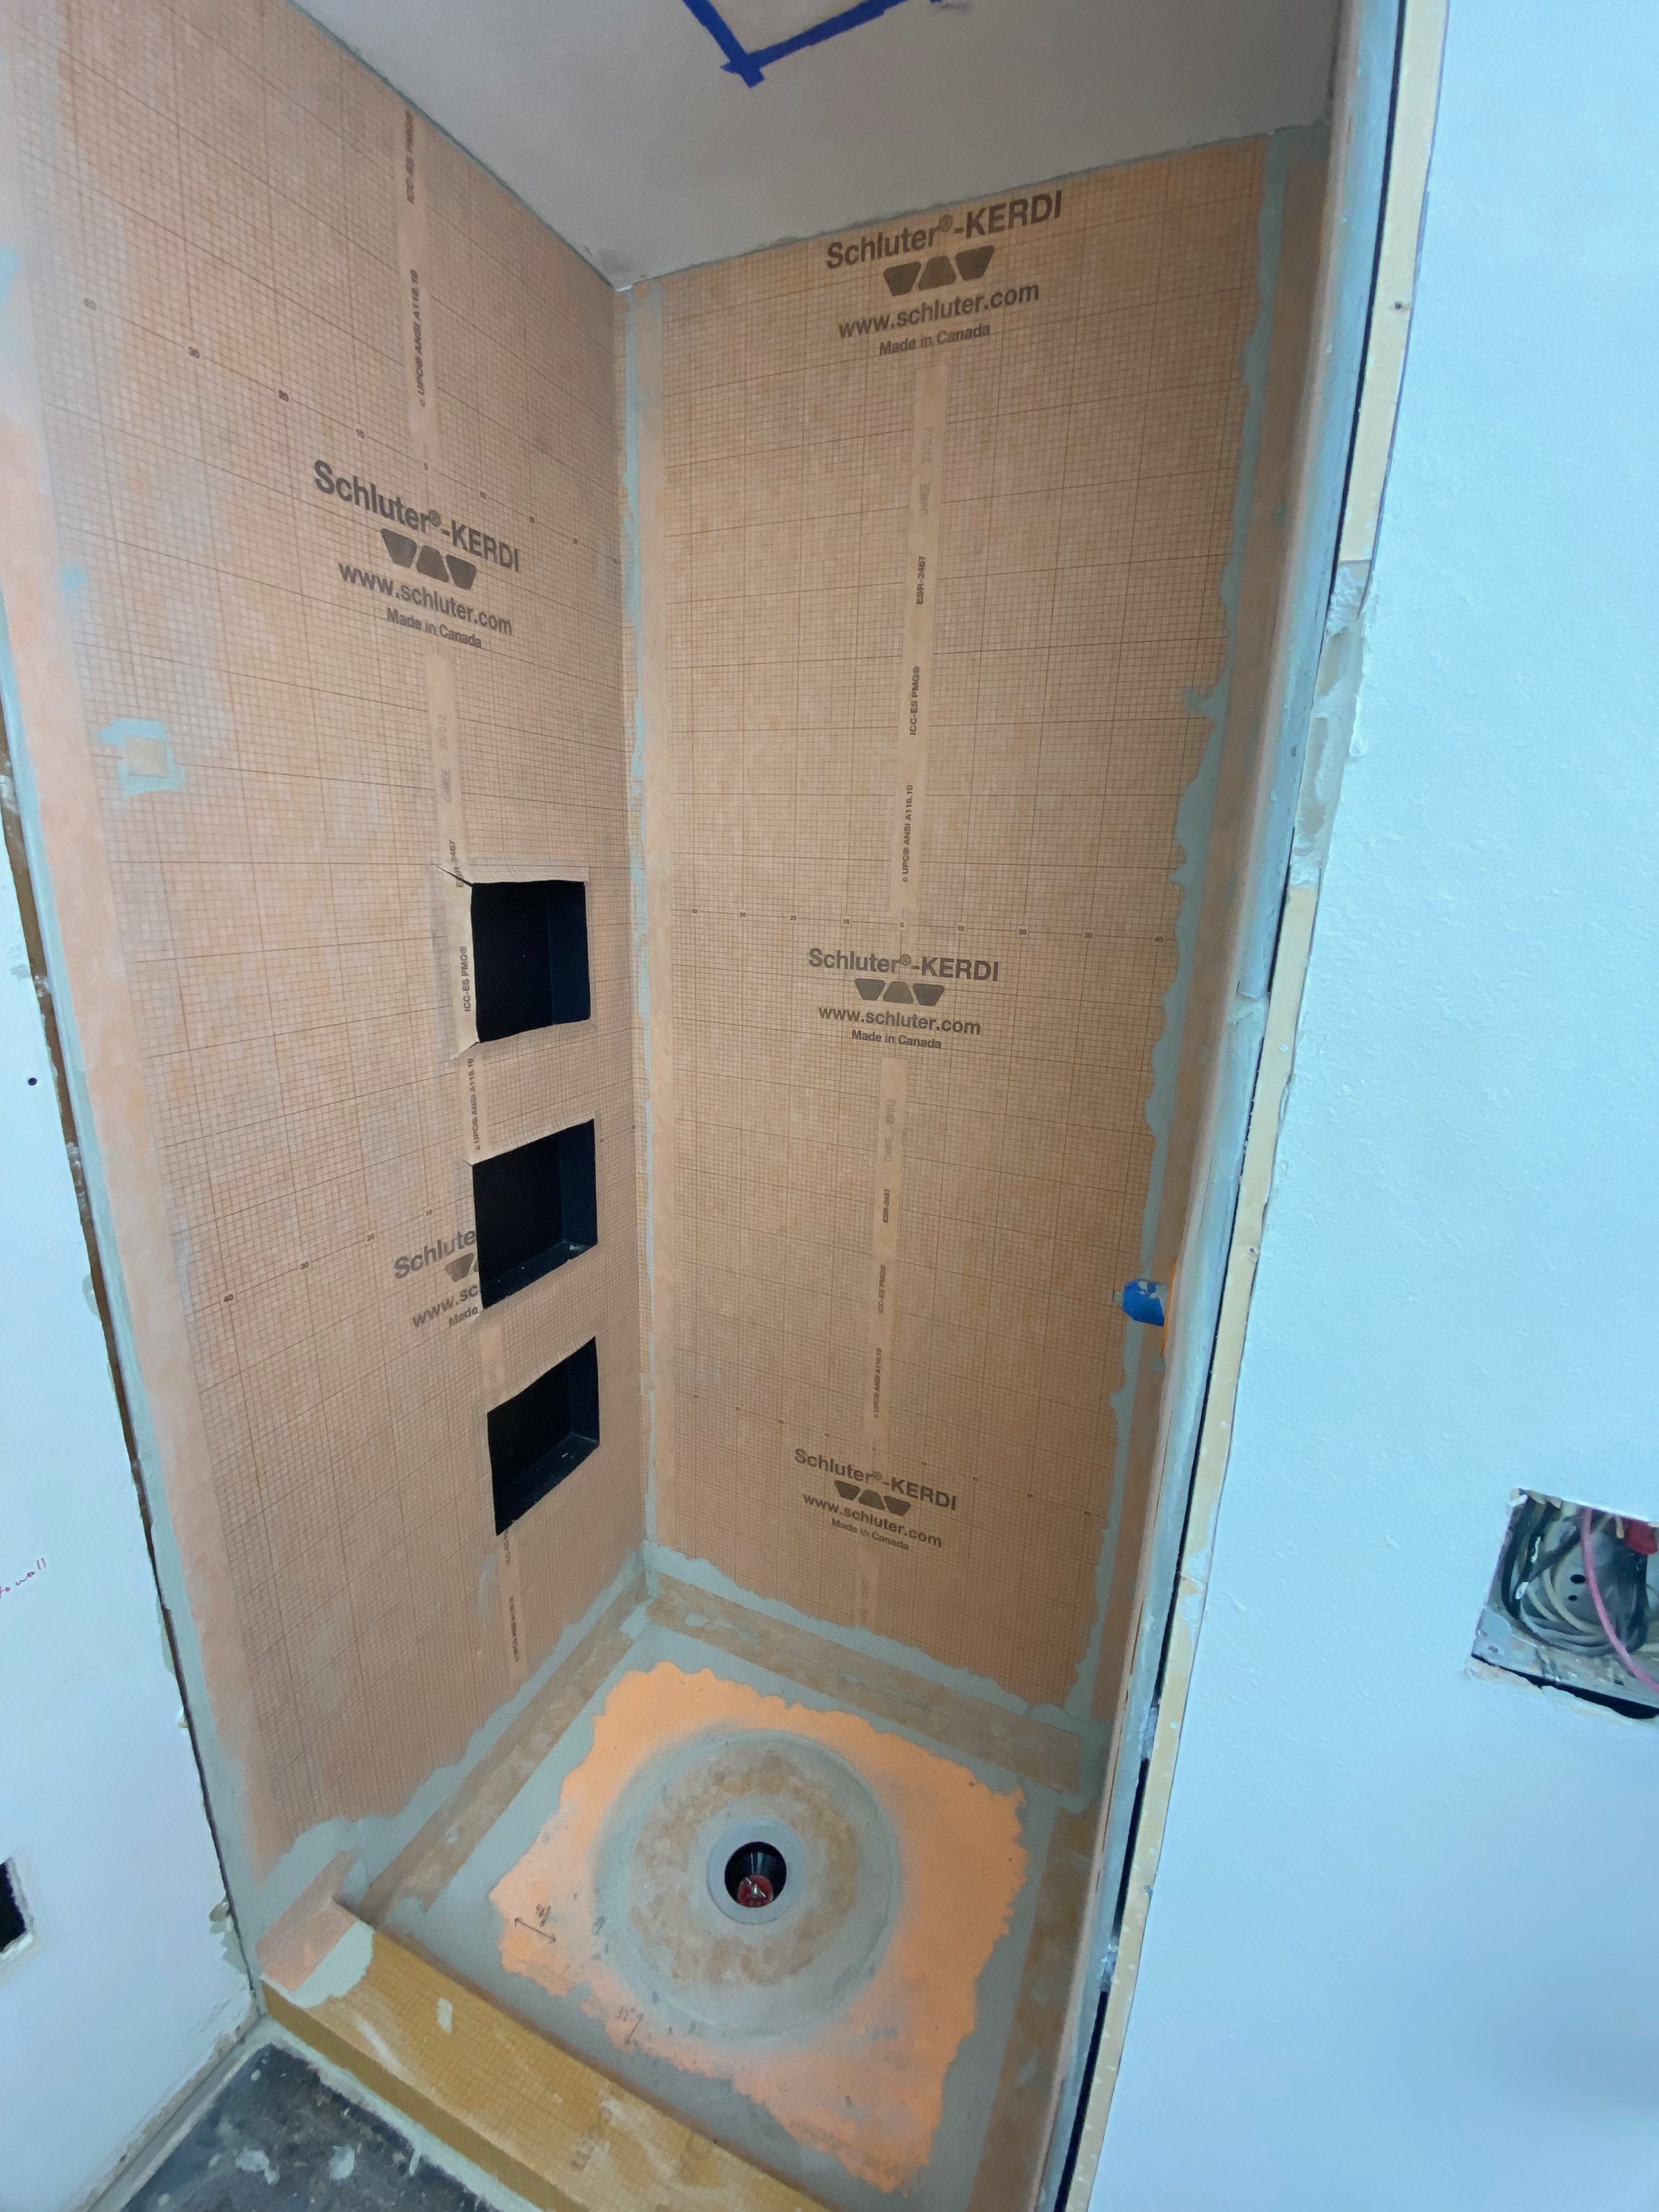
After that came prepping for tile. Josh used cement board on the walls and then added the Schluter Kerdi shower tray and waterproof membrane on the walls.
This was our first time to use the Schluter Kerdi system and there was definitely a learning curve to install it. We chose this system because the base of our shower was a non-standard size and you can custom fit the tray that comes in the kit. The tray is also pre-sloped to the drain, which was really helpful in our case as Josh had no experience building out a shower before (and figuring out how to get the slope of a shower floor just right was not appealing to him). The installation videos that Schluter provides are excellent and really helpful for first timers.
I’m not sure that we’d use this system again if we didn’t need that preformed base as the entire kit is quite expensive. Although, the reassurance that the shower is 100% waterproof and that the water will run down into the drain is definitely worth it!
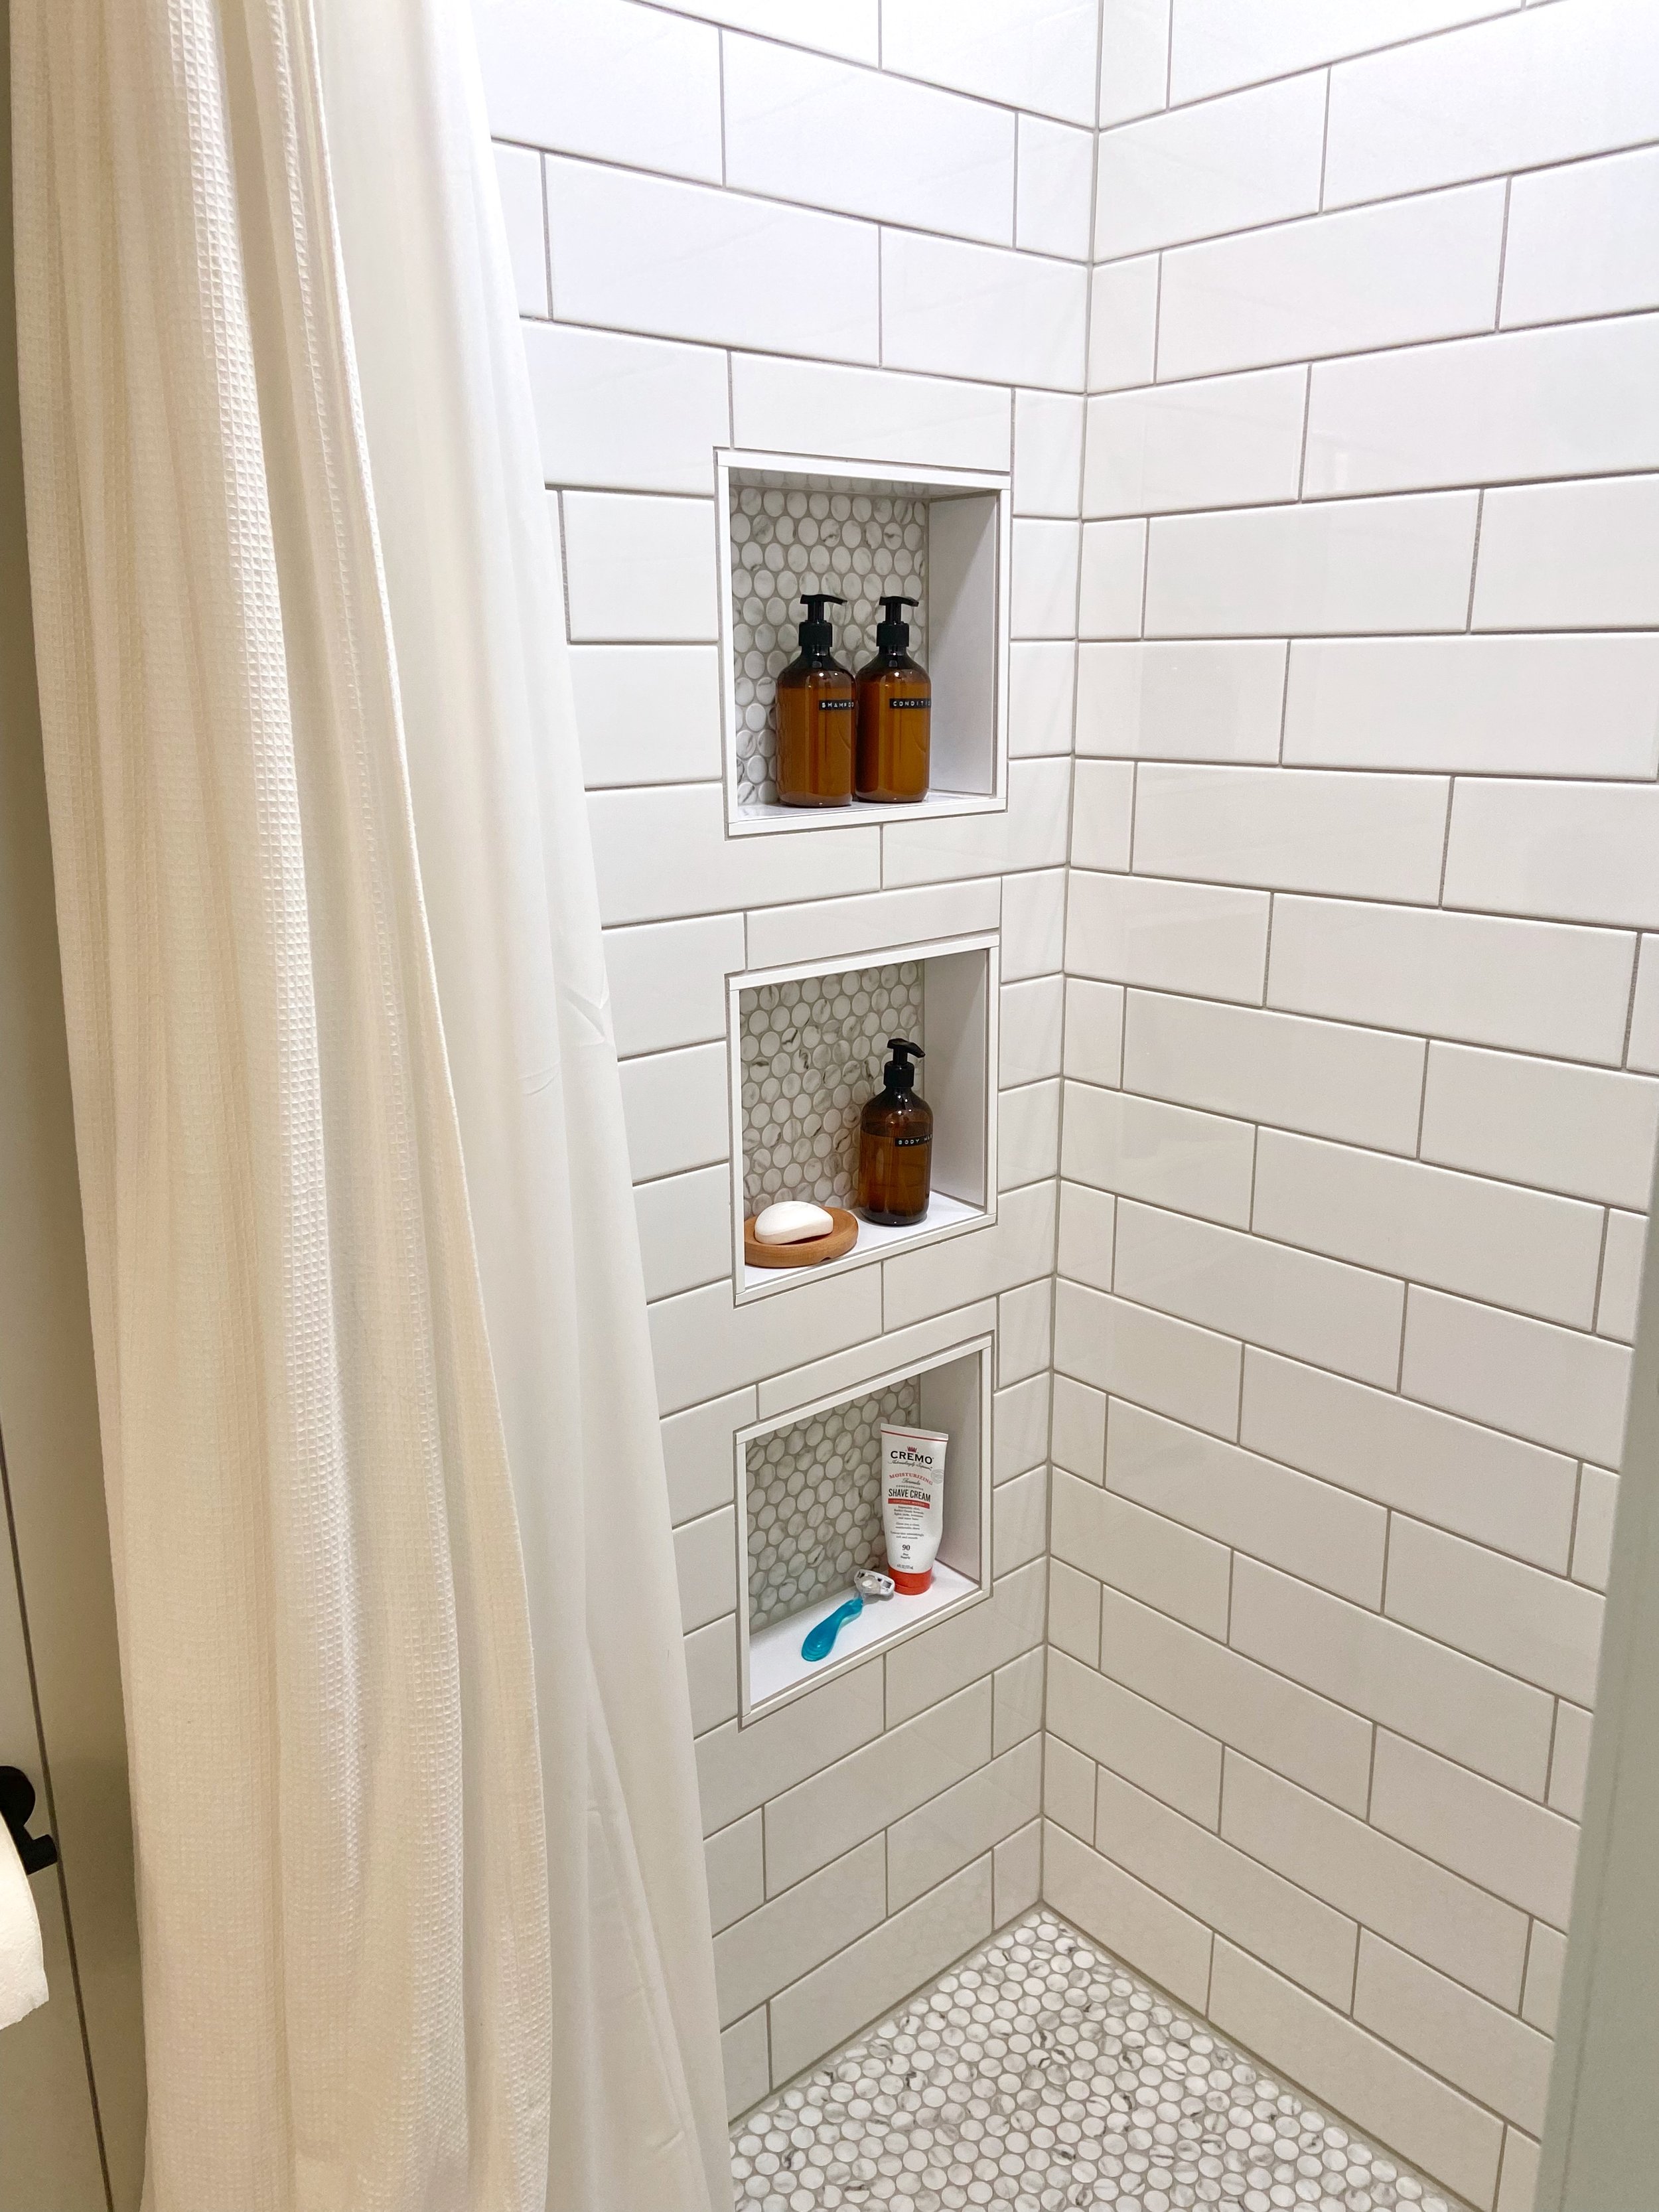
Another major improvement we added to the shower was adding niches! The old shower had a corner seat where we stored shampoo bottles and I used to prop my foot on while shaving. However, it really ate up valuable space in the shower stall. When reimagining this space, I knew I didn’t want to add anything like that, but I did want some sort of footrest for shaving and we needed some extra storage space for toiletries. We came up with the idea to add three separate niches stacked on top of each other. The lowest one is about 18” off the ground and the bottom of the upper one comes about to my shoulder (I’m 5’7” for reference). We used these preformed niche boxes because they were the right size and had the perfect pitch on the edges to drain away any water that lands on them. (The photo below shows the niche boxes before Josh finished the edges around them).
After a water test to ensure the floor of the shower was water tight (it passed! phew!) it was time to start tiling. For the floor, we went with this gorgeous 1” ceramic Carrara penny tile. It’s a bit different than the hex tile in my moodboard, but I absolutely adore it! Here’s a photo of it before grout:

And here it is after grouting. We used the Mapei Flexcolor CQ grout in Warm Gray and it applied like a dream! I had no idea that you grout the floor before moving on to the walls, so I’m glad Josh did his research on that 😅

Once the floor was finished, it was time to move on to the shower walls! We were originally going to use the same 3x6” tile we used in the guest bath, but ended up opting for a larger format 4x12” subway tile option instead. We chose this because I realized that the smaller tile would feel too busy in such a small space. I’m so glad we pivoted to this larger tile instead (we had actually purchased all of the smaller size and then I changed my mind. Thankful for generous return policies!)

This is another instance where our laser level came in super handy! We’ve gotten so much use out of this tool.
And of course, Gladys had to come do her inspection. Thankfully, we passed with flying colors 😉

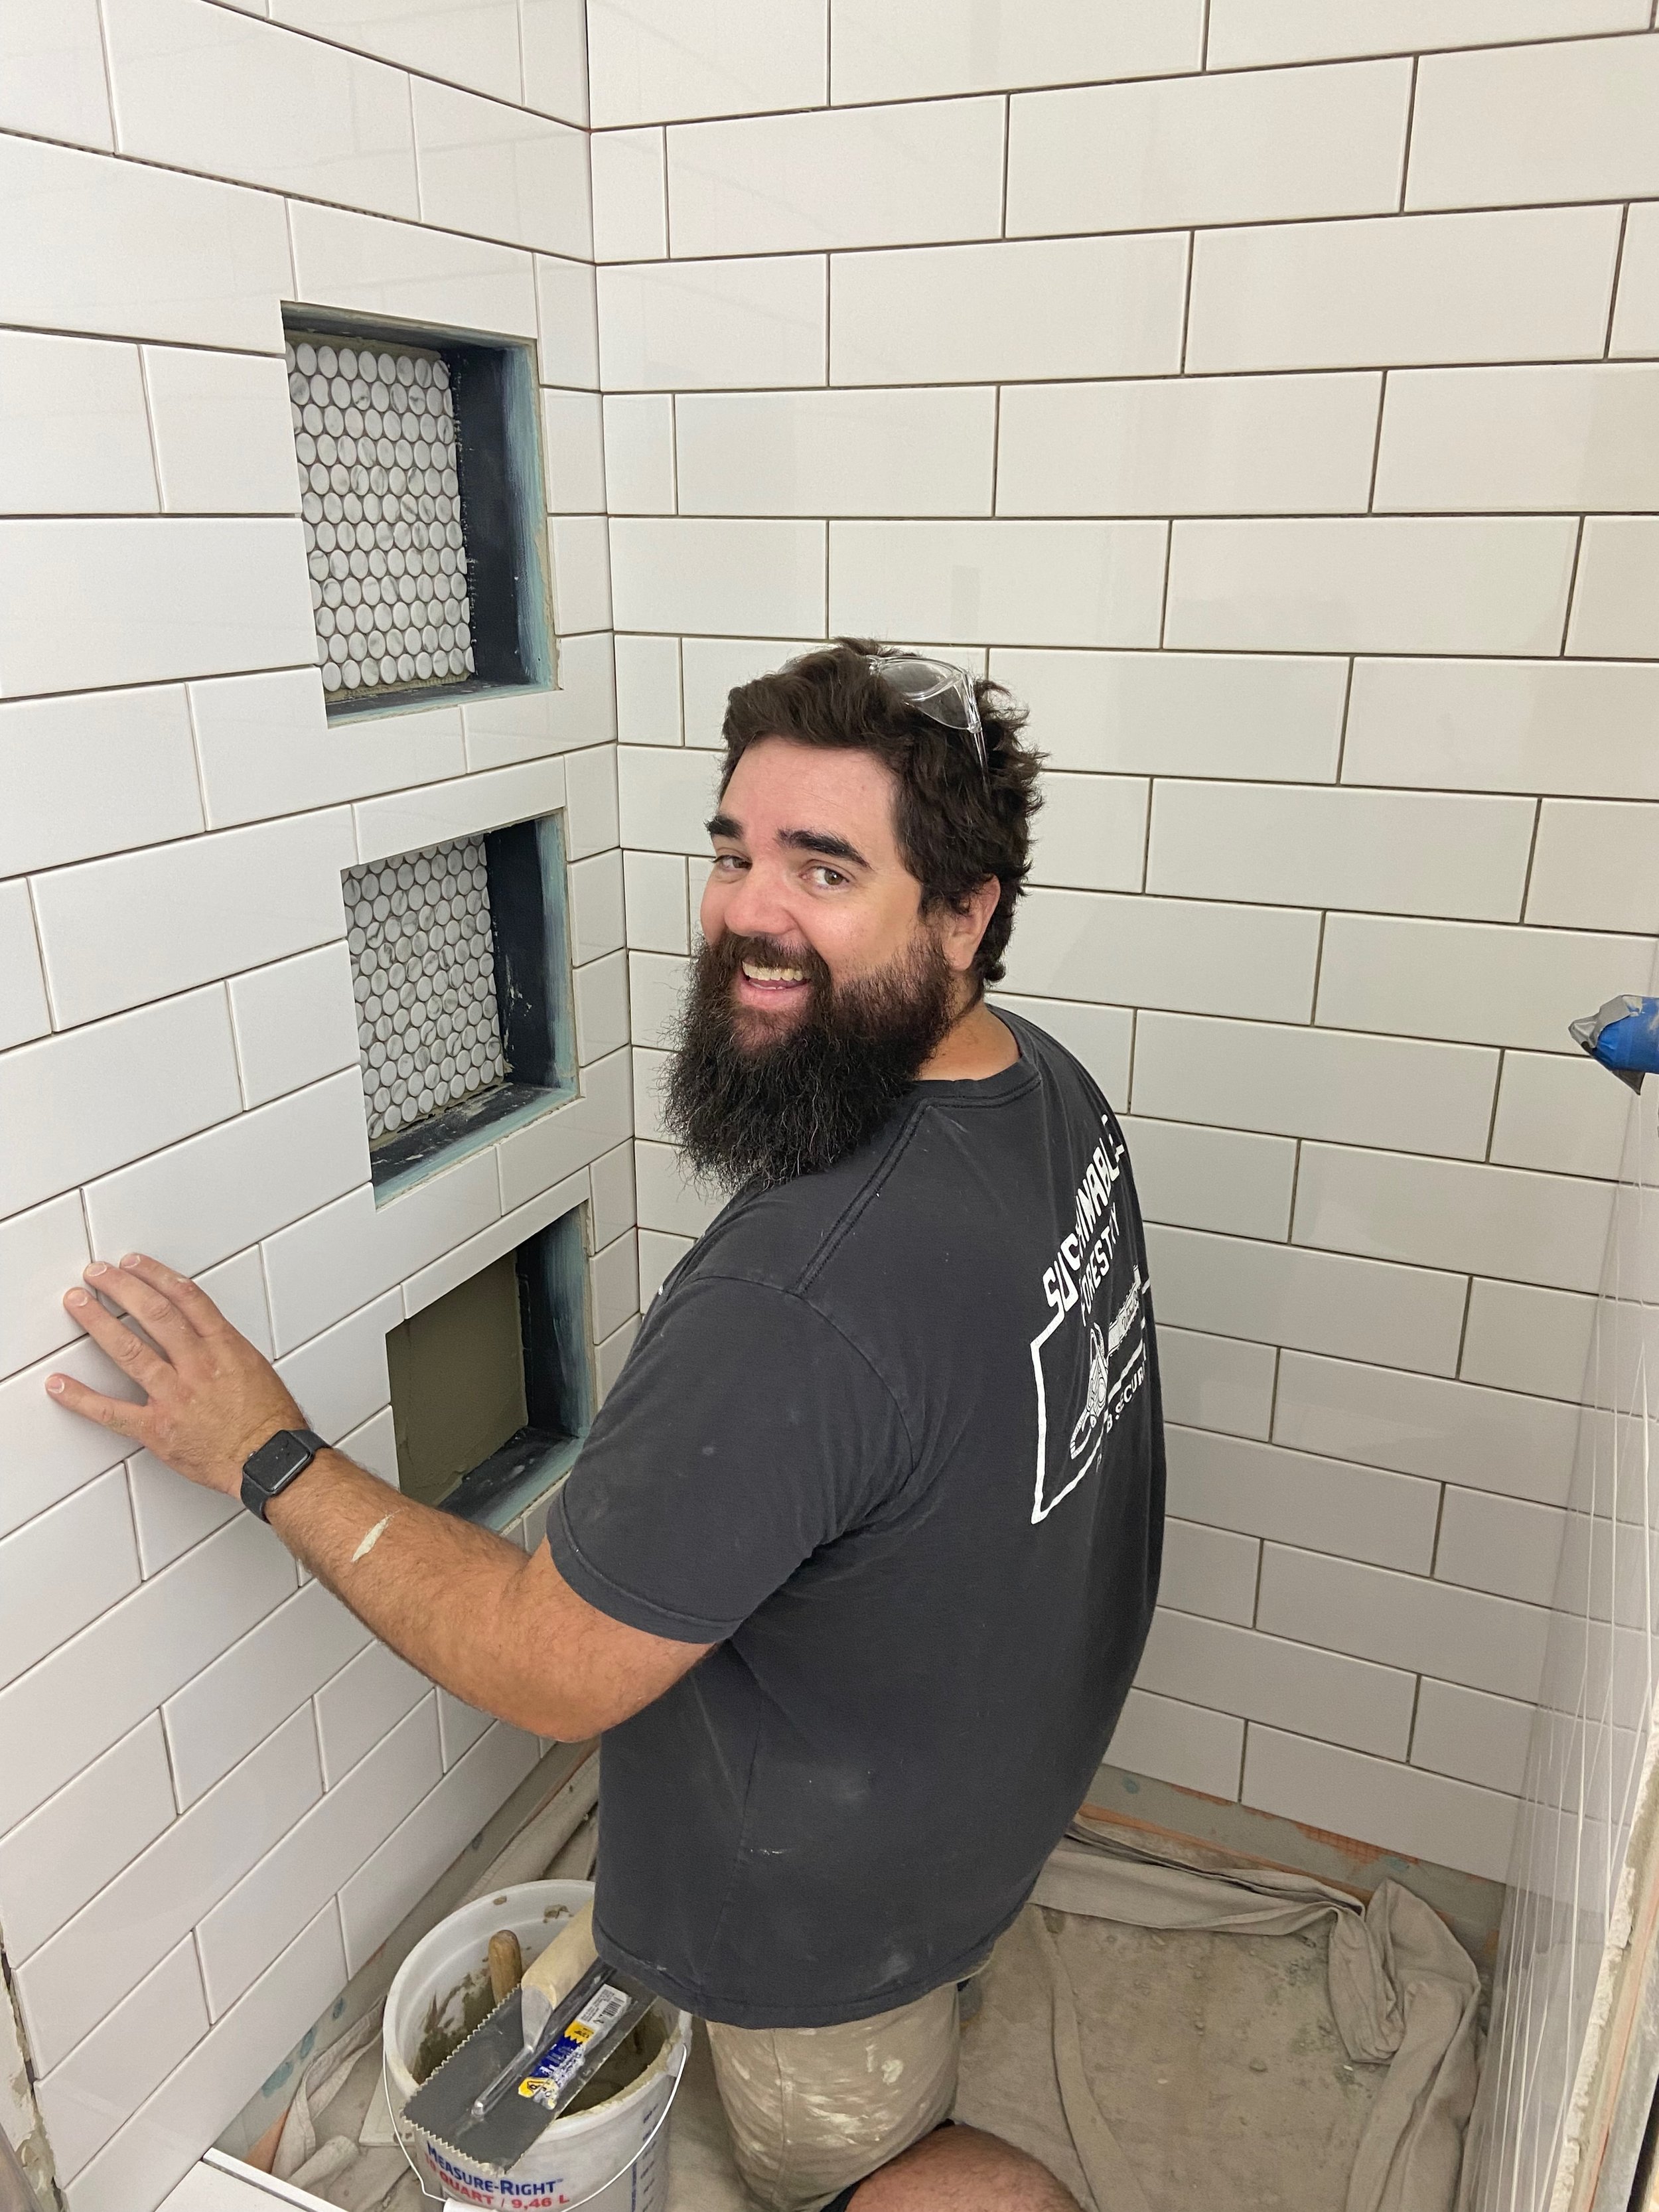
Once he was done with the walls, Josh tiled the back of the niches with the same penny tile we used on the floors. I love how it ties it all together! He’s smiling here because he’s almost done tiling 😉 He decided he definitely didn’t want to become a professional tiler after this project haha.
To finish off the edges around the niches and along the curb, we used the Schluter Jolly edge trim. Here’s a look at the finished tile pre-grout:
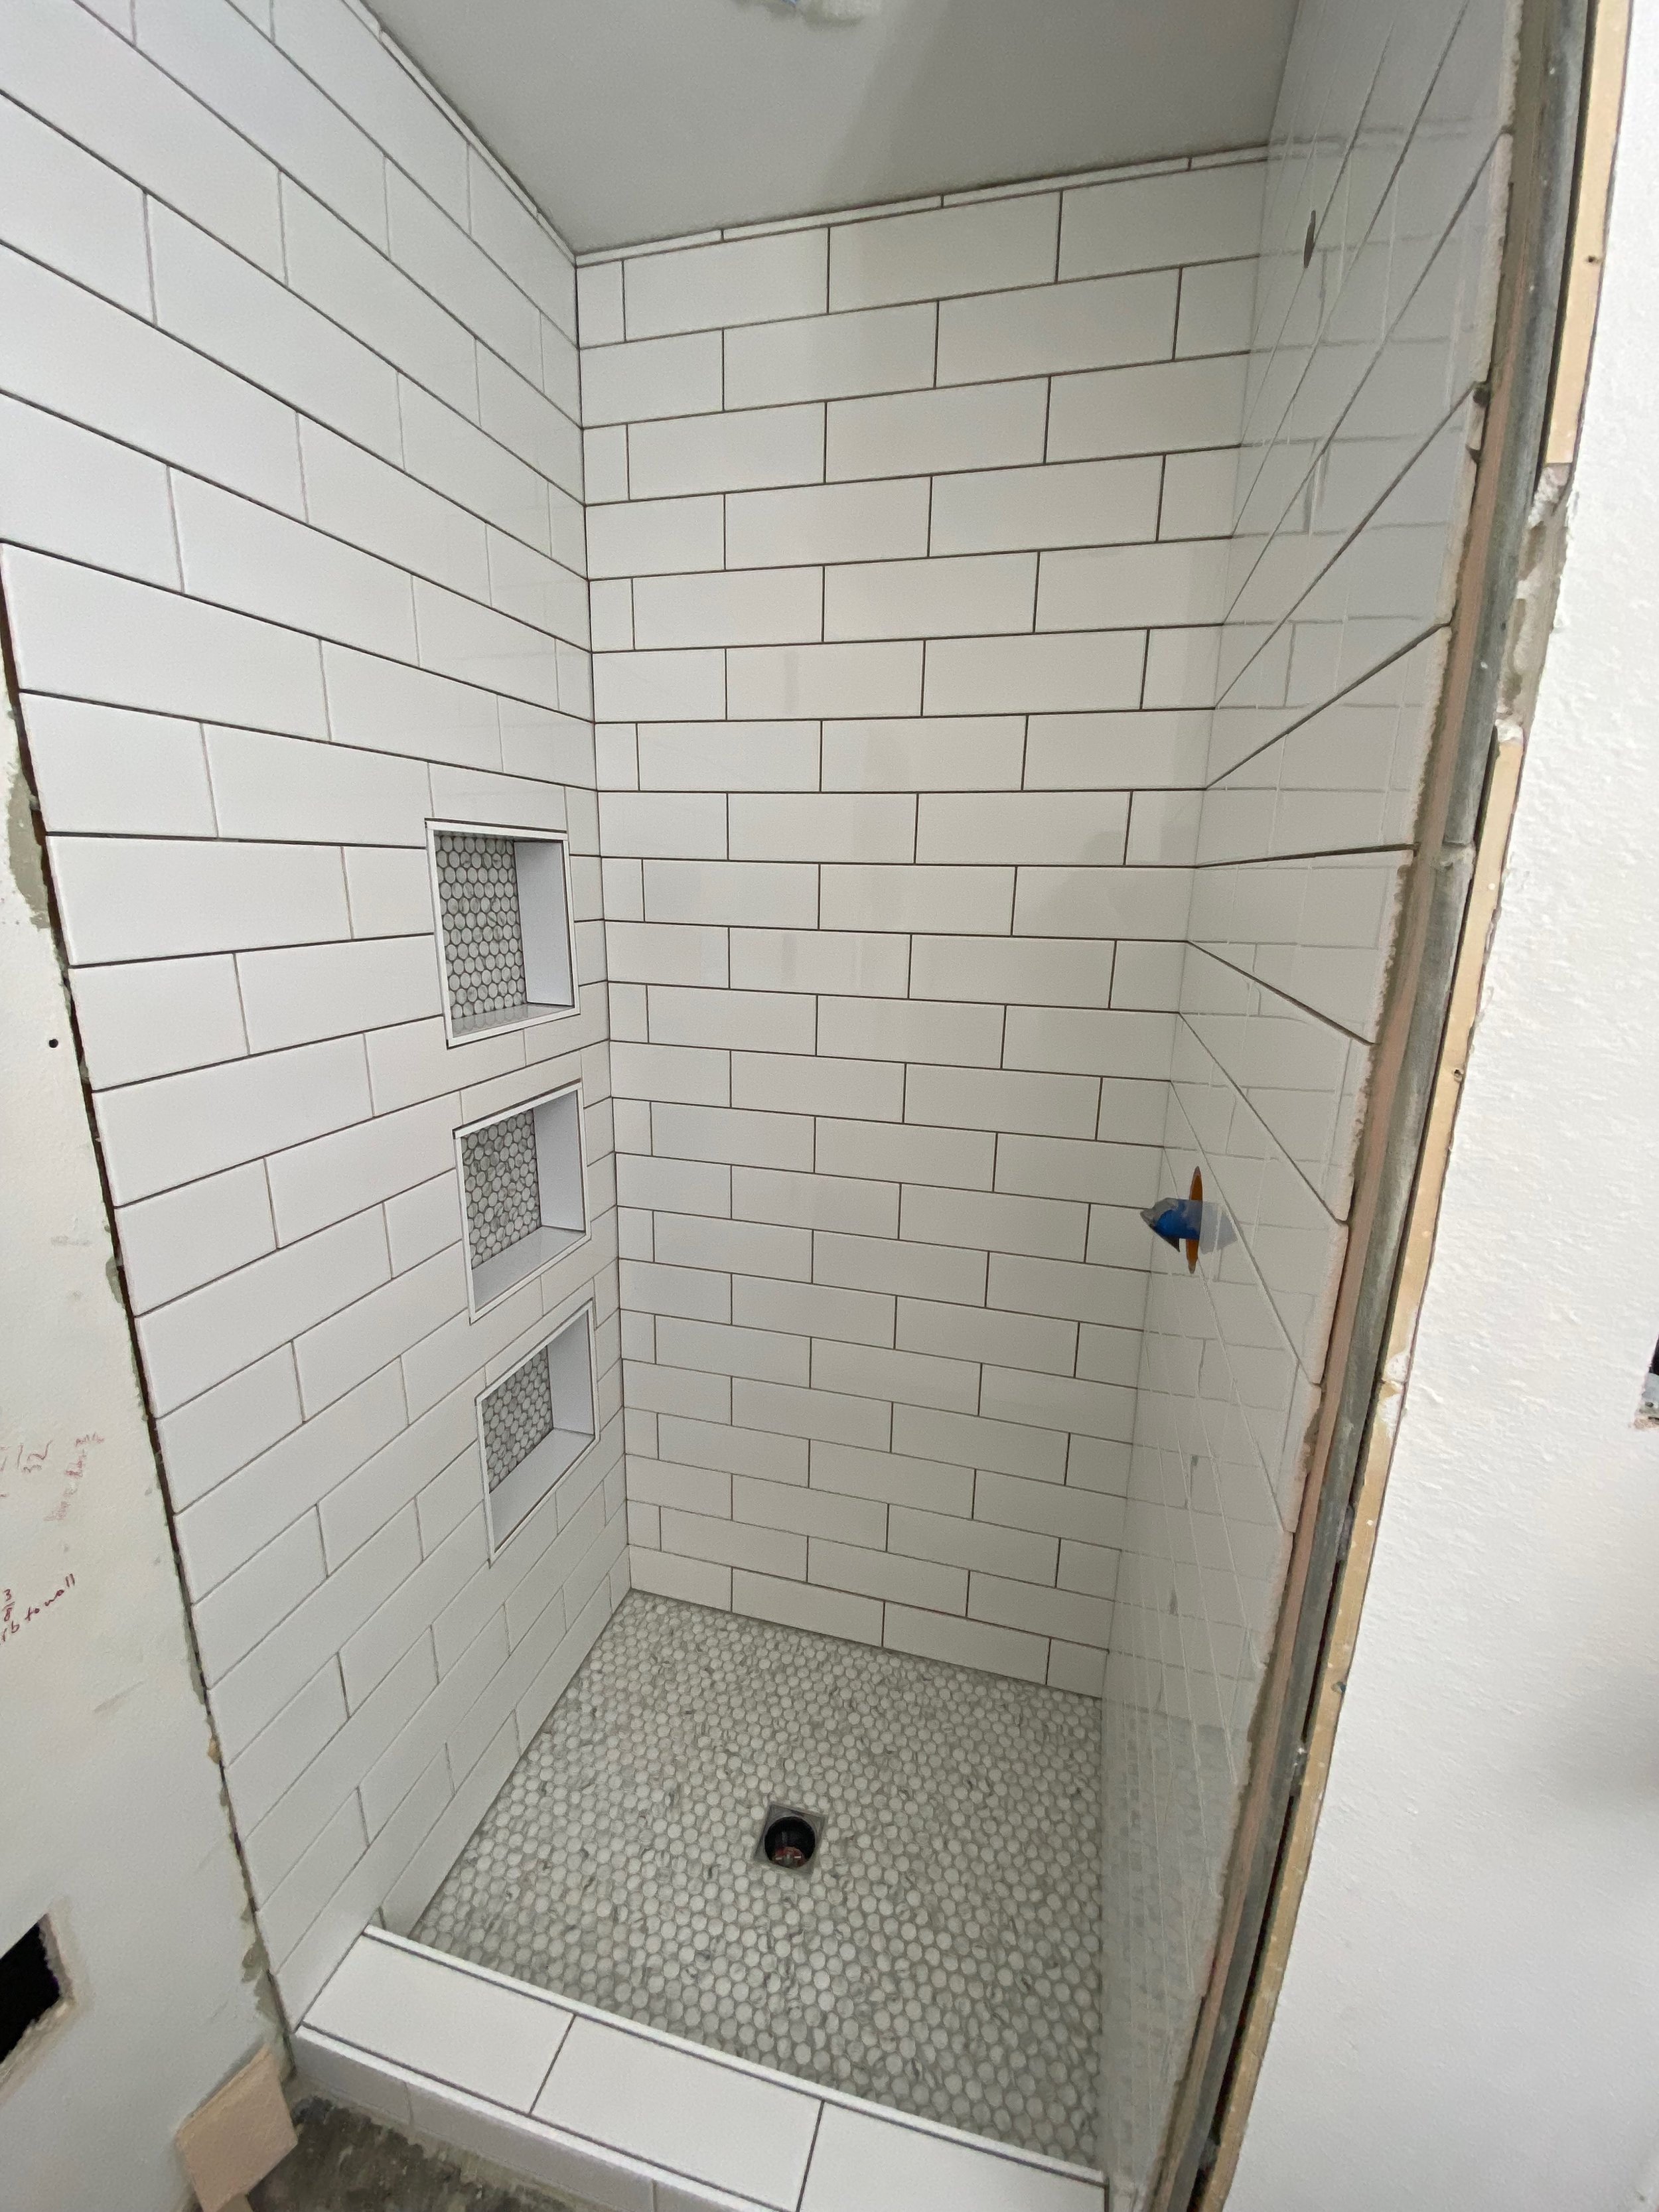
And here’s after grout. We used the same warm gray grout on the walls as we did on the floor and I love the soft contrast it adds!

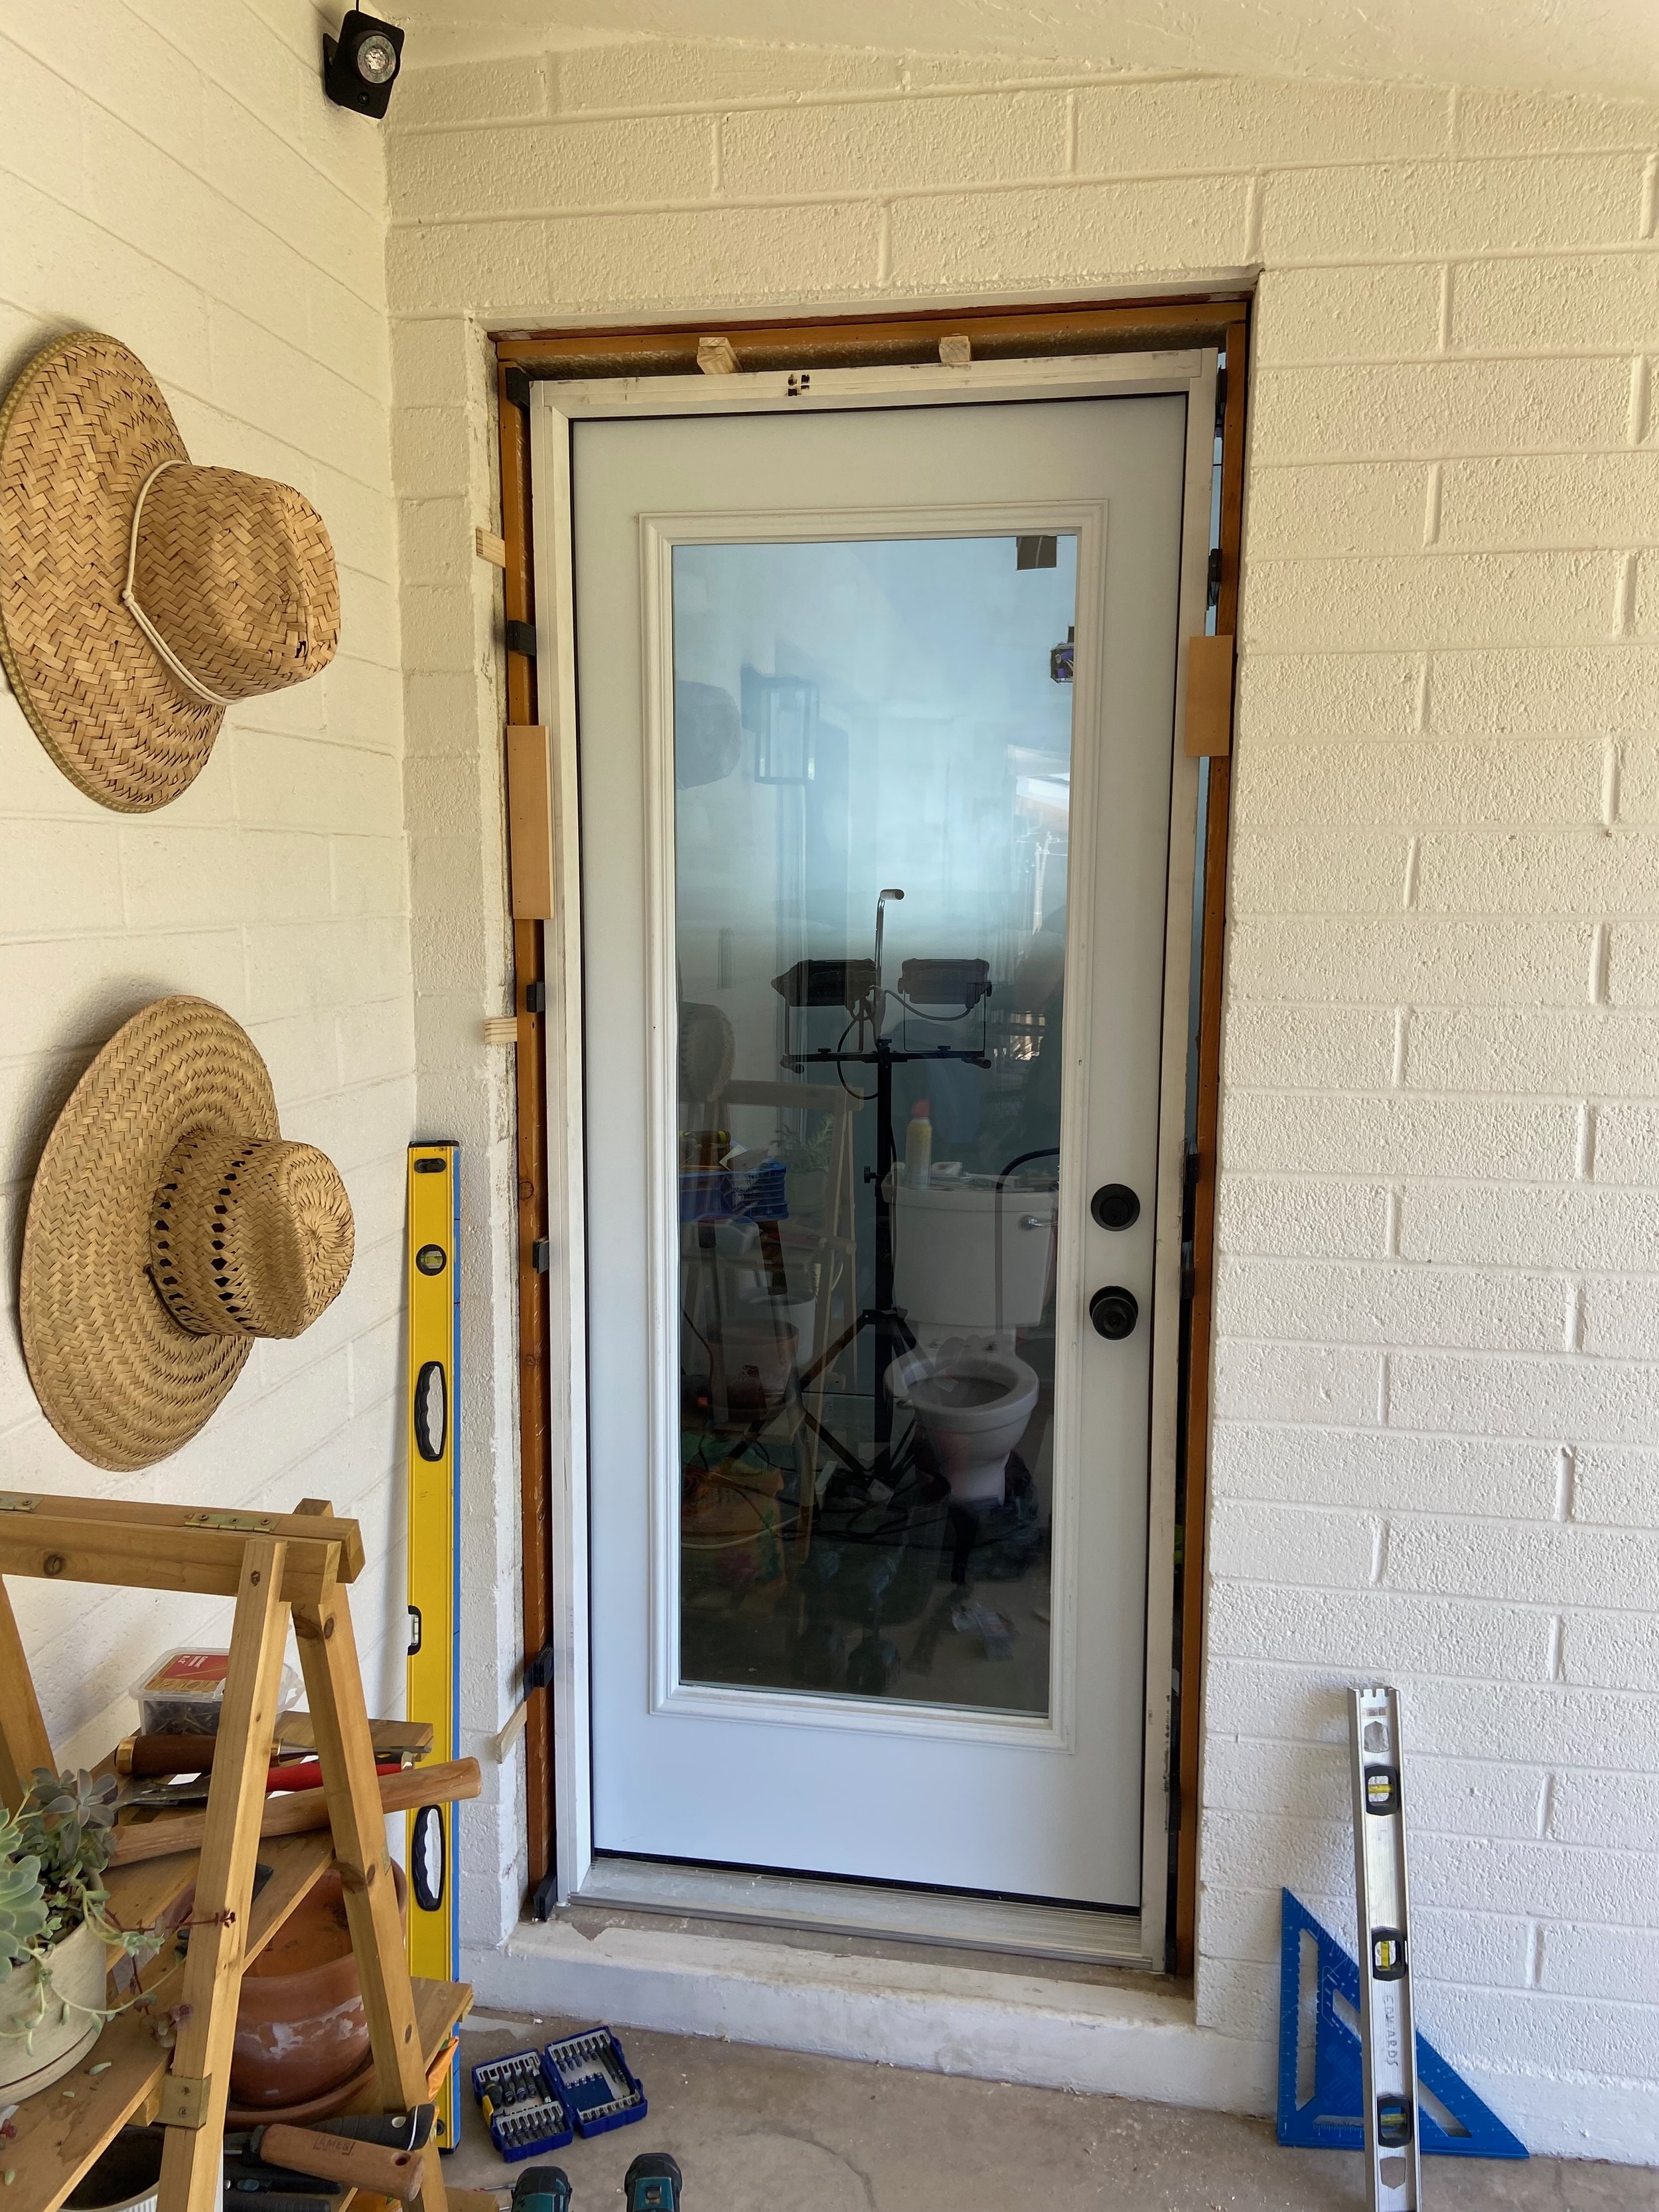
Next came dealing with the exterior door. We weren’t going to be able to close it off (that would have required patching the slump block on the exterior), so we decided to swap it out with a new full glass door to make it feel more like a window instead.
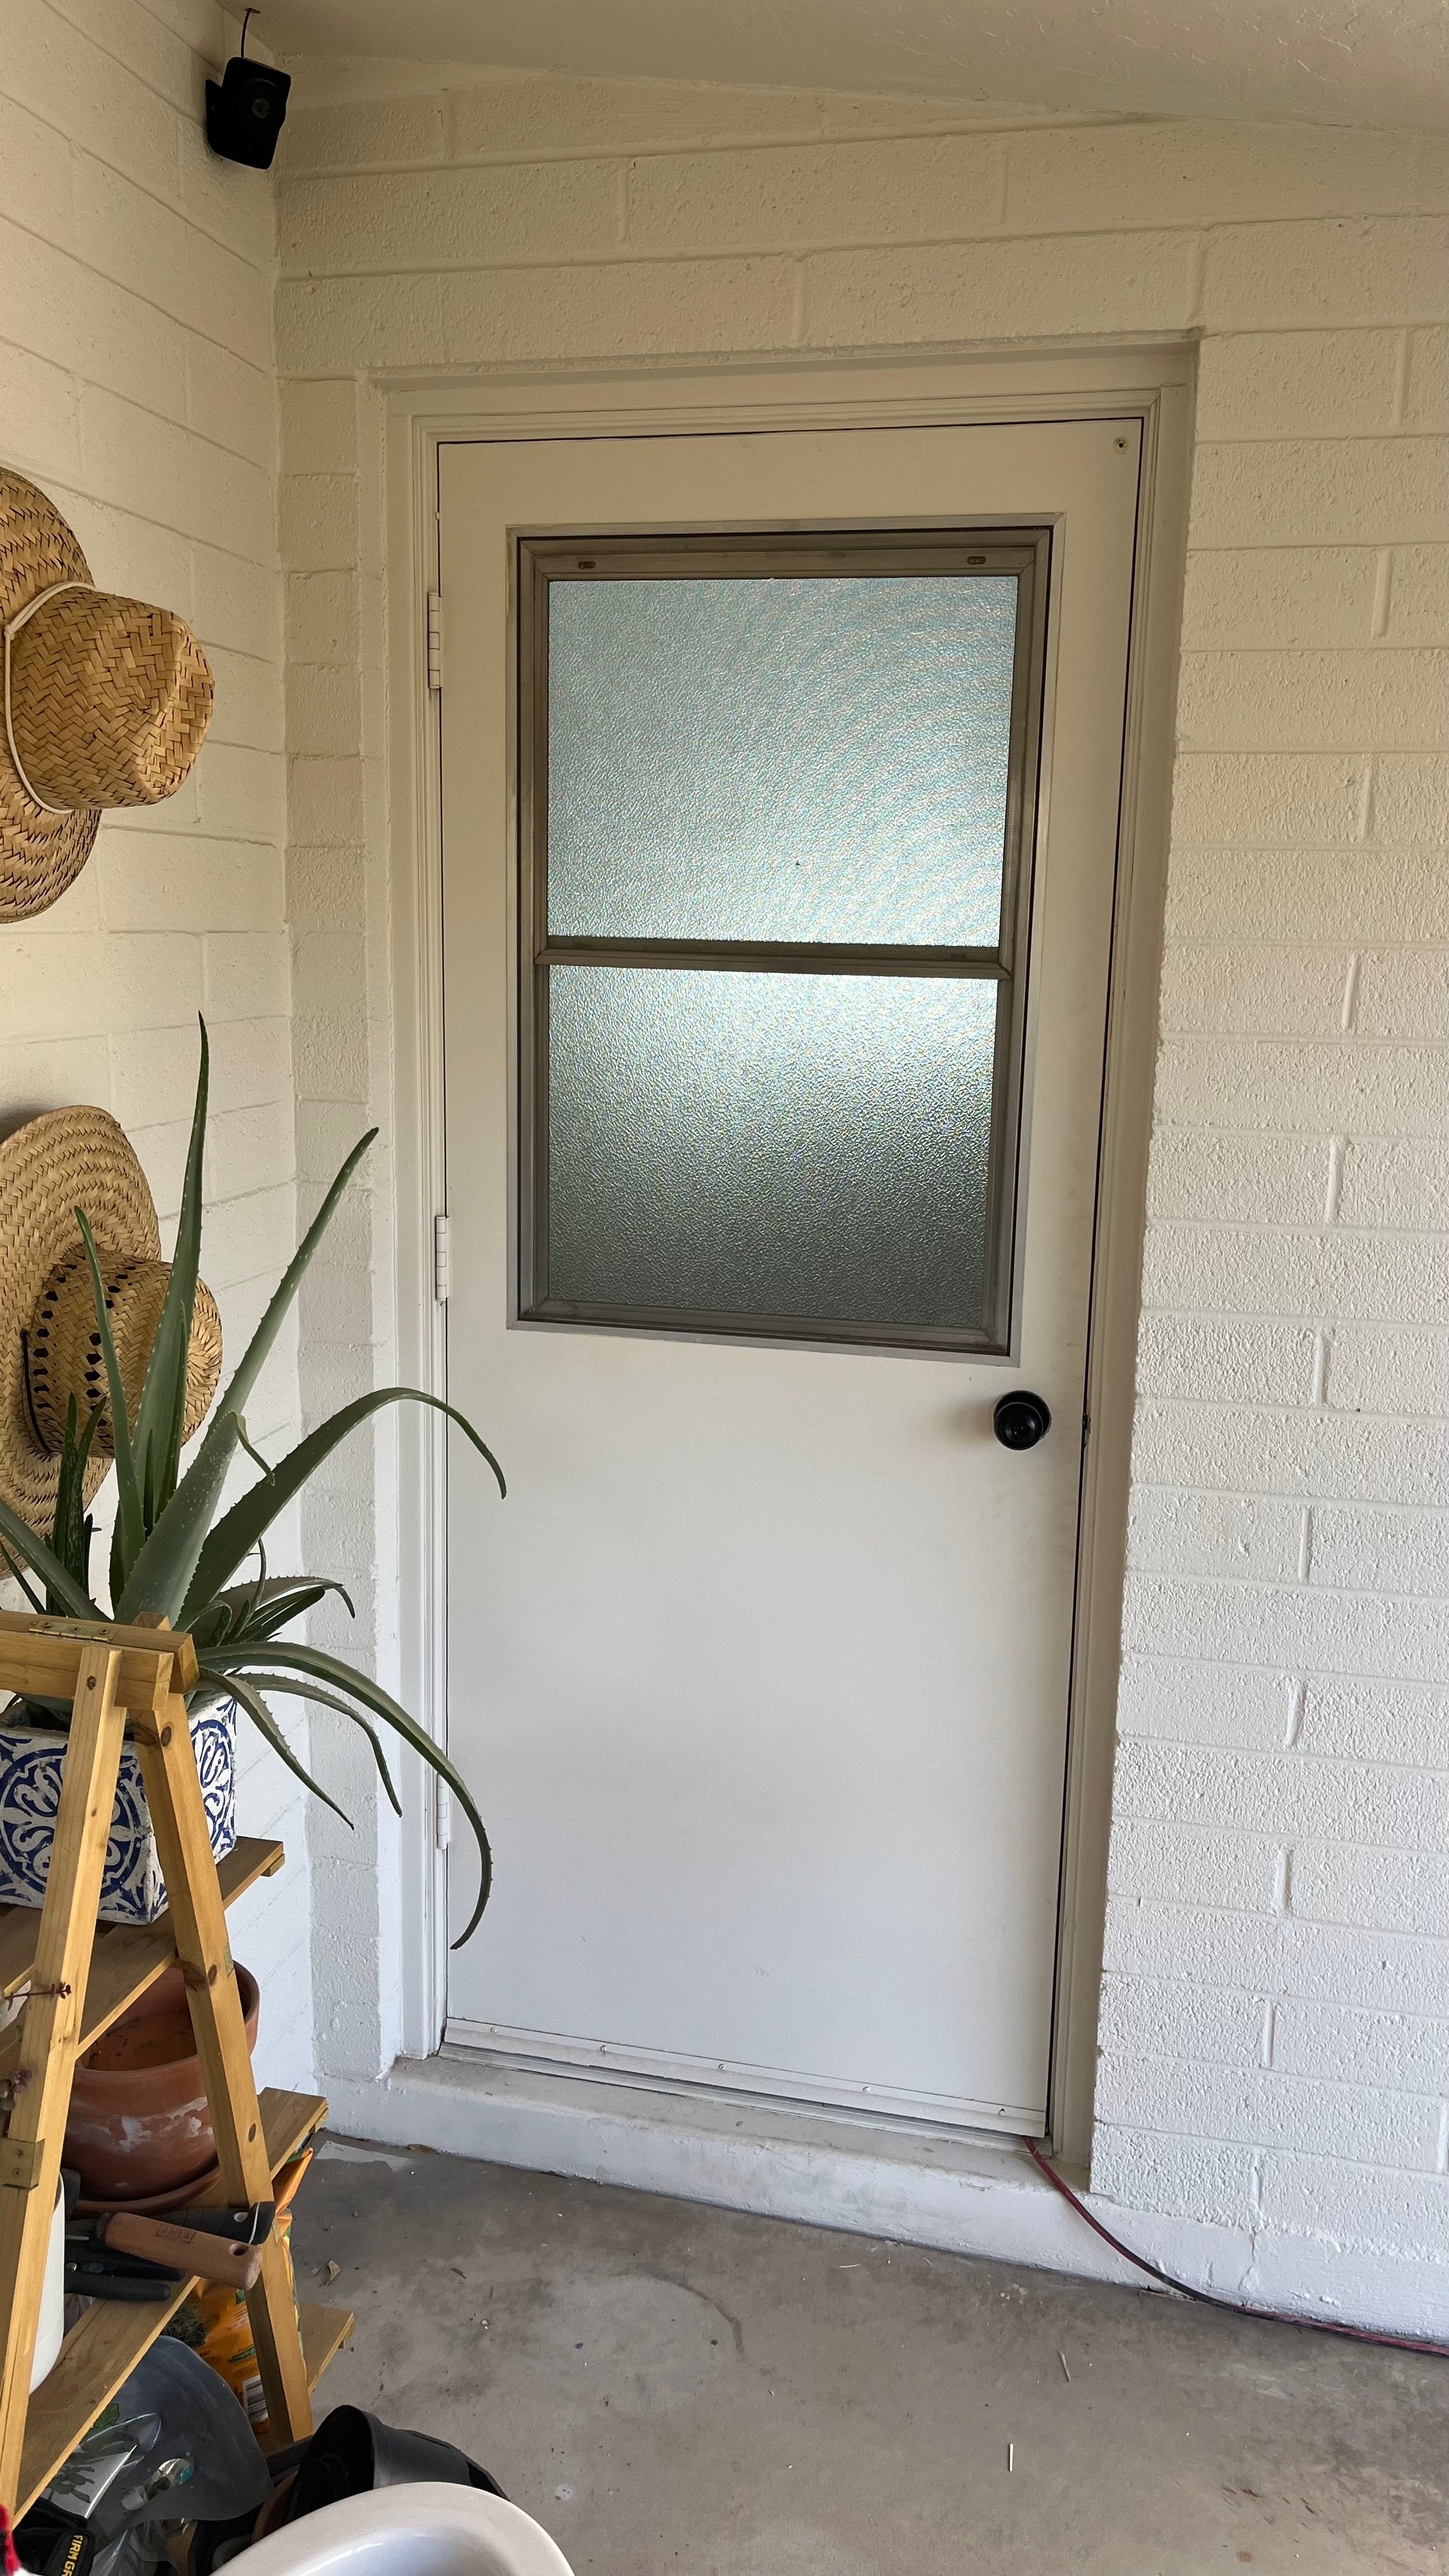
The door was also an out-swing, which always felt a bit odd so we replaced it with one that has an in-swing. And not to worry, we’d be adding privacy film so no one would be getting a show 😉 Even with the privacy film, the full glass lets in so much natural light—I love it!
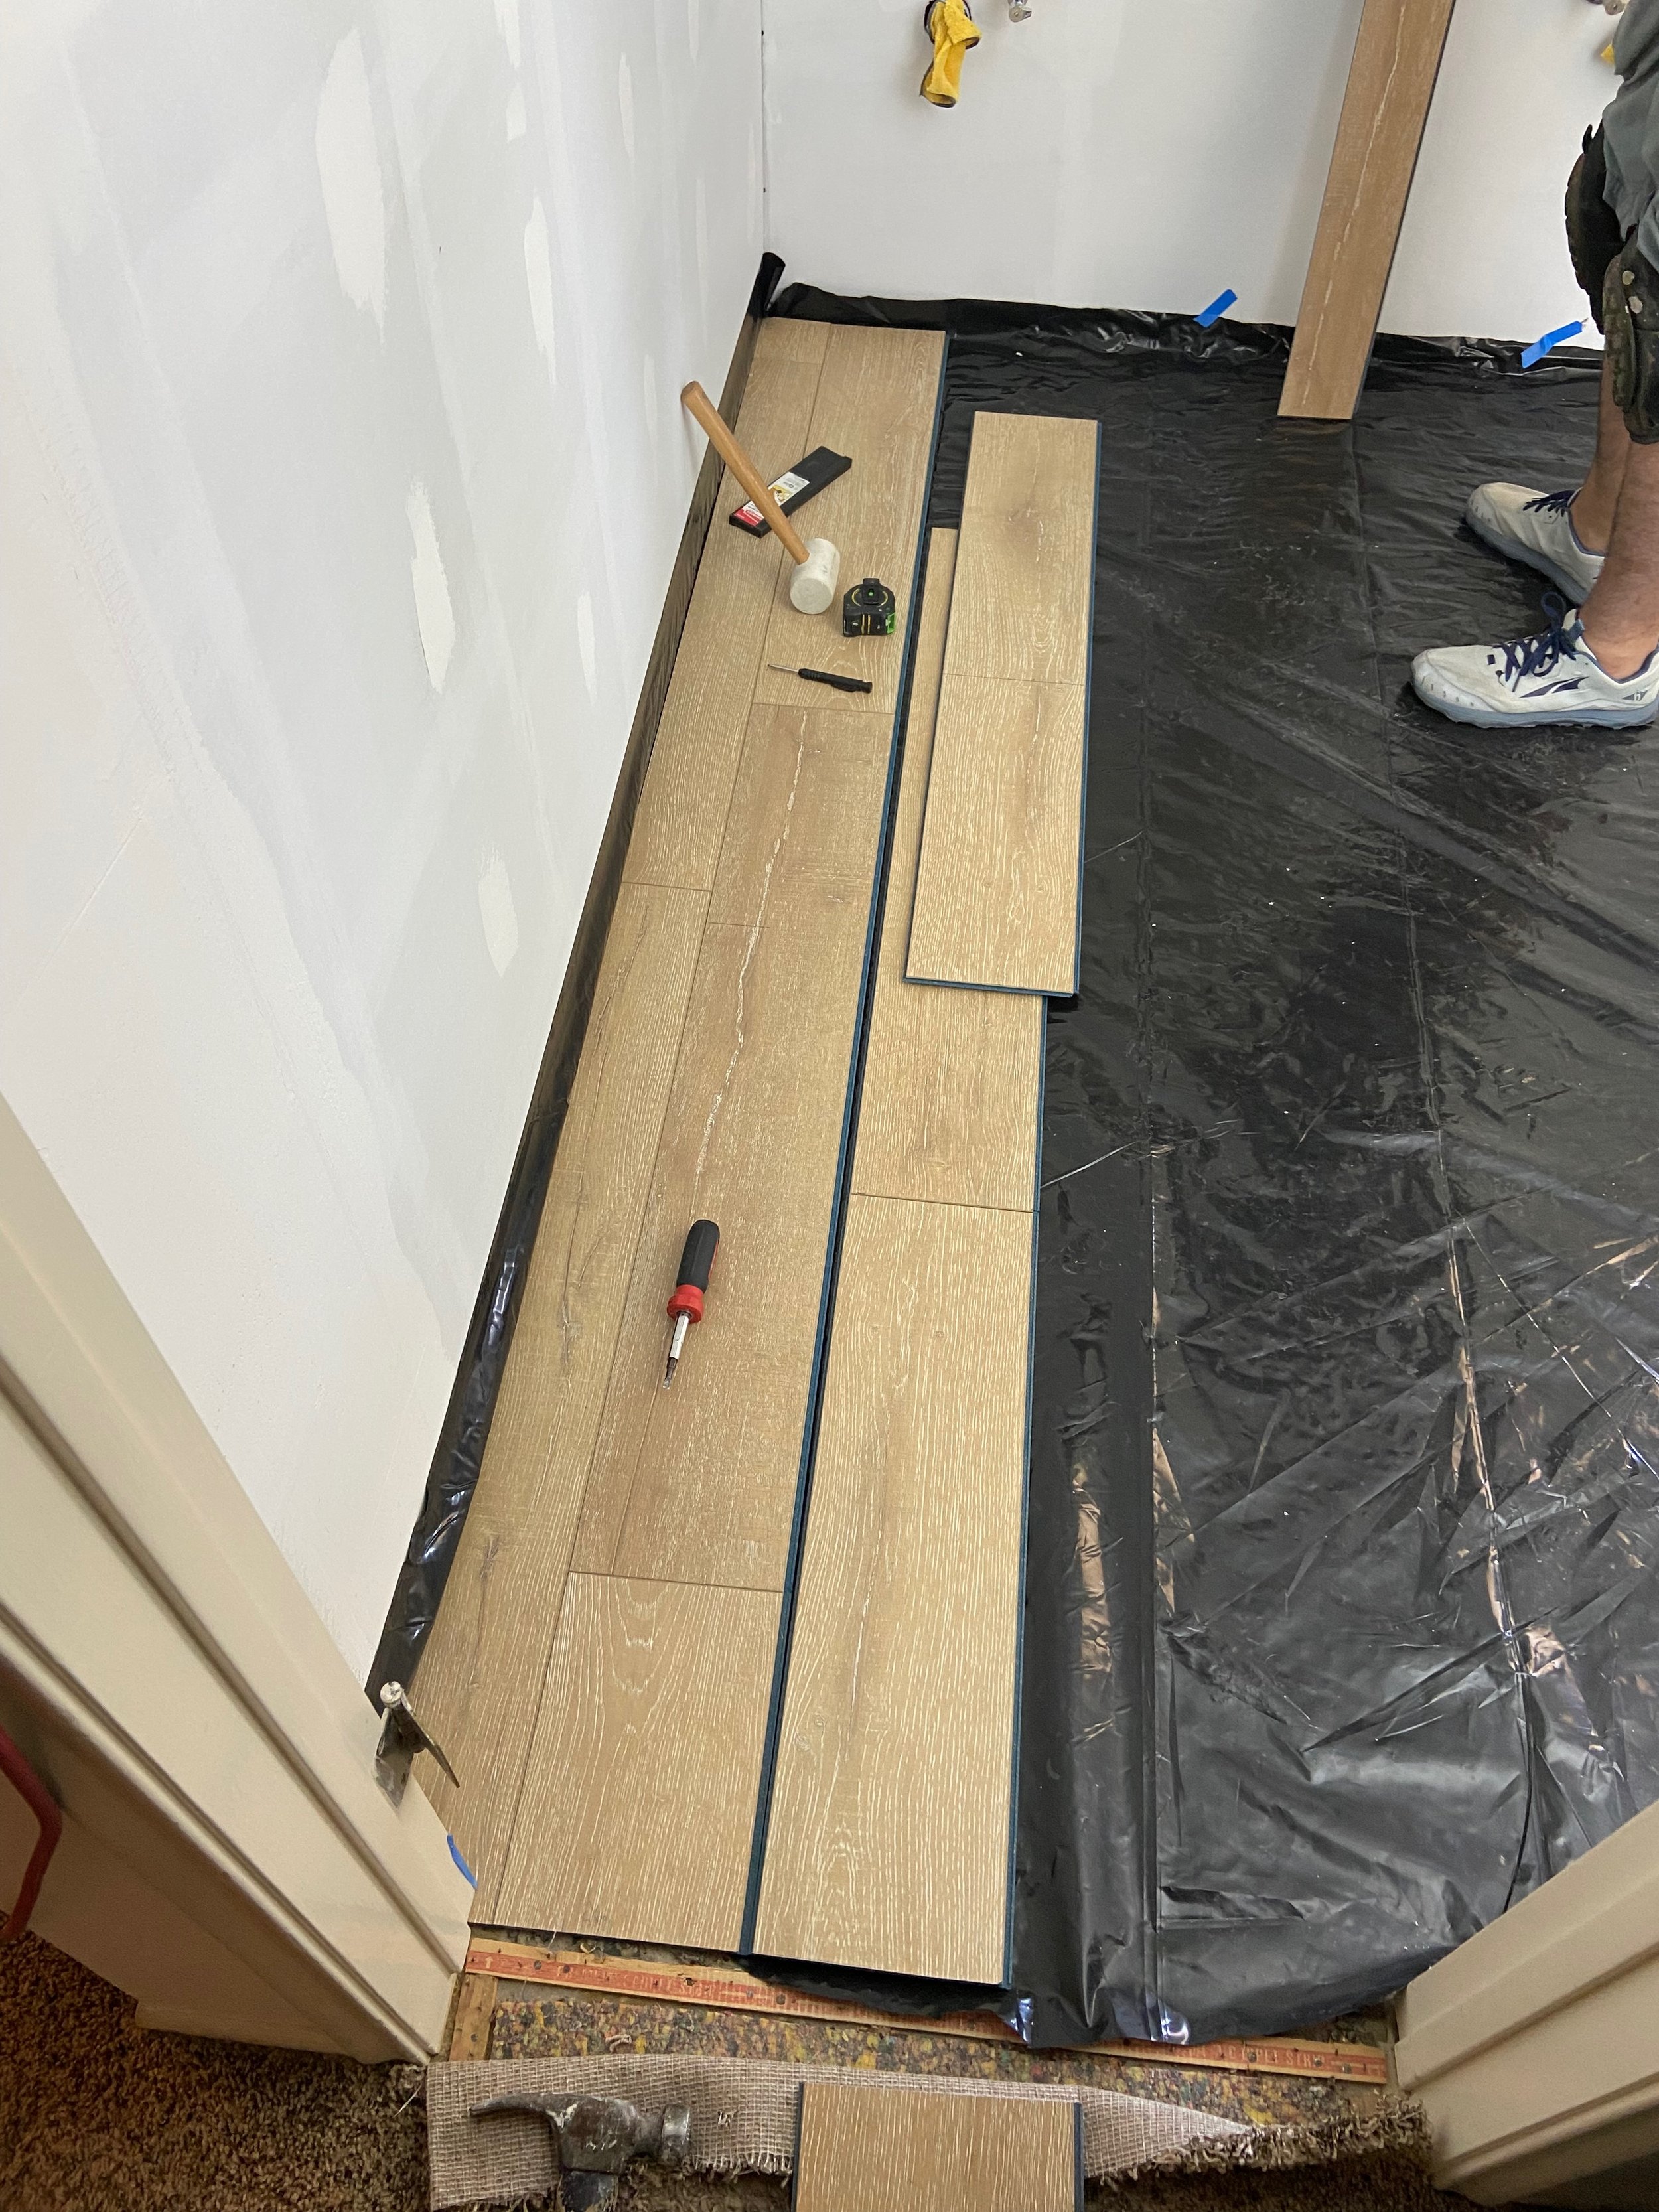
After the new door was installed, it was time to work on flooring! As I mentioned before, we planned on continuing our waterproof laminate flooring into this bathroom. We absolutely love it and it’s worked really well in our other bathroom!
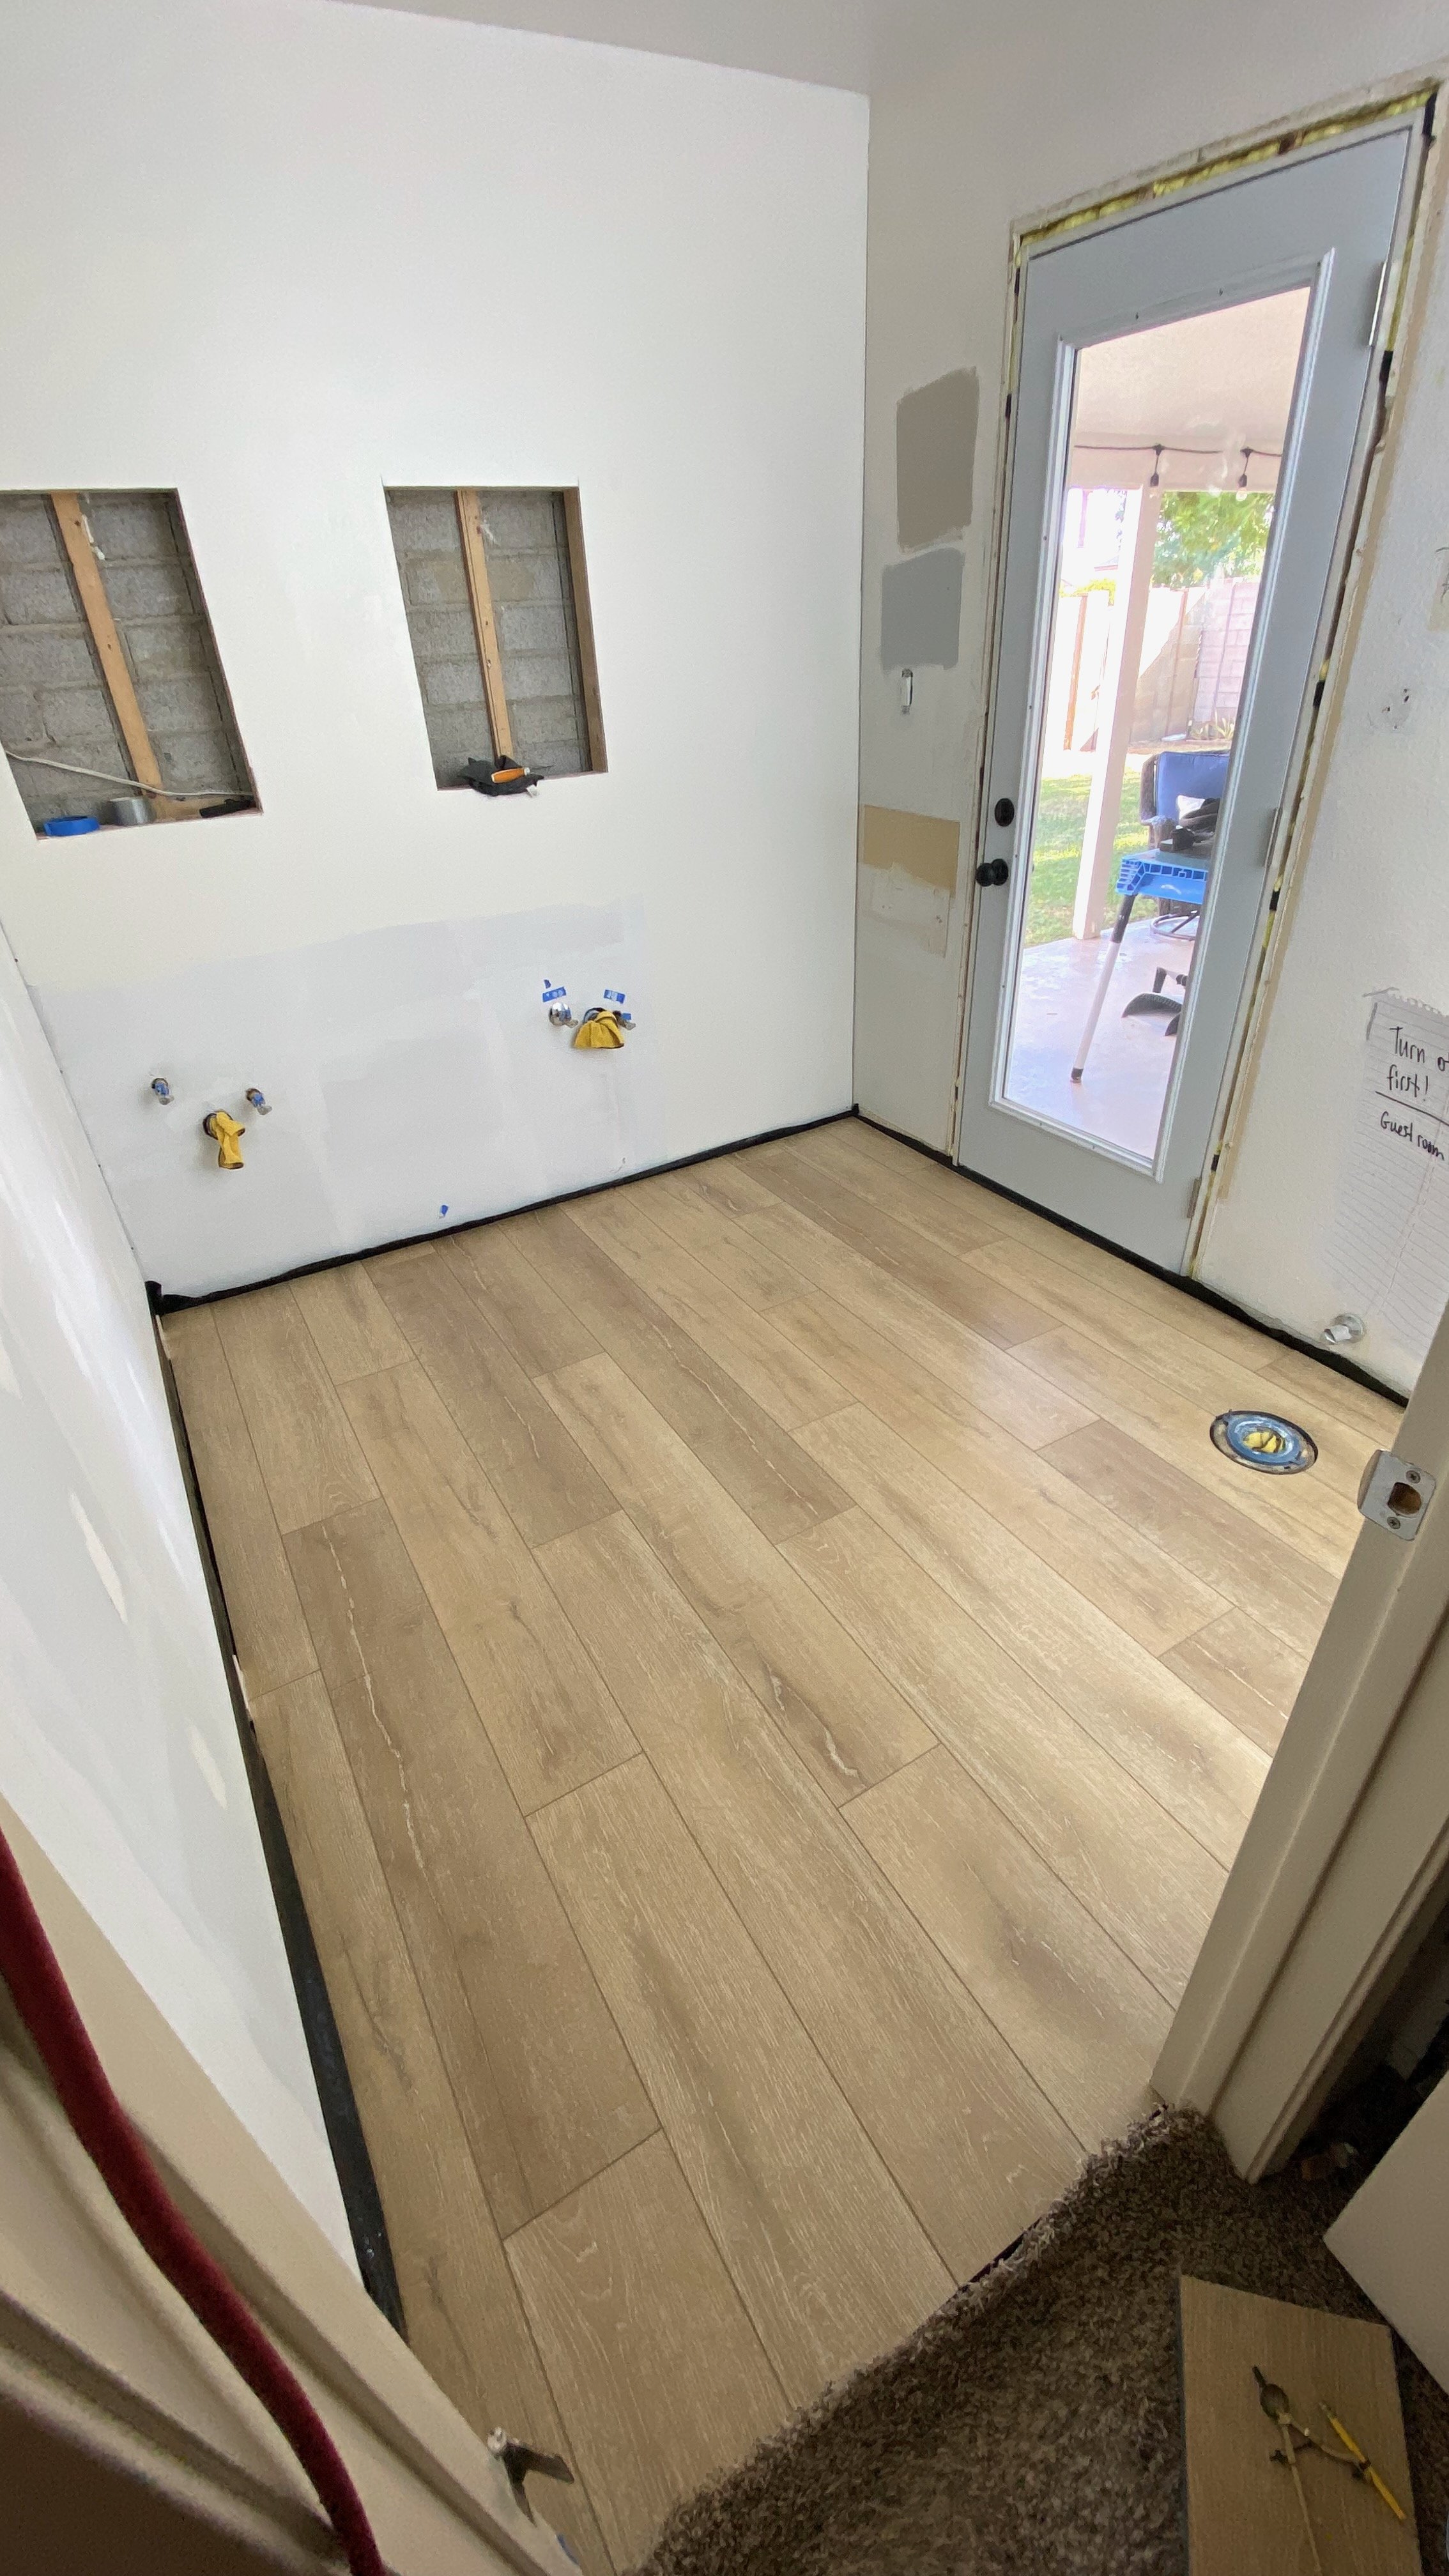
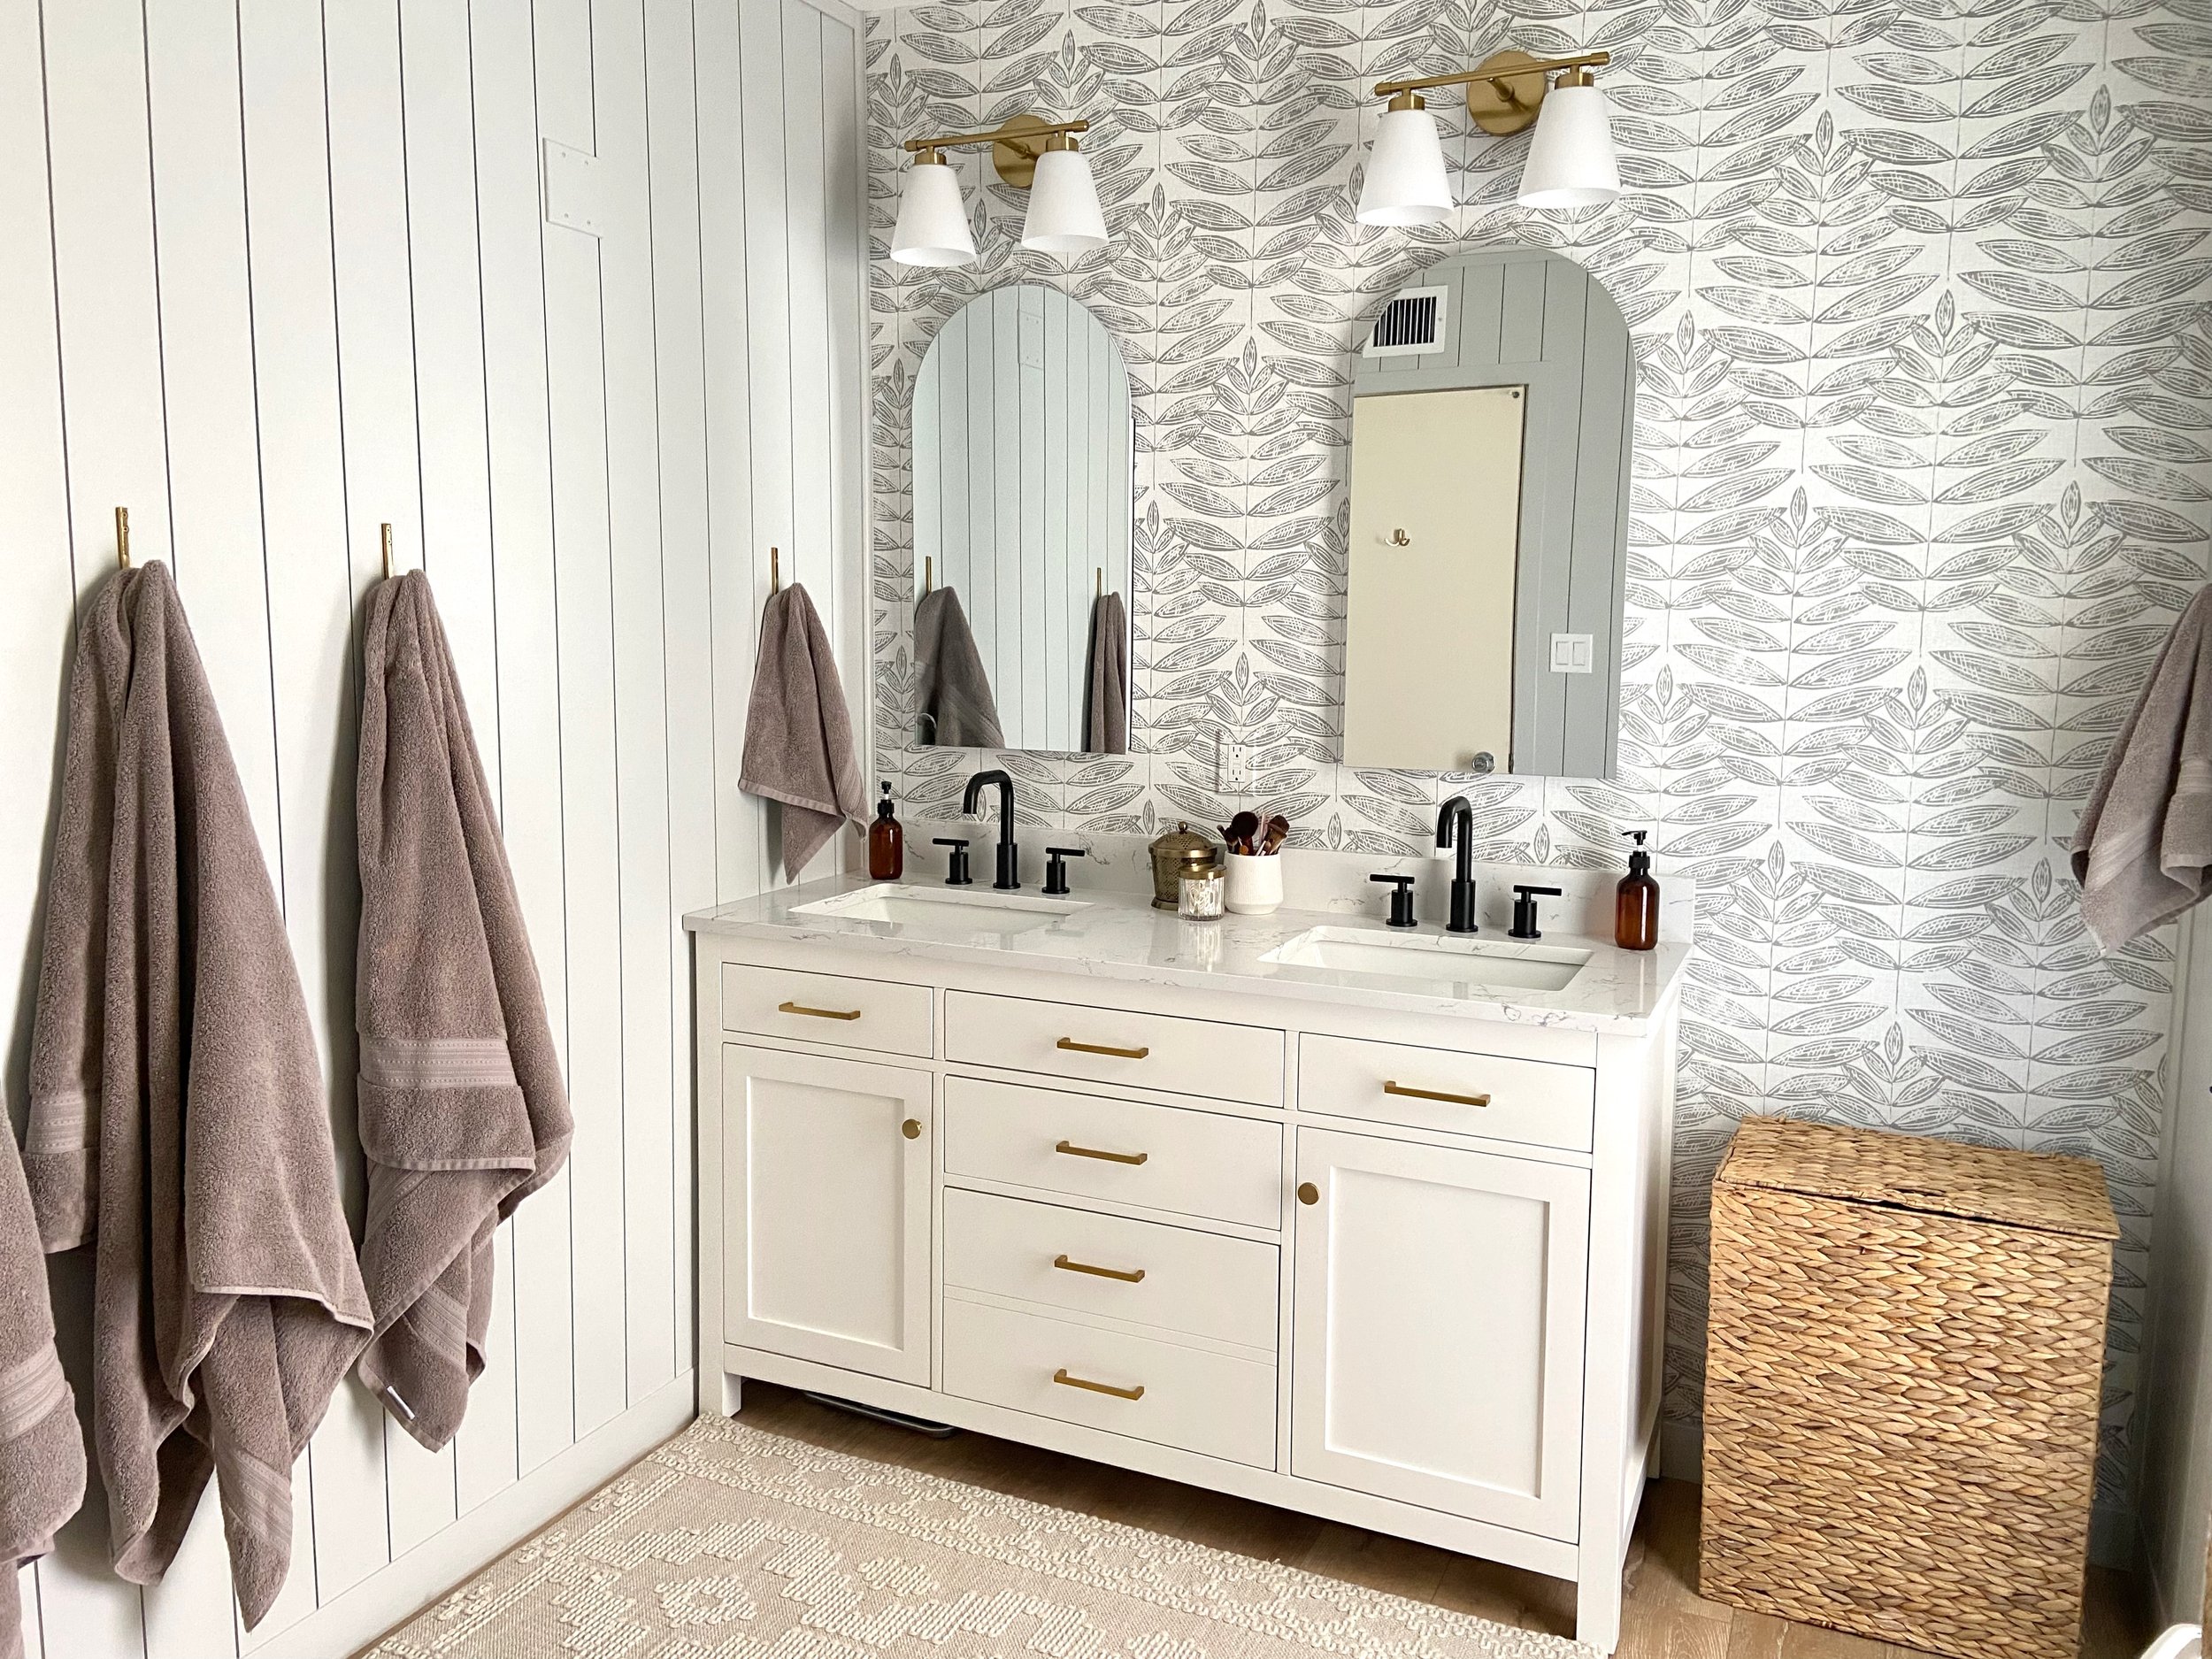
After the flooring was installed, it felt like we had turned a corner on this project! We just had a few things left to do, starting with the walls. I knew I wanted to do wallpaper on the vanity wall, and we considered adding wainscoting or board & batten on the other walls. Ultimately, we decided to go with our ol’ faithful: vertical shiplap. We’ve used it in our kitchen, laundry room, and guest bathroom and I absolutely love the clean lines of it! This is the shiplap we’ve used for all of these projects.
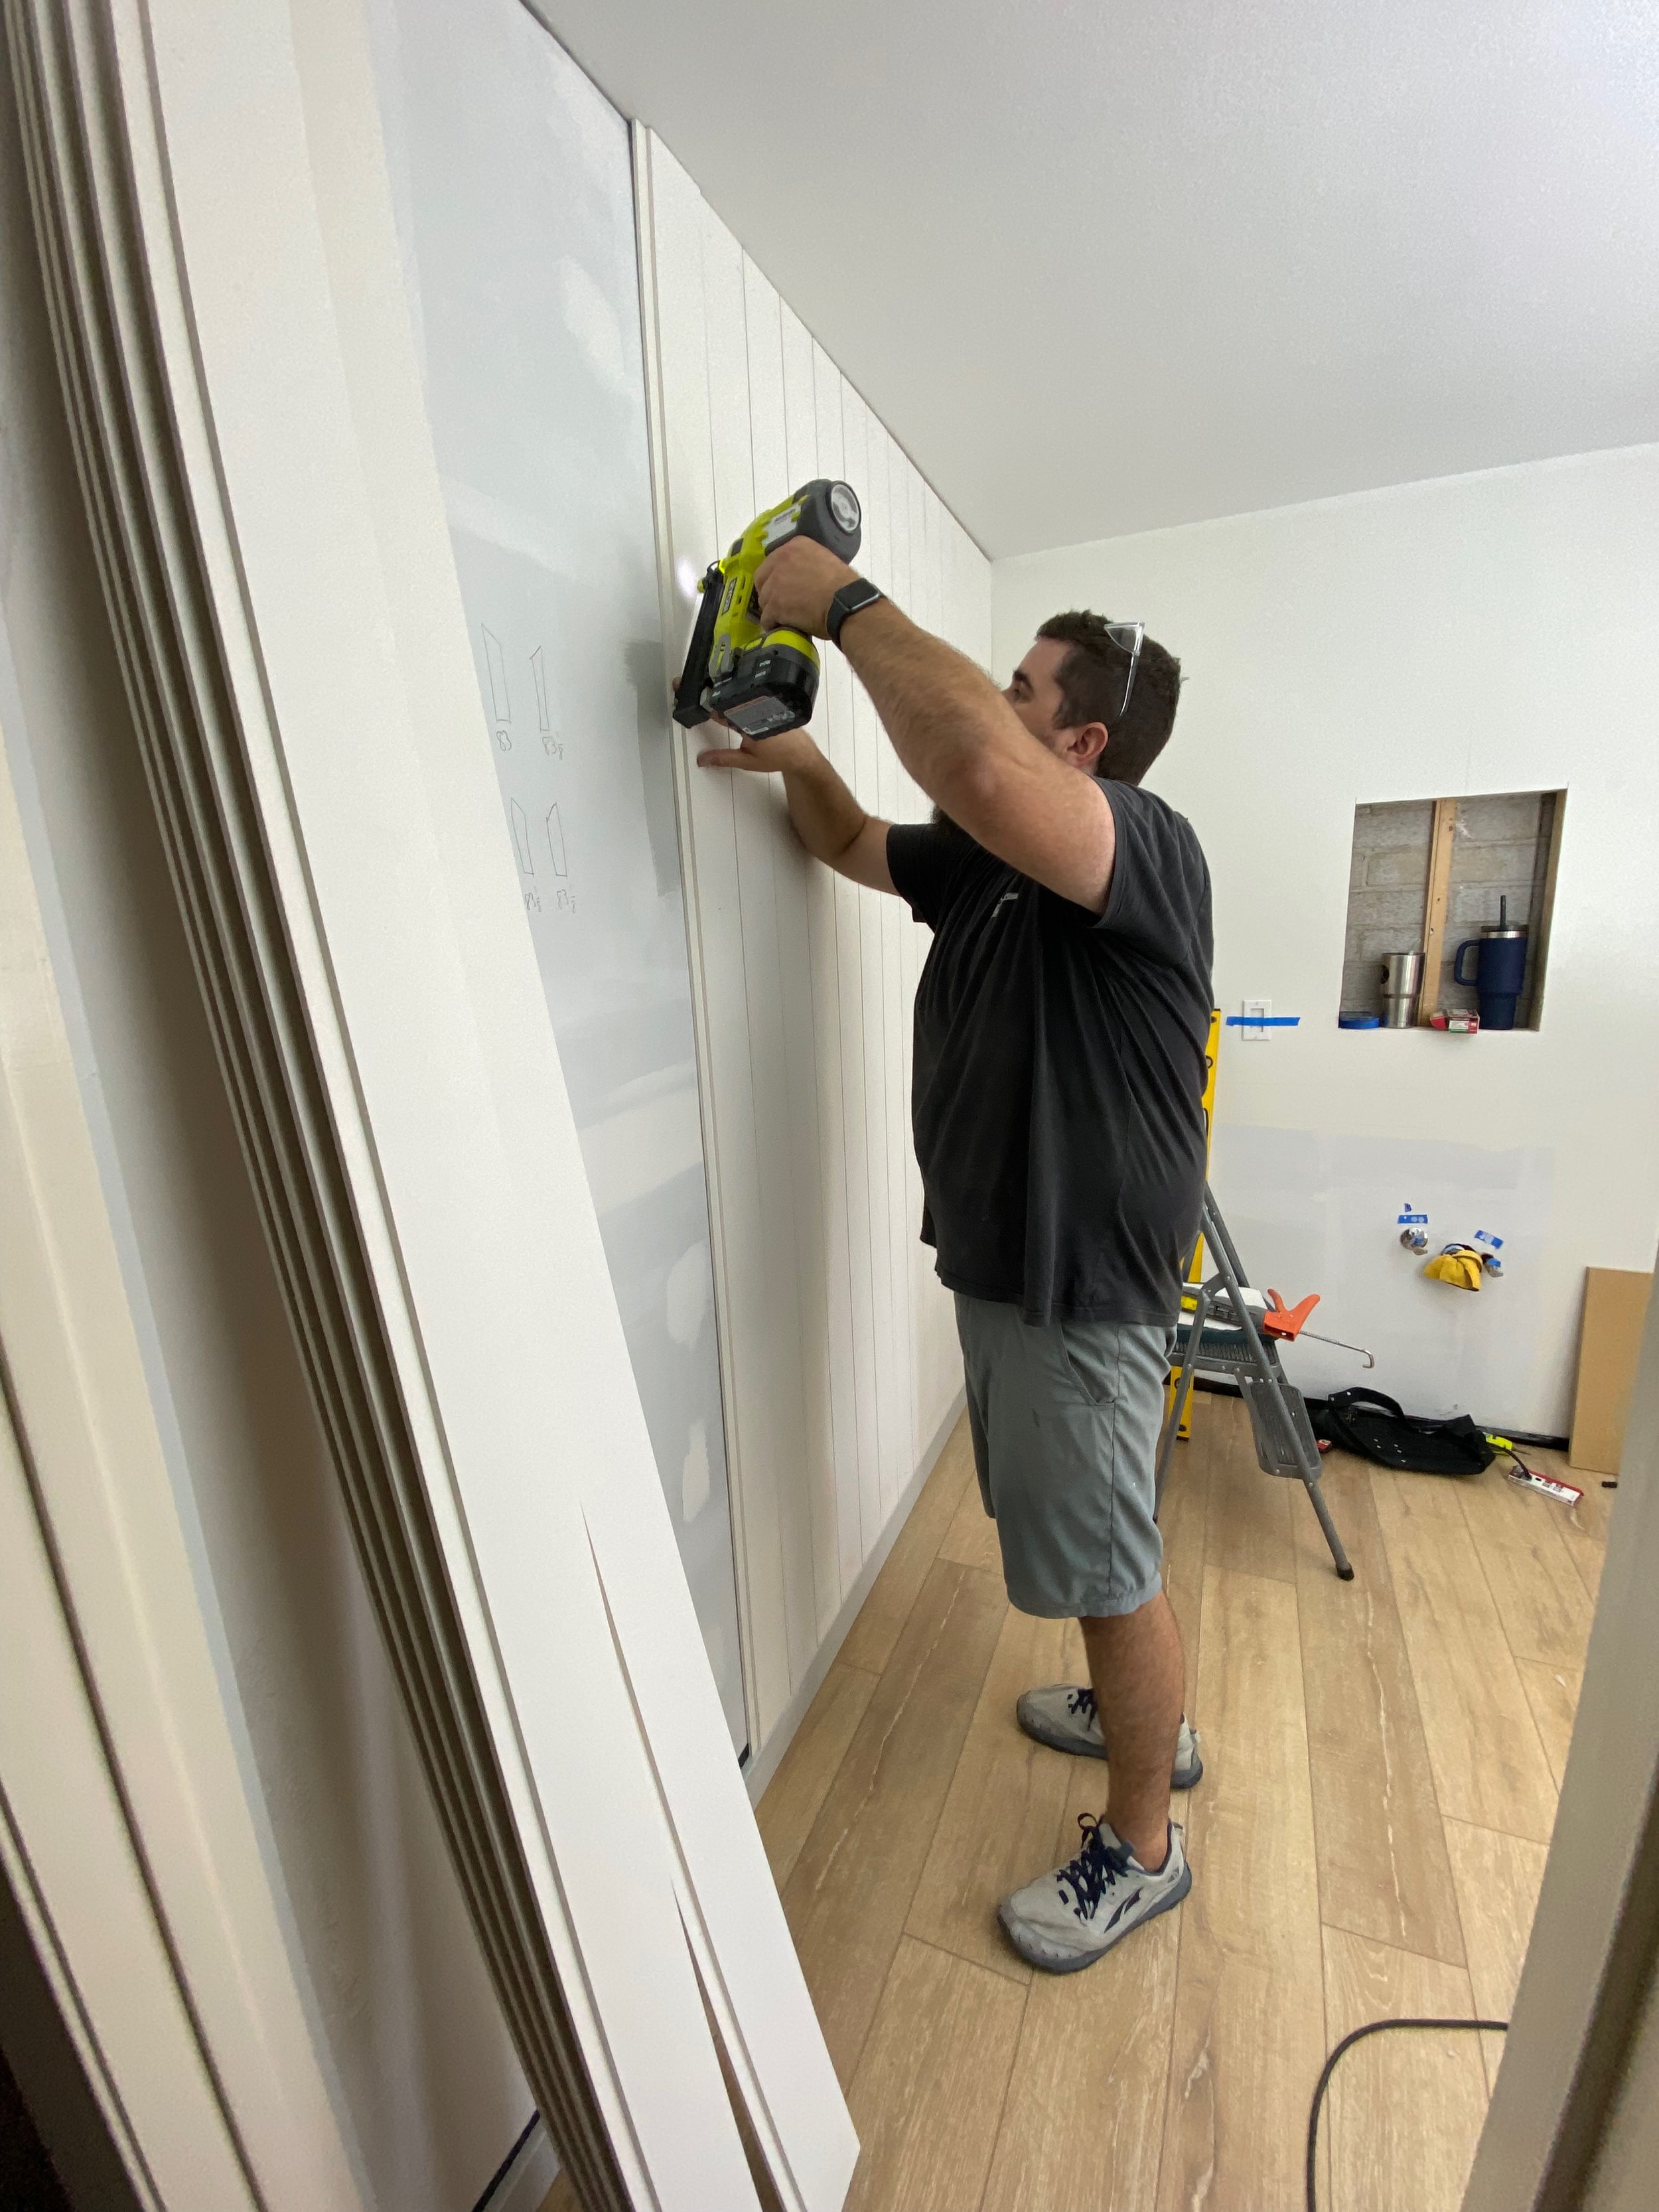
We painted it the same color as the guest bathroom: Passive by Sherwin Williams. It’s the perfect neutral blue-gray color.

Then, it was finally time to wallpaper! This was our first time ever wallpapering and it went surprisingly smooth! I looked at a thousand different options (not exaggerating there 😅) and ultimately settled on this peel & stick option. I love the simplicity of the pattern, especially with the shiplap on the other walls.

We did learn a few things while installing it that I think are really valuable. Prepping your walls well is essential! We primed and painted this wall with semi-gloss paint and we’ve not had any issues with it staying put. Next, working with a partner is key. I can only imagine how frustrating it would have been to do this on my own! Having a second set of hands to line up the edges and pull the backing off is so helpful. Lastly, using a squeegee tool is incredibly helpful! We found that this type of squeegee, with felt on one side, worked best and didn’t catch or scratch the paper at all.

Once the wallpaper was installed, Josh began working on installing our new vanity mirrors. As soon as I spotted these arched mirrors, I knew they were perfect for this room! 😍 I was able to score one of them for $30 on Marketplace so it made the other one a bit more affordable.

Next came installing the double vanity, along with hooking up the drains and faucets. Josh also installed our new vanity lights! To match the lights, I swapped out the hardware on the vanity from the brushed nickel it came with to a gold option. These are the knobs and drawer pulls I used (same as what we used in the guest bath).
After that, we wrapped everything up with paint touchups, trim pieces around the shiplap, privacy film on the door, shower faucet, and reinstalling the old toilet. Then it was time to decorate and move back into the space.
After eight weeks of hard, hard work, we were finally done! 🥳 Are you ready to see the after pictures?!
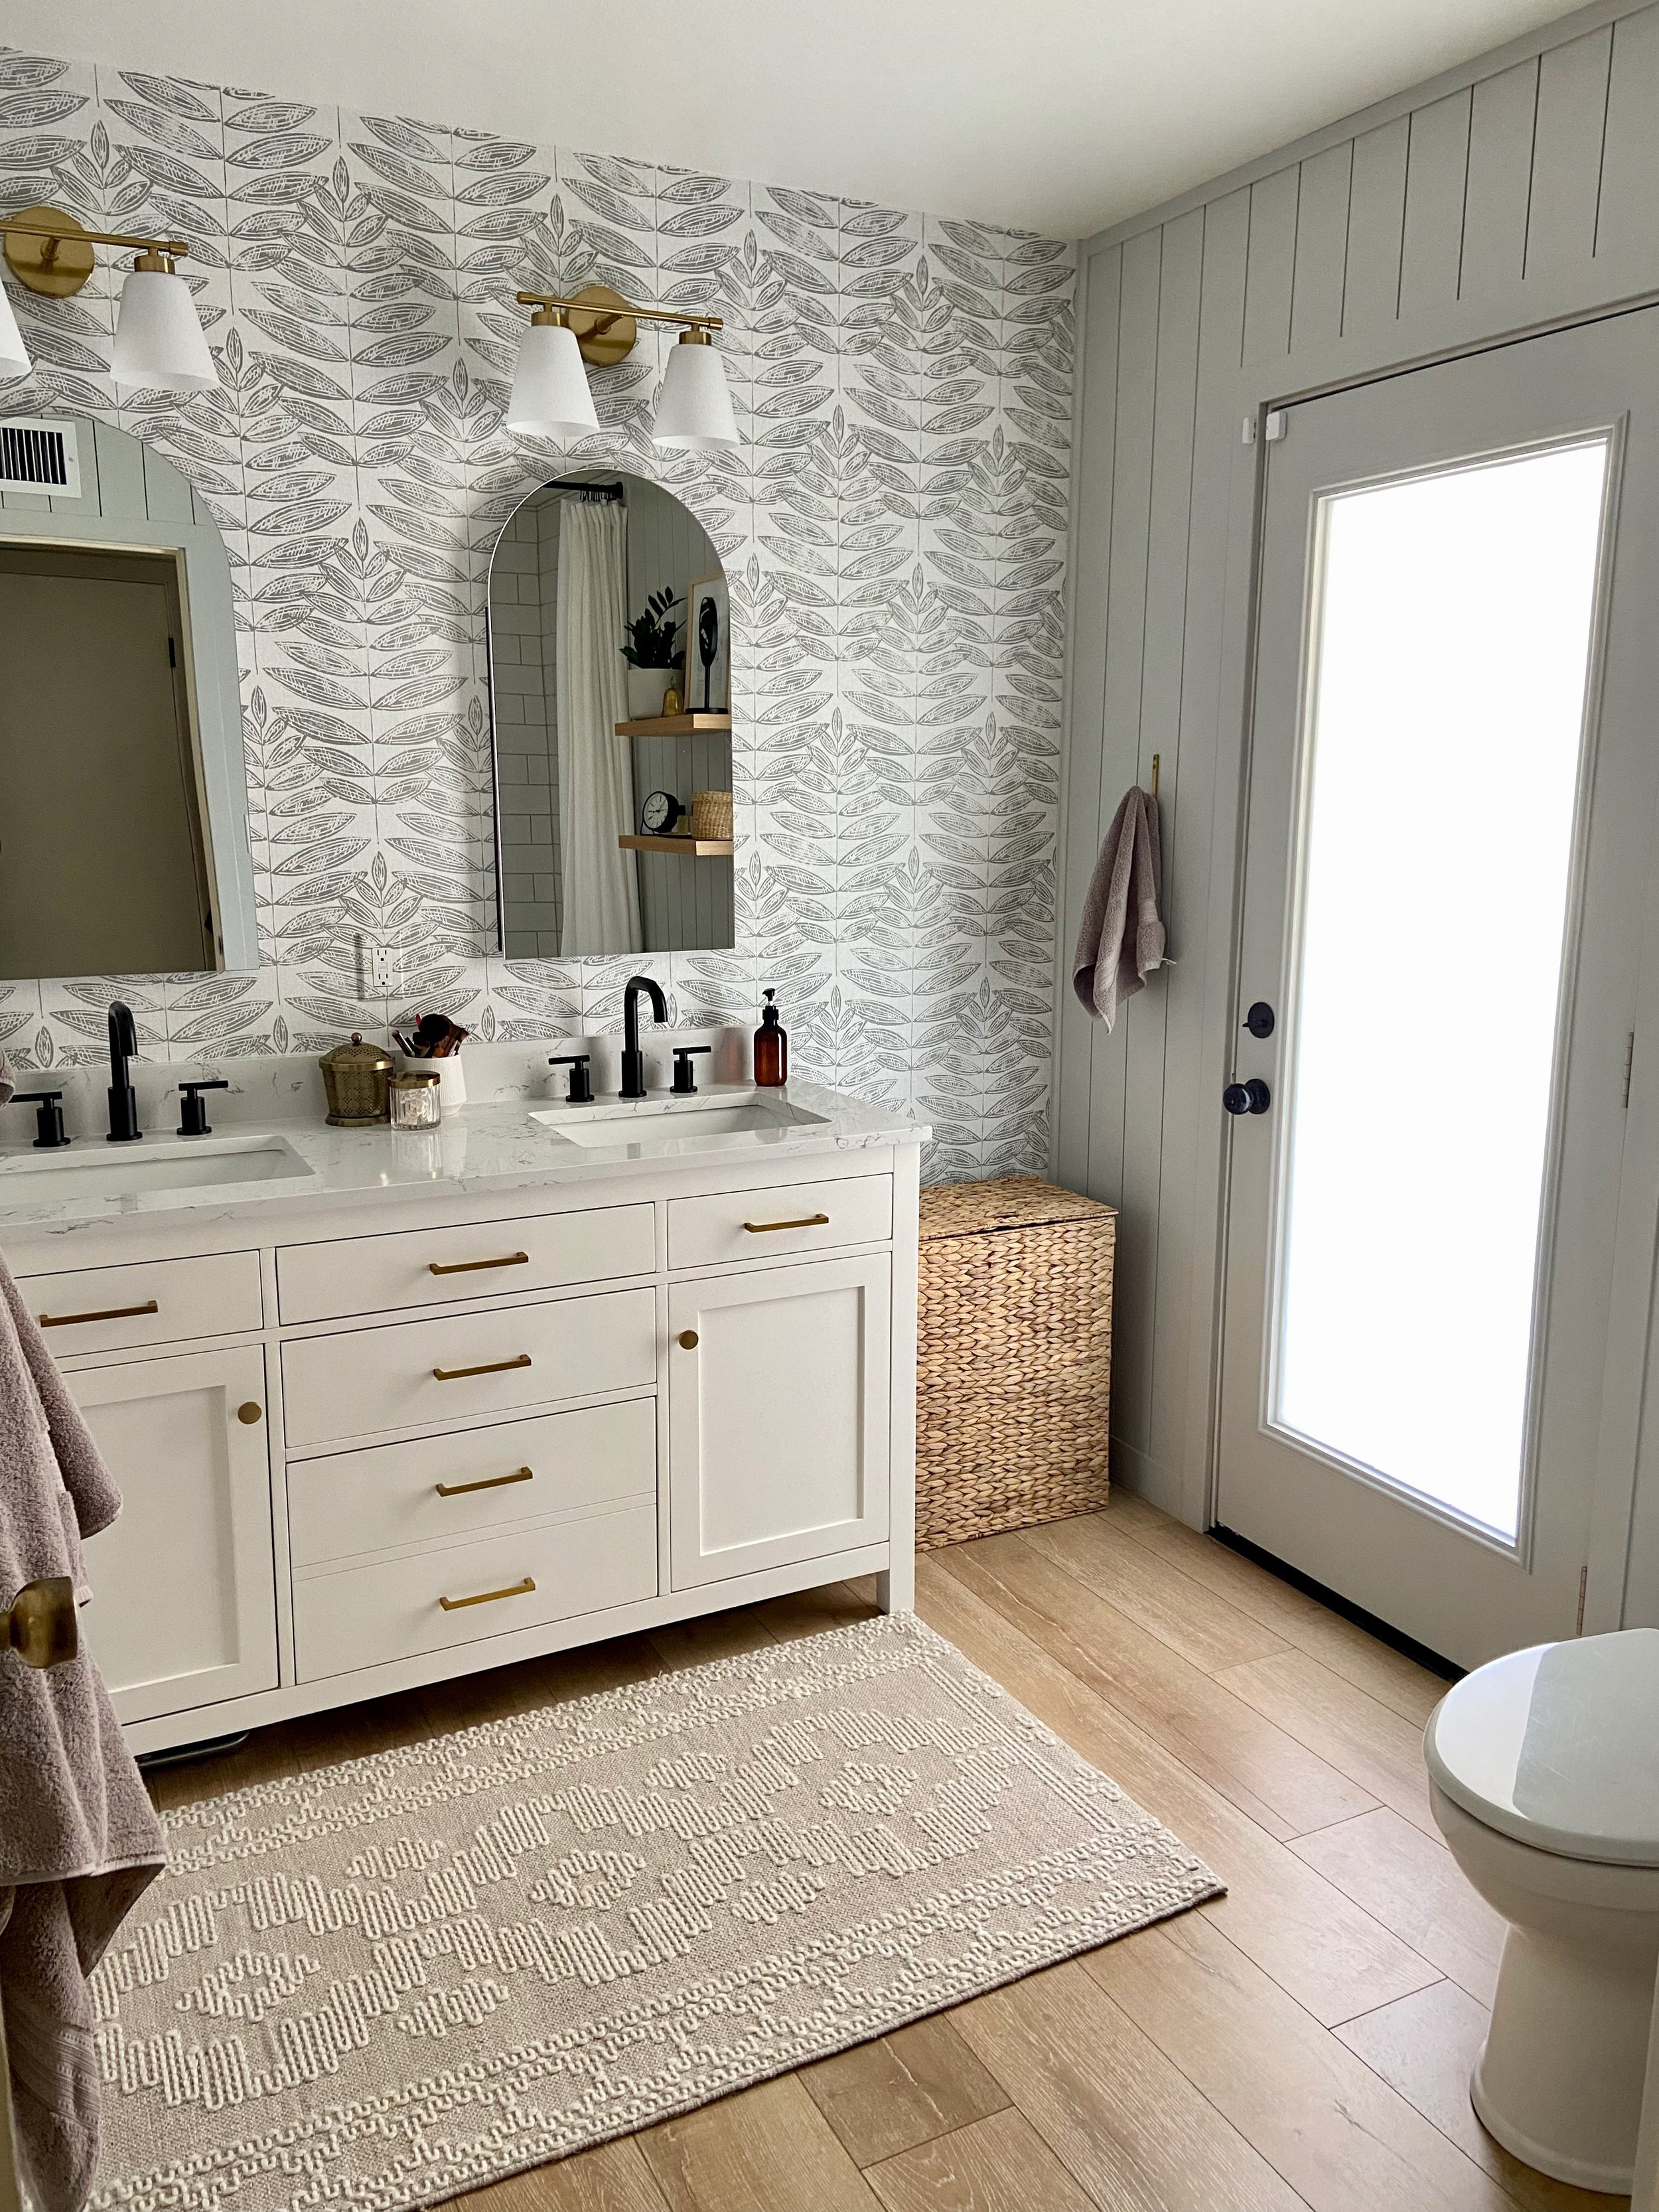
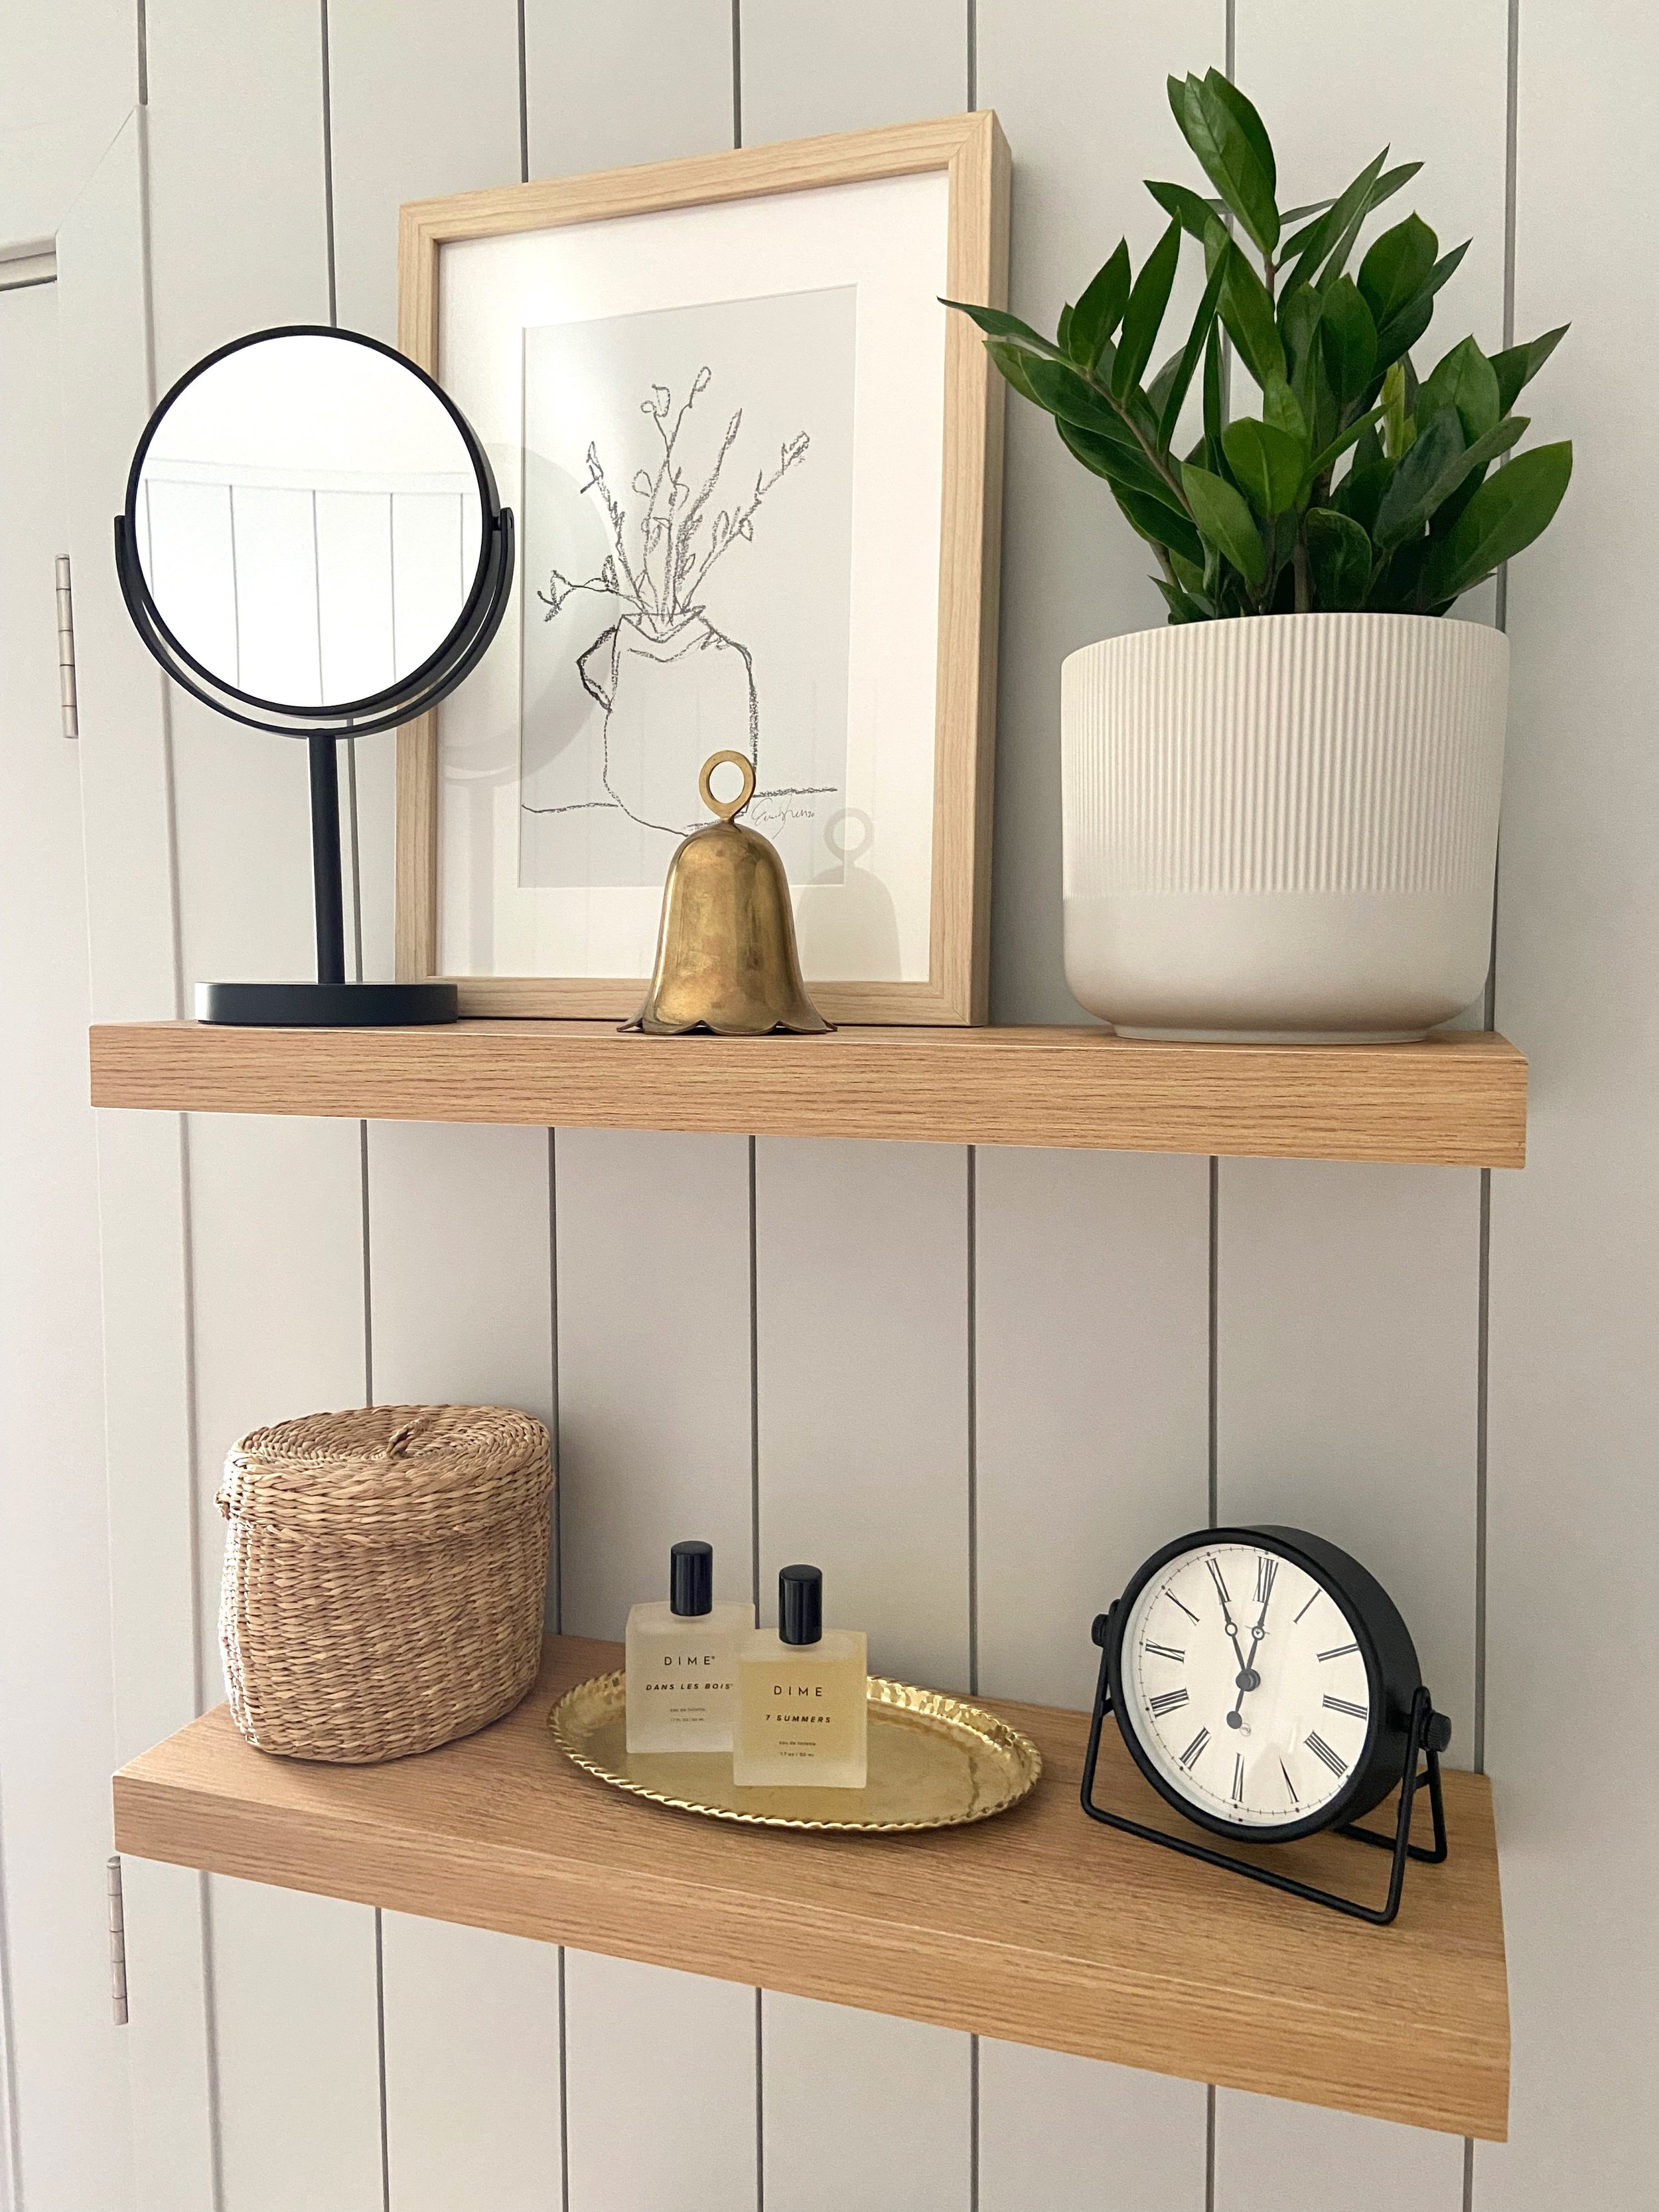
I found these shelves that match the flooring really well and added a few things I had been collecting for a while. I also hung our shower curtain as high as possible to maximize the ceiling height and show off the tile that goest up to the ceiling. Here’s the extra long shower curtain and liner I used.

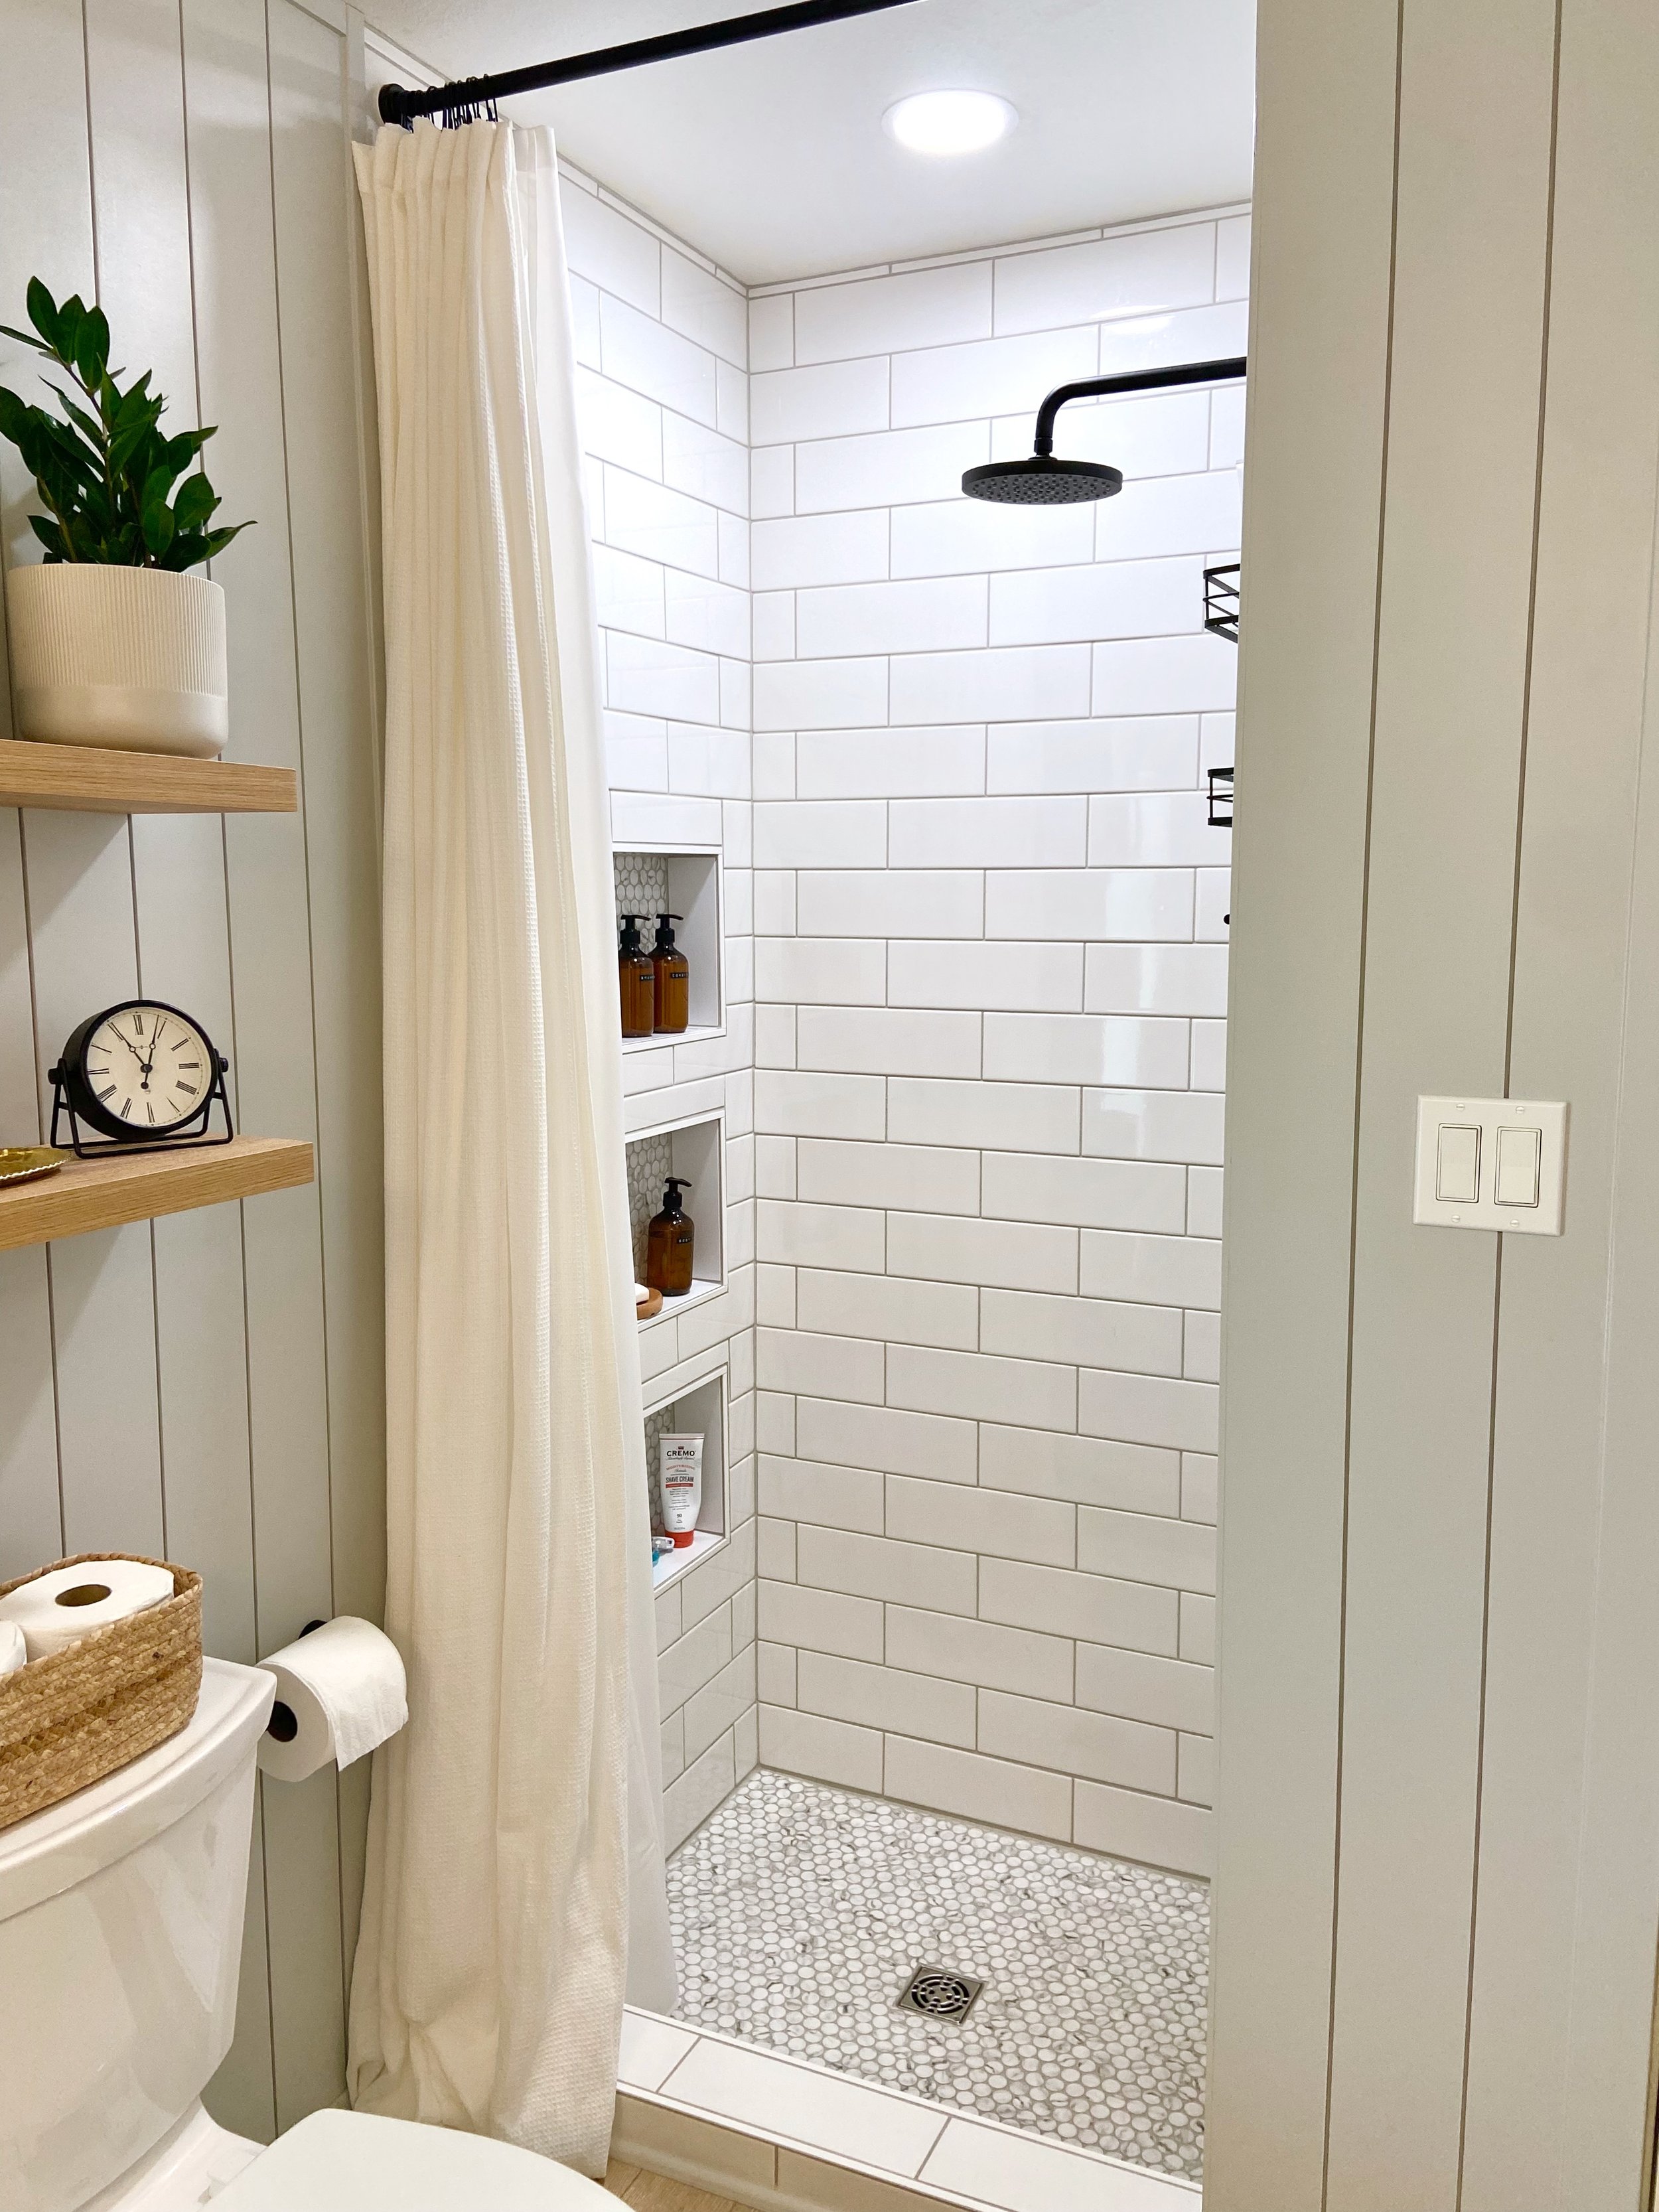
I am SO satisfied with the shower niches that we added. They store exactly what we need and the lowest one is the perfect height for shaving.
We are in love with this room and are so glad to have it crossed off the list. The wait was well worth the reward. I’m so proud of our hard work, especially what Josh did to pull this off. He was stretched outside of his comfort zone all throughout this project, but persevered and learned so much through it all! ❤️
Thanks for hanging with me while I recapped our entire renovation up until this point! It’s been so fun to go back through the archives of photos and remember where we started. This whole process has given me even more of an appreciation for this home and what we’ve learned through the renovation. We still have plenty to do to, but thankfully all of the big projects are in the rear view mirror (for now, at least 😉).

Guest Bathroom Sources:
Wall color: Passive by Sherwin Williams
Ceiling color: Pure White by Sherwin Williams
Vanity door knobs / drawer pulls
Extra long shower curtain / liner
All other decor is thrifted or old 😊
Missed previous posts in the Reno Recap series? Check them all out here!