
Reno Recap: Front Landscaping
I think you could best describe our landscaping method the first few years we lived here as: “Just ignore it”. When we purchased the house, half the landscaping was dead or dying and the other half seemed to thrive off of neglect. Just like the rest of our exterior updates, our attention was on the interior of the house for the first couple of years that we were here, so the landscaping just sat there languishing.
Here’s a look at what the front yard looked like when we bought this home:
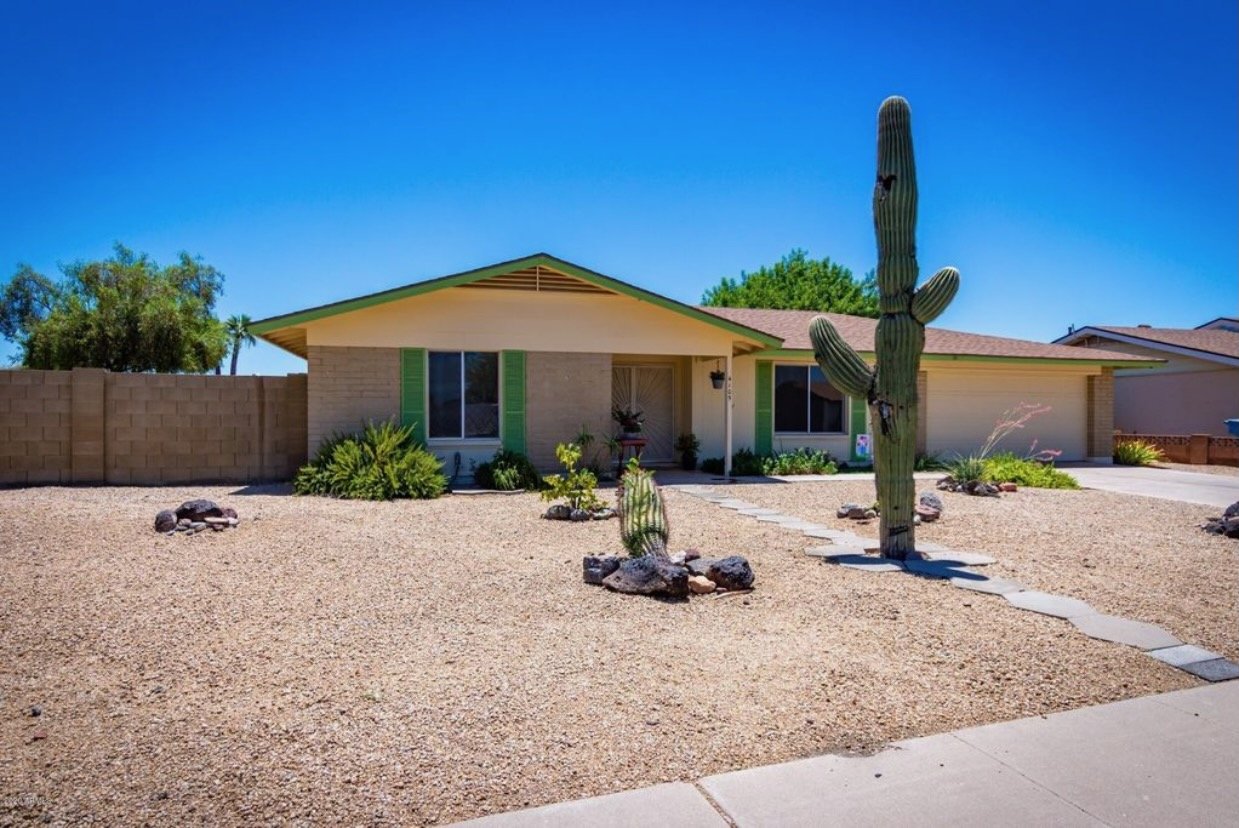

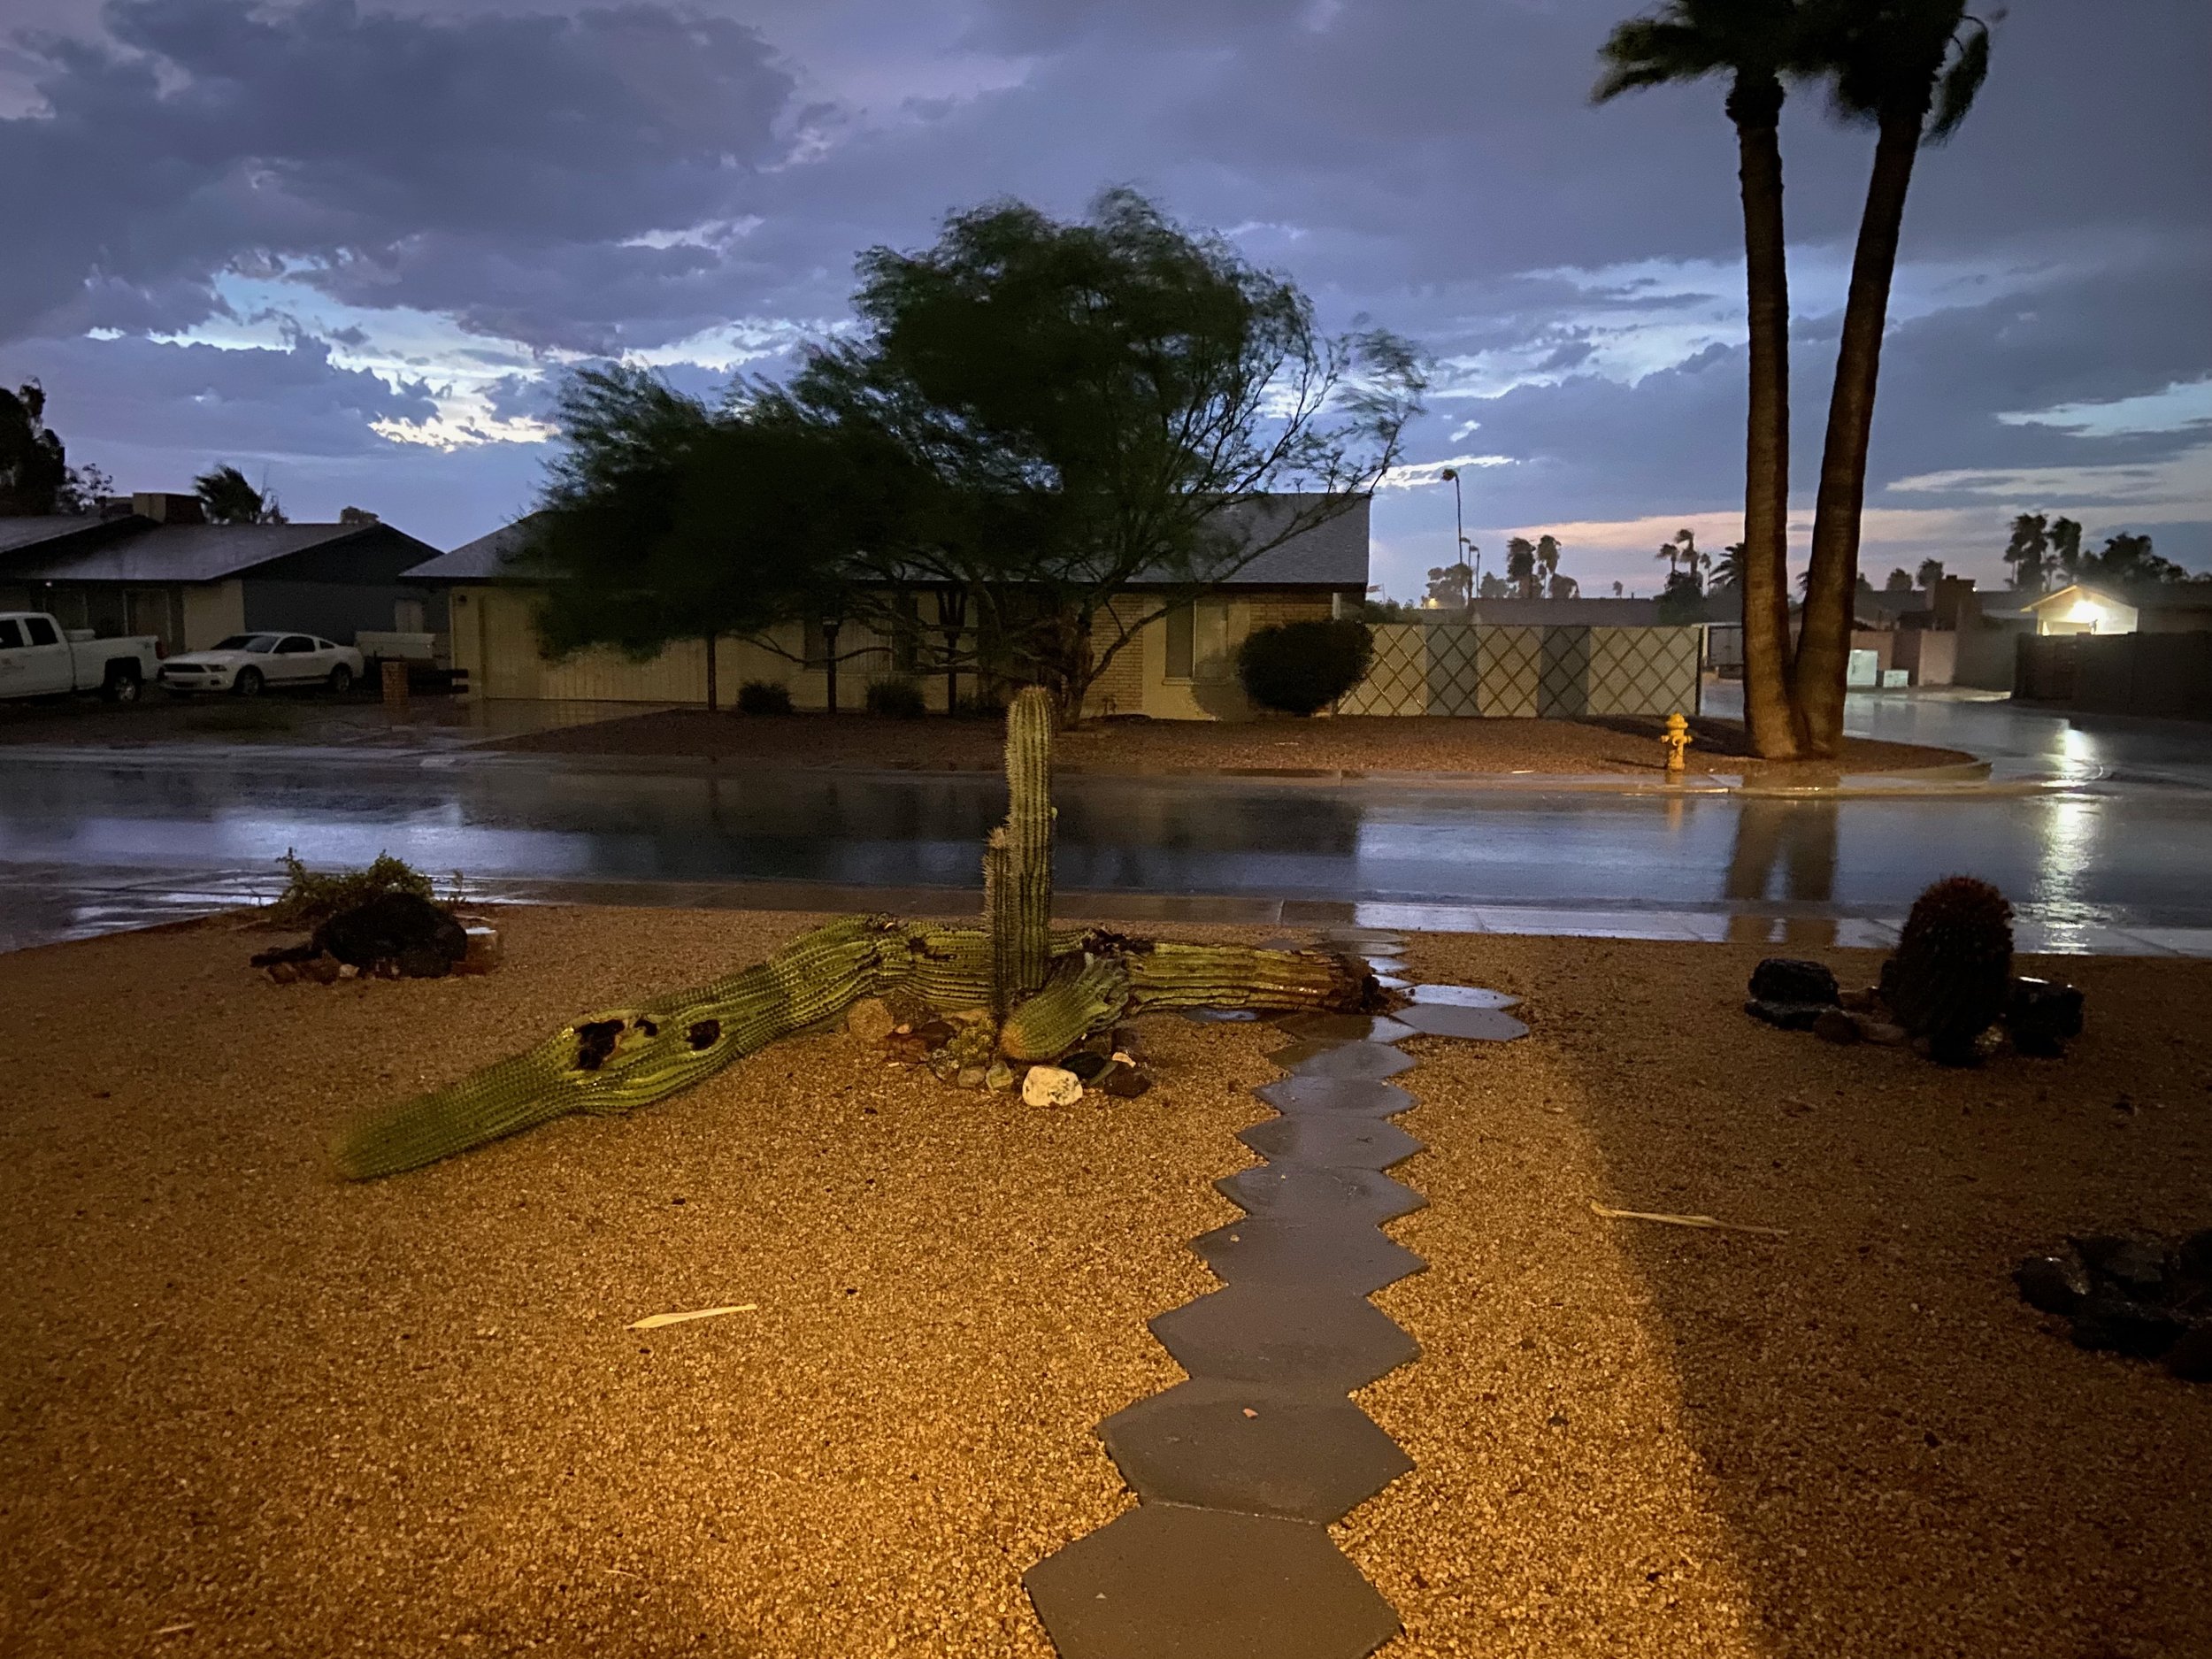
We really liked the big Saguaro cactus in the middle of the yard, but sadly, a huge monsoon blew through one summer and took it out 😕 The Saguaro, along with the barrel cactus next to it, had rotted bases when we got here so we weren’t at all surprised to see the Saguaro fall. Thankfully, it narrowly missed hitting the healthy Cardon cactus a few feet away.
When we were finally ready to give the yard some love earlier this year, we knew that we needed something that was easy to maintain, needed very little water, and didn’t require a big budget. Enter: Xeriscaping. Our yard was already leaning in that direction with the gravel and existing cactus, but we needed to make some changes to certain areas of it to reduce our need for water and maintenance.
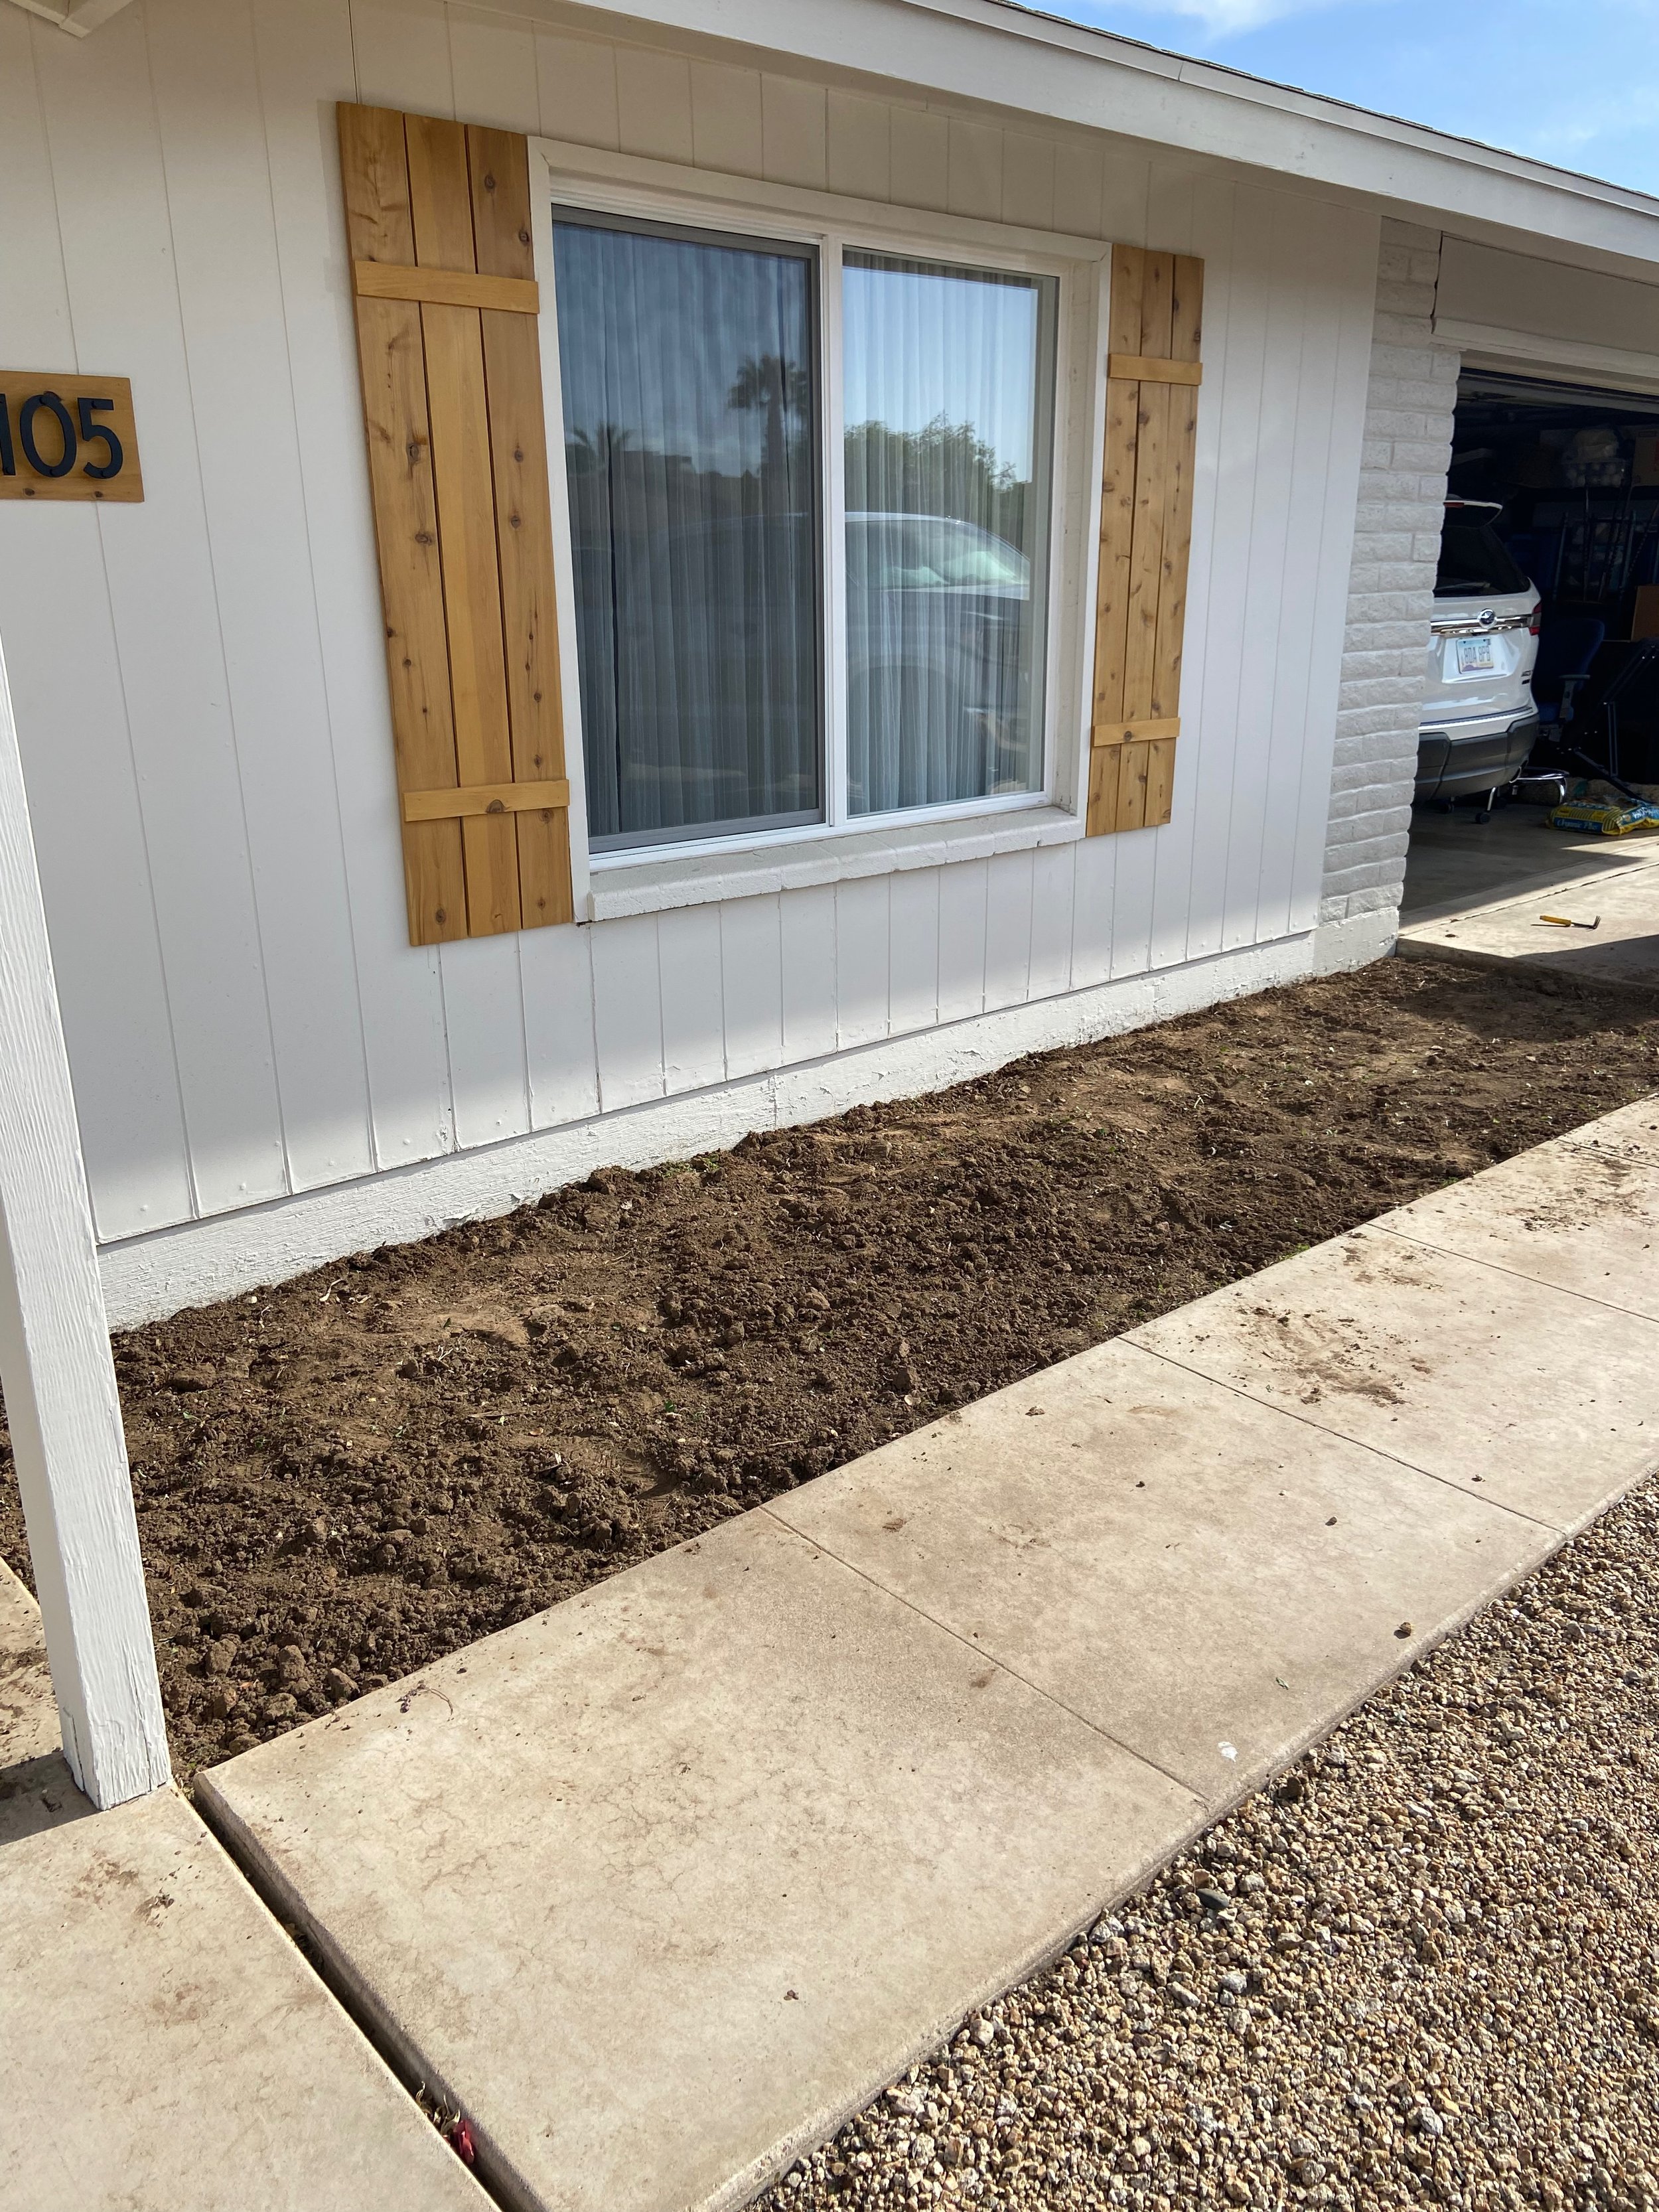
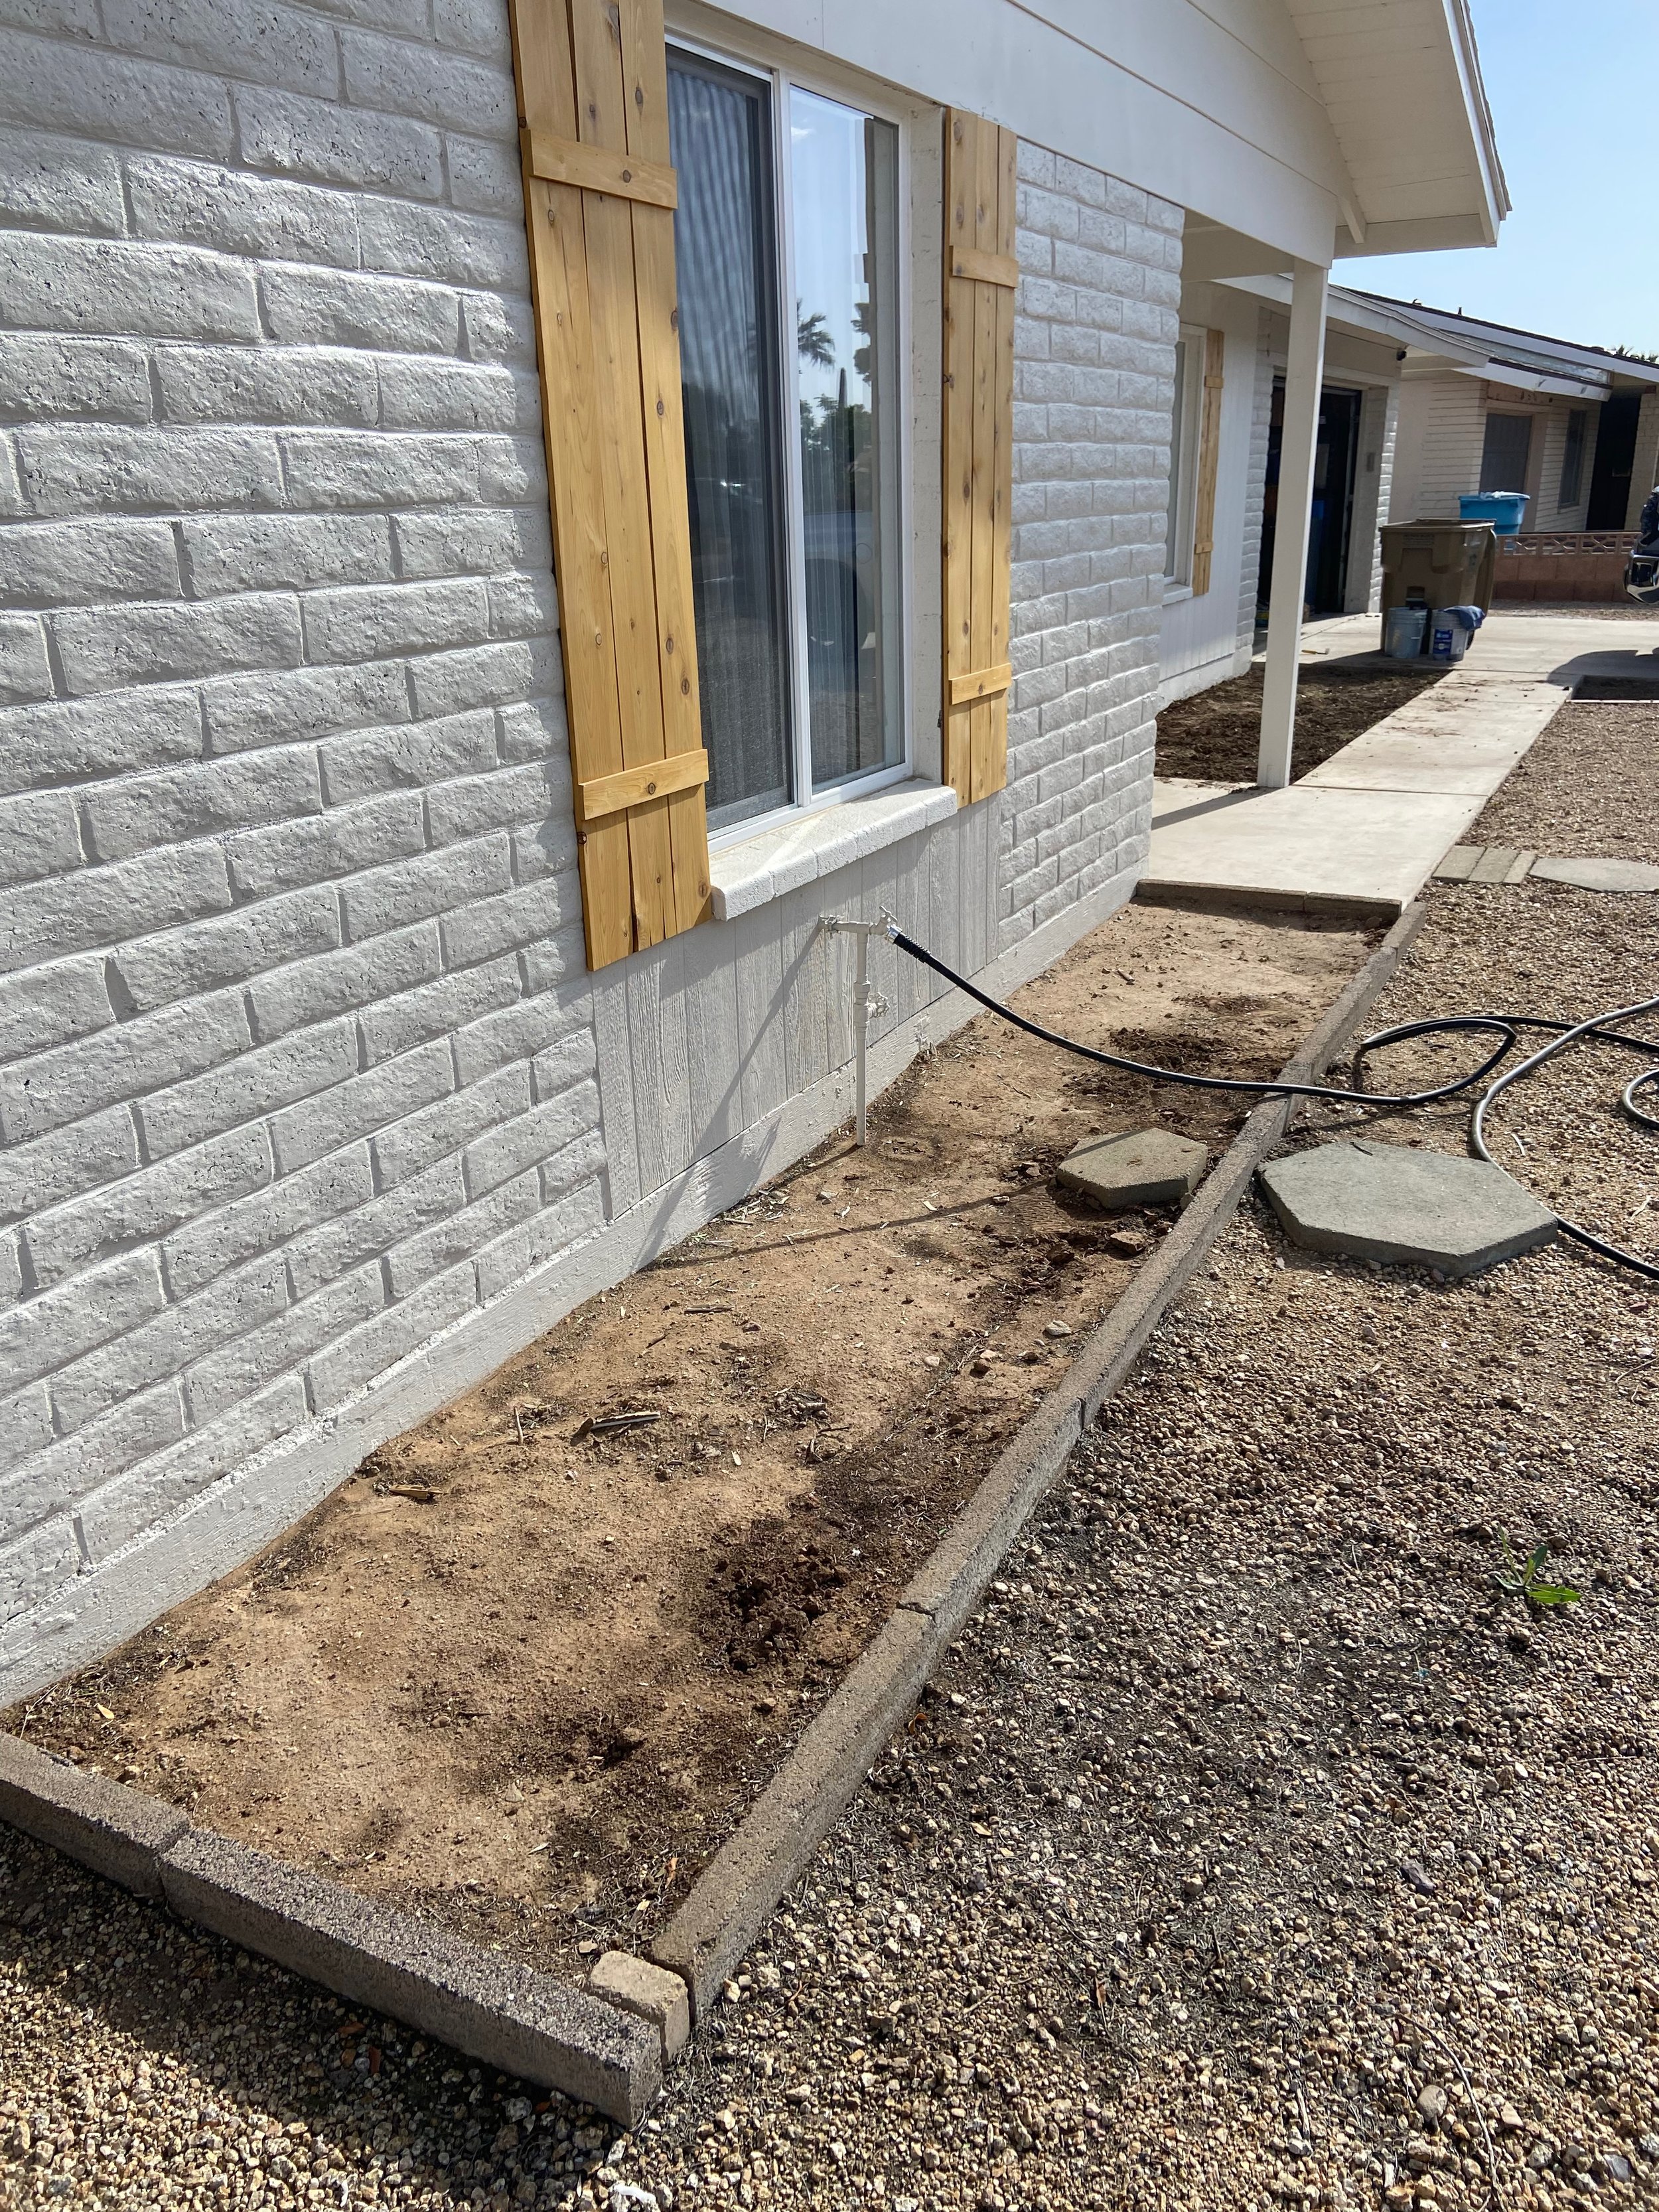
Along the driveway there were two half-circle beds with overgrown elephant food succulents that required a bit too much attention and felt out of place. And then at the front of the house are flower beds beneath each of the windows. The one on the left (under the guest room window) had two giant rosemary bushes. And in the bed under the living room window (on the right), there were irises and so. many. weeds. Multiple times per year we’d pull as many weeds out as possible just to keep it looking semi presentable, but they kept coming back worse each time 😩.

I spent an entire weekend digging out those weeds and separating the iris bulbs. I essentially dug out all the dirt and sifted through it to remove every last remnant of what was growing. It was a ridiculous amount of work but absolutely necessary in order to prep the bed for new plants. We also didn’t want to use any pesticides as we’d be planting new things here, so manual labor it was.
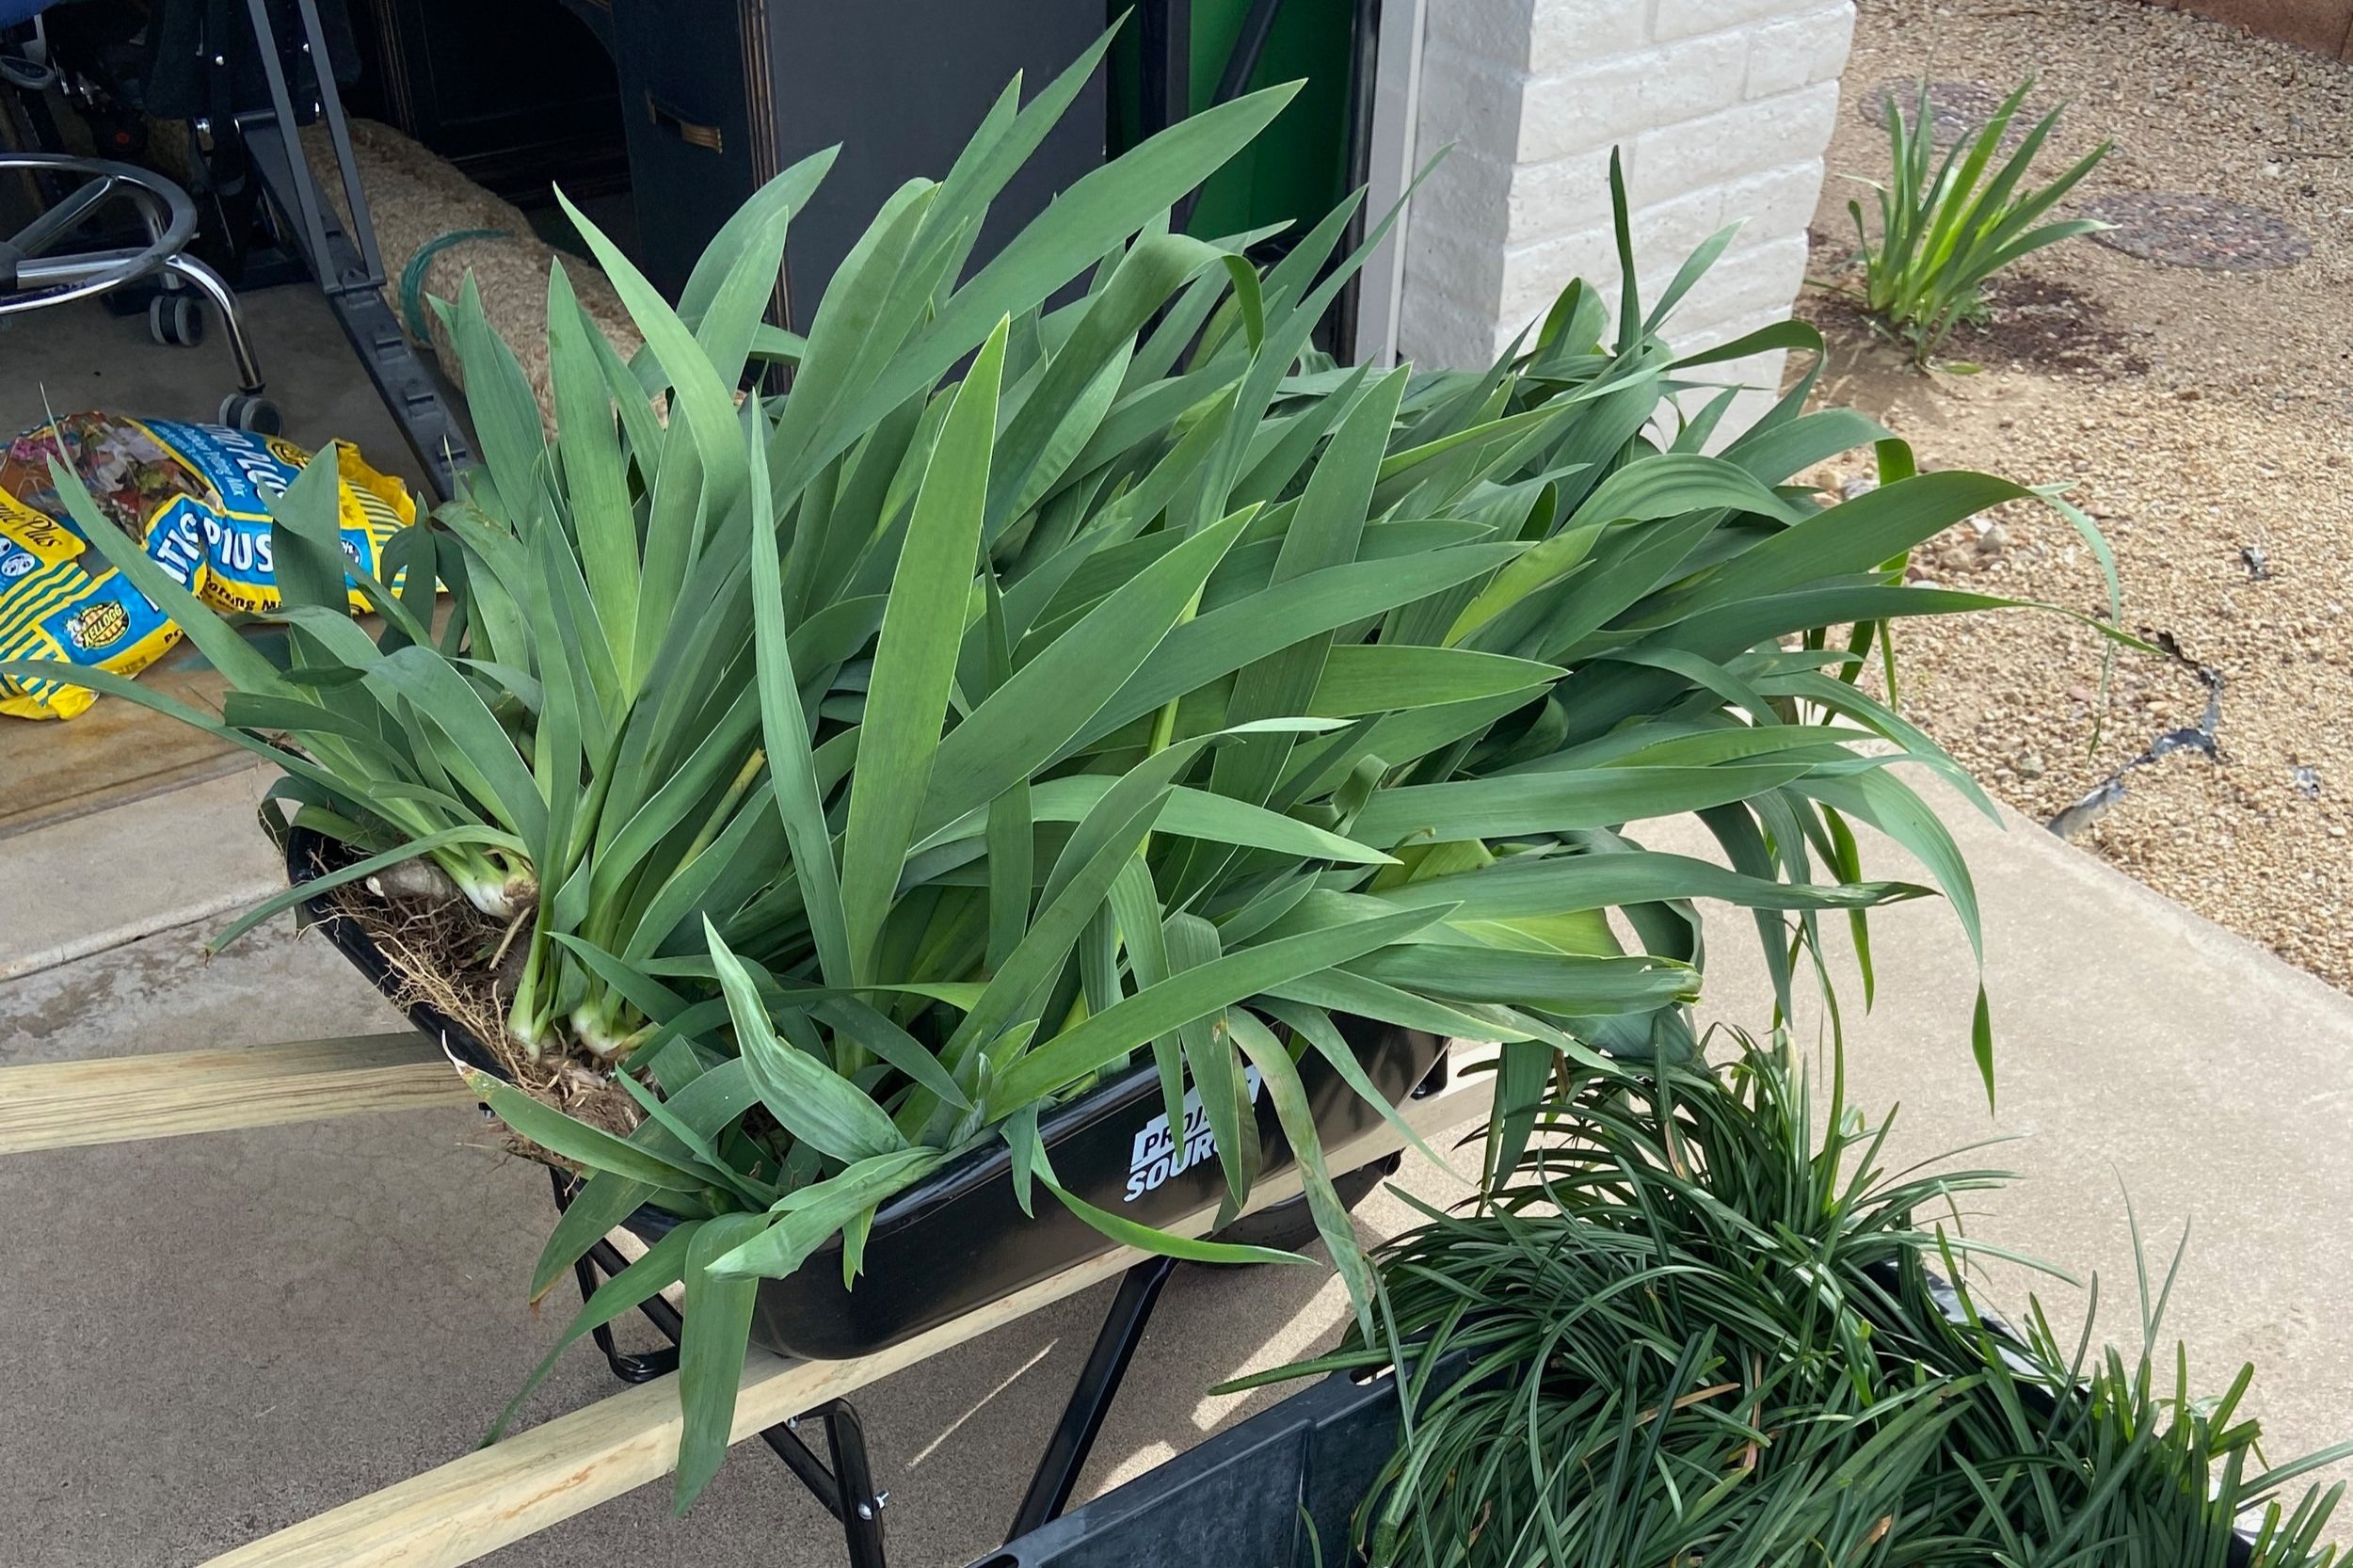
The reason I spent time saving the irises is because they remind me of my grandma Joyce, who passed away a few years ago. She had a giant iris bed that would produce the most gorgeous blooms each year. In every home we’ve lived in I’ve planted irises in memory of her, so it was really cool to find that this bed was filled with them when we moved in. We have a great spot for them in the back yard (which is irrigated) so my goal was to try to save as many as I could to transplant them. I was able to dig up an entire wheelbarrow full and relocated them to the back yard.

Here are the front beds emptied out (so much work, but so much better!):
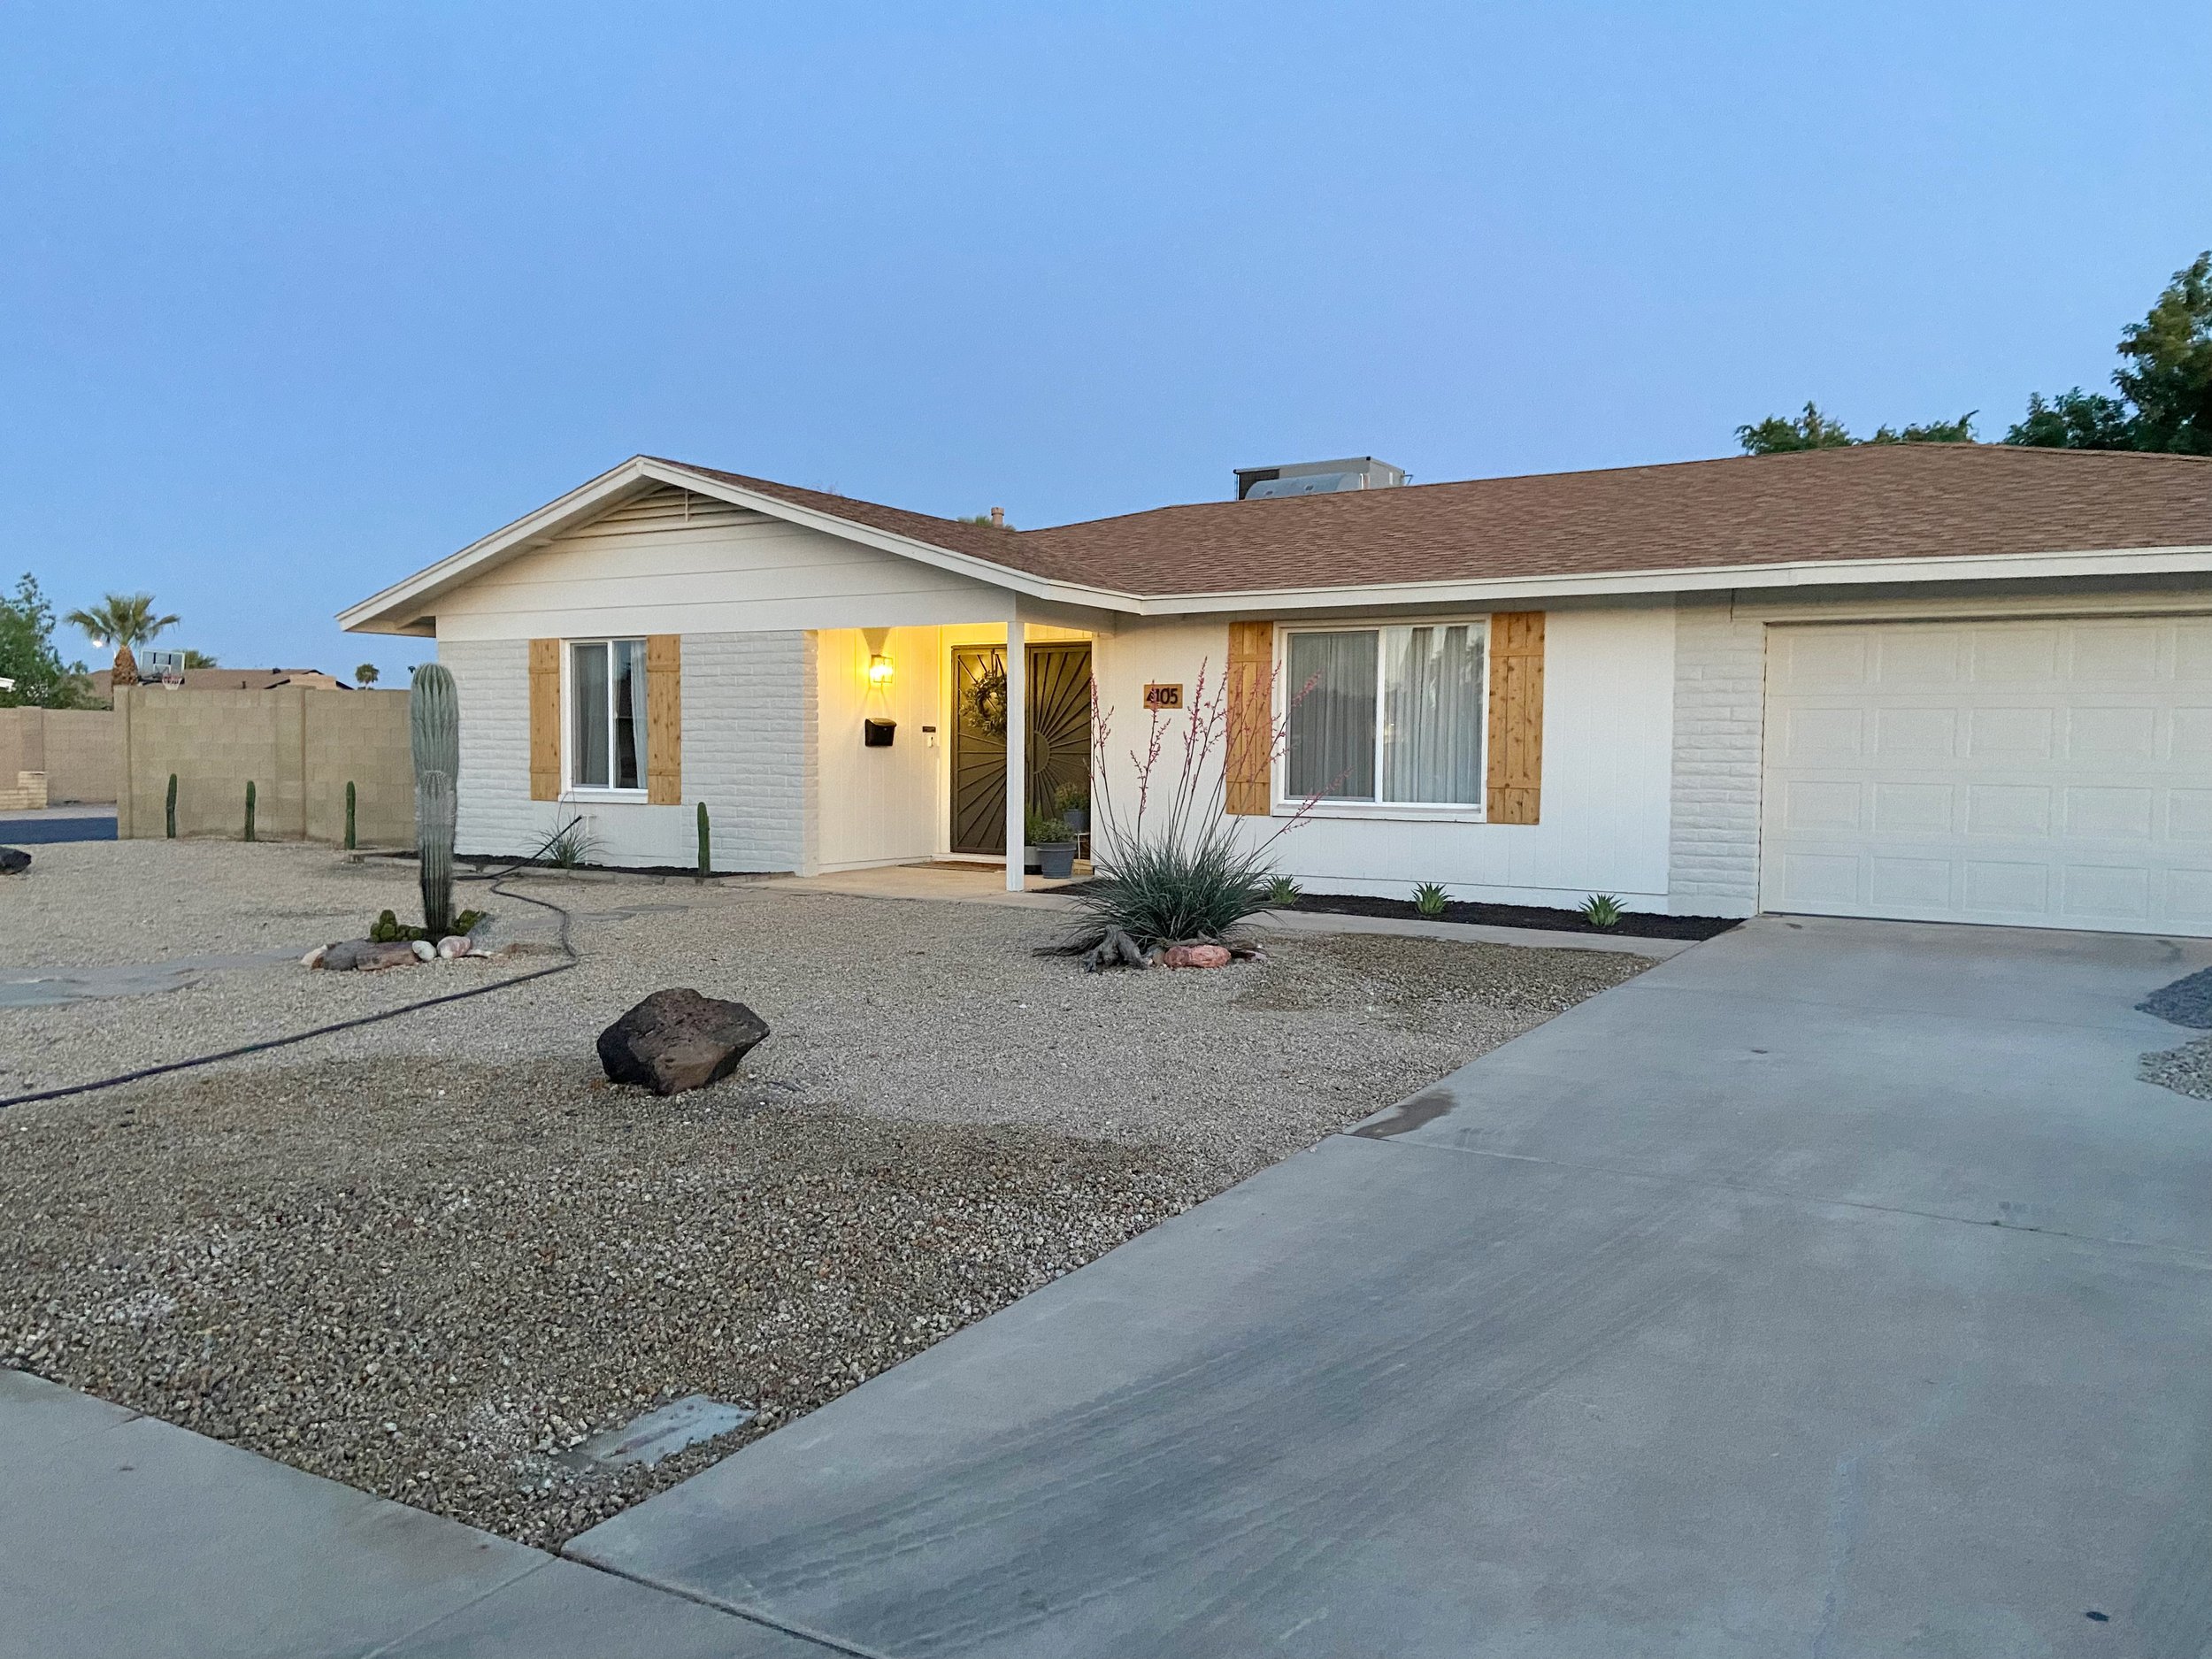
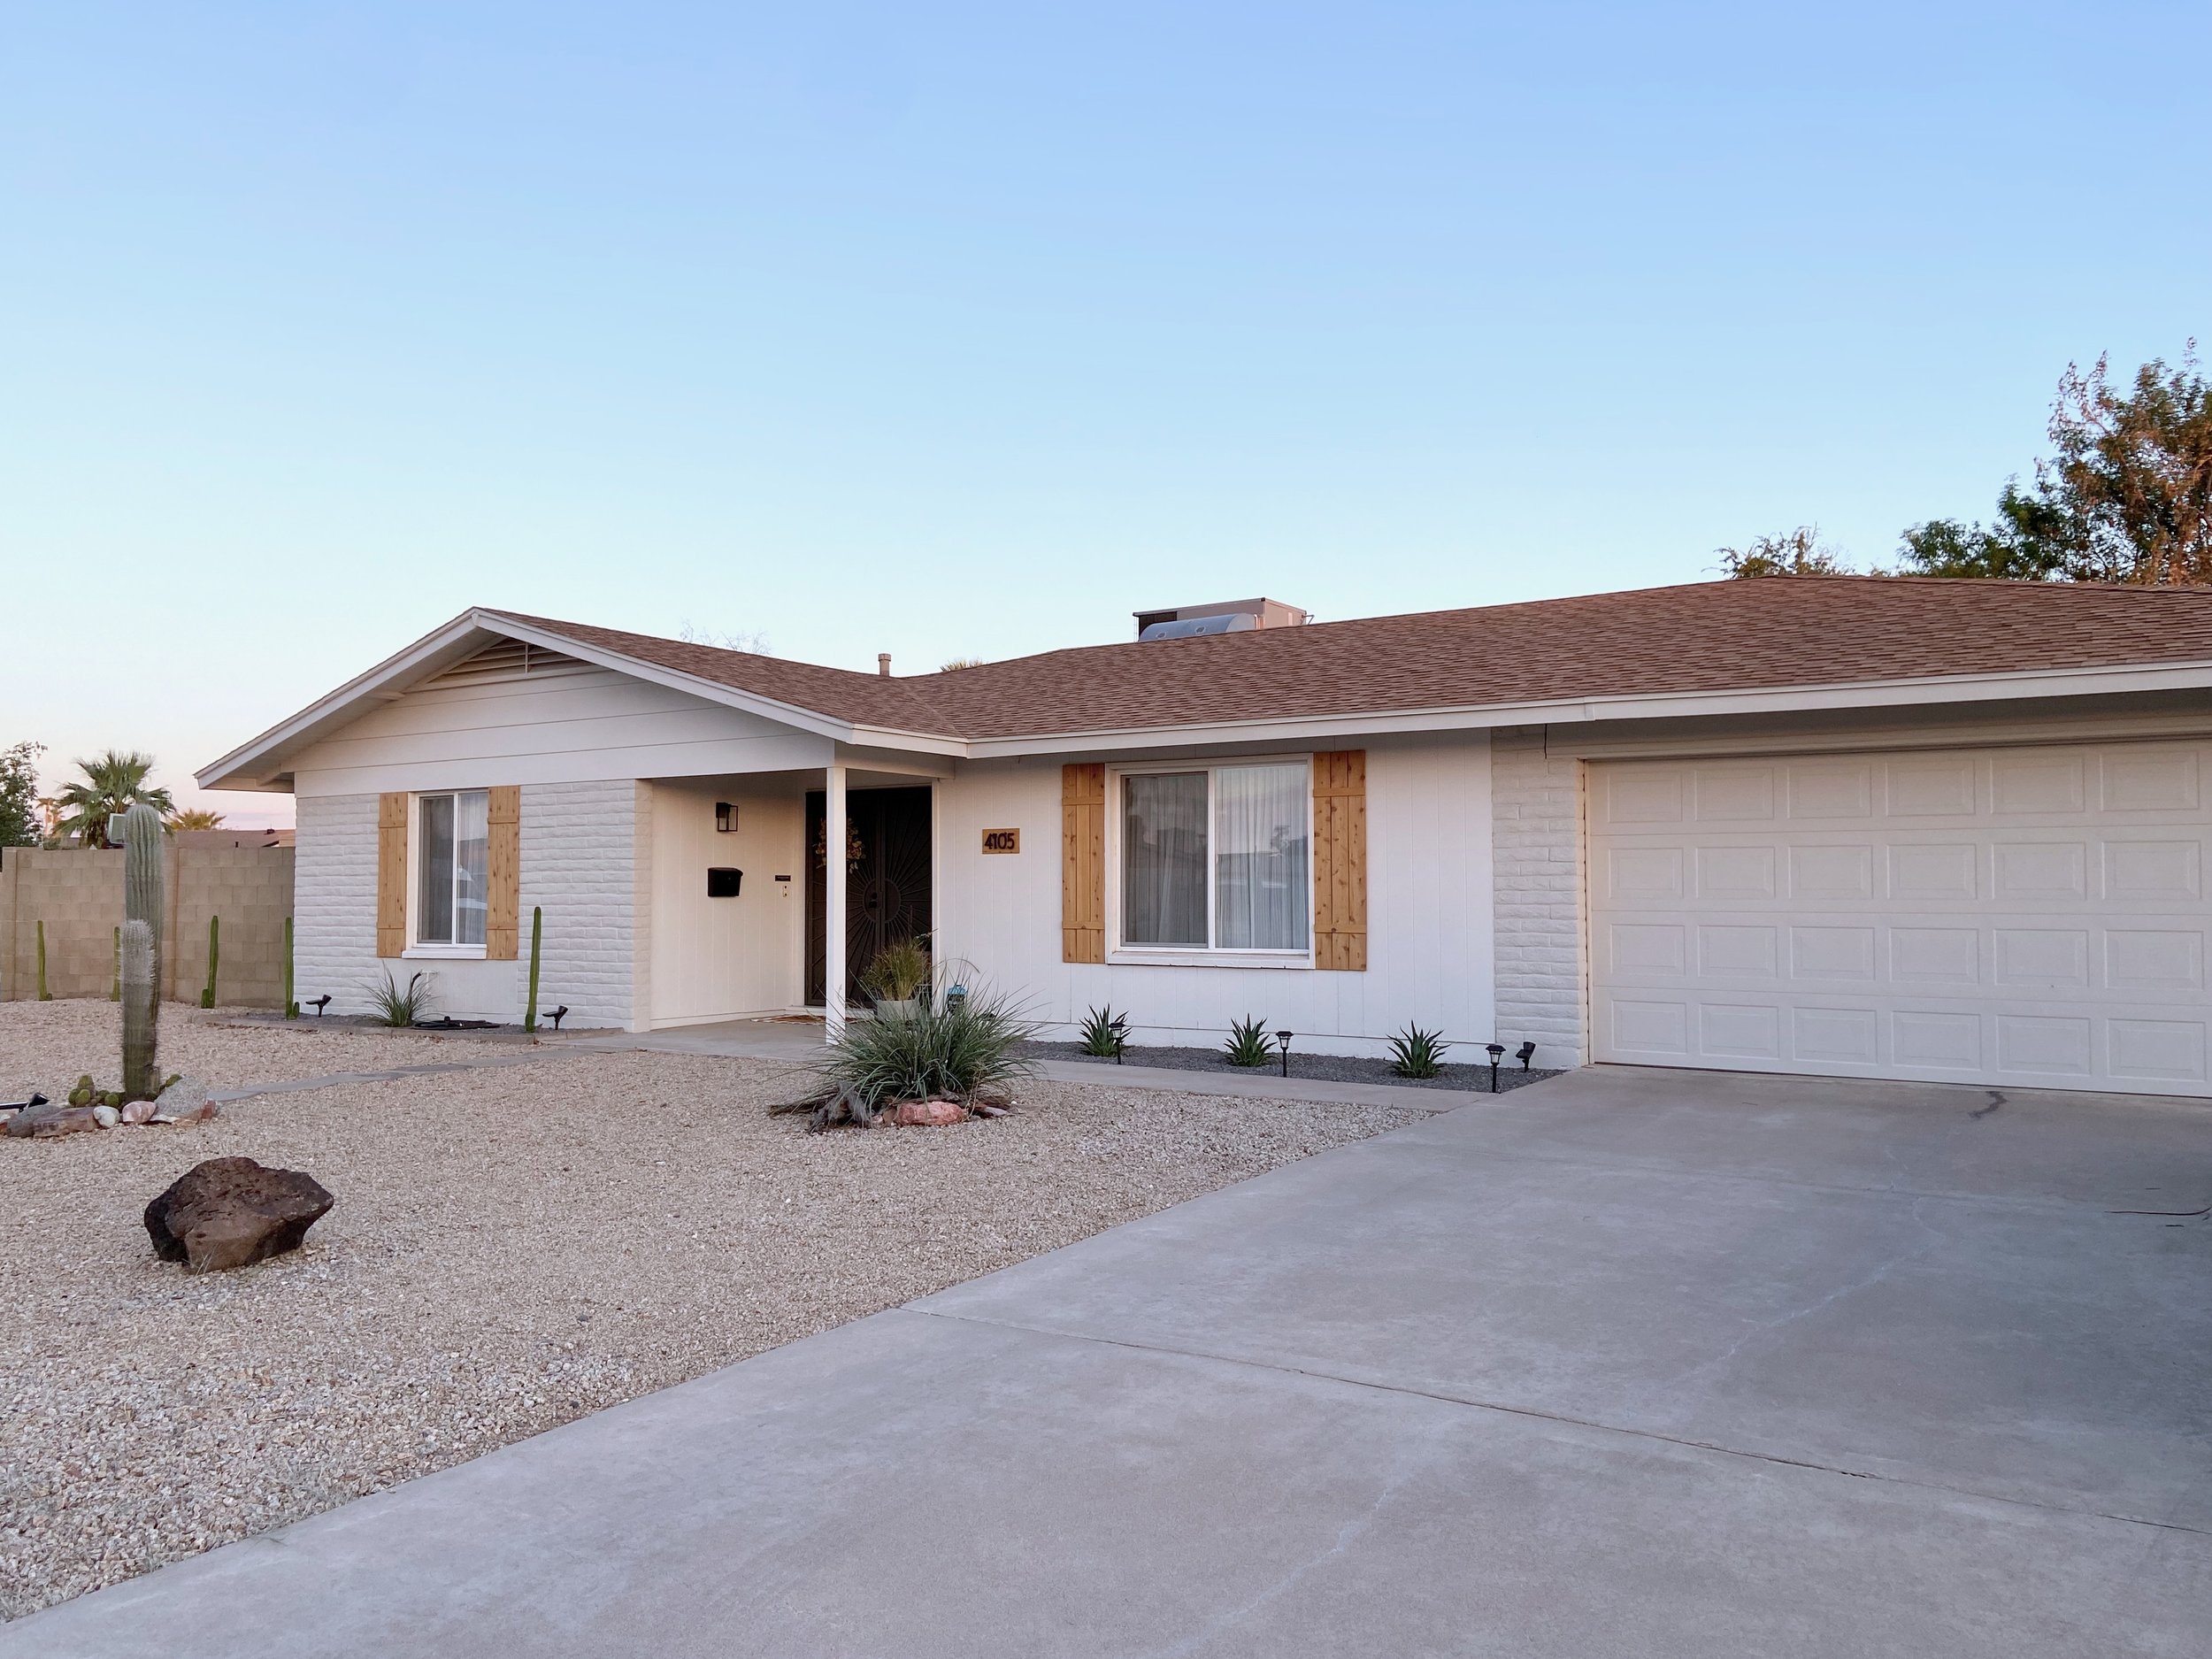
Next up, it was time to come up with our new landscaping plan! We headed to Moon Valley Nurseries where we met with Sam, an amazing landscaping designer who helped us dream about what we could do. Using a photo of the yard, he was able to mock up this plan using our existing healthy plants (the Cardon cactus and a red yucca) and new native plants. We knew we only had about $500 to pull this off, so Sam helped us plan it out in a couple of phases. First, we’d start with the front beds and some new cactus along the cinderblock wall to the left. Later on, we’ll consider adding a tree and a few smaller plants further out toward the street.

We left the nursery with five San Pedro cactus, four variegated smooth agave, and one red yucca.

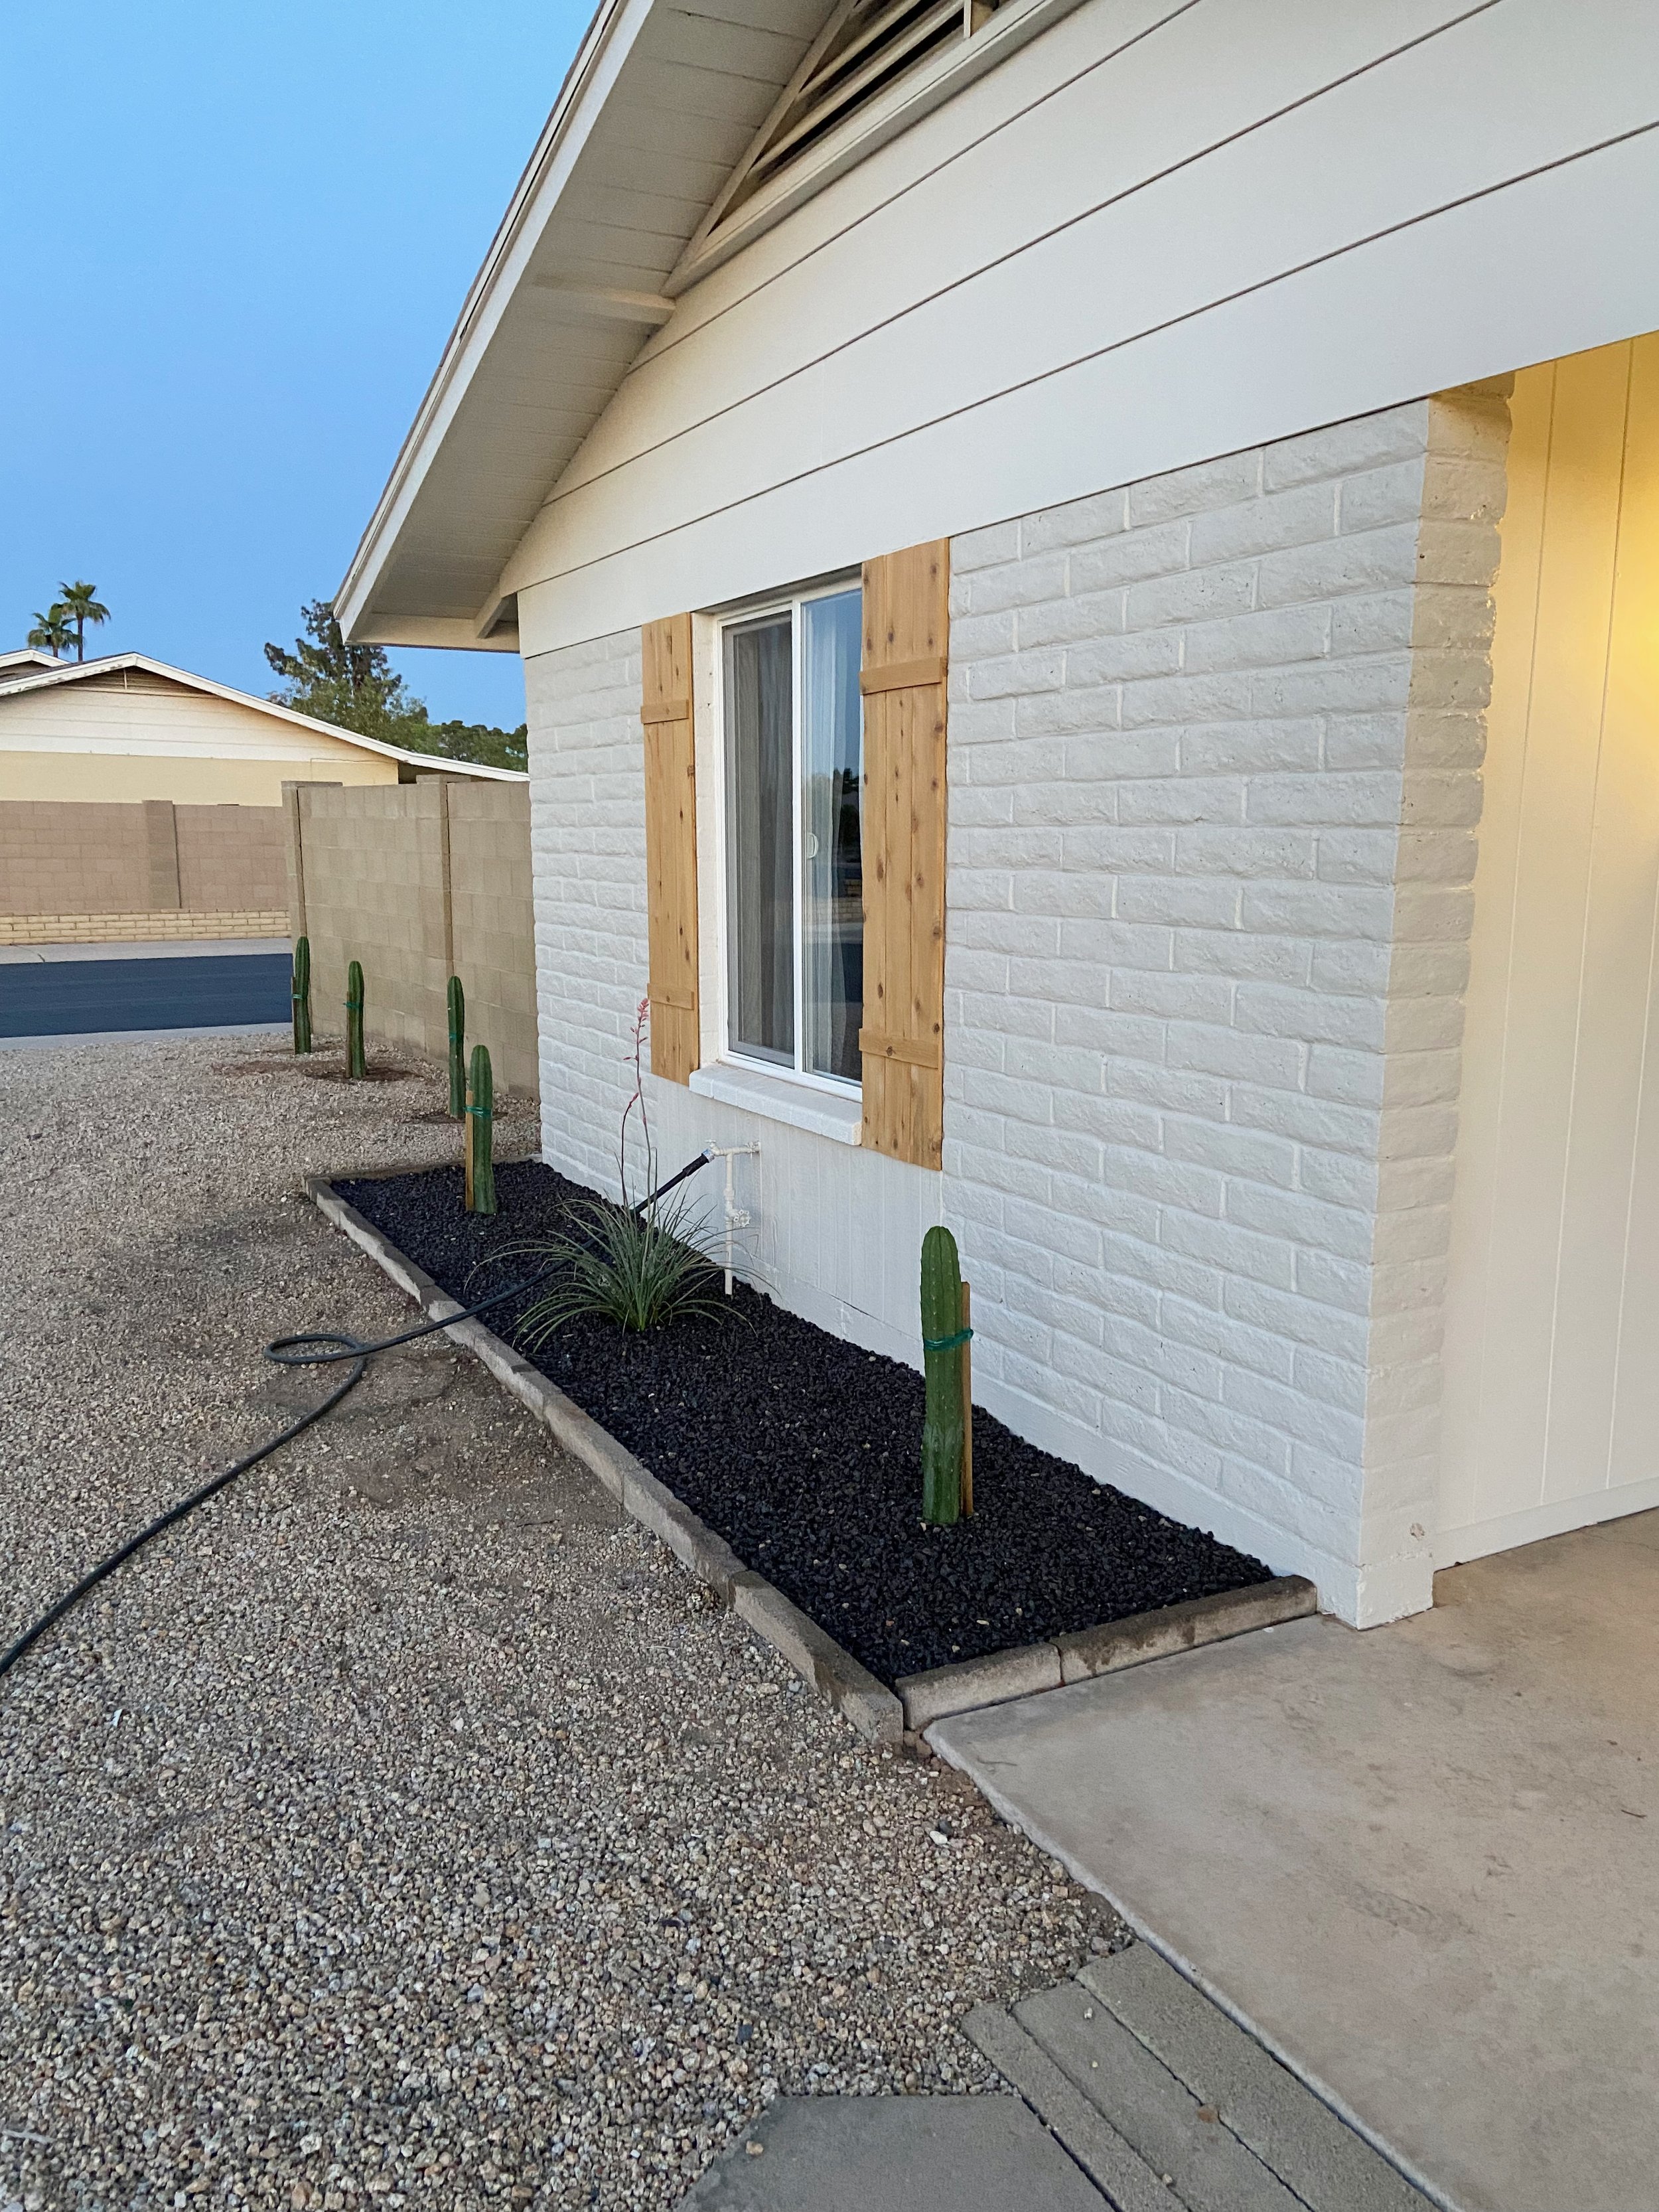
Next, we mapped out where everything was going and got to digging. The four agave plants would go here in front of the living room, while two of the San Pedro cactus and the red yucca would go in the other bed.
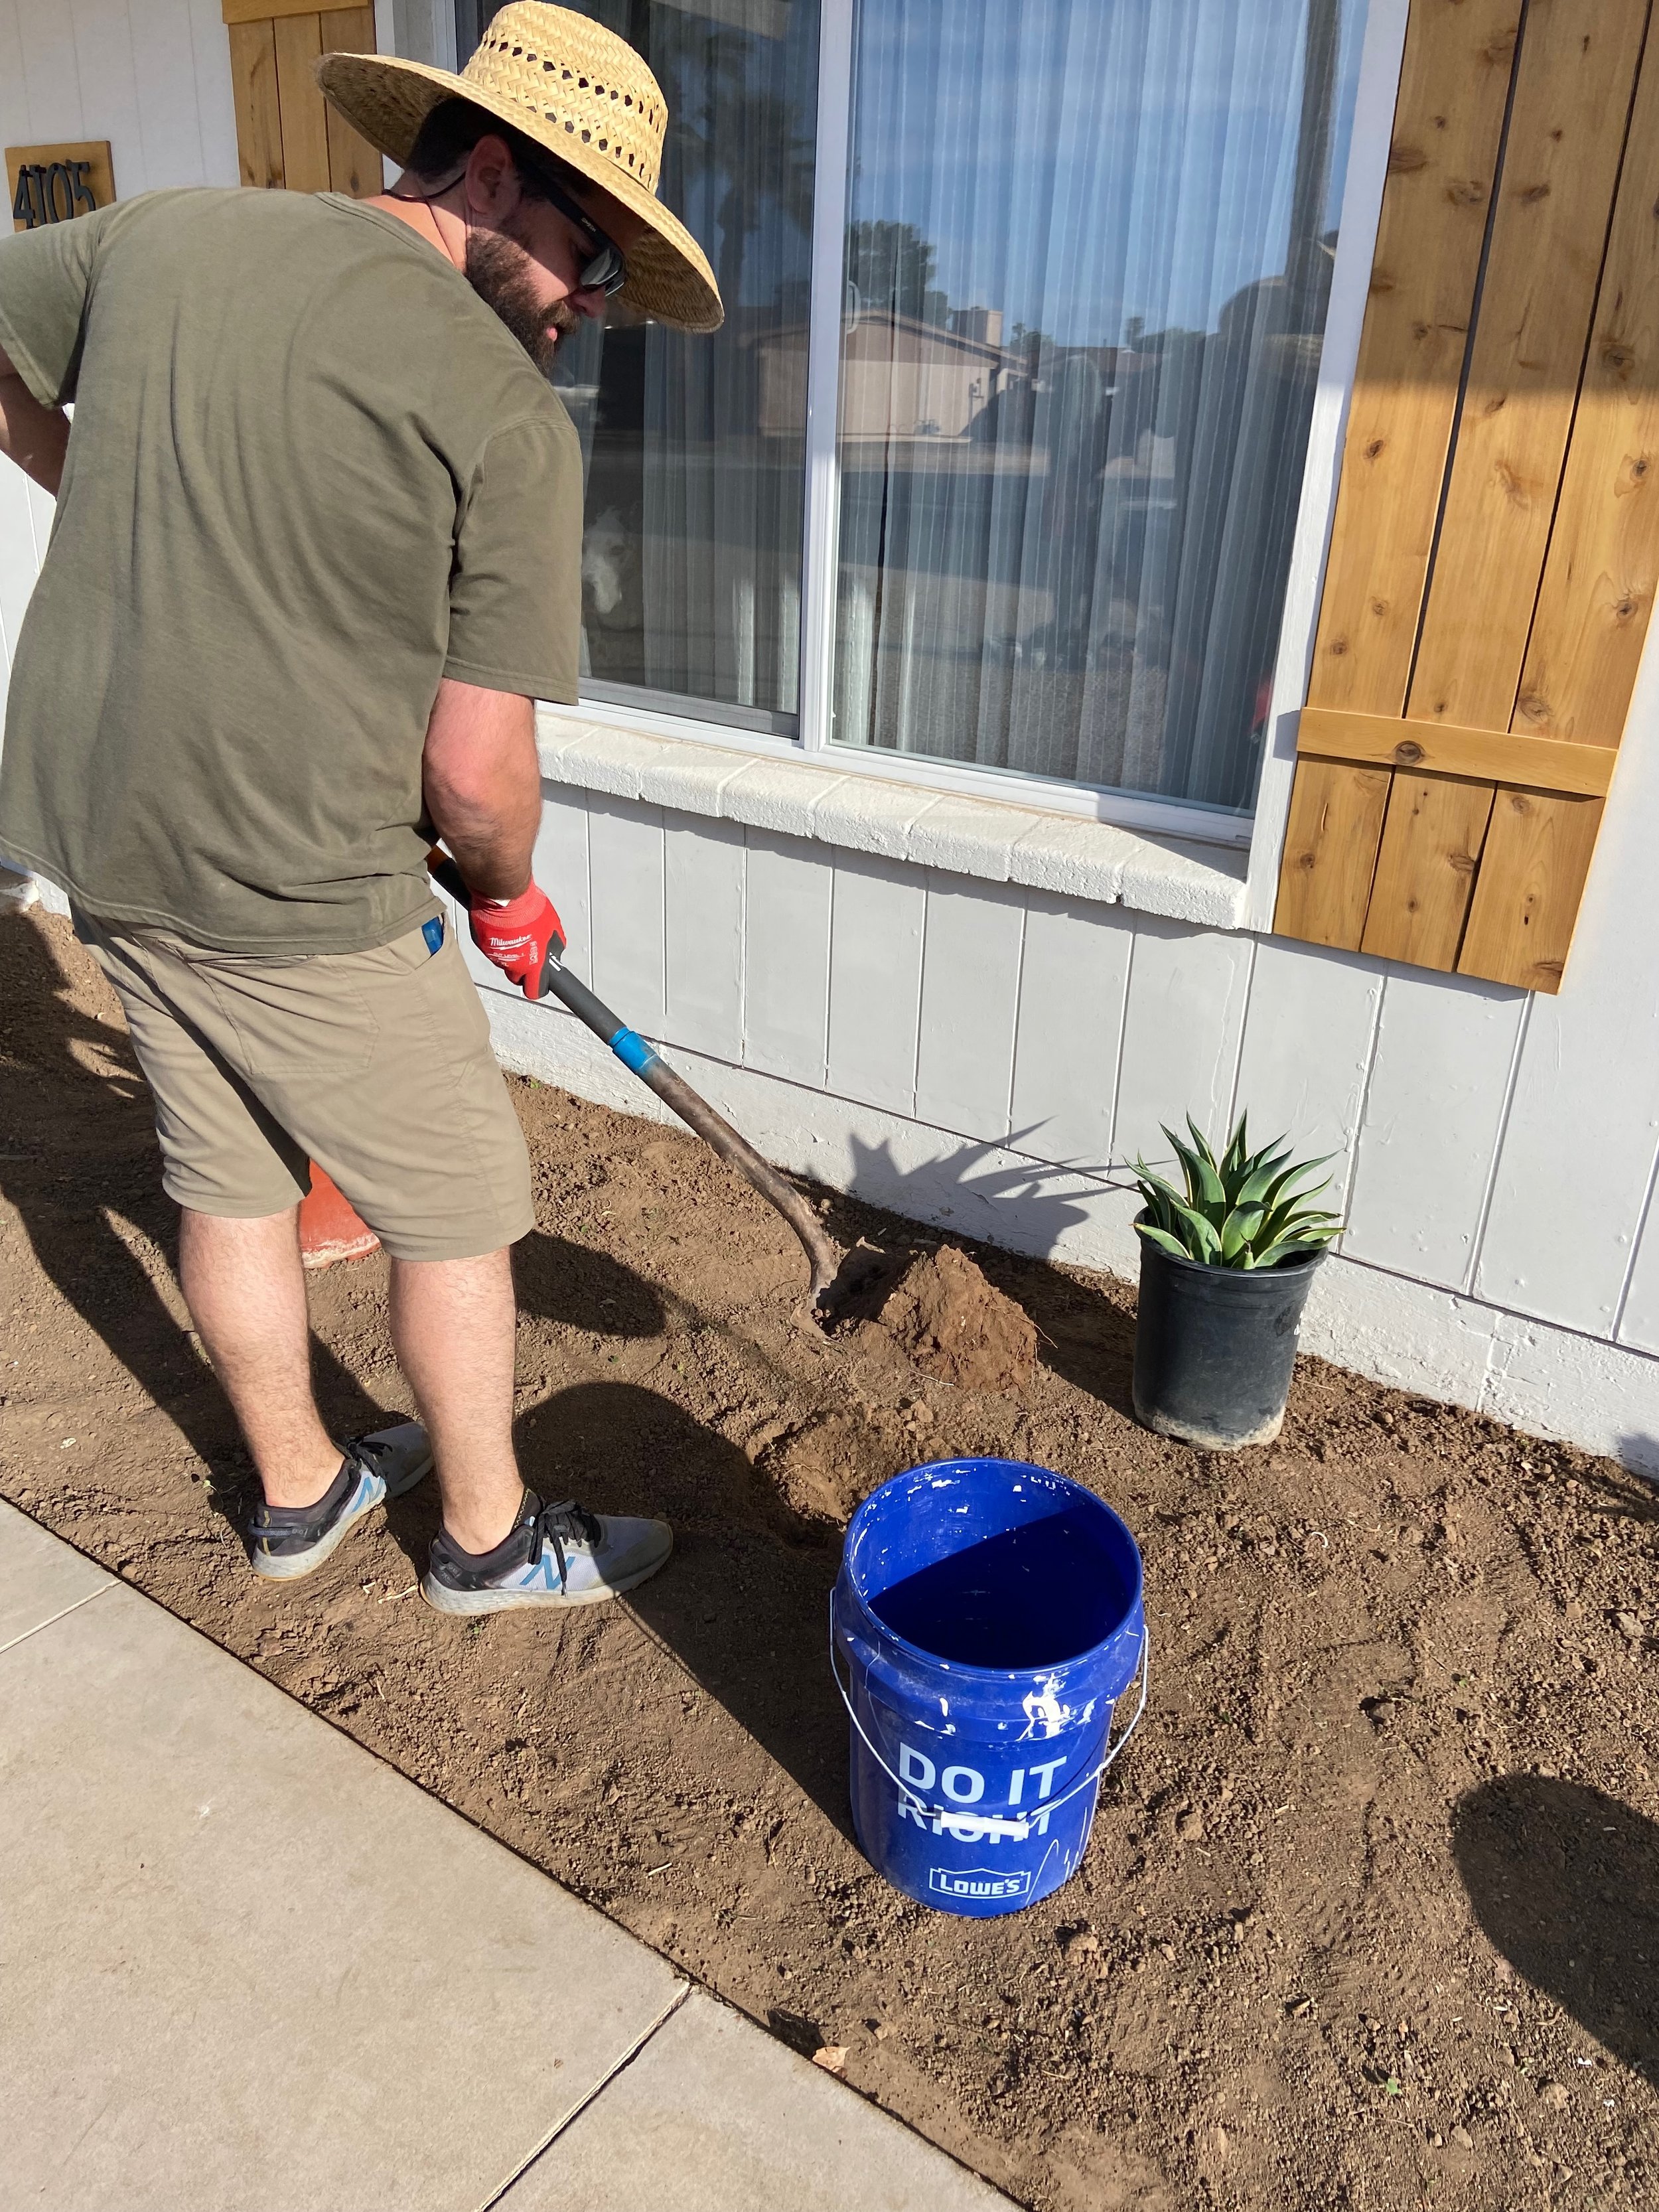
We used this weed barrier landscaping fabric (secured with these fabric staples) to hopefully avoid the weedy mess we had before. But before we laid and secured that, we dug our holes first and then cut openings in the fabric.
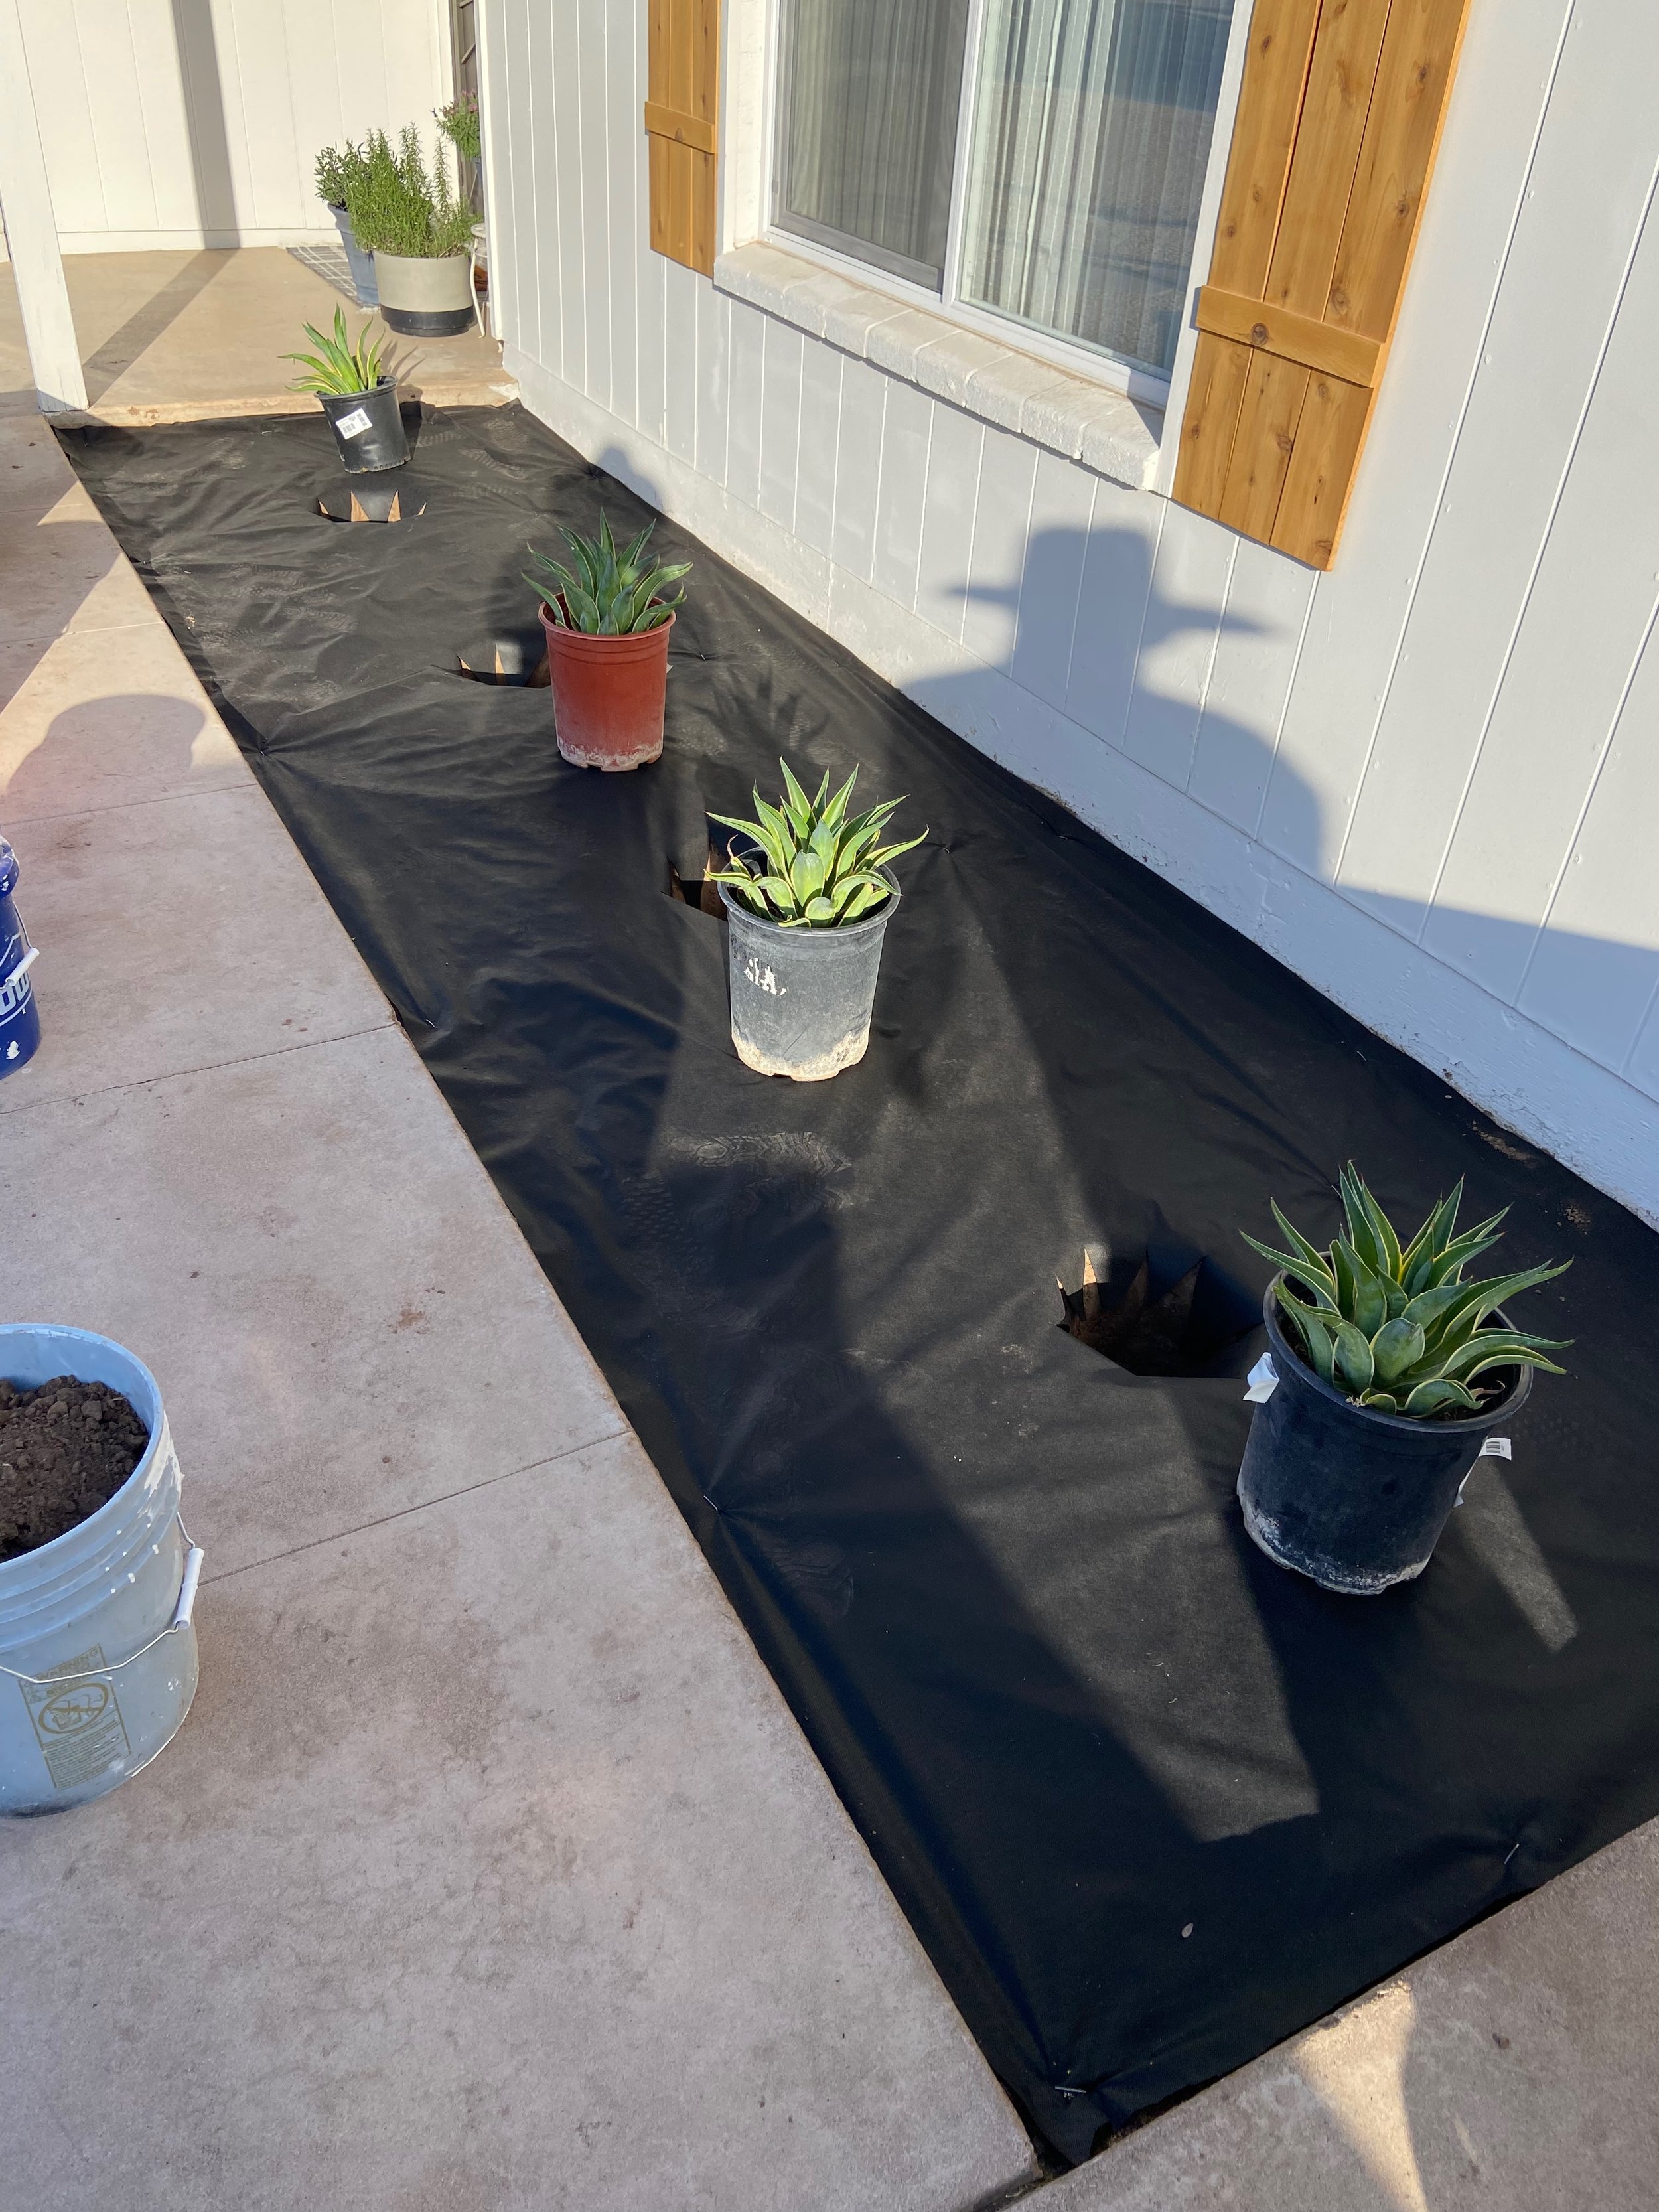
Compared to prepping the beds, planting was easy breezy! (See if you can spot Gladys creepin’ in the photo below 😆)


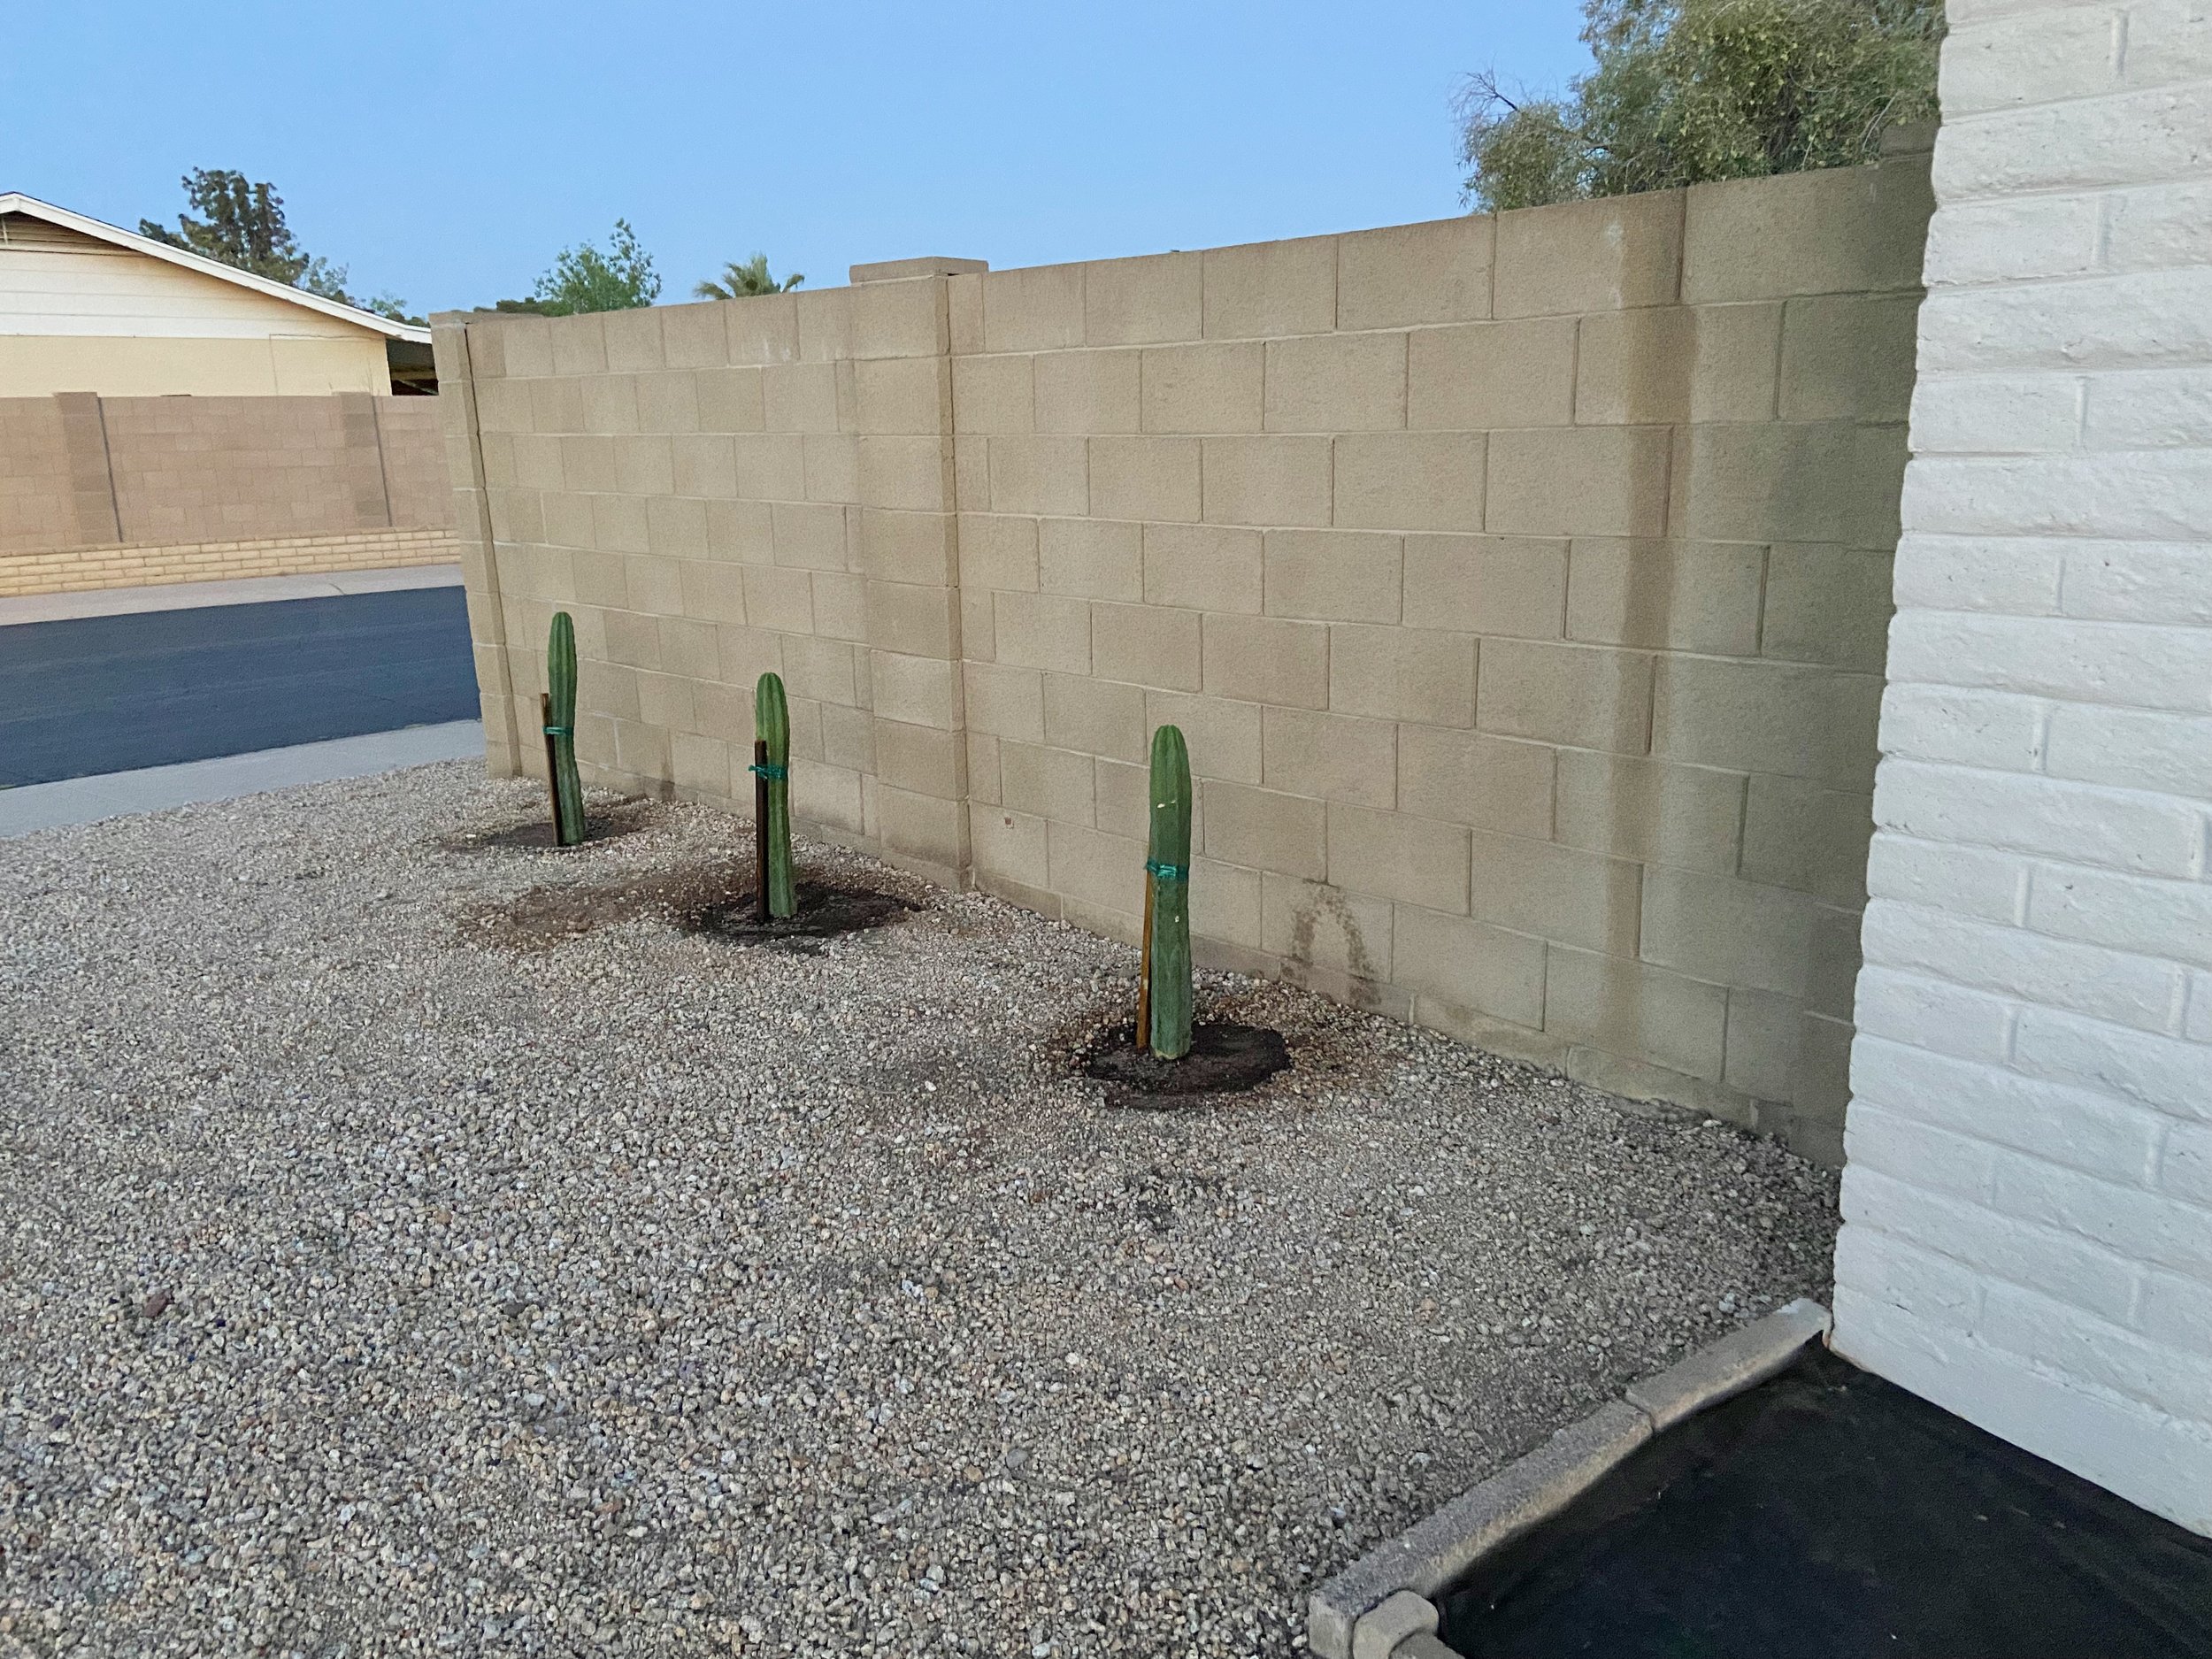
The other three San Pedro cactus got planted along this cinderblock wall to the side of our house. Our hope is that they’ll grow large enough to distract you from the ugly wall.
Next came deciding on a ground cover for the planting beds. We’ve always used wood chip mulch in garden beds at other houses, but there’s a few reasons we wanted to avoid that here. One, mulch holds in moisture, which is good in many instances but cactus really doesn’t like that—they need something that’ll dry out fairly quickly. Another reason we wanted to avoid mulch is because we get pretty severe monsoon storms with high winds (see: fallen Saguaro above). I think mulch would have just blown around and made a mess. Lastly, we were going for the lowest maintenance possible and wood chip mulch is something that has to be replaced semi regularly.
With all of those things considered, we decided to add gravel as our ground cover within the planting beds. It drains well, stays in place, and is extremely low maintenance. The rest of the yard is a golden colored gravel, so we thought a different color gravel would look good for contrast.
In addition to new gravel for the planting beds, we needed to get a bit more of the existing gravel because we removed the two smaller planting beds along the driveway and needed to fill in a few bare spots around the yard. We visited a local sand and gravel yard where we were able to find a perfect match of our existing gravel (called Madison Gold) and a great contrasting option for the planting beds (called Charcoal Grey). We bought a half yard of the Madison Gold and a full yard of the Charcoal Grey and instead of loading it ourselves, we opted to have them deliver it do our house directly. A couple days later they showed up with a giant truck and trailer to deliver a comically small amount of gravel (a yard and a half is…not much 😅).

Here you can see just how little was in that big ol’ dump truck 😂

We tag teamed spreading the gravel out in the beds and got it done in no time!
We were so, so satisfied when we finished up spreading everything out and rinsing the dust off! The Charcoal Grey gravel in the beds looks much darker when wet, but even dry the contrast is perfect.


Here you can see where we got rid of the planting beds along the driveway and filled the space in with new, matching gravel. It’s wet in this photo, but really blends in nicely when dry!
The last thing on our list was adding some landscape lighting. We weren’t ready to dive into low voltage lighting so we opted for solar options instead. I found these LED solar lights from Wayfair and absolutely adore the star shape light they cast (if those are out of stock, these from Amazon are a great option)!

We also added these spotlights in a few places—shining up on the brick portions of the house and highlighting our Cardon cactus.

It’s been a few months since we made all of these updates so here’s a progress report: Everything we planted is thriving! Minimal weeds! Low water needs! Easy to maintain!


We’re so, so happy with the outcome and are really pleased with how big of an impact this project made. As I mentioned in my exterior updates post, this is a project that I wish we would have made a priority earlier in our renovation. Seeing a well maintained, attractive house each day is so life giving and something I am really grateful for now.
As always, my favorite way to wrap up a post is to look back at where we started vs. where we are today. I know I say this every time…but…can you believe this is the same place?! I certainly cannot 🤯

We’re almost caught up with projects in our Reno Recap series, can you believe it?! Up next, I’ll share all about our primary bath renovation and oooo baby, it’s a good one. Thanks for following along!

Missed previous posts in the Reno Recap series? Check them all out here!