
Reno Recap: Coffee Bar
Have you ever heard of a home having a secret room or a spot where a previous owner stashed something valuable and forgot about it? Well, we didn’t have either, but we did have some wasted space behind a wall in our dining room that was just asking for something cool to be built into it.
One day shortly after we moved in, I was putting clean towels away in the linen cabinet that’s built into the hallway on the back side of this wall in our dining room. When I reached in, I realized that the cabinet may not span the entire depth of the wall. I grabbed a tape measure to compare the depth of the cabinet to the width of the brick portion of this this wall, and sure enough, there was a significant difference. This meant that there was some empty space behind this wall!

Thanks to some Zillow stalking research of homes in our neighborhood, I found out that some houses with our same floor plan have either a built in china hutch or a fireplace on this wall, while others—like ours—have a blank wall. I convinced Josh to knock a hole in it during the demo of the wall that separated our living room and dining room (pictured on the left side of the photo above). Although we didn’t find a secret room or long lost treasure, we did find about 20” of empty space between the wall and the back of the linen cabinet on the other side. I immediately knew that I wanted to somehow turn it into a dry bar/coffee bar and Josh was game to make my vision a reality!
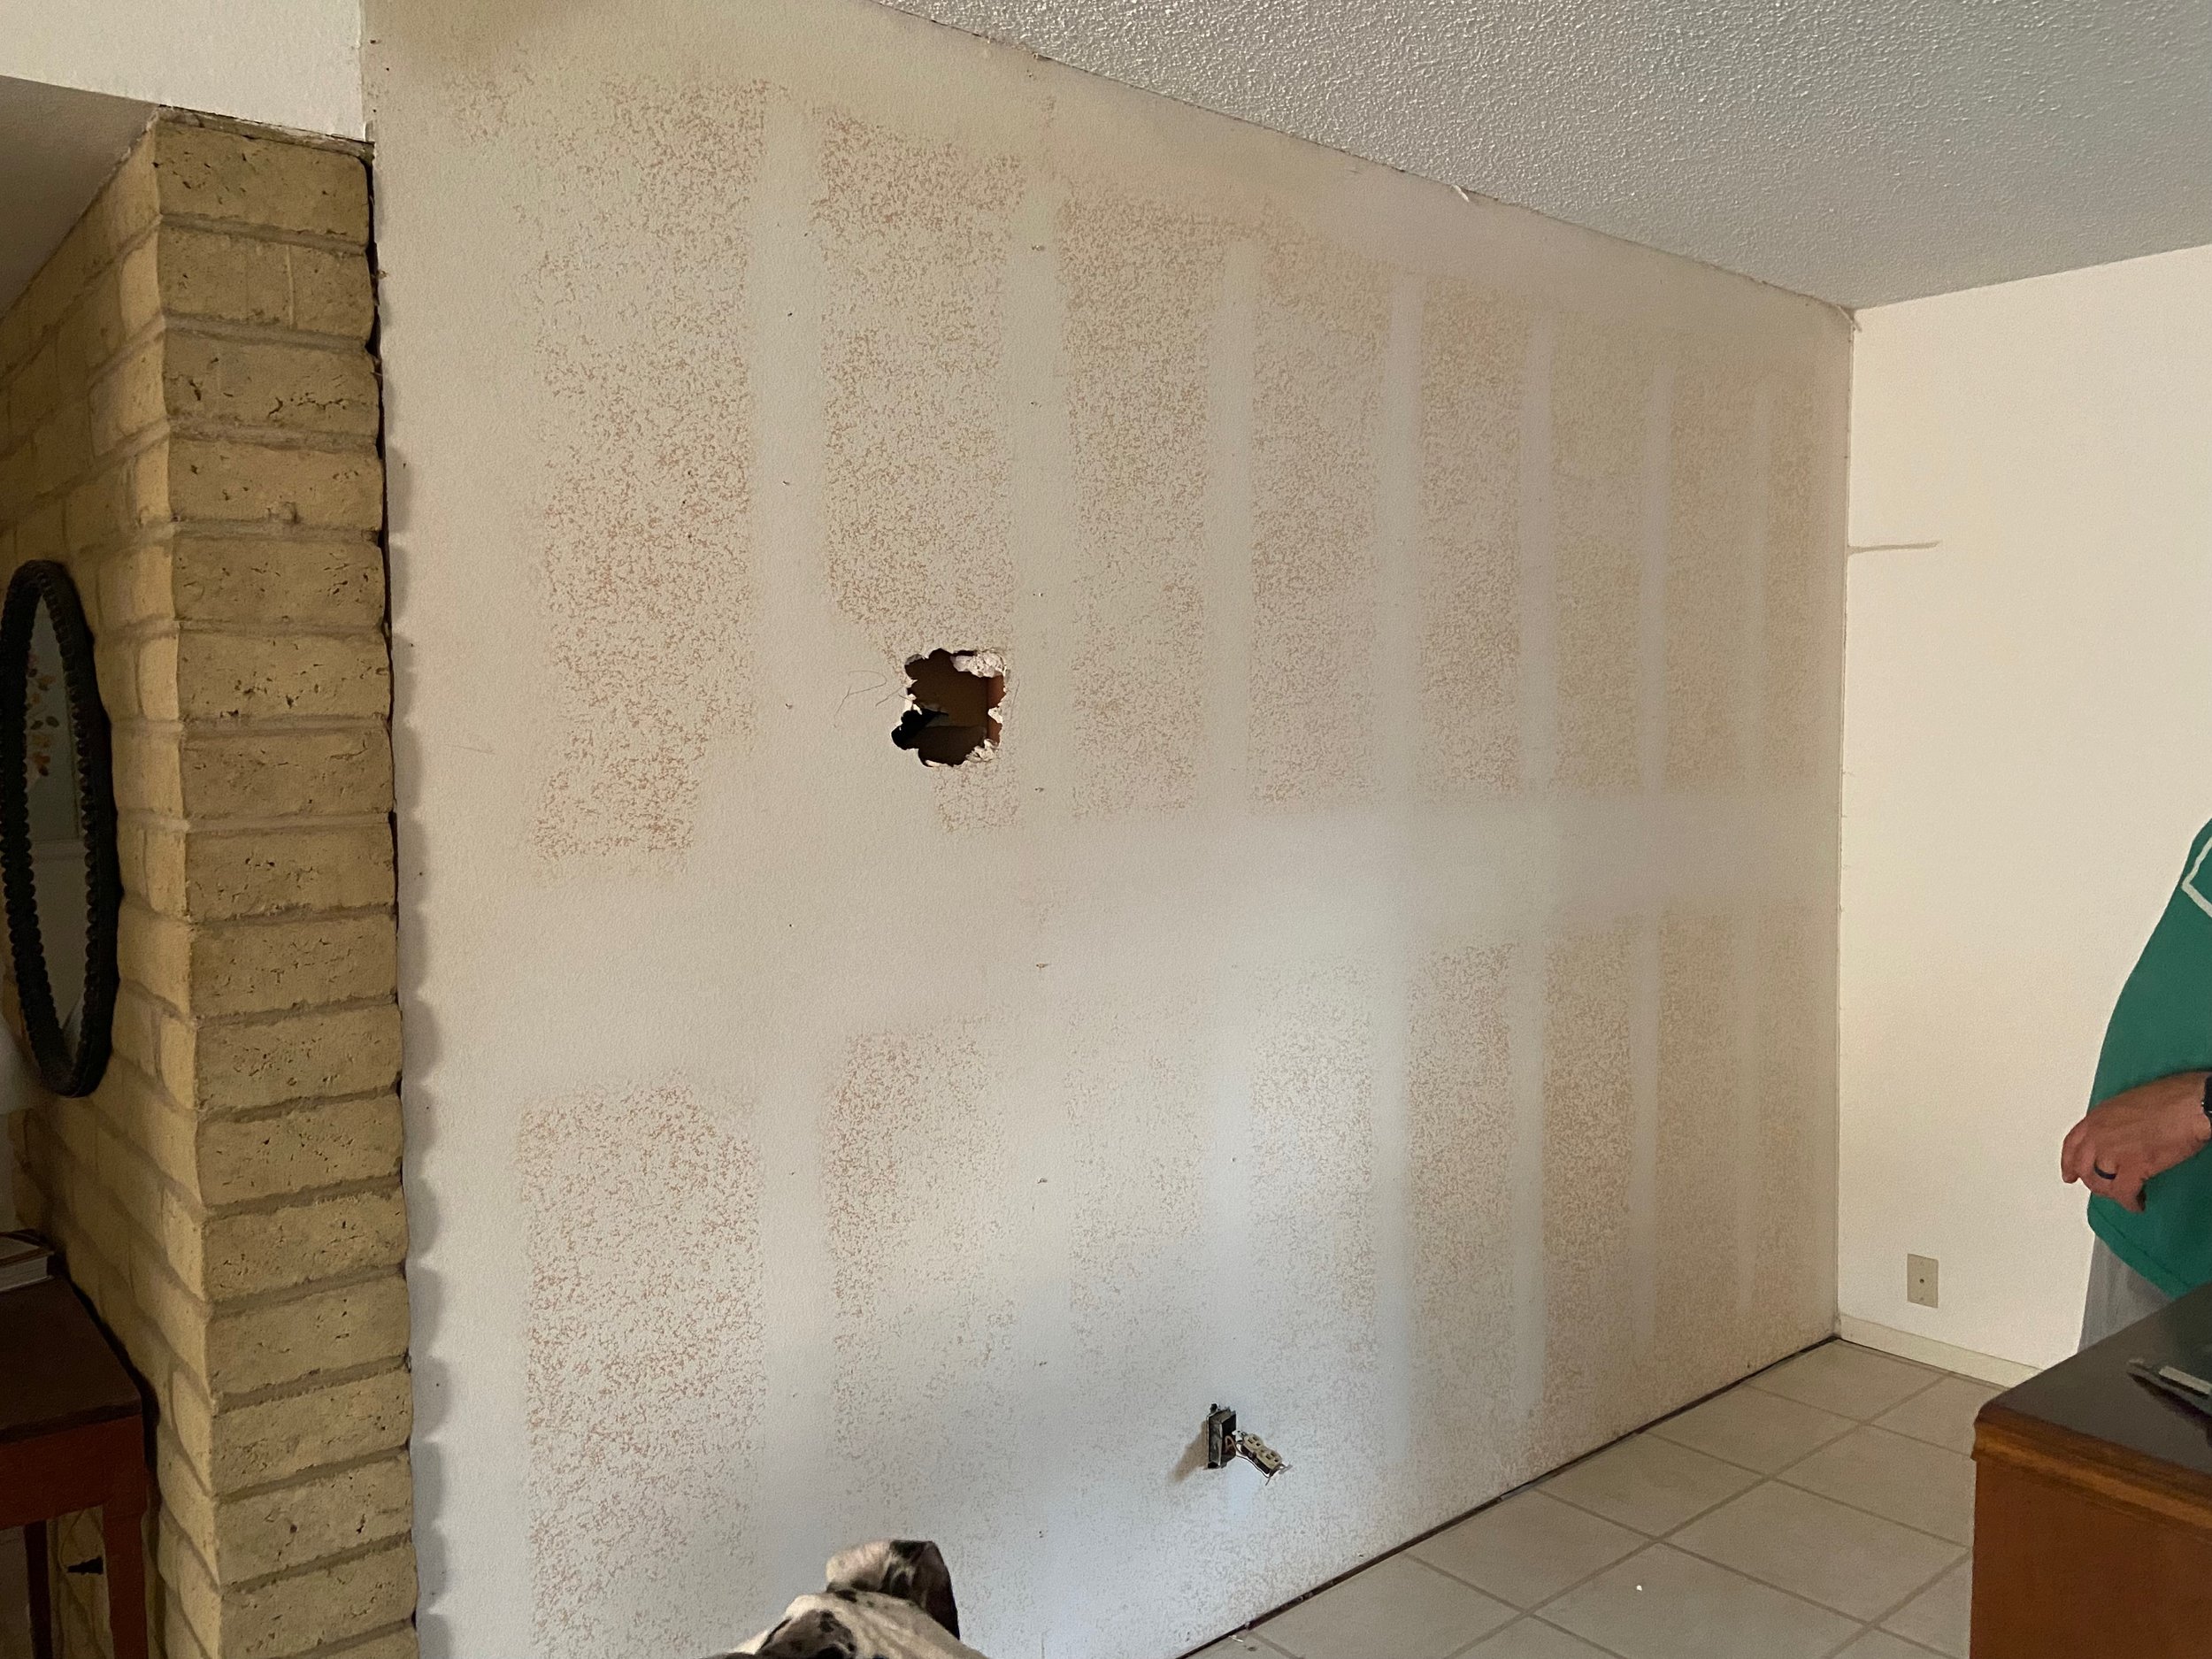
Once we got it fully opened up, we were left with a space that was about 20” deep and 60” wide.

We lived with that gaping hole in the wall for about 9 months while we worked on other things (like leveling the floor in the living room, renovating the kitchen, and installing new flooring). Come spring of 2022, we were ready to get this thing built out!
The first order of business was making the space deep enough for a lower cabinet and beverage fridge. The entire depth of this space, including the built in linen cabinet, was about 50”. We knew we needed to add a wall between the linen cabinet and the coffee bar in order to run electrical, attach shelves, and tile on. The linen cabinet alone was almost 30” deep, which was much more space than we needed (organizing something that deep is quite a headache!) so we decided to steal some of that space to add to the coffee bar.
My dad loves helping us with projects and was more than happy to jump in on this one! He started by removing the remaining 2”x4”s from the floor of the newly acquired space and then we needed to tackle the depth of the linen cabinet itself.

The back of the linen cabinet was just thin plywood, so it easily popped off allowing us access to the shelves. Here you can see just how massively deep this cabinet was!

Using an oscillating tool and a circular saw, Josh and my dad cut off about 10” from each shelf and the sides/top/bottom of the cabinet. Once they did that, they were able to reattach the backing, and voilà! A shallower, more easy to maintain linen cabinet AND the extra space we needed to create the coffee bar of my dreams. Below you can see how it looked all cleaned up—no one would be the wiser if they didn’t know what it was like before!

We purchased a simple unfinished 30” base cabinet from Home Depot and acquired a beverage fridge through Josh’s work. Here’s Josh dry fitting both in the space to make sure our measurements were right (they were).

Next up came framing the wall between the two areas. We already had electrical in the space (you can see it hanging down to the right in the photo above). It got re-routed through the ceiling and down through the wall to power an outlet above the counter for coffee machines, as well as an outlet below, for the beverage fridge.

After that, we added drywall, installed the cabinet, finished flooring, and got everything prepped for the countertop. We had a remnant piece of quartz left over from our kitchen that our fabricator came and installed for us (we also used this in our laundry room!) I love that we have the same surface in all three areas as they’re quite open to one another.

Next up, we started the tiling process. We went with the same MusselBound Adhesive Tile Mat and this zellige style ceramic tile because we loved working with both so much in our kitchen renovation! We also planned to install the same white oak wood shelves that we did in the kitchen, so we preemptively installed the floating shelf hardware before tiling (so we wouldn’t have to drill through the brand new tile—eek!) To grout, we used the Mapei Flexcolor CQ in white.

Once we got everything cleaned up, it was very evident how badly the brick wall to the left needed to be painted as it harshly clashed with the bright and clean white of the countertop and tile (the tile looks very gray in the photo below, but that’s due to the bright work light we were using. The pieces are actually a much warmer blend of white and taupe).

I call this “brick”, but it’s actually slump block, which is a porous concrete material. To prep for paint, I started by priming the entire thing with Zinsser B-I-N Primer and Sealer first. In the photo below you can really see how dingy the wall looked. Also, to the left you can see the hallway to our primary bedroom/where the linen cabinet is and to the right is the dining room.

After priming the wall, I followed up with two coats of Accessible Beige by Sherwin Williams. I also painted the cabinet the same color as the kitchen shiplap, Meadow Sage by Sherwin Williams. Are you sensing a theme of repeating things from the kitchen? 😉 The spaces are just across the dining room from one another, so it flows really nicely!

We still had some drywall to repair, trim work, and caulking that needed to be done, but I got a bit impatient and started using the space (and added some decor) right away lol.
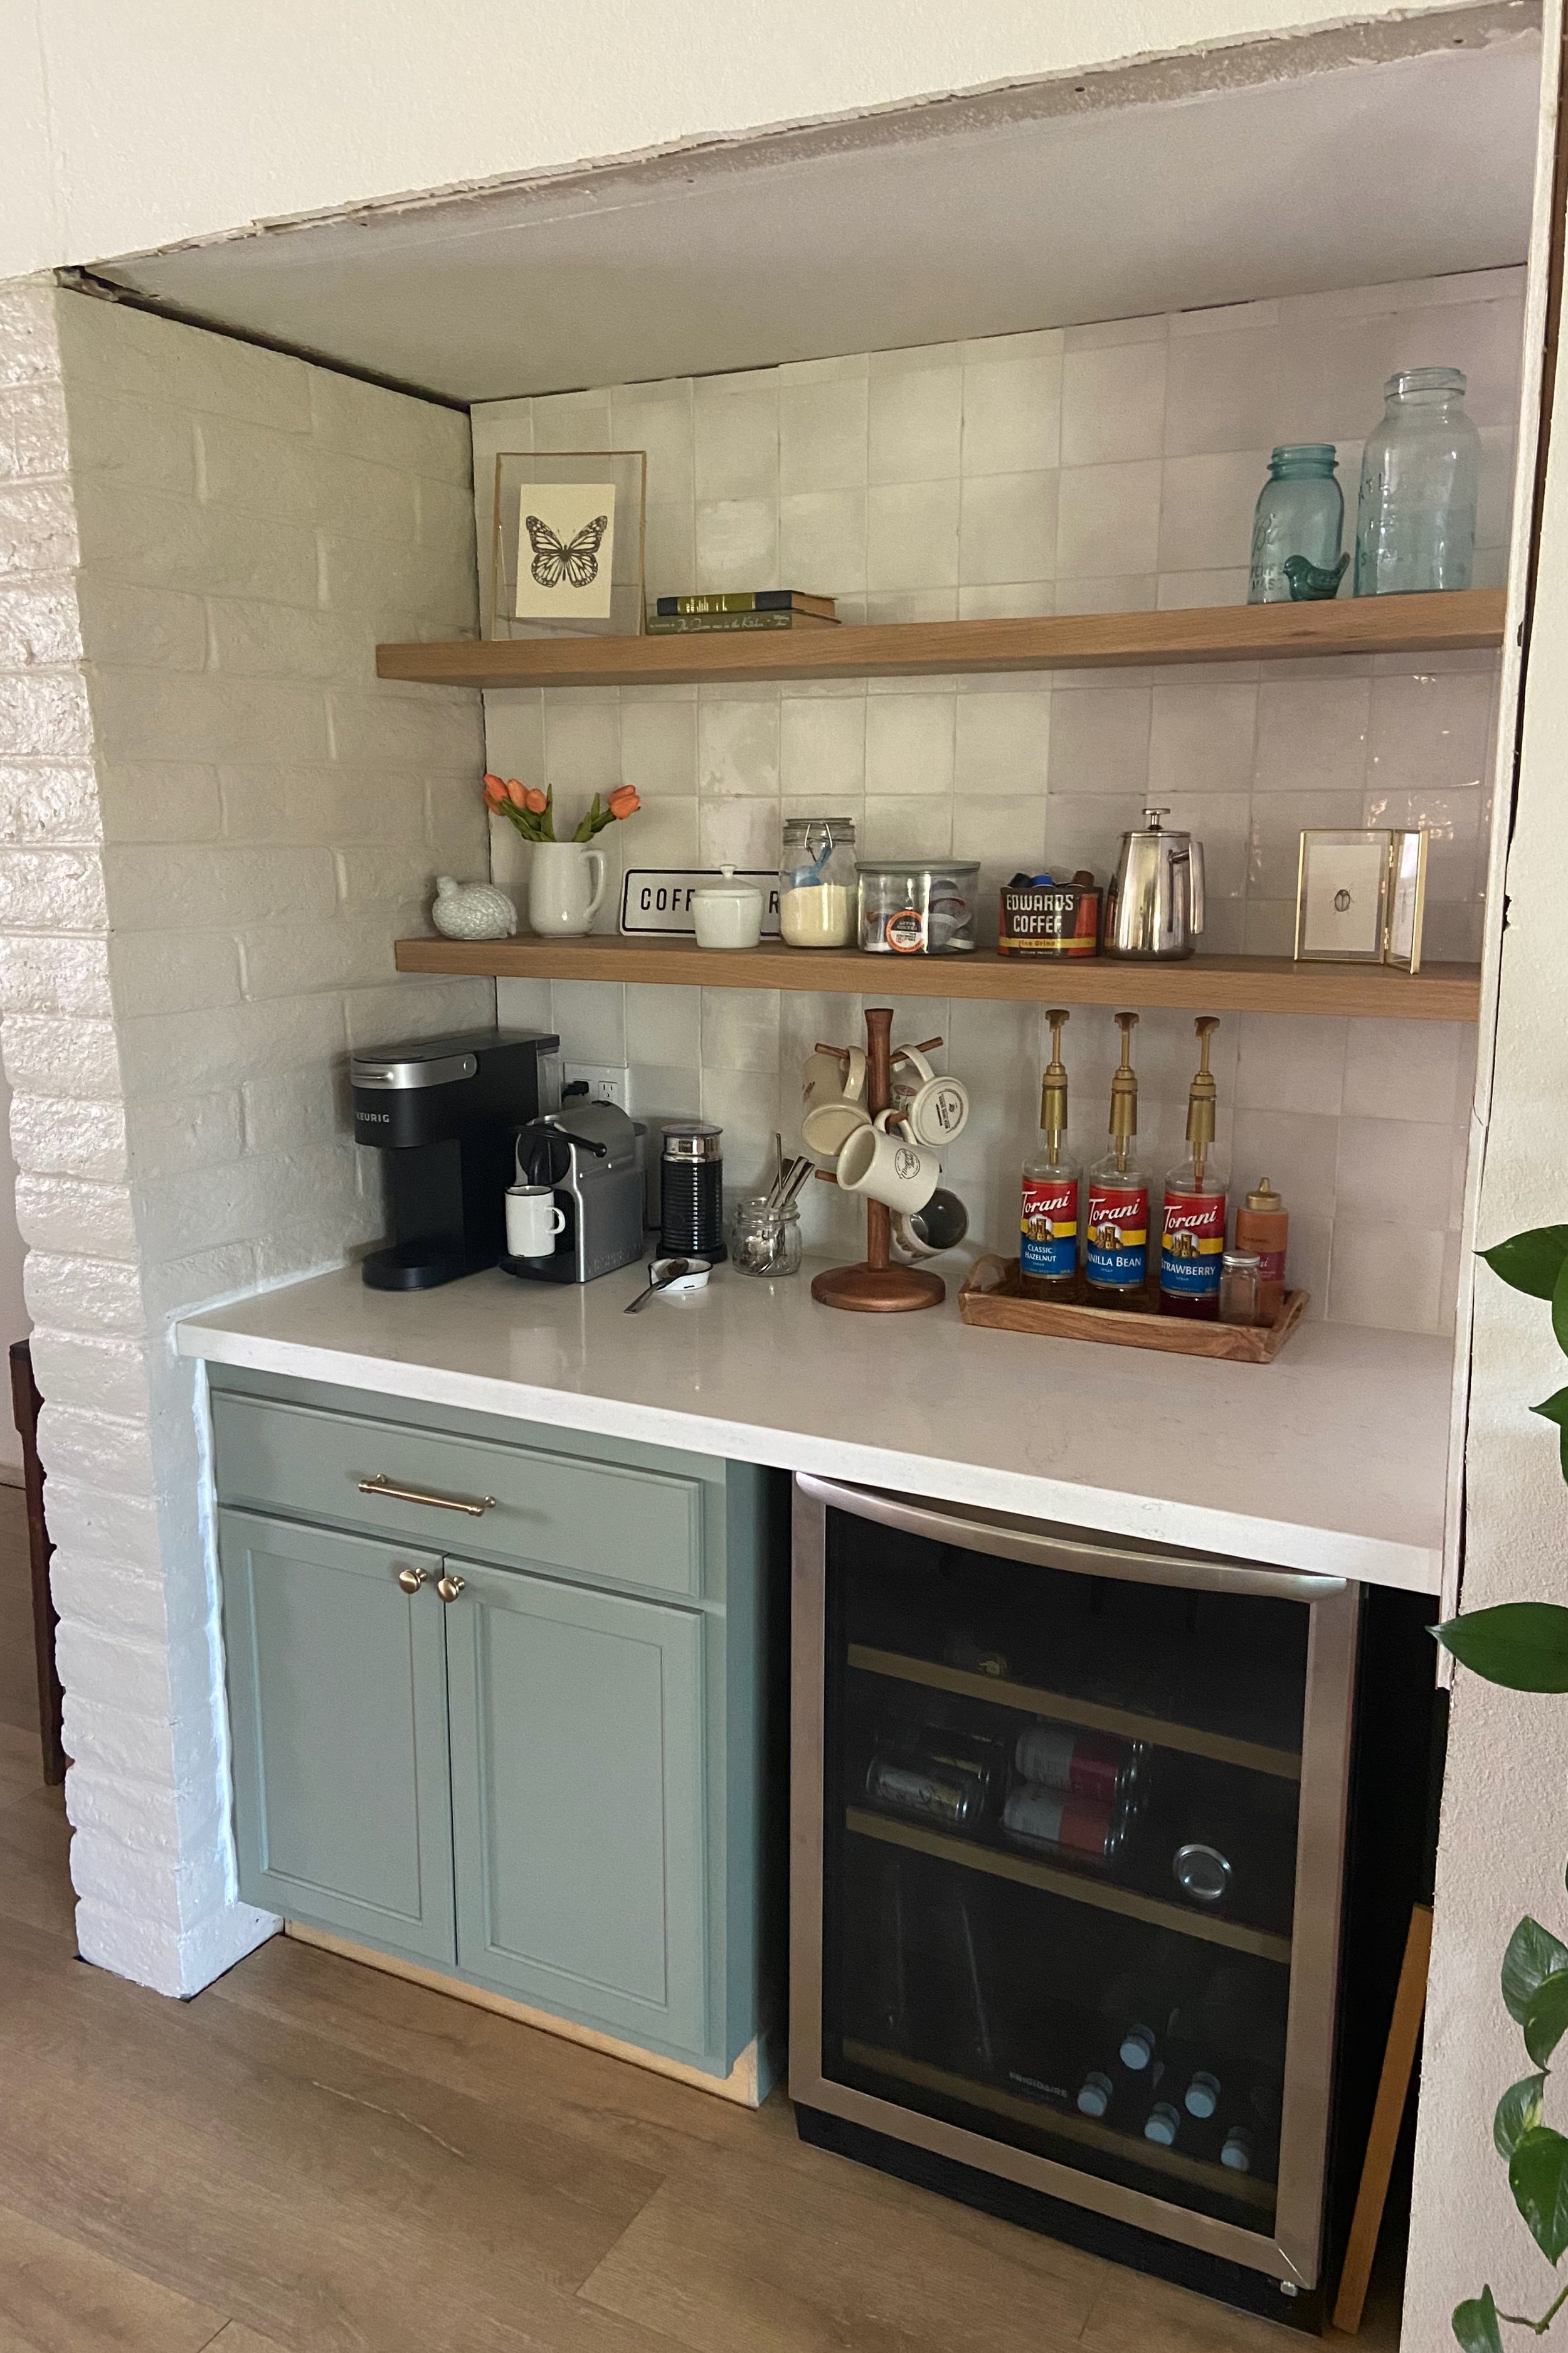
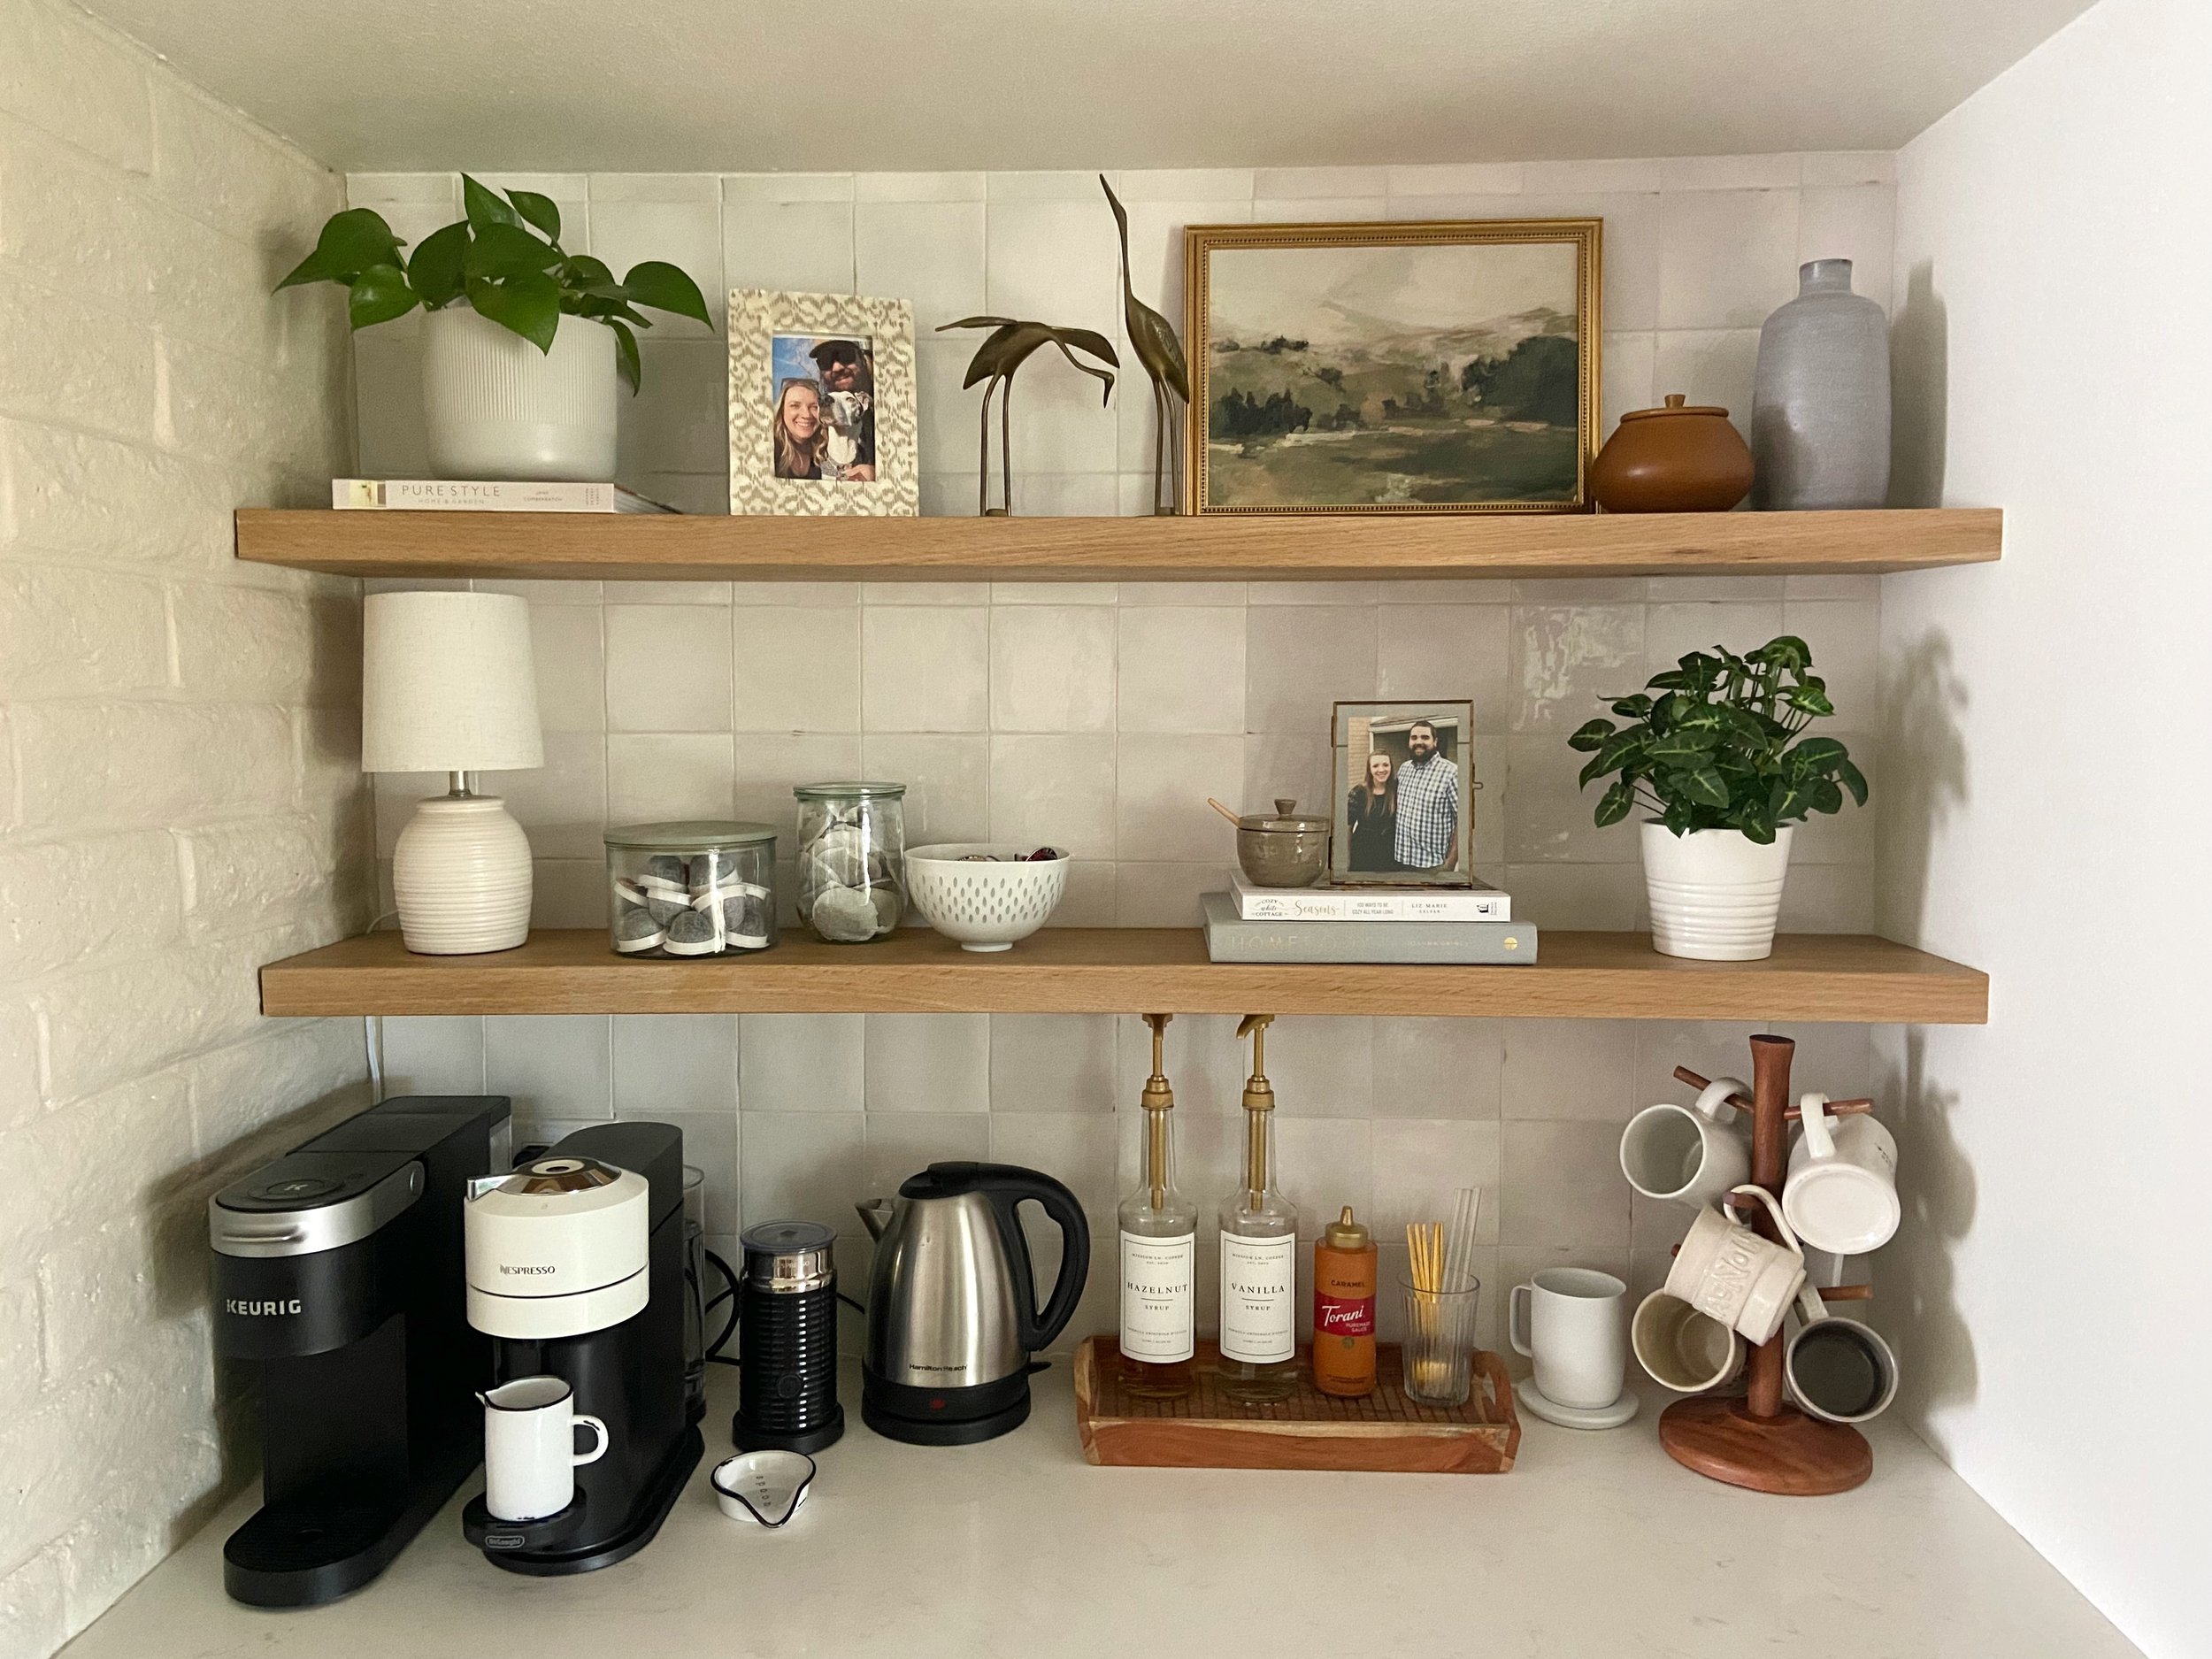
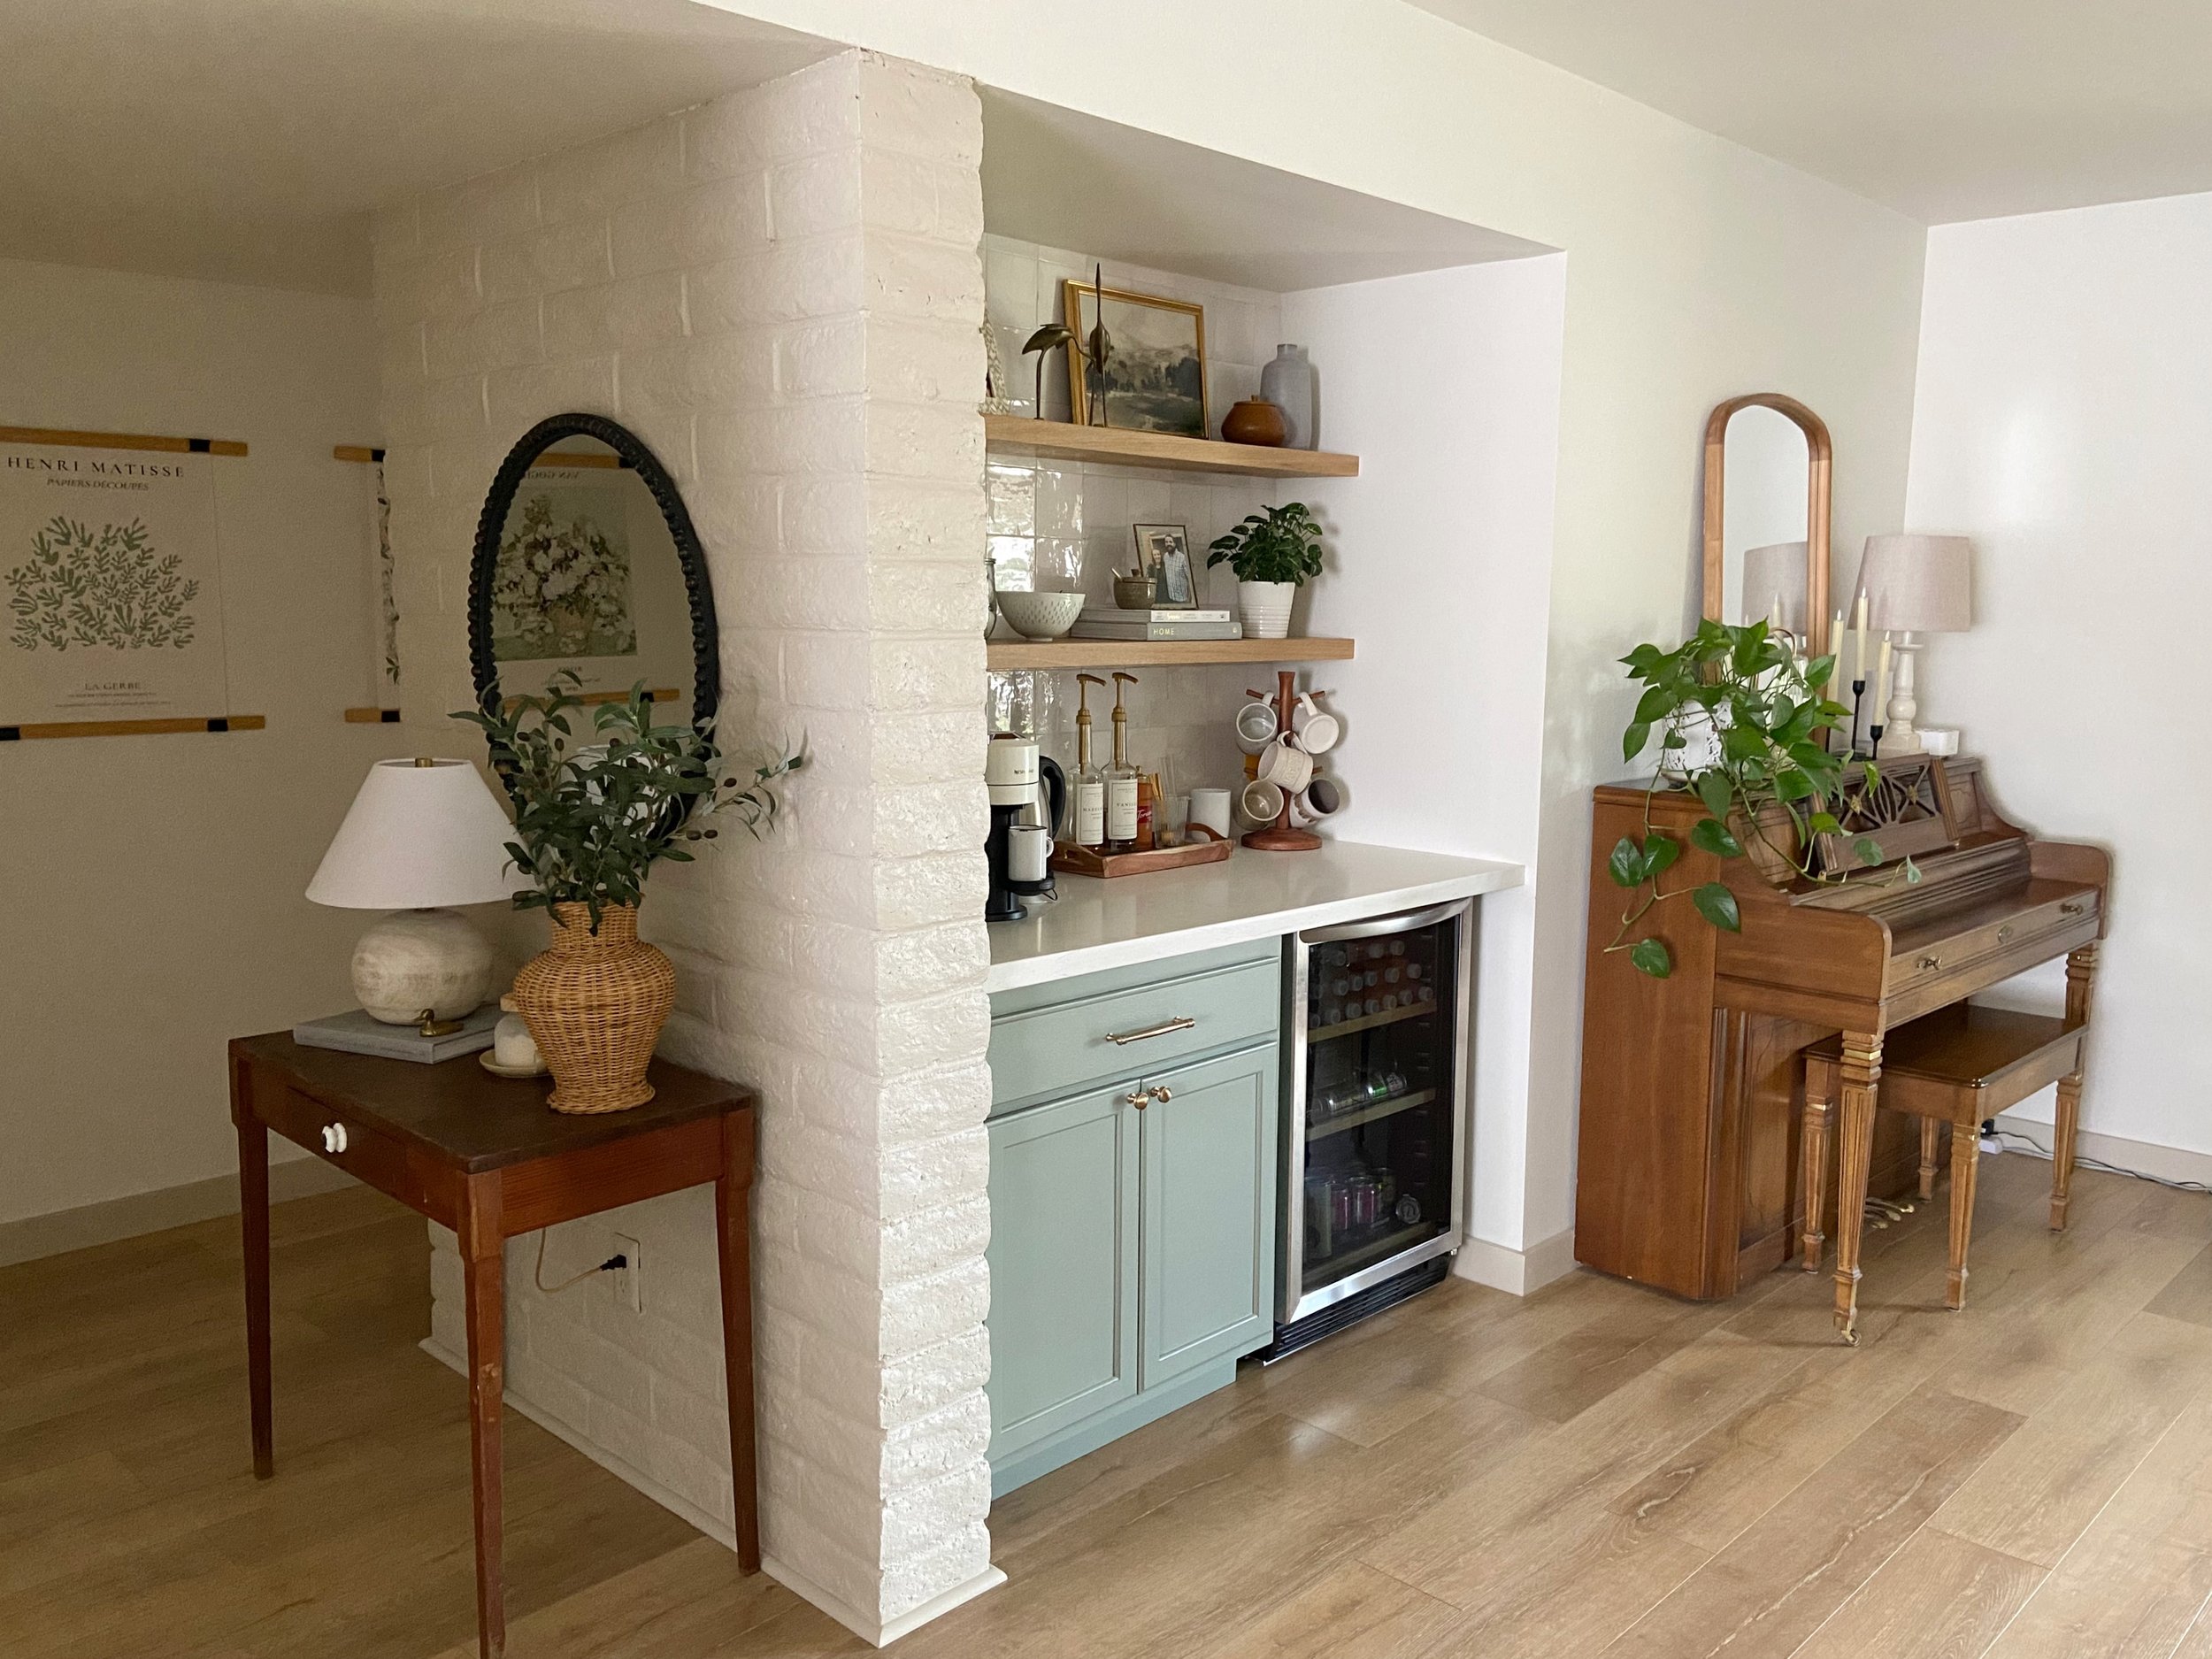
Once those final few tasks were done, I was able to decorate it for real and we’ve been using (and loving!) this space for about a year now. Every few months I swap out the decor for things that reflect the season or to showcase a new thrifted find. It’s had a lot of different looks over the last year, but here is my current iteration, which features things that I use, love, and enjoy looking at each day while making a cup of coffee or sitting at the dining table.


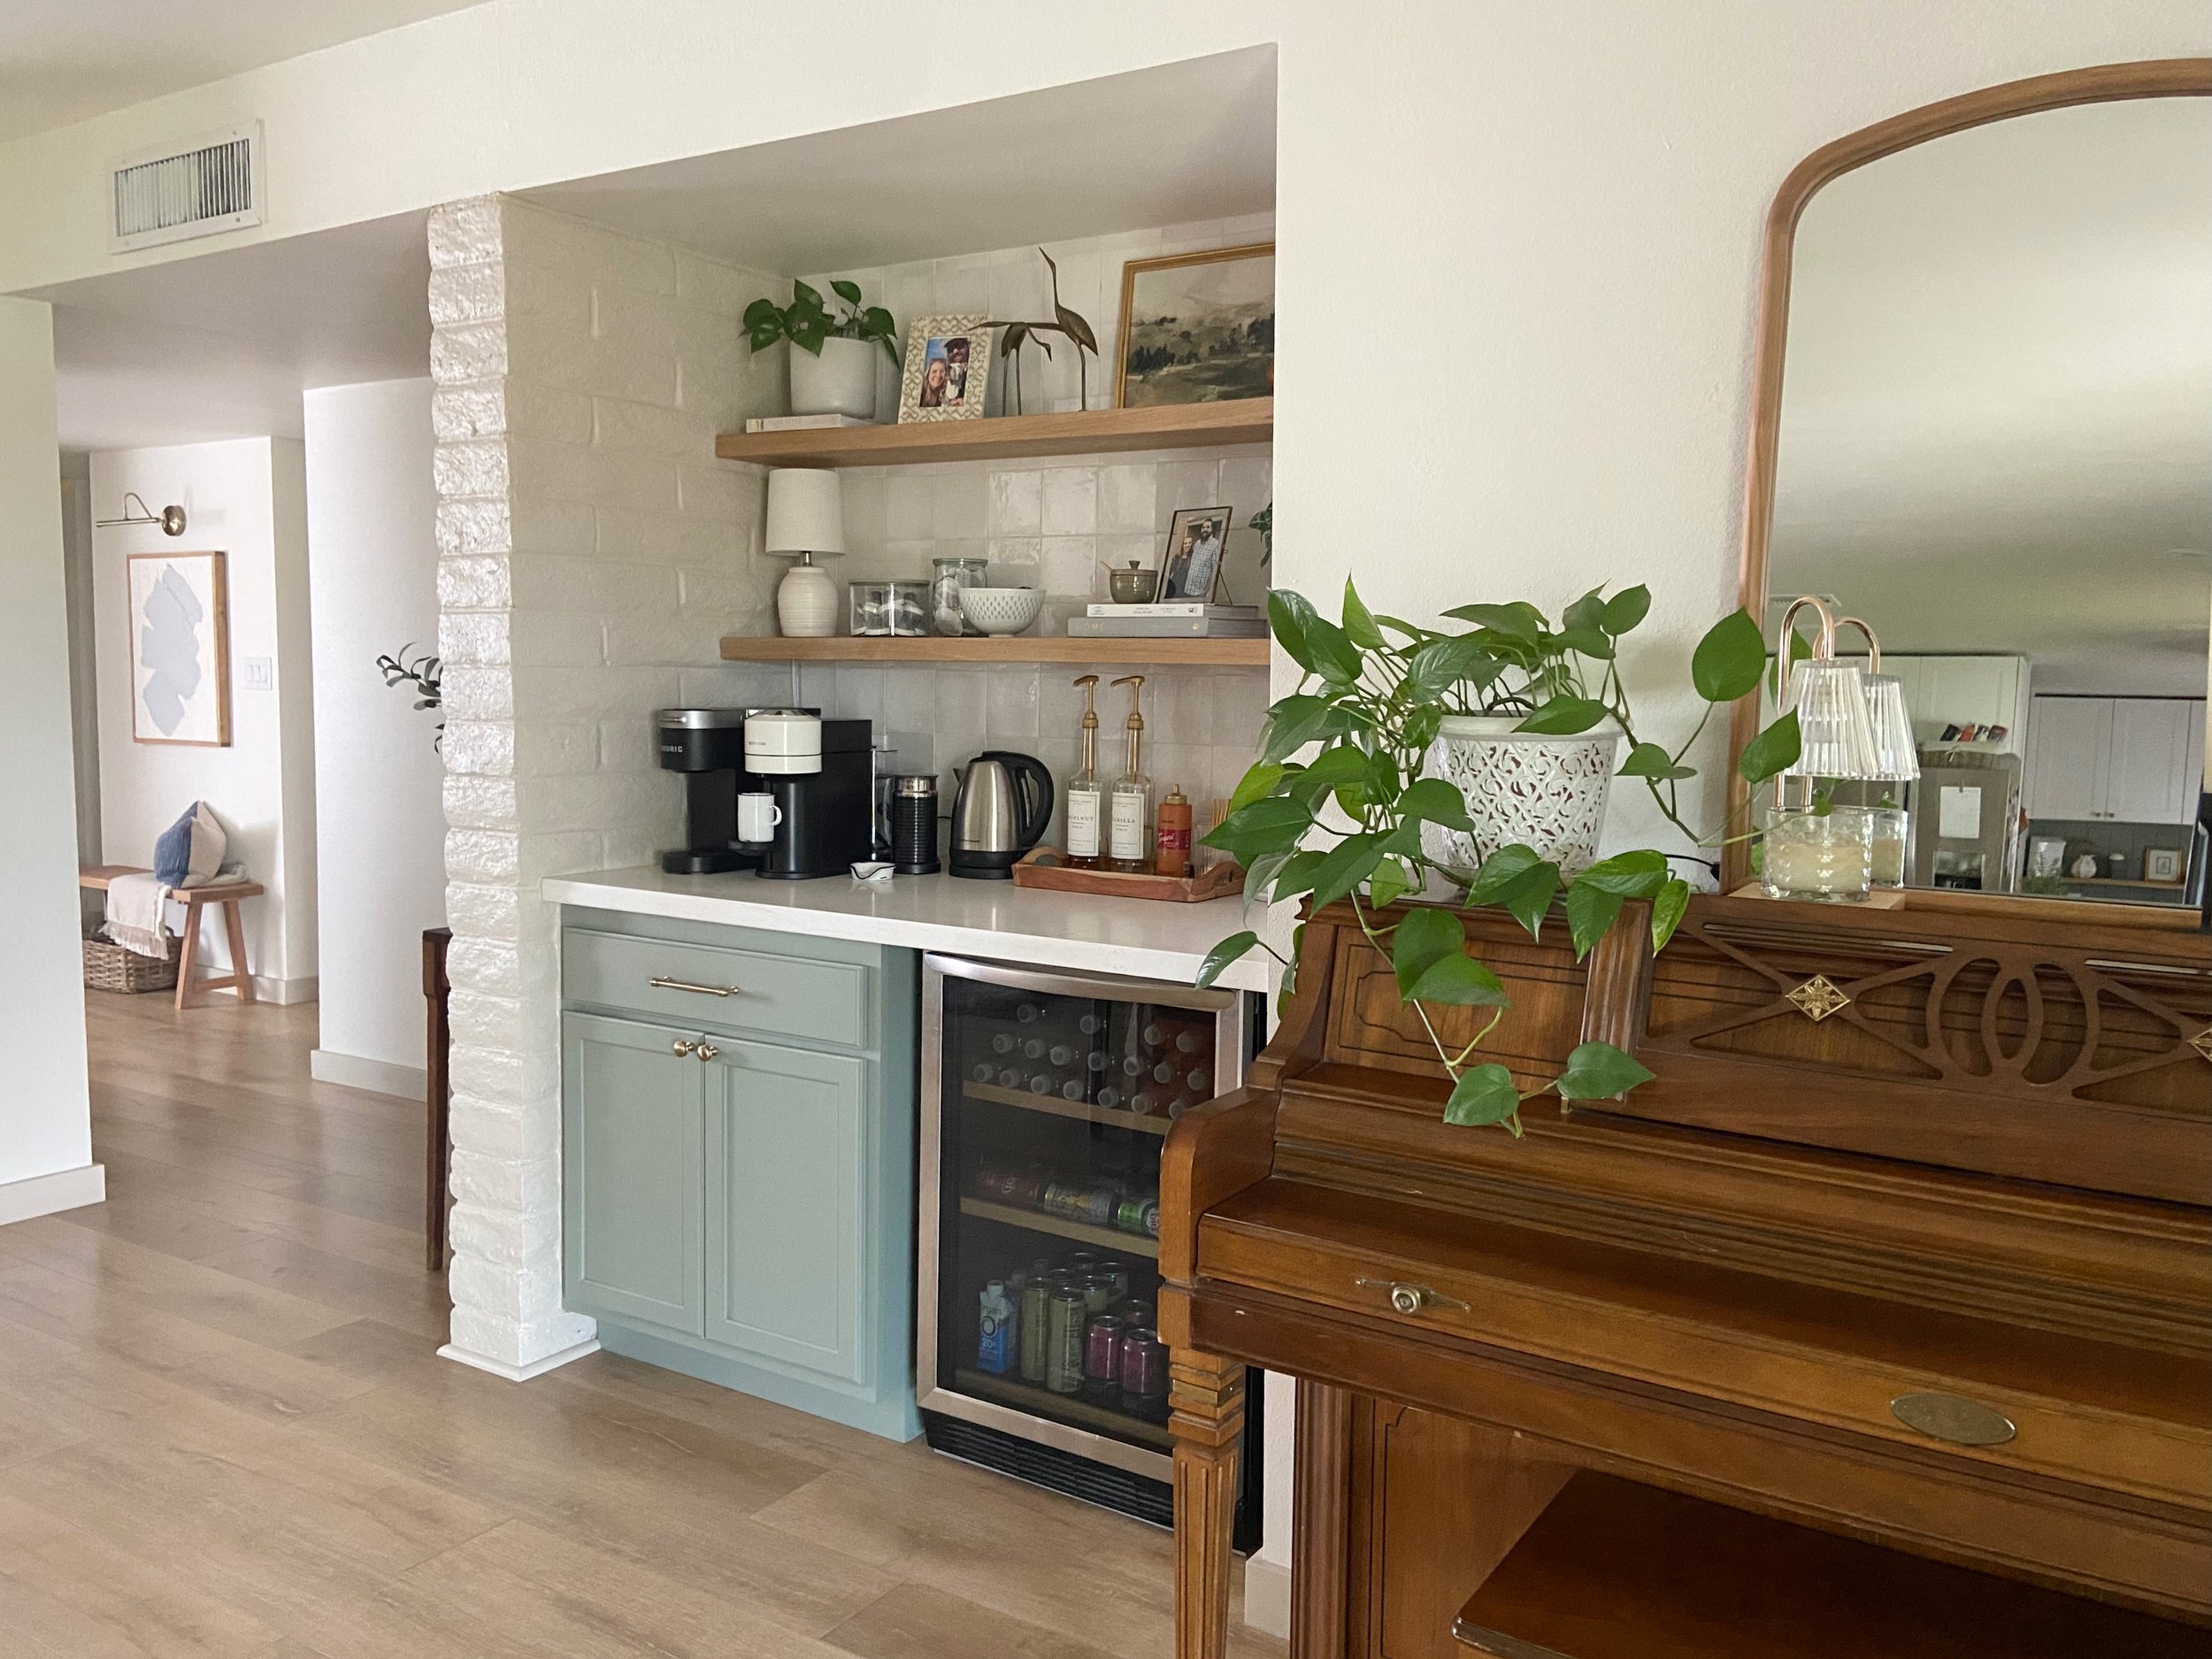

Below is a before photo followed by a shot of the same angle as it is today. I still can’t believe it’s the same space!

I feel so lucky to have this beautiful space to use every day and am so proud of the work we put in to create it. I’m so glad we decided to knock a hole in the wall and just go for it!
Next up, in the Reno Recap series, we’ll take a look at our guest bathroom.
P.S. if you’re looking for sources of anything we used in this space, see below!

Coffee Bar Sources:
Countertop: Carrara Marmi Quartz in 2mm
Cabinet color: Meadow Sage by Sherwin Williams
Brick wall color: Accessible Beige by Sherwin Williams
Lamp (similar)
Tray beneath syrup bottles: HomeGoods
Espresso cup (similar)
Coffee machines: Keurig / Nespresso / Frother / Kettle (similar)
All other decor is either thrifted or old 😊
Missed previous posts in the Reno Recap series? Check them all out here!