
Reno Recap: Guest Bathroom
I’m back again with another Renovation Recap! This time we’ll be taking a look at another space that got a giant visual makeover plus a ton of functional add ons as well: The guest bathroom.
This space was quite boring when we moved in. I think everything in it was original to the home, minus the linoleum flooring that was put in in the 80s maybe. Here’s what it looked like the day we bought the place:
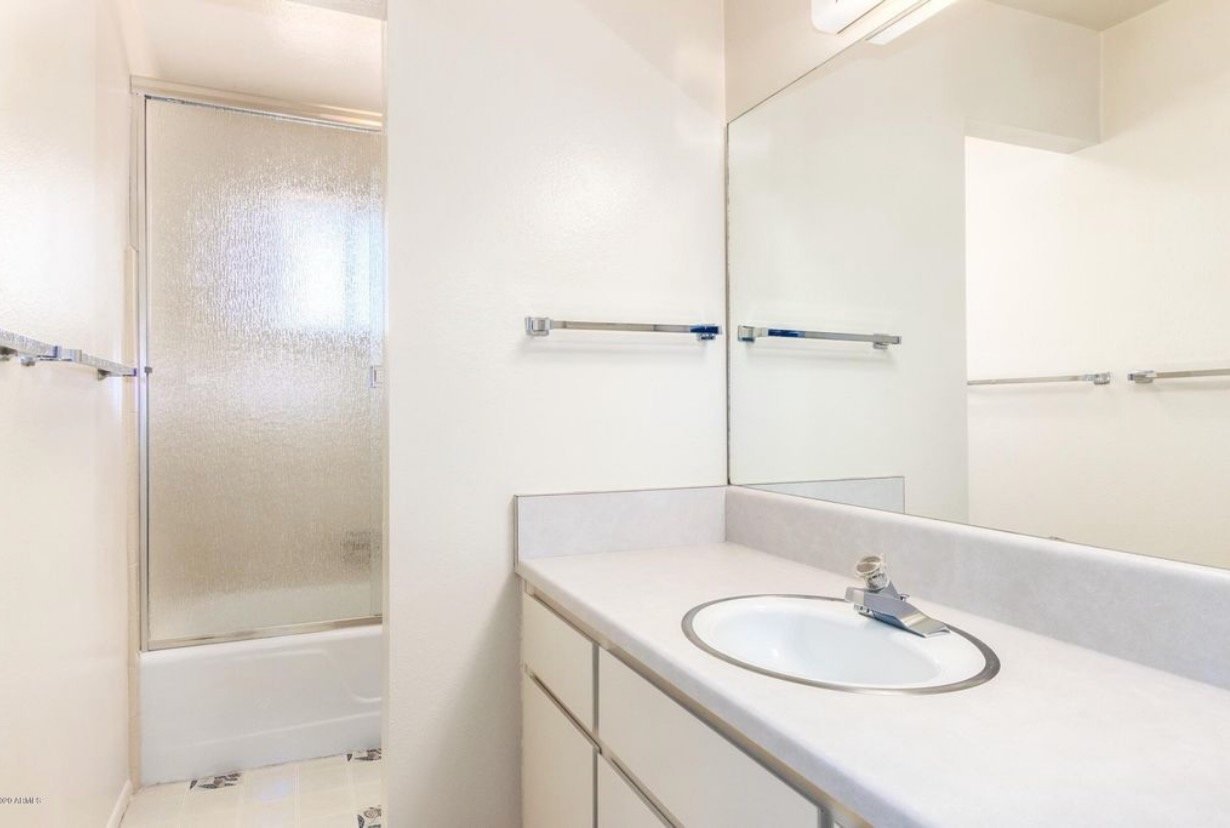
We knew we wouldn’t work on this room for quite some time and since it’s a space that we and our guests use frequently, we gave it a small facelift just after moving in. We figured that would hold us (me) over until the time came to fully renovate it a couple of years later. It’s amazing what a coat of paint, new fixtures, and swapping the glass shower door for a curtain can do! (Although, what you don’t see in these pictures is the ugly rust spots in the sink or the original yellow tile in the shower 😬).

That small makeover held us over for about 2 years until the time finally came to give this bathroom the attention it needed. In the fall of of 2022, it was finally time to say goodbye to this bathroom! Oh and one thing to note is that we were hosting family for Thanksgiving and had a hard deadline to get the room done within a few weeks (sound familiar?!). We put ourselves in the same situation with our kitchen renovation the year before. Apparently we never learned our lesson 🫣
I knew that I wanted to give this room an entirely different look and feel—think bright white tile, textural shiplap, and a mix of black and brass hardware. Here’s a moodboard I made that guided me in the planning process:

As we were thinking of the layout of this space, we realized that one of the biggest issues that needed to be addressed was the wall that separated the vanity from the toilet/shower area. It did add a bit of privacy, but completely blocked off any natural light that came through the window in the shower. It also made both areas feel really cramped and we knew that by taking it out, the entire space would feel roomier.
Demo started with removing the original vanity and then taking down the wall. The next morning, I was (pleasantly) shocked by how much light came flooding through that window! 😍

In the photo above you can see how the original tile stopped midway up the wall. The tub was in great shape still so we’d be able to leave that in place, but we definitely needed to replace the tile and wanted to take it up to the ceiling for a more modern look.
Josh got to work on demoing the tile as well as removing the toilet and flooring. It started looking much, much worse, very quickly haha.

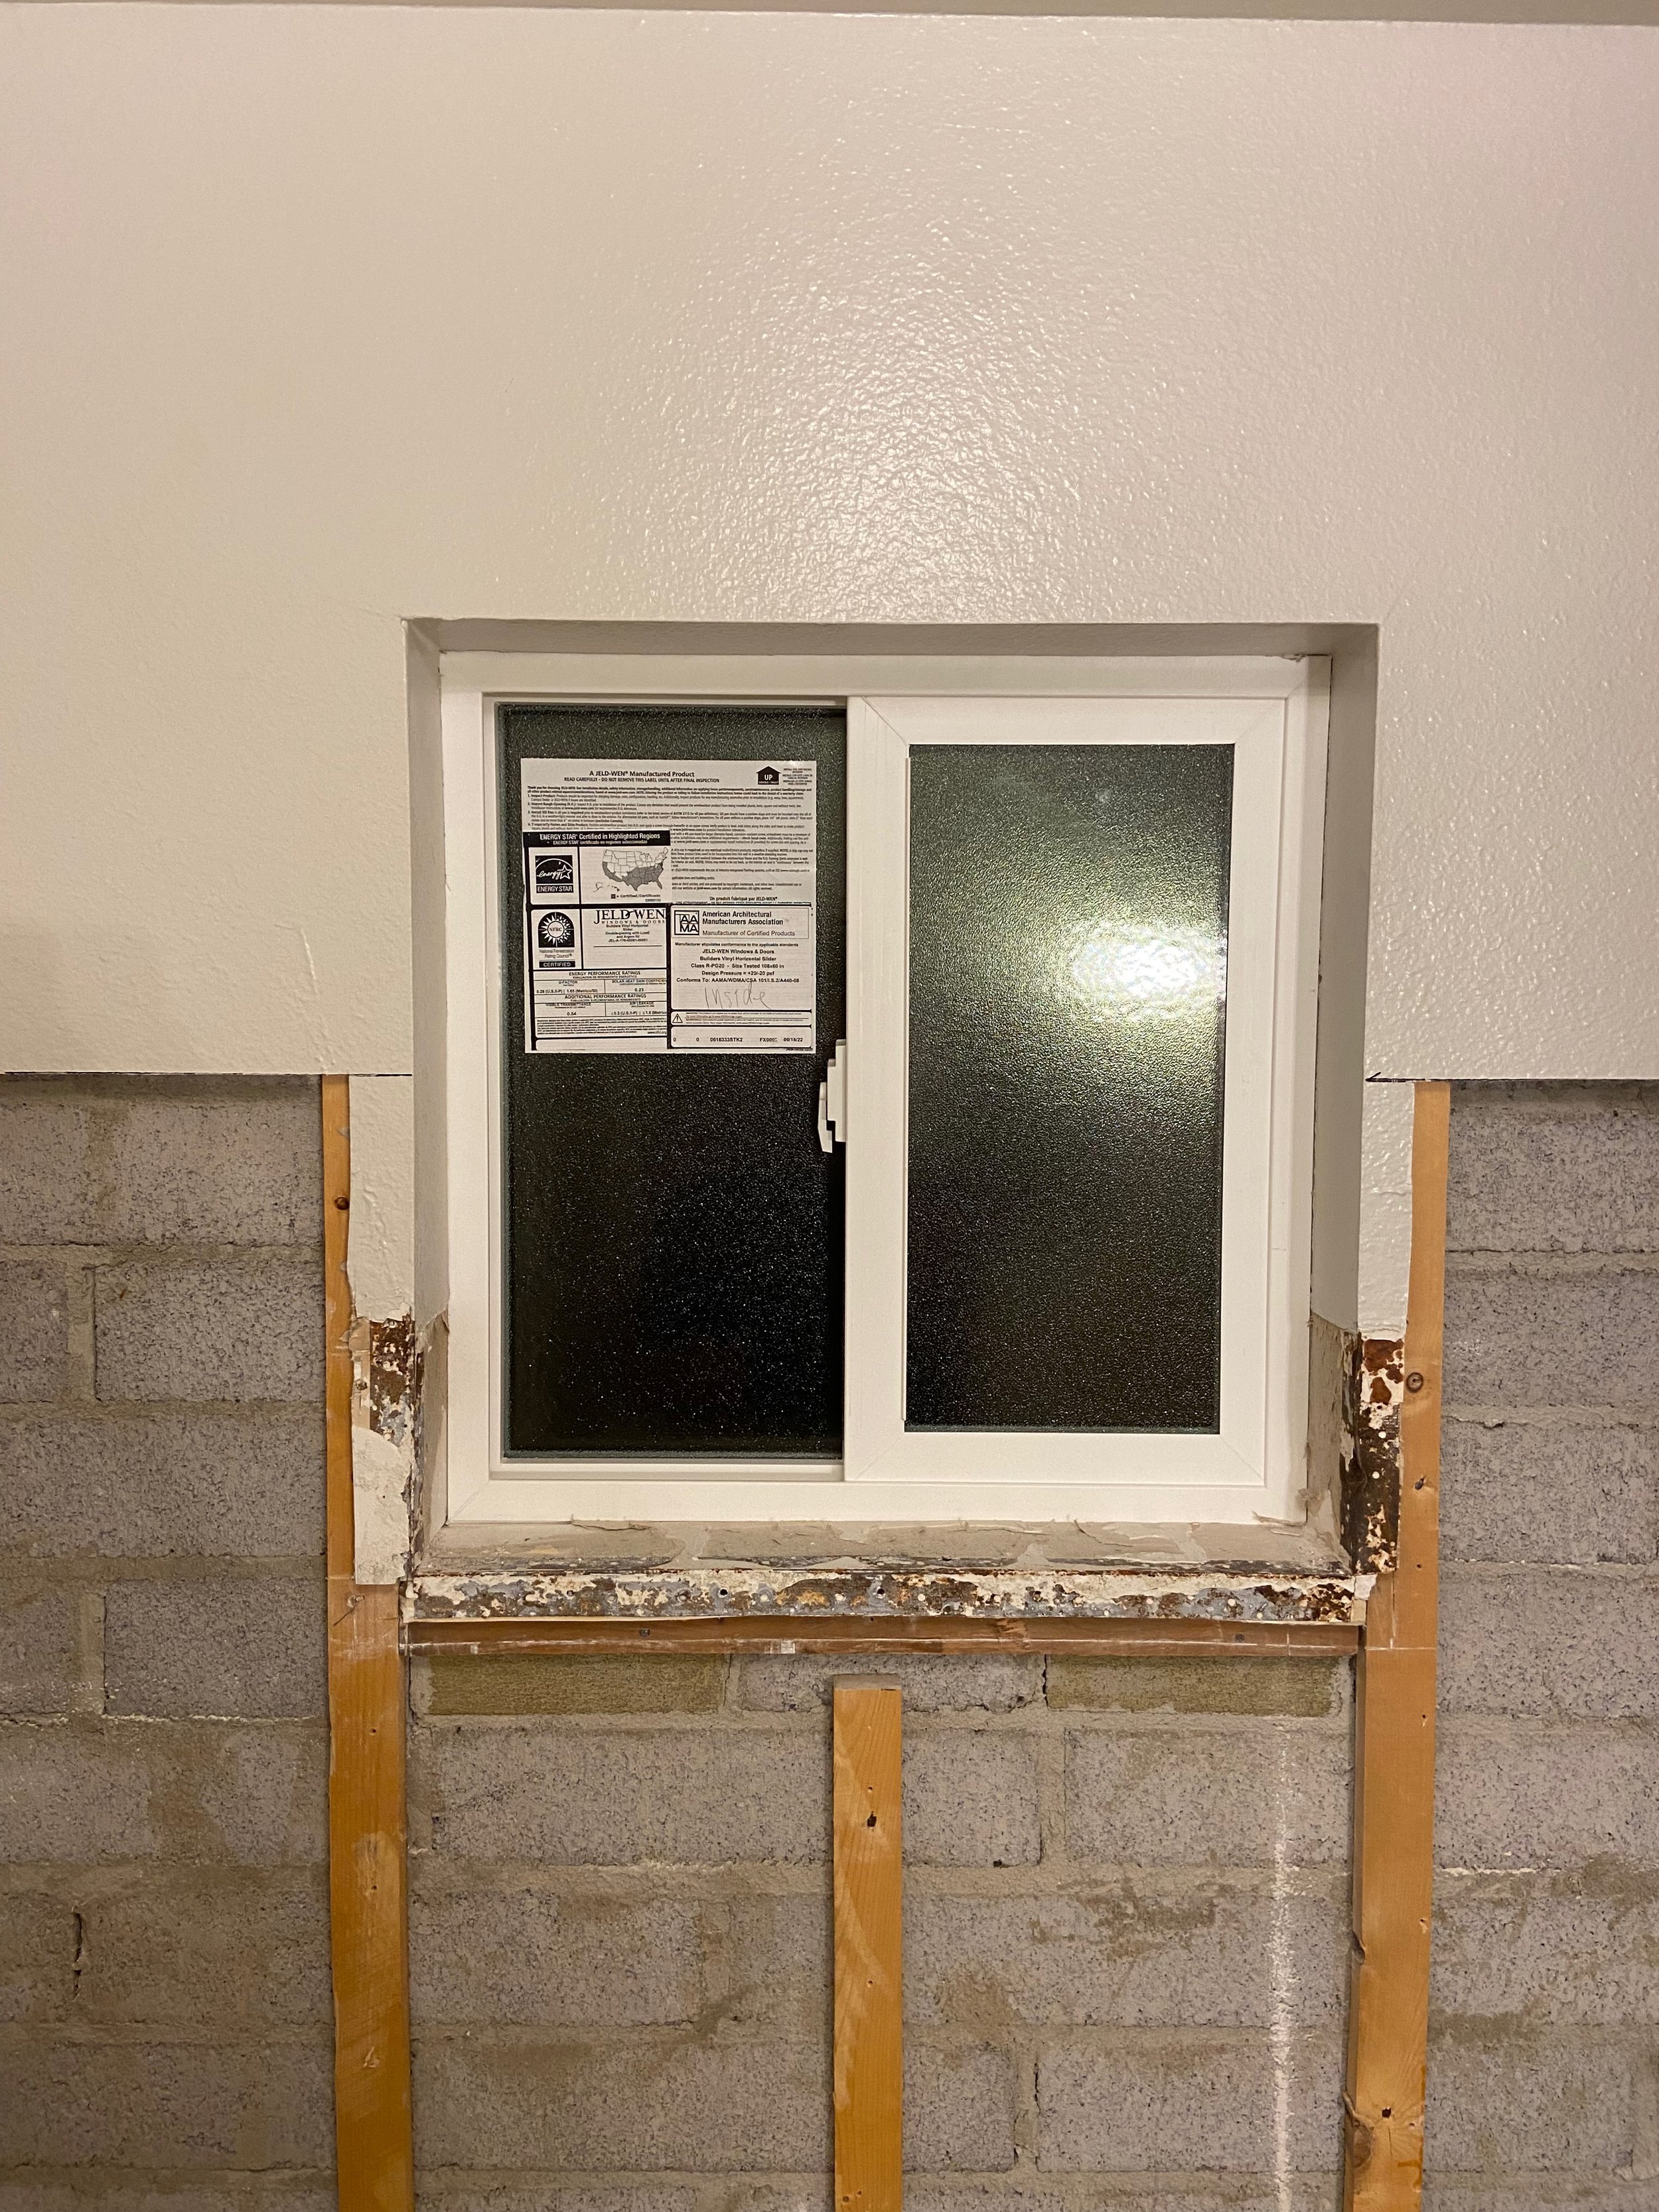
Our plan was to replace all of the aluminum frame windows throughout the house a few months later, but since everything was already torn up, Josh replaced the one in the shower before moving on. We picked up a replacement window (with obscured glass for privacy) and he was able to swap it out pretty easily!
One other thing we wanted to improve in this bathroom was the height of the shower head. We’re both on the tall-ish side (I’m 5’7” and Josh is 6’3”) and it’s always a bummer to shower in a bathroom with a low shower head. So we figured that while we had everything opened up, we might as well raise this one up a few inches. We raised it about 6” and it’s the perfect height now!
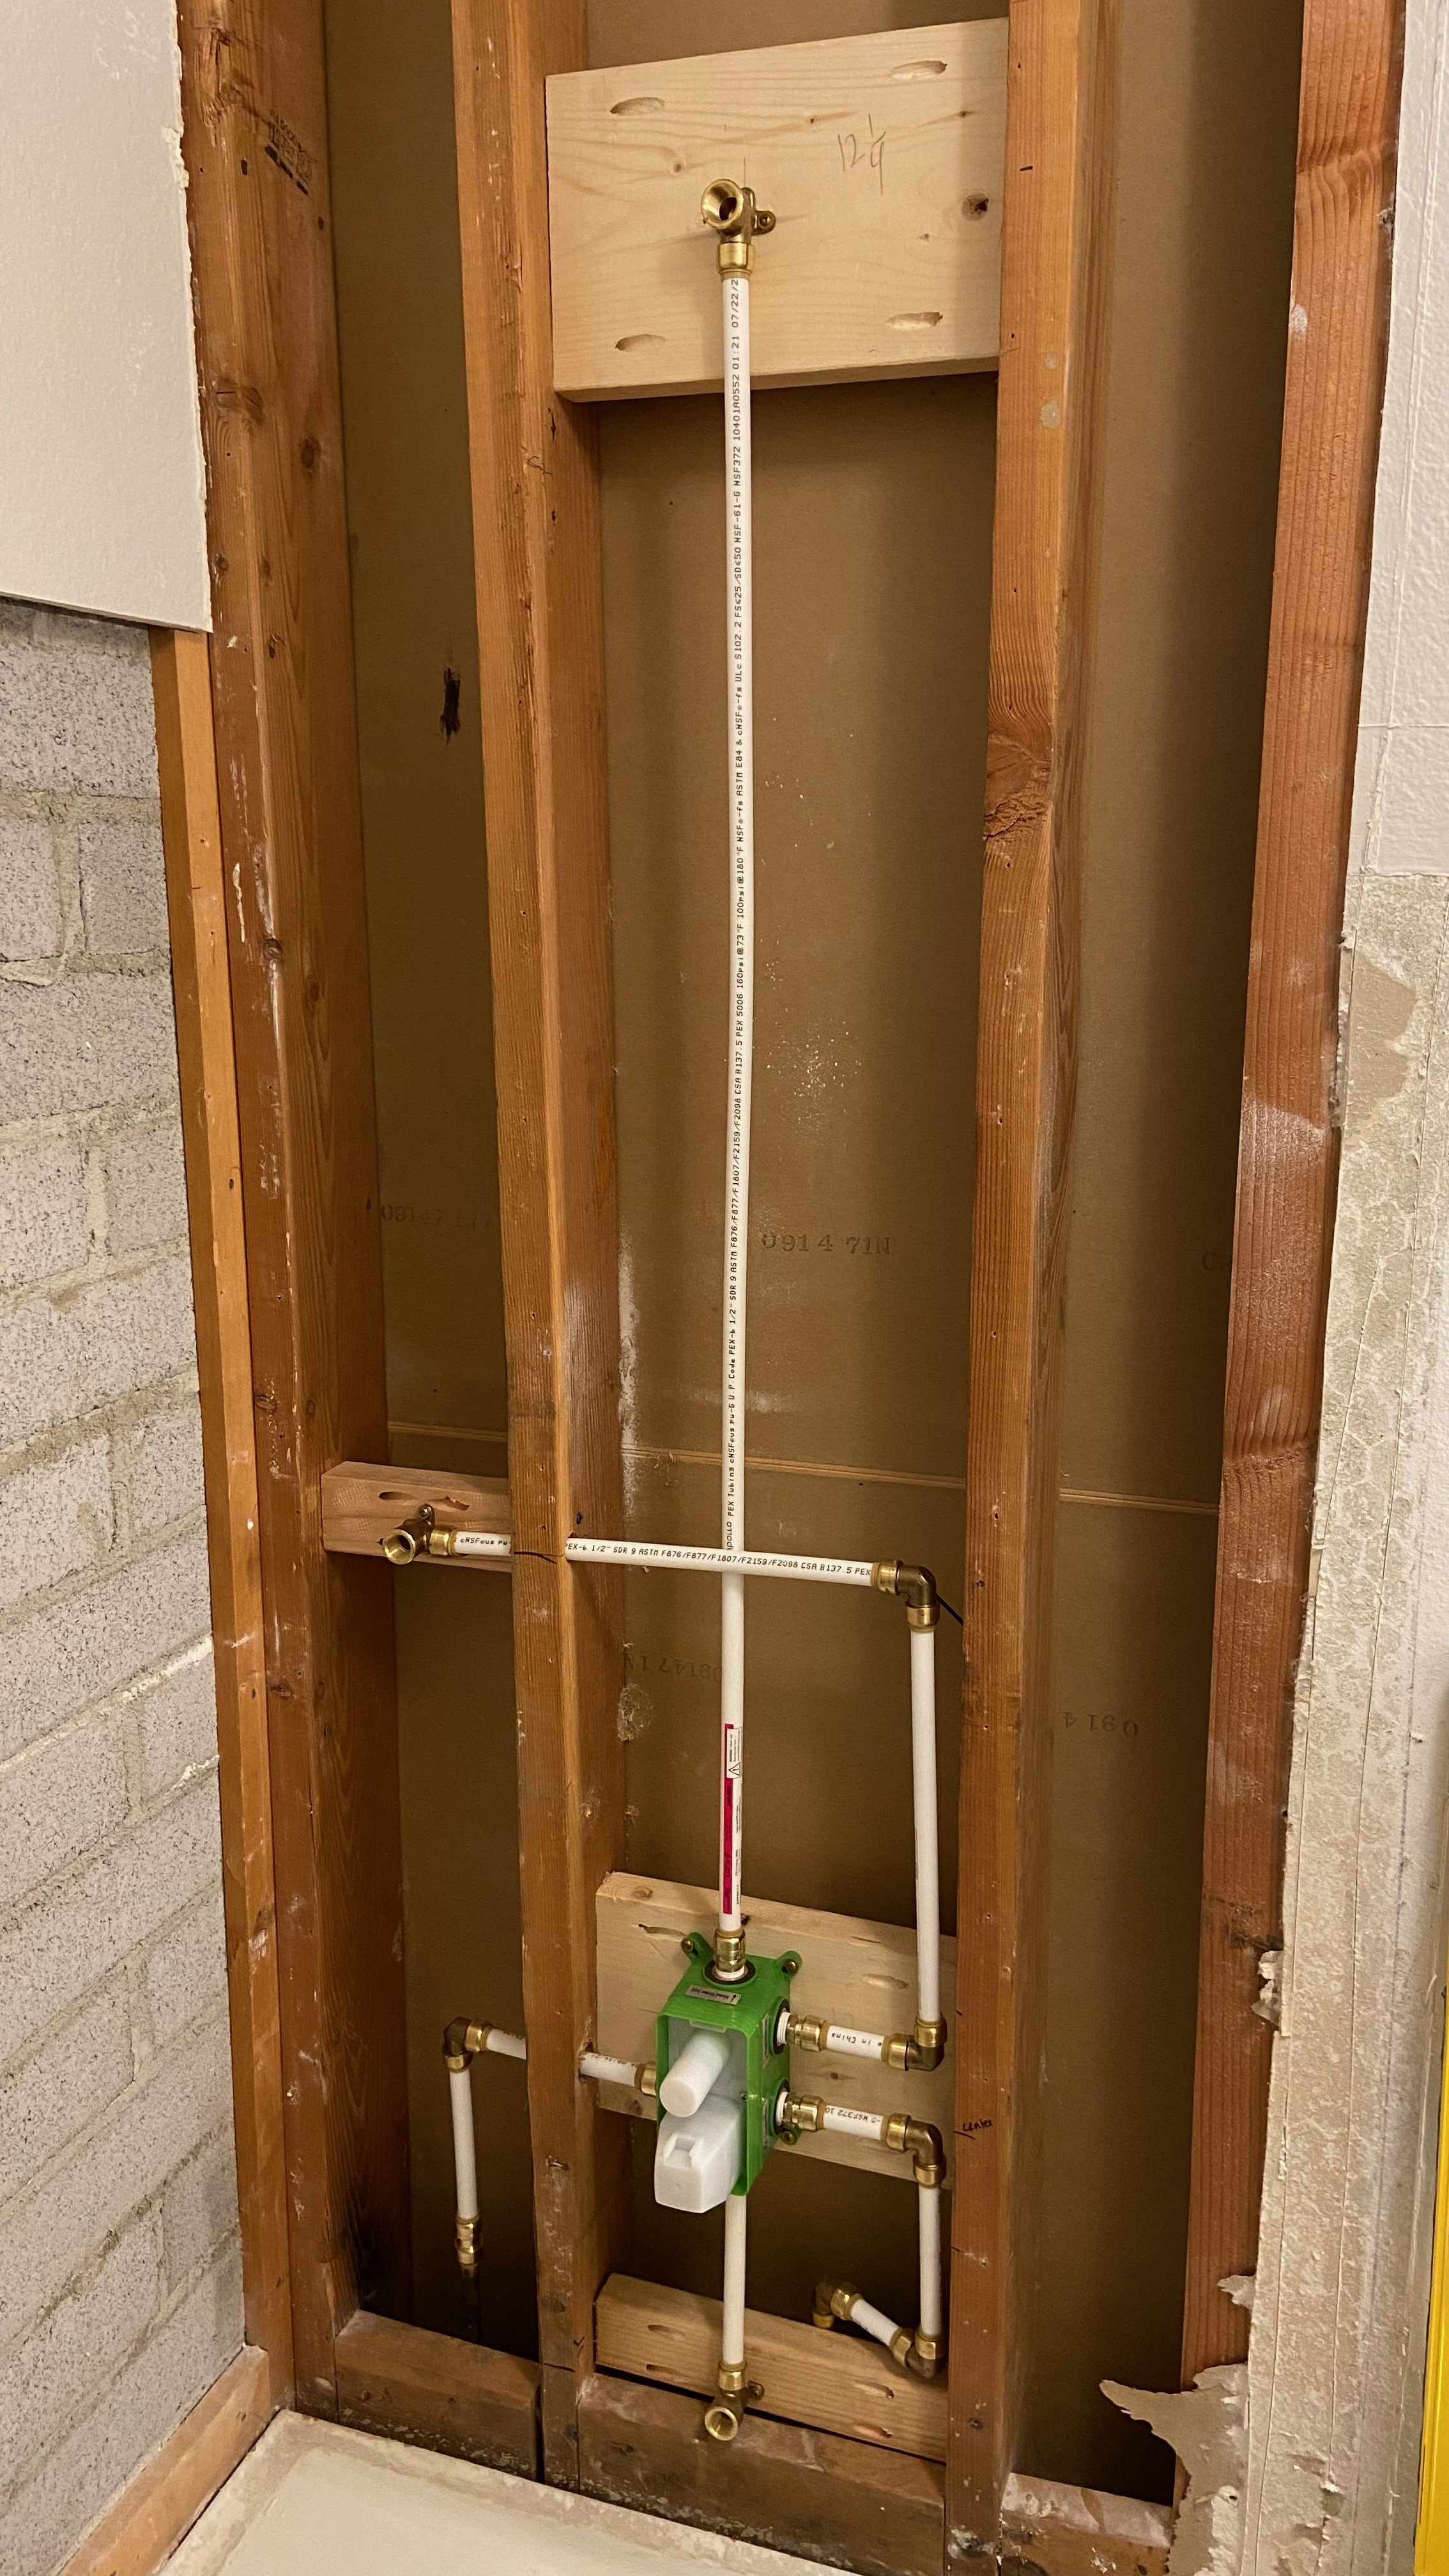
The shower faucet set we chose also came with a handheld sprayer, which would come in super handy for cleaning the tub or for giving Gladys (our dog) a bath. Here she is checking our work to make sure it meets her demands 😉

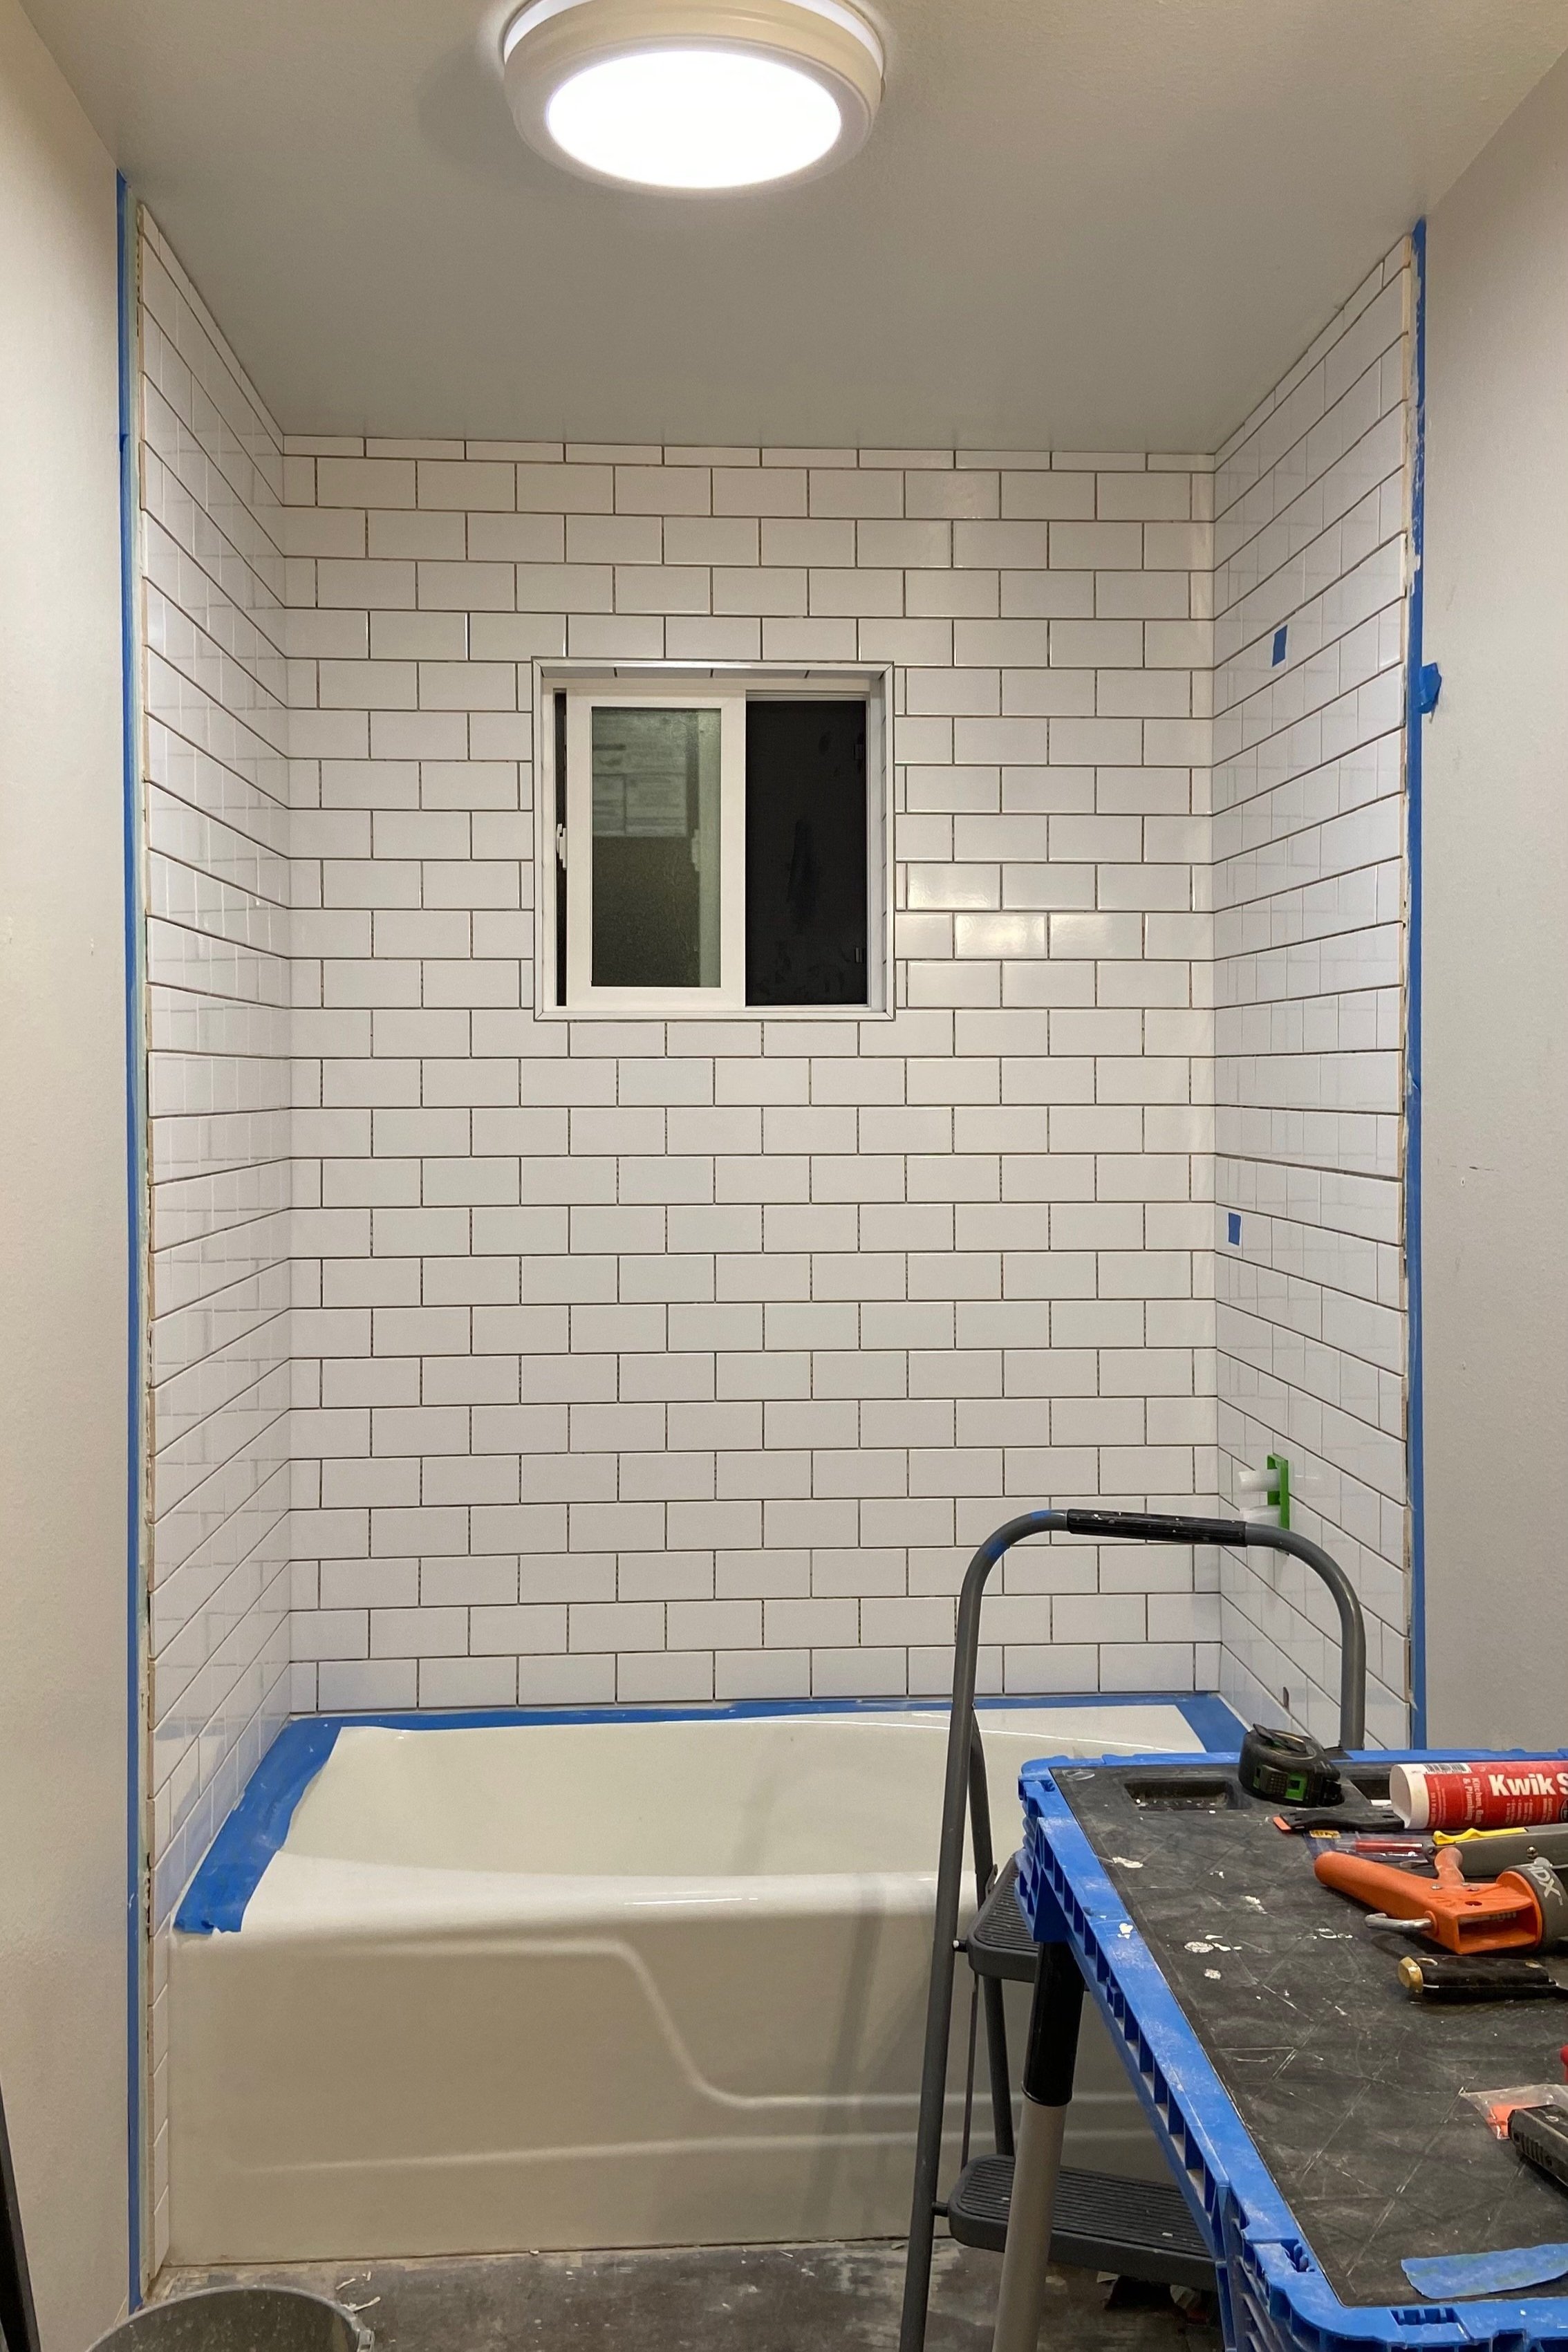
Next up came prepping for new tile. We used cement backer board where we removed the old tile and then went all the way up to the ceiling with liquid waterproofing membrane, just to ensure that everything was as watertight as possible.
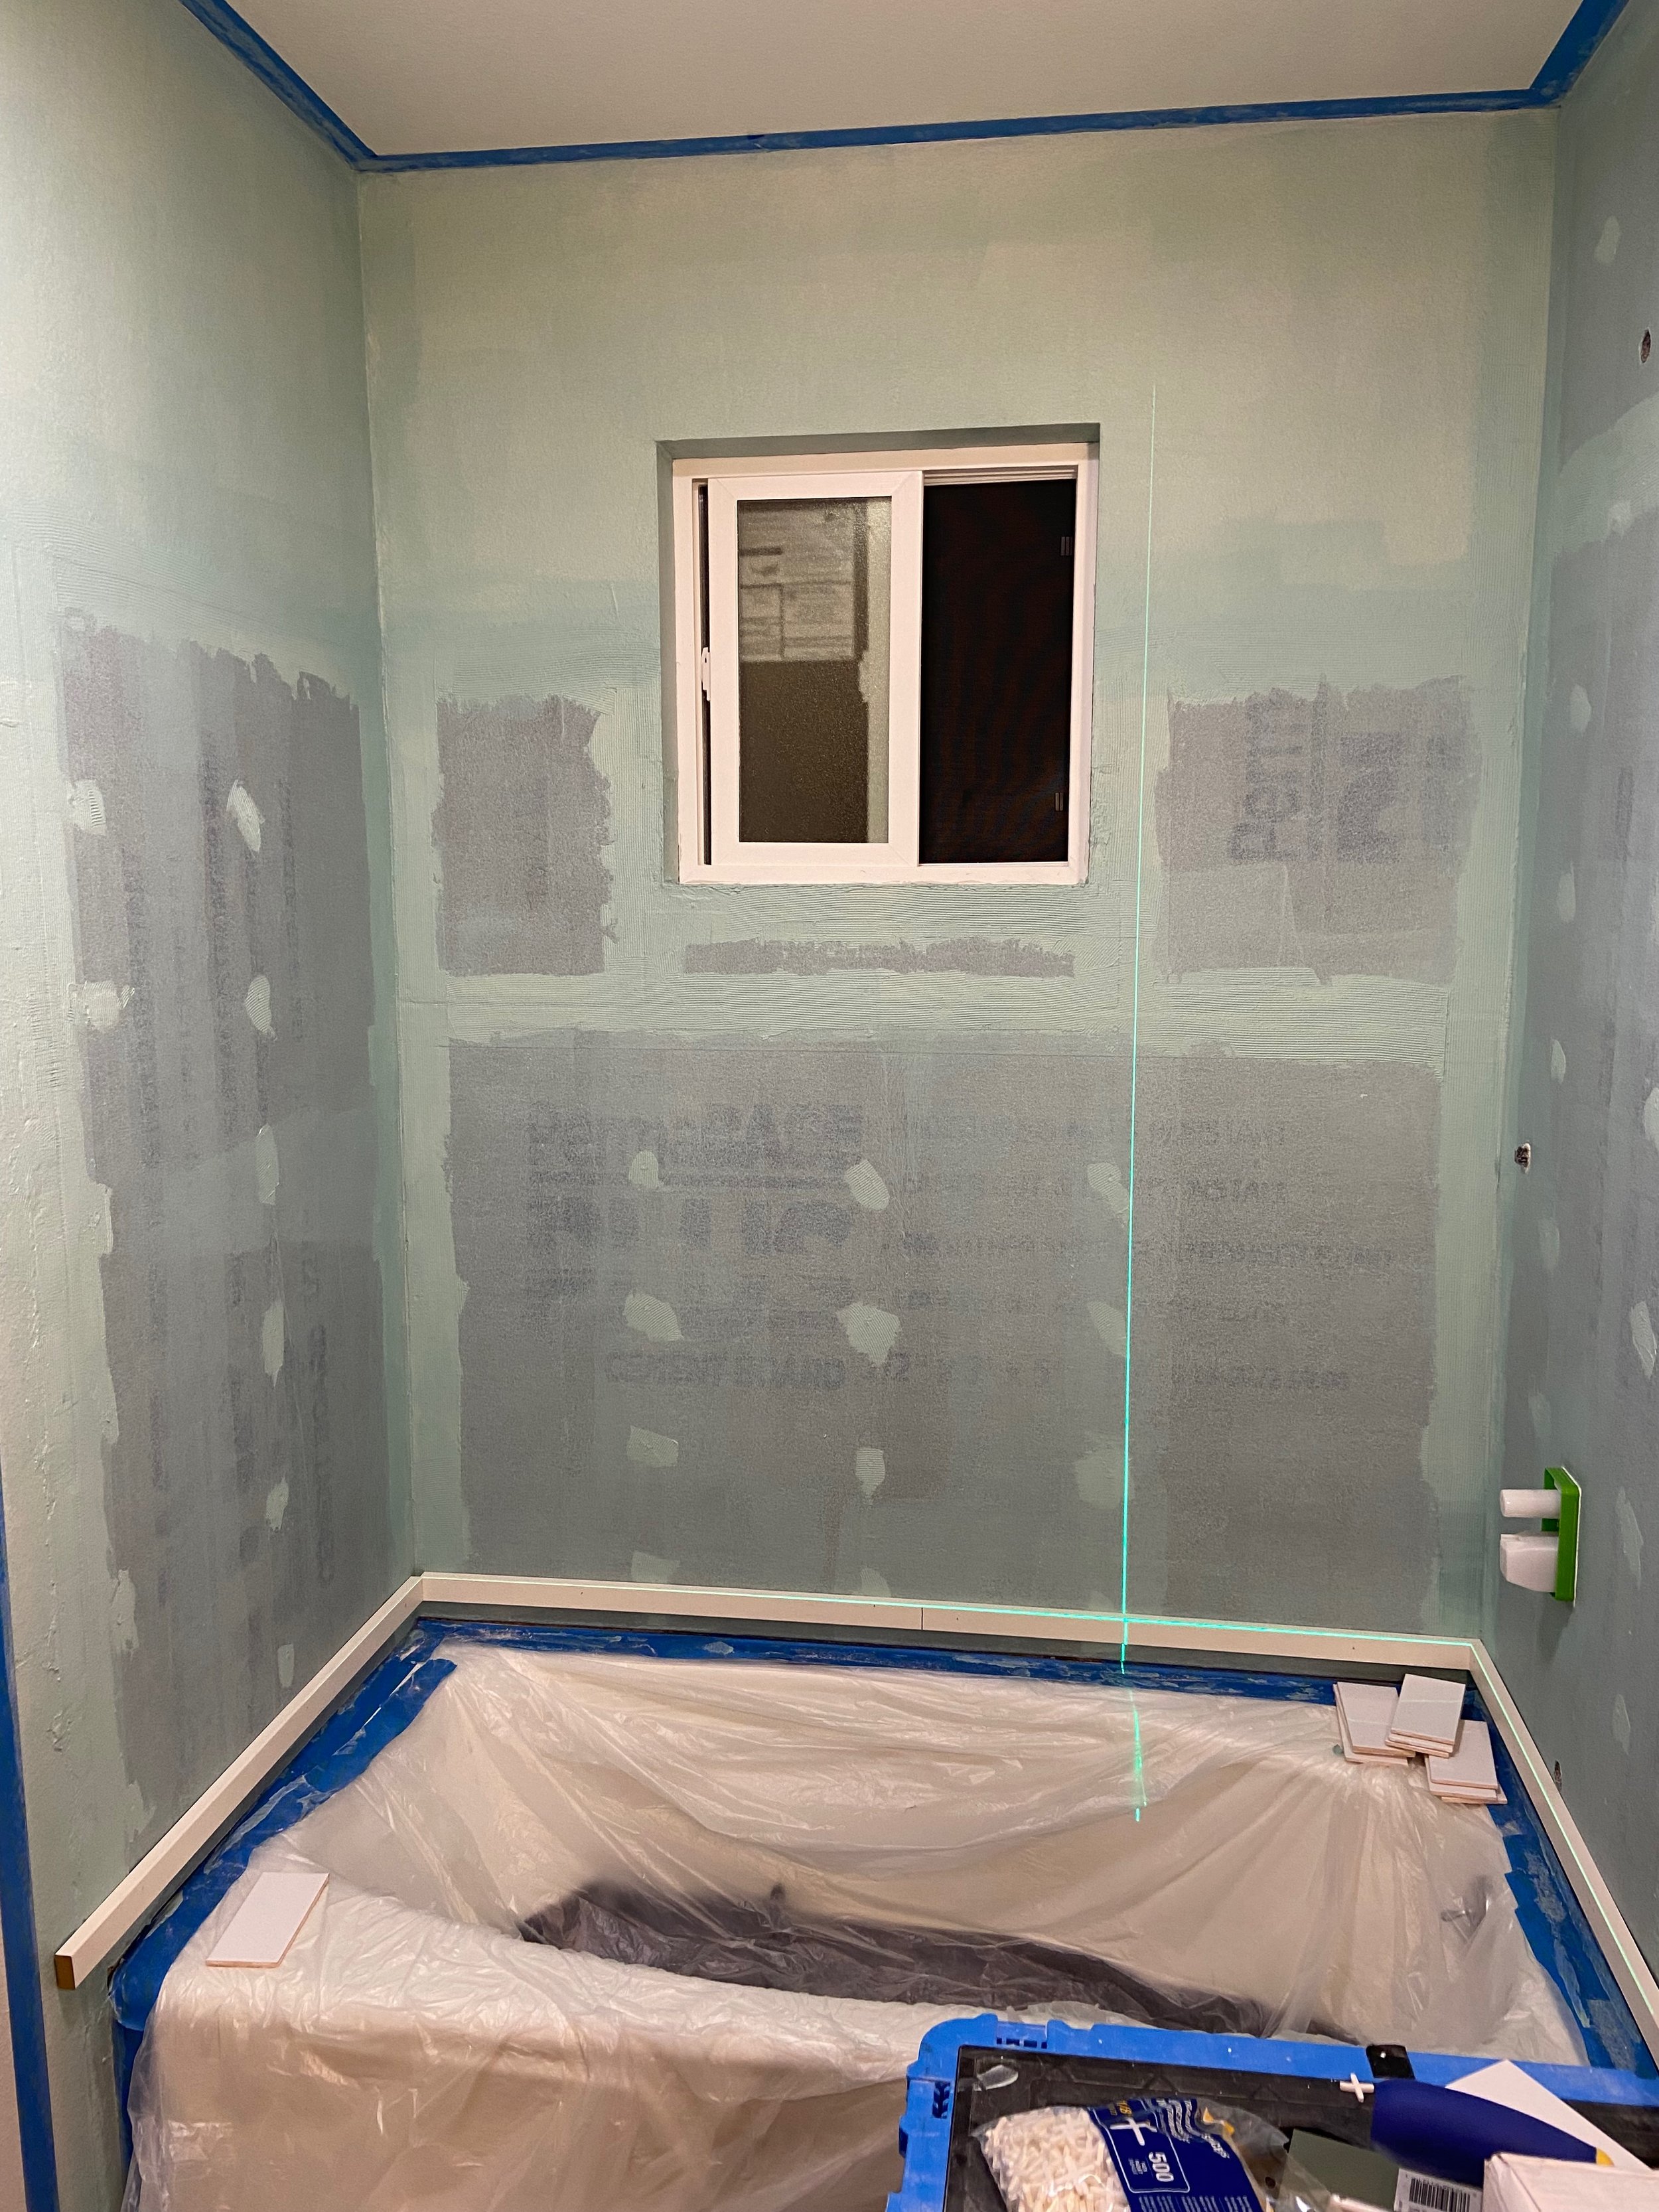
After that, we were finally ready for tile! We went with a classic 3”x6” white subway tile. At $0.15 per piece, it fit our budget perfectly and I’ve always loved the timeless look of it!


This was another project where our trusty laser level was a life saver!
Tiling was definitely time consuming, but altogether pretty easy. We came up with a good process of Josh measuring/installing and me making cuts with the tile cutter. We also used a wet tile saw for the more intricate cuts.
I wish I could tell you that grouting was easy-peasy-lemon-squeezy, however…it…was not. It should have been easy, but we learned the (very) hard way that you should only grout in small sections and wipe off the excess as you go. We applied too much and didn’t work quickly enough to clean it off before it began to set up (and it set up much quicker than we were expecting). I won’t go into the details and share how many curse words were spoken, but needless to say, we stayed up until 4am fixing this 🫠 A hard lesson to learn, but a mistake we won’t make again!
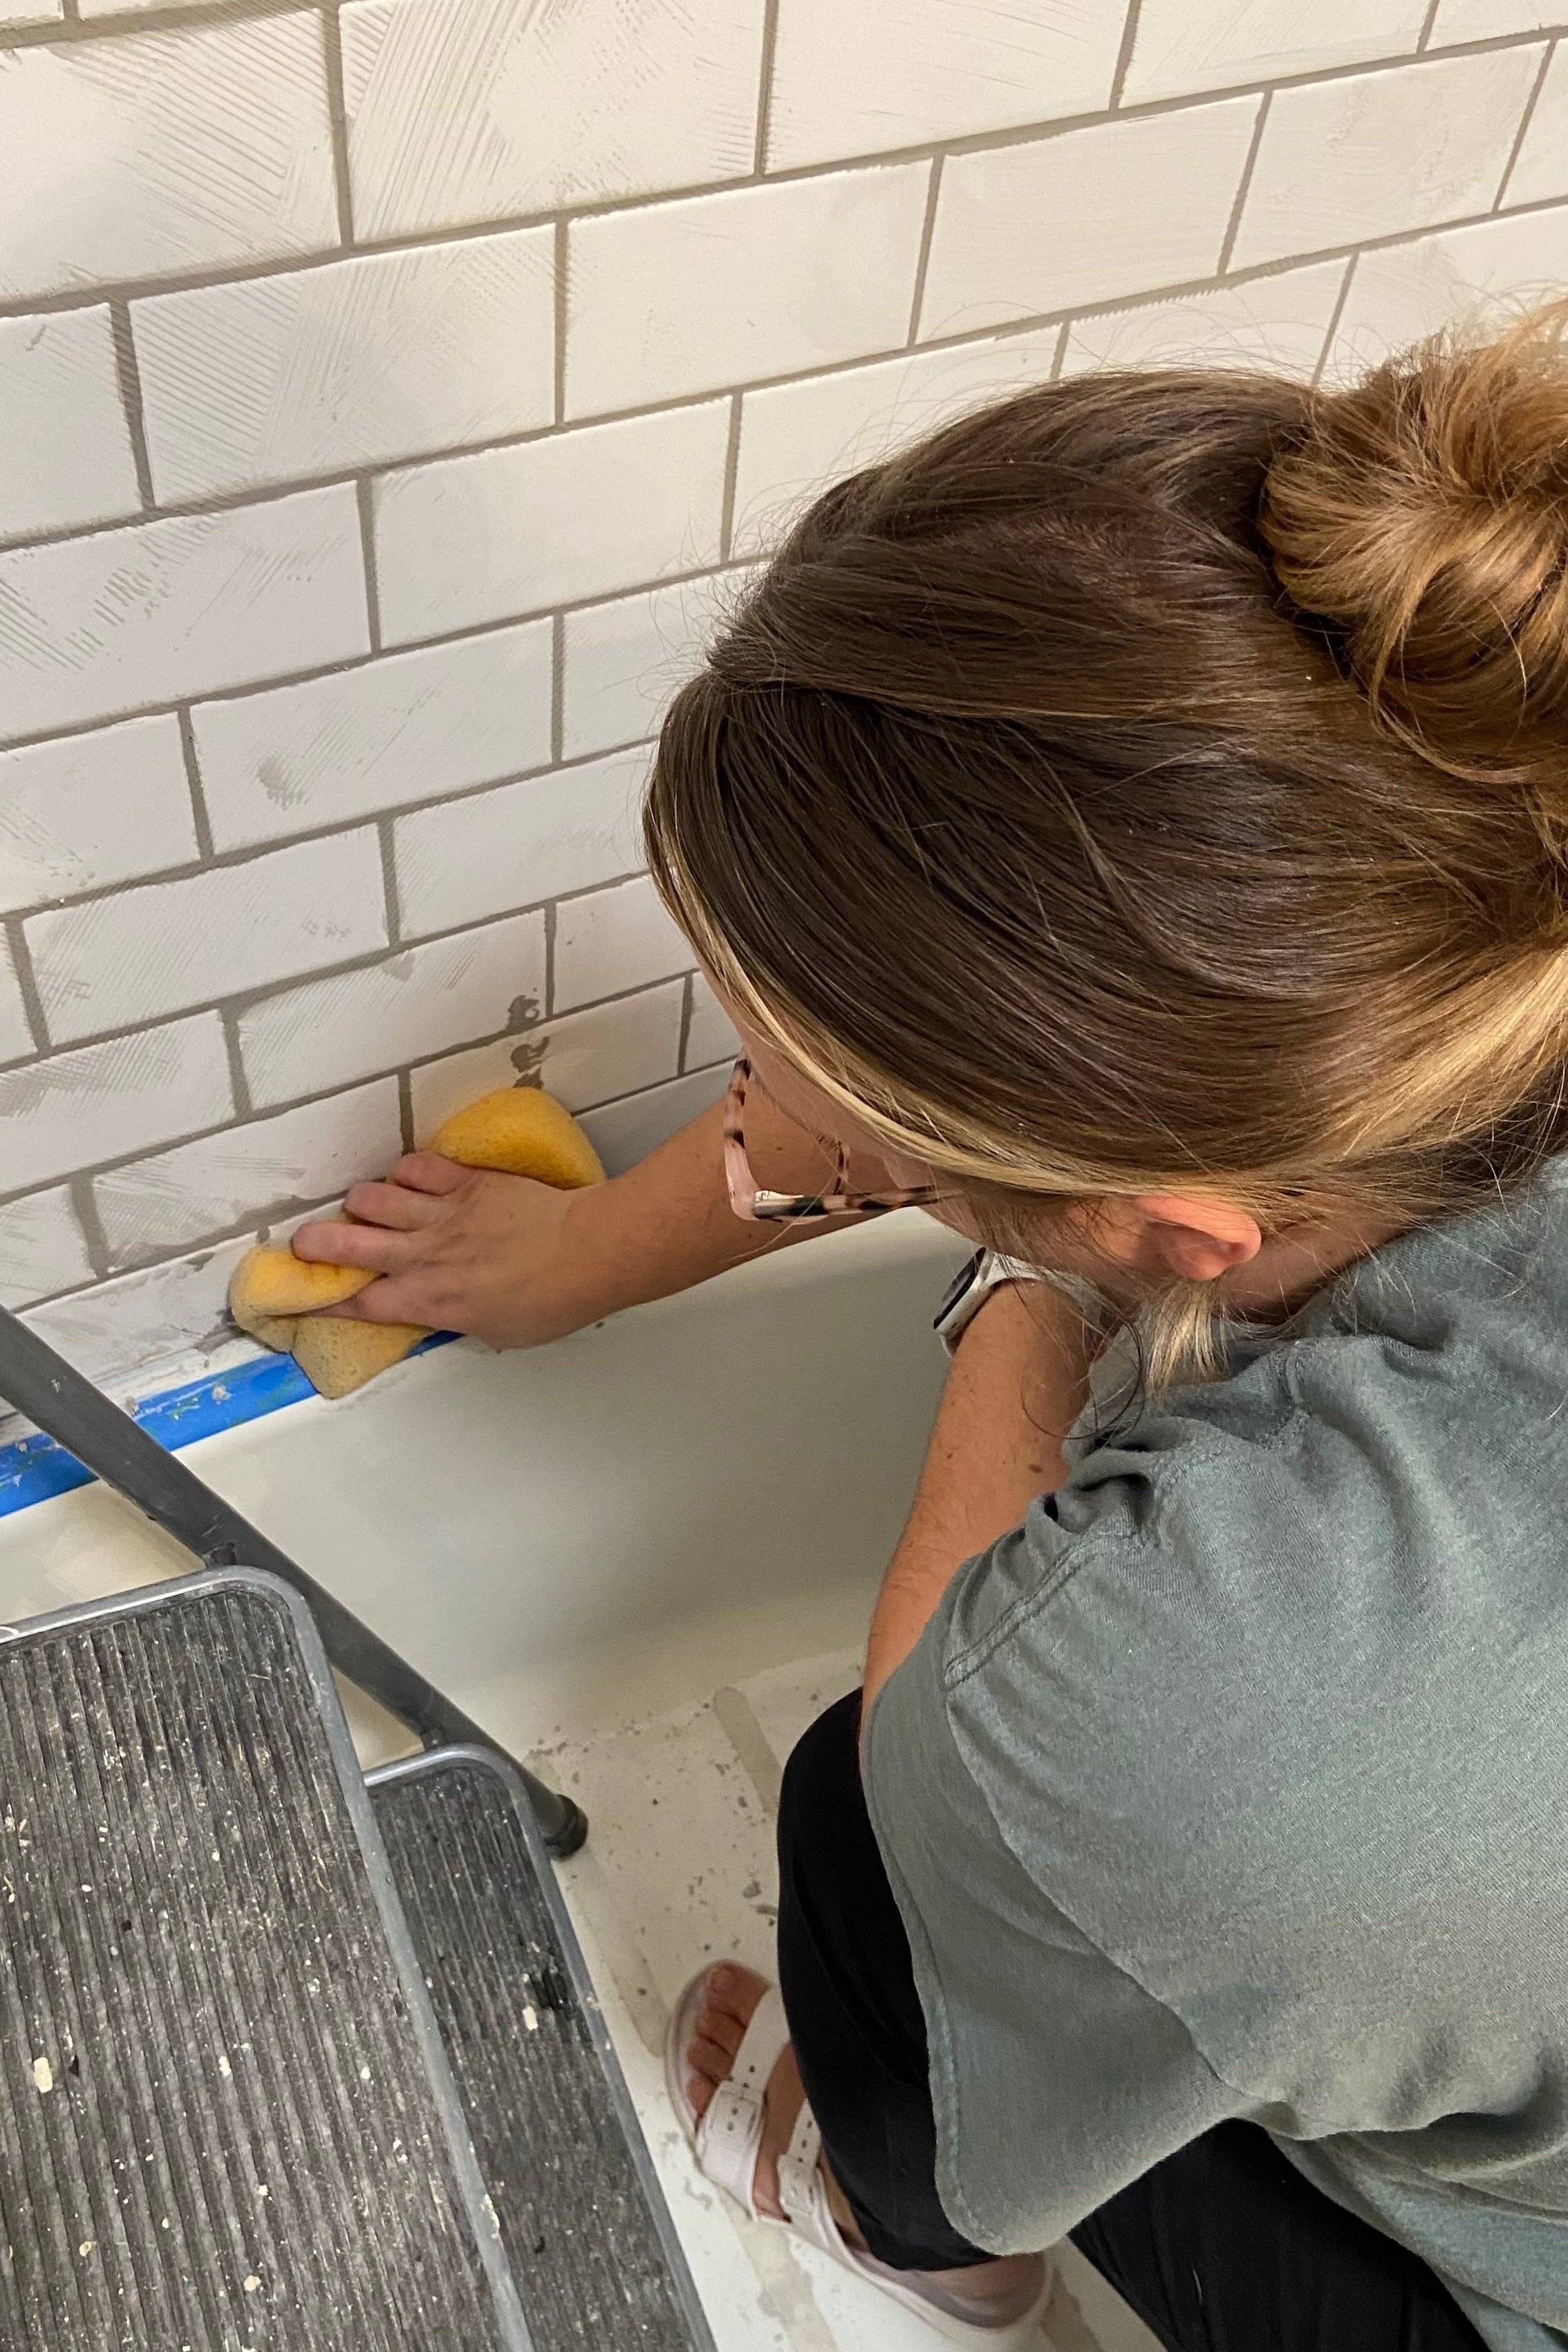
We used this Mapei Keracolor Unsanded Grout in Warm Gray, but if it’s in your budget, we’d recommend using Mapei Flexcolor Grout (premixed) instead, as it’s much more user friendly and forgiving (we’ve used it in the kitchen and our other bathroom and the application was flawless).
The good news is that the finished product looks great (even if it did take a few years off of our lives getting there lol).

Once the tiling and grouting was done (phew!) we were able to move on to flooring and finishing the walls. As you may remember from this post, we chose a waterproof laminate flooring for our main living area. We love it so much we decided to run it into this bathroom as well for a seamless look.


Getting the flooring in made it really feel like we had turned a corner and that the room was finally coming together, which was a relief because we had family arriving in less than a week for Thanksgiving 😅.
Next up came the shiplap installation. We originally chose to cover the walls with vertical shiplap purely for the aesthetic, but an added advantage was that it would cover up some of the blemishes caused by removing the old wall between the vanity and toilet. Josh did a great job of patching and finishing where there was damage on the ceiling, but it was a nice relief to not have to worry too much about the walls as they’d be covered up.


Then it was finally time to paint the walls! Whenever we get to this point in the project, it feels like I can see the light at the end of the tunnel.
We painted the ceiling Pure White by Sherwin Williams. It really is a perfectly neutral white! Here you can see the unpainted portion closest to the door:

I chose Passive by Sherwin Williams for the walls as it feels very calm, exactly what we want for a guest space. I originally planned to use Krypton by Sherwin Williams (as pictured in the moodboard above) but when I tested it in the space, it came across as baby blue (not what I was going for at all). Passive is the perfect shade of gray without being too blue.

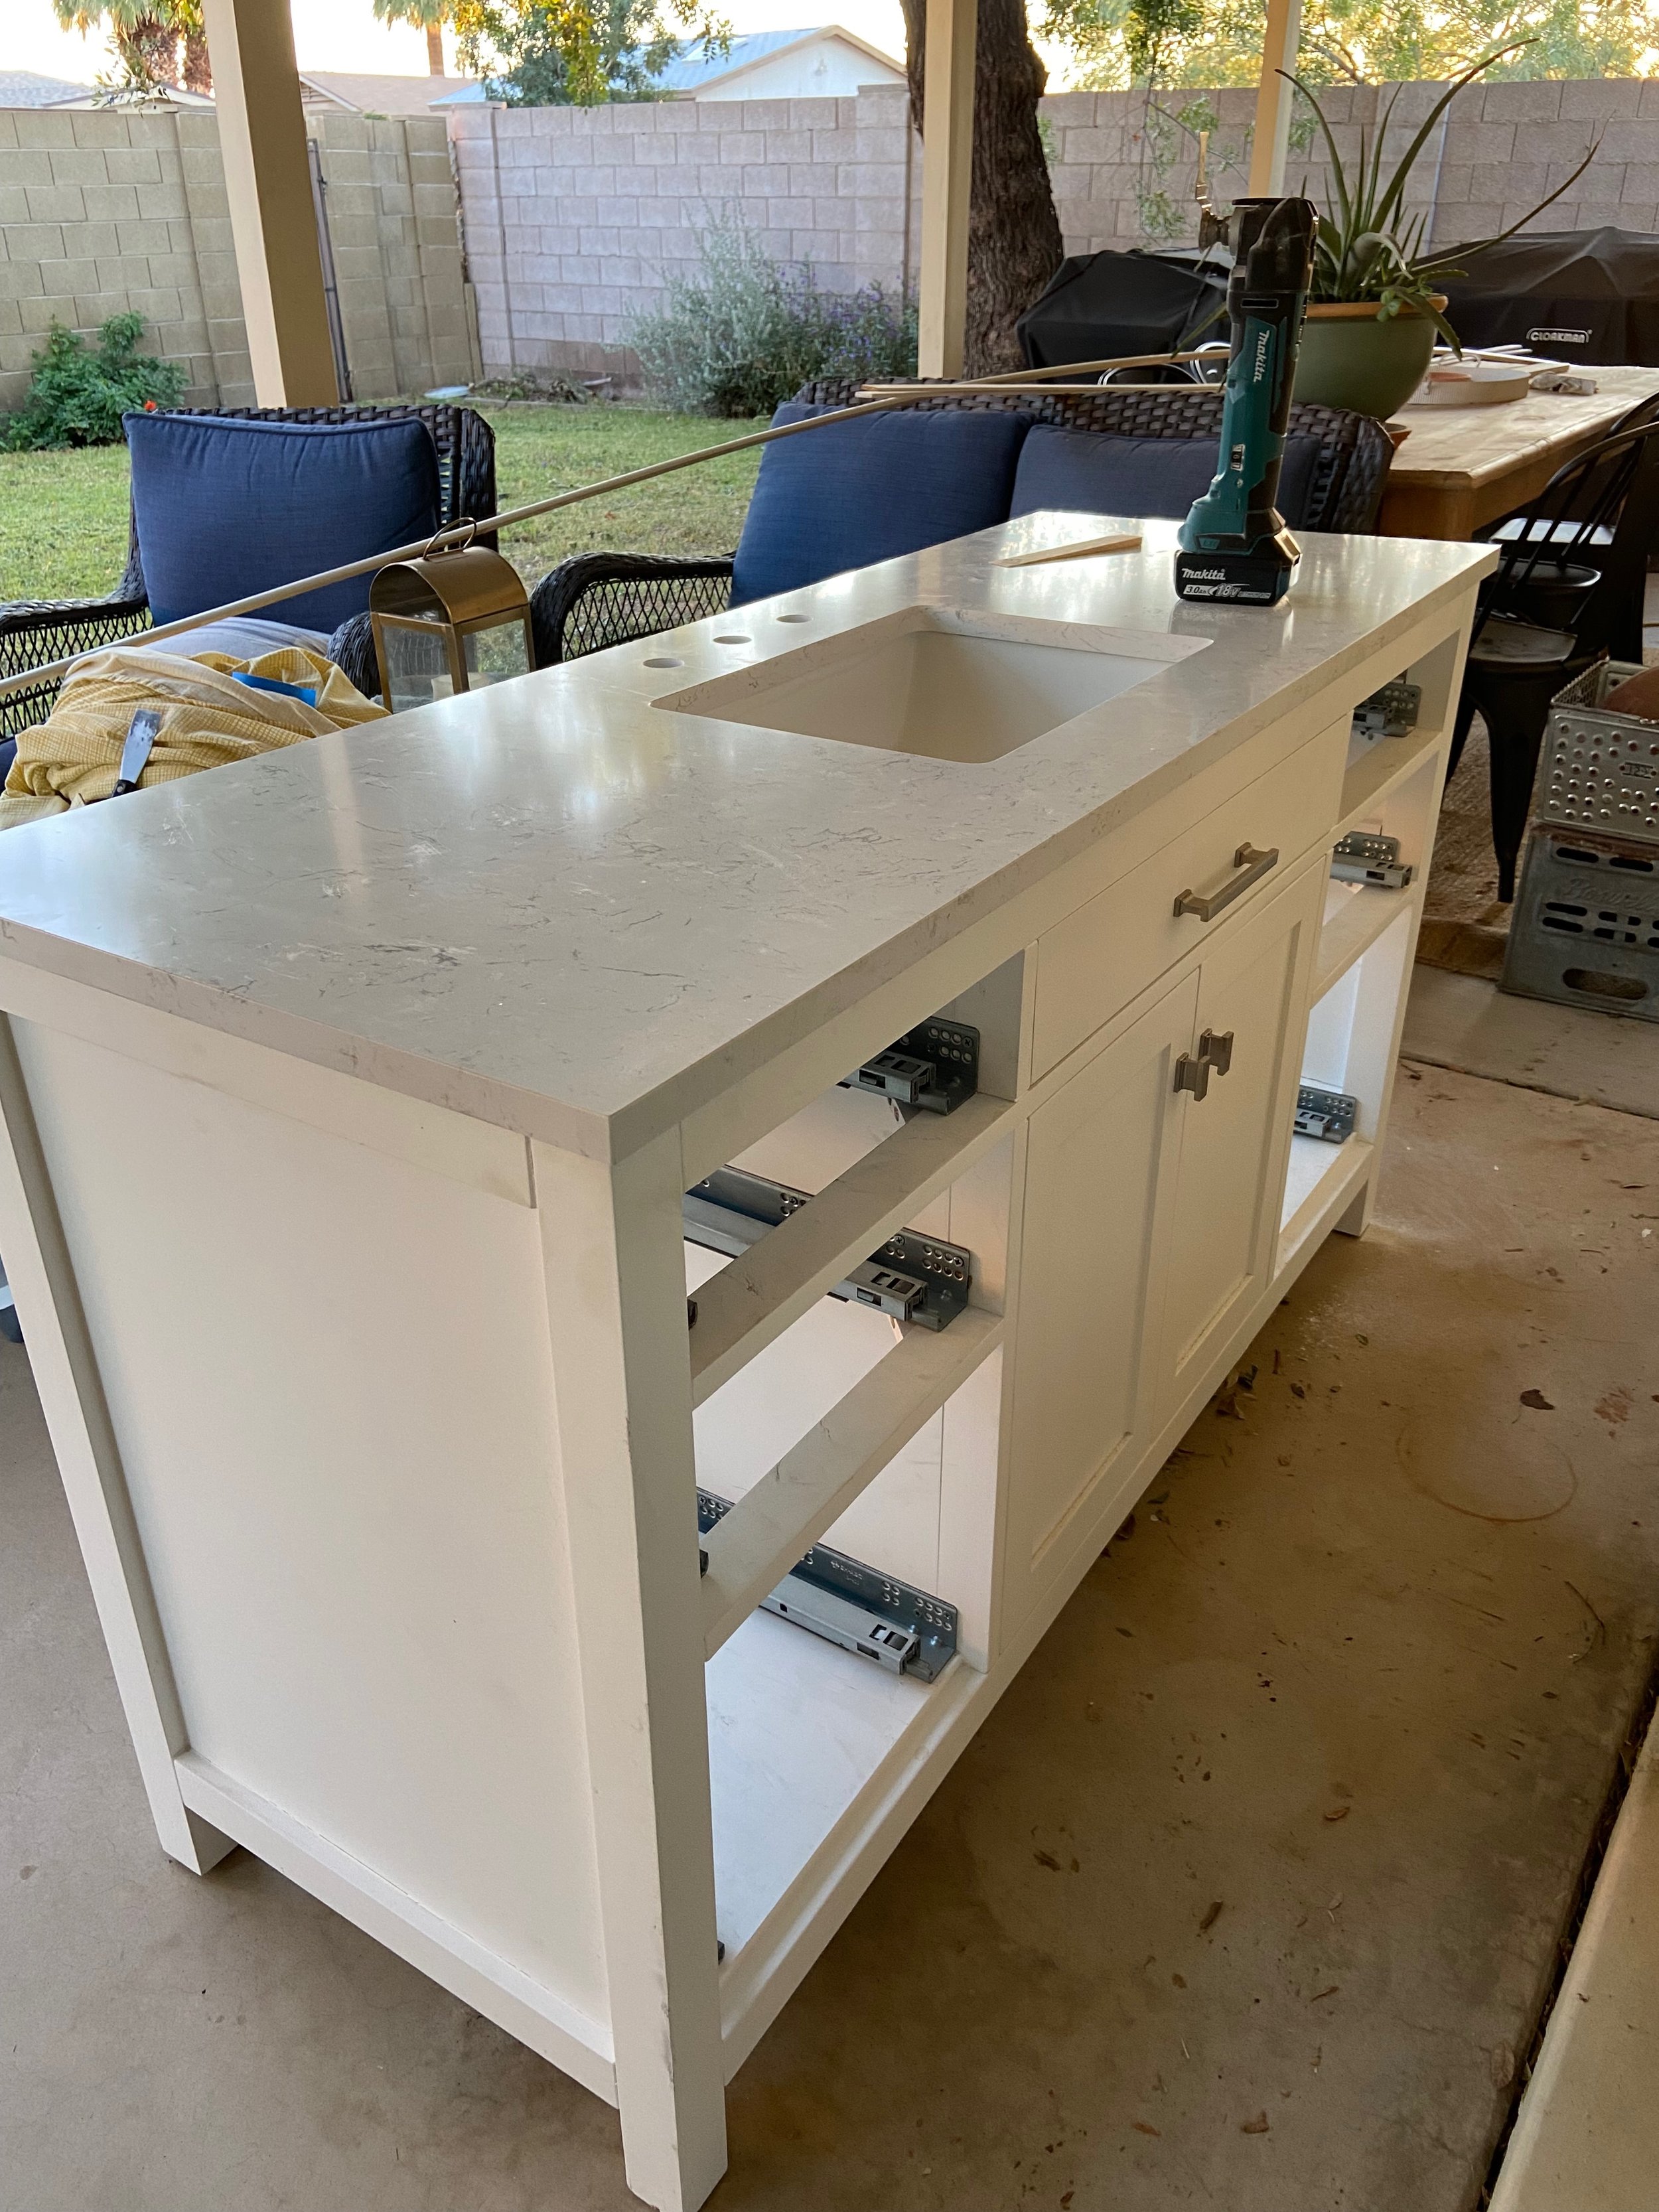
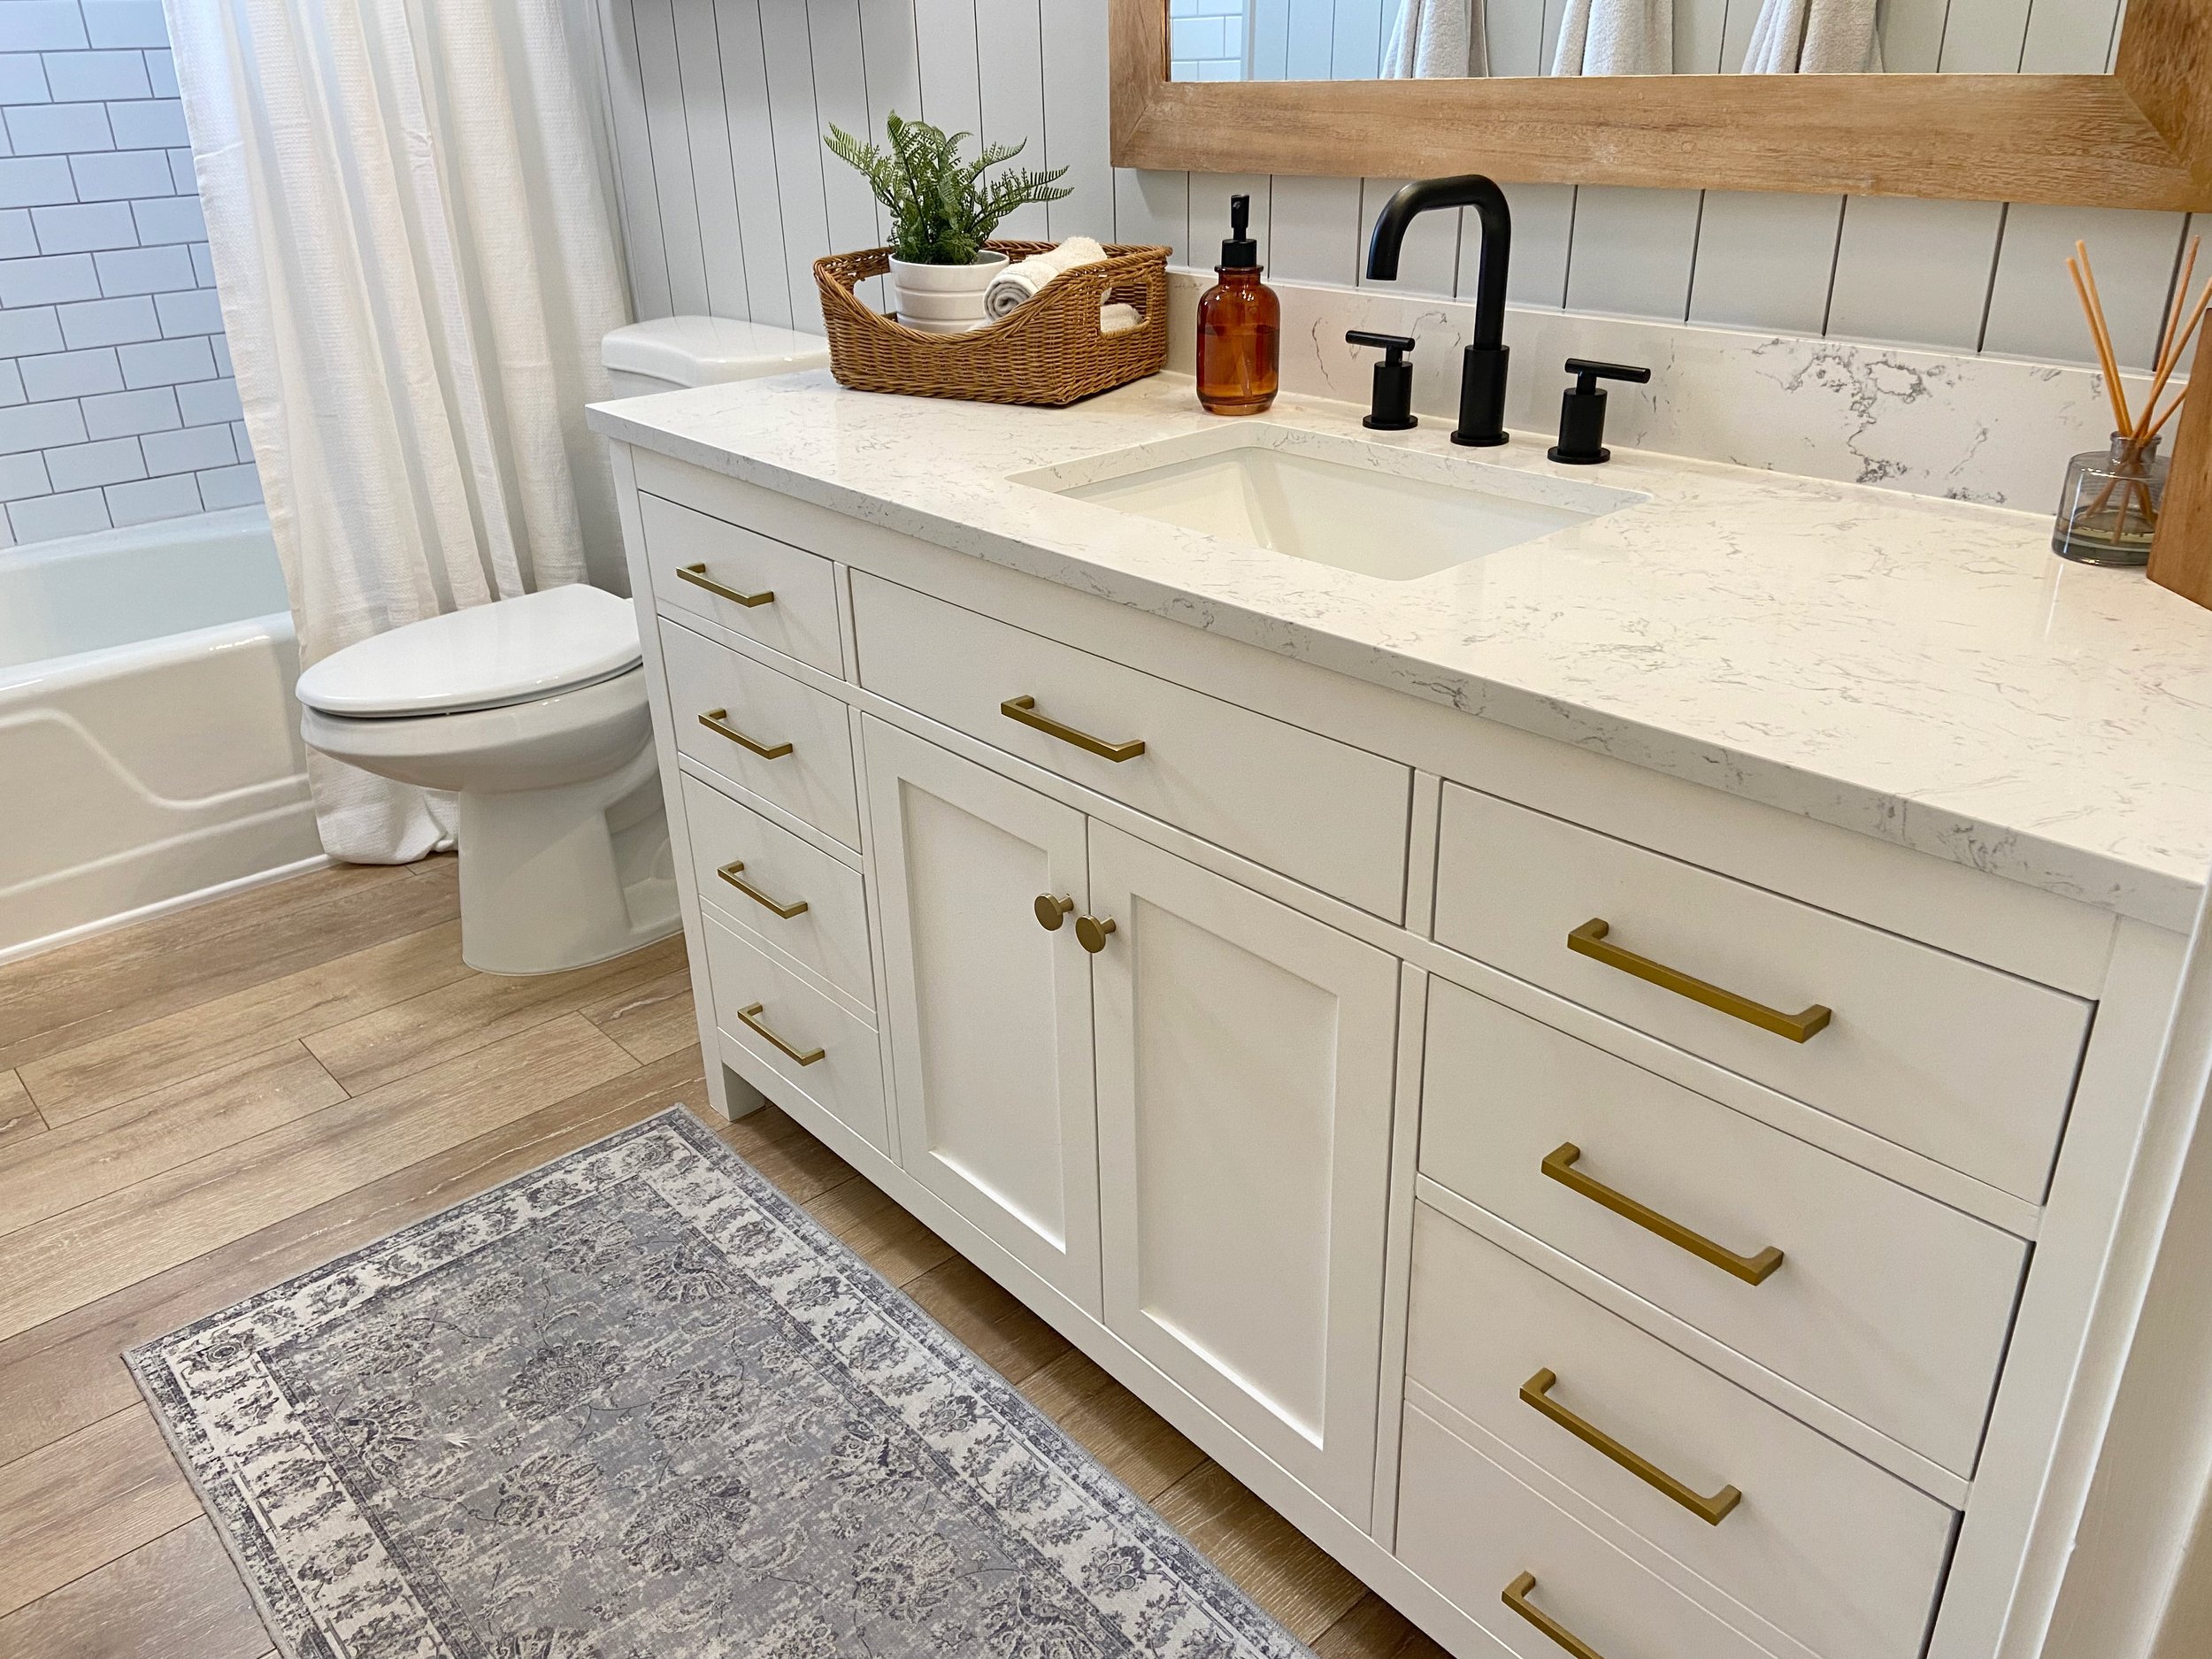
Once the room was painted, we could start to bring all of the furnishings and finishes in. Leading up to this project we searched high and low for a vanity that was in our budget but we couldn’t find anything for under $1,000, with most ranging between $1,500-2,000—woof! At the final hour, we stumbled upon this gorgeous 60” vanity on FB Marketplace for $500 (!!!) from a couple selling Home Depot returns out of their garage 🤷🏼♀️ The only issue was that it weighed so. freaking. much. There was no way we were going to be able to move it into place by ourselves. Josh had the bright idea to use an oscillating tool cut through the perimeter of glue that held the quartz top on so we could separate the top from the base. I was very doubtful it would work (and terrified that he’d break the top…eek!) but he did it! And we were able to move it into the bathroom in two (still heavy, but manageable) pieces.


Once the vanity was in and all the trim work and caulking was done, I was able to jump in and add the finishing touches, and just in the nick of time as family was arriving for Thanksgiving within a few hours, literally 😅 (I still can’t believe we did that to ourselves…again)!
As you can imagine, final touches are always my favorite part of any project. I had been collecting pieces for this space for a long time and to see it all come together was so rewarding! I especially love to look back at my moodboard and see how it came to life in it’s own way.
Without further ado, here’s what the space looks like today:

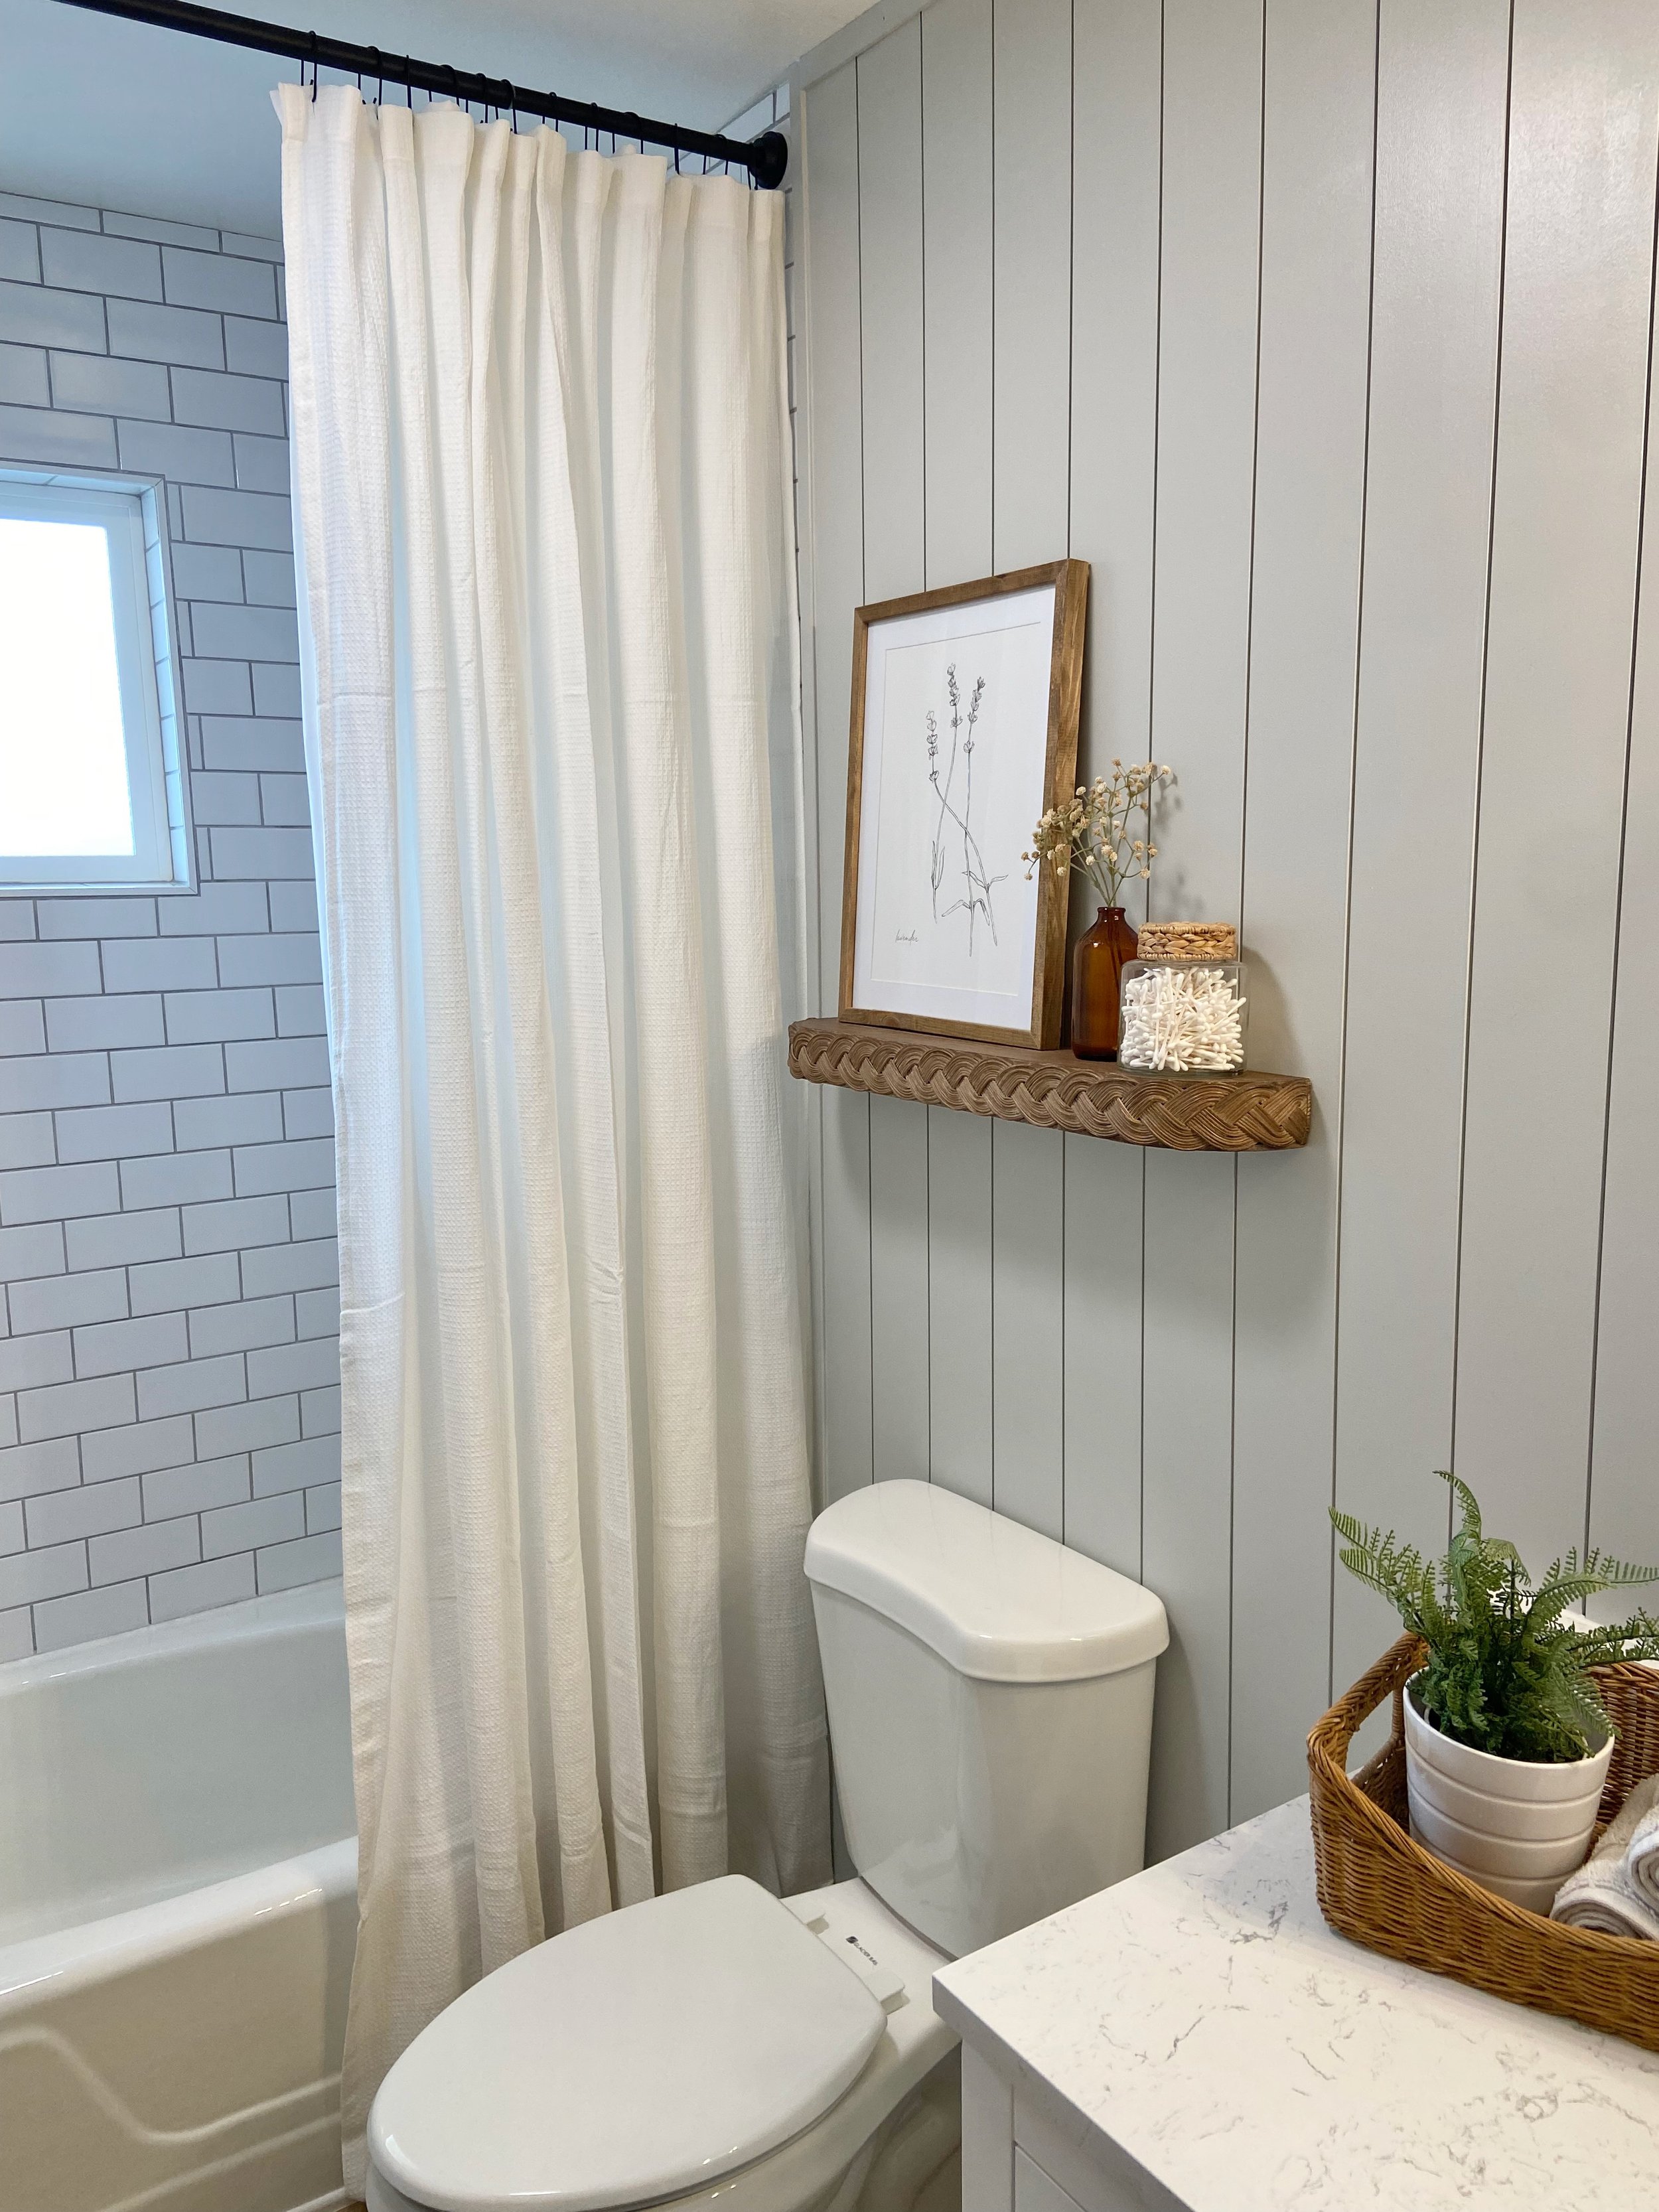
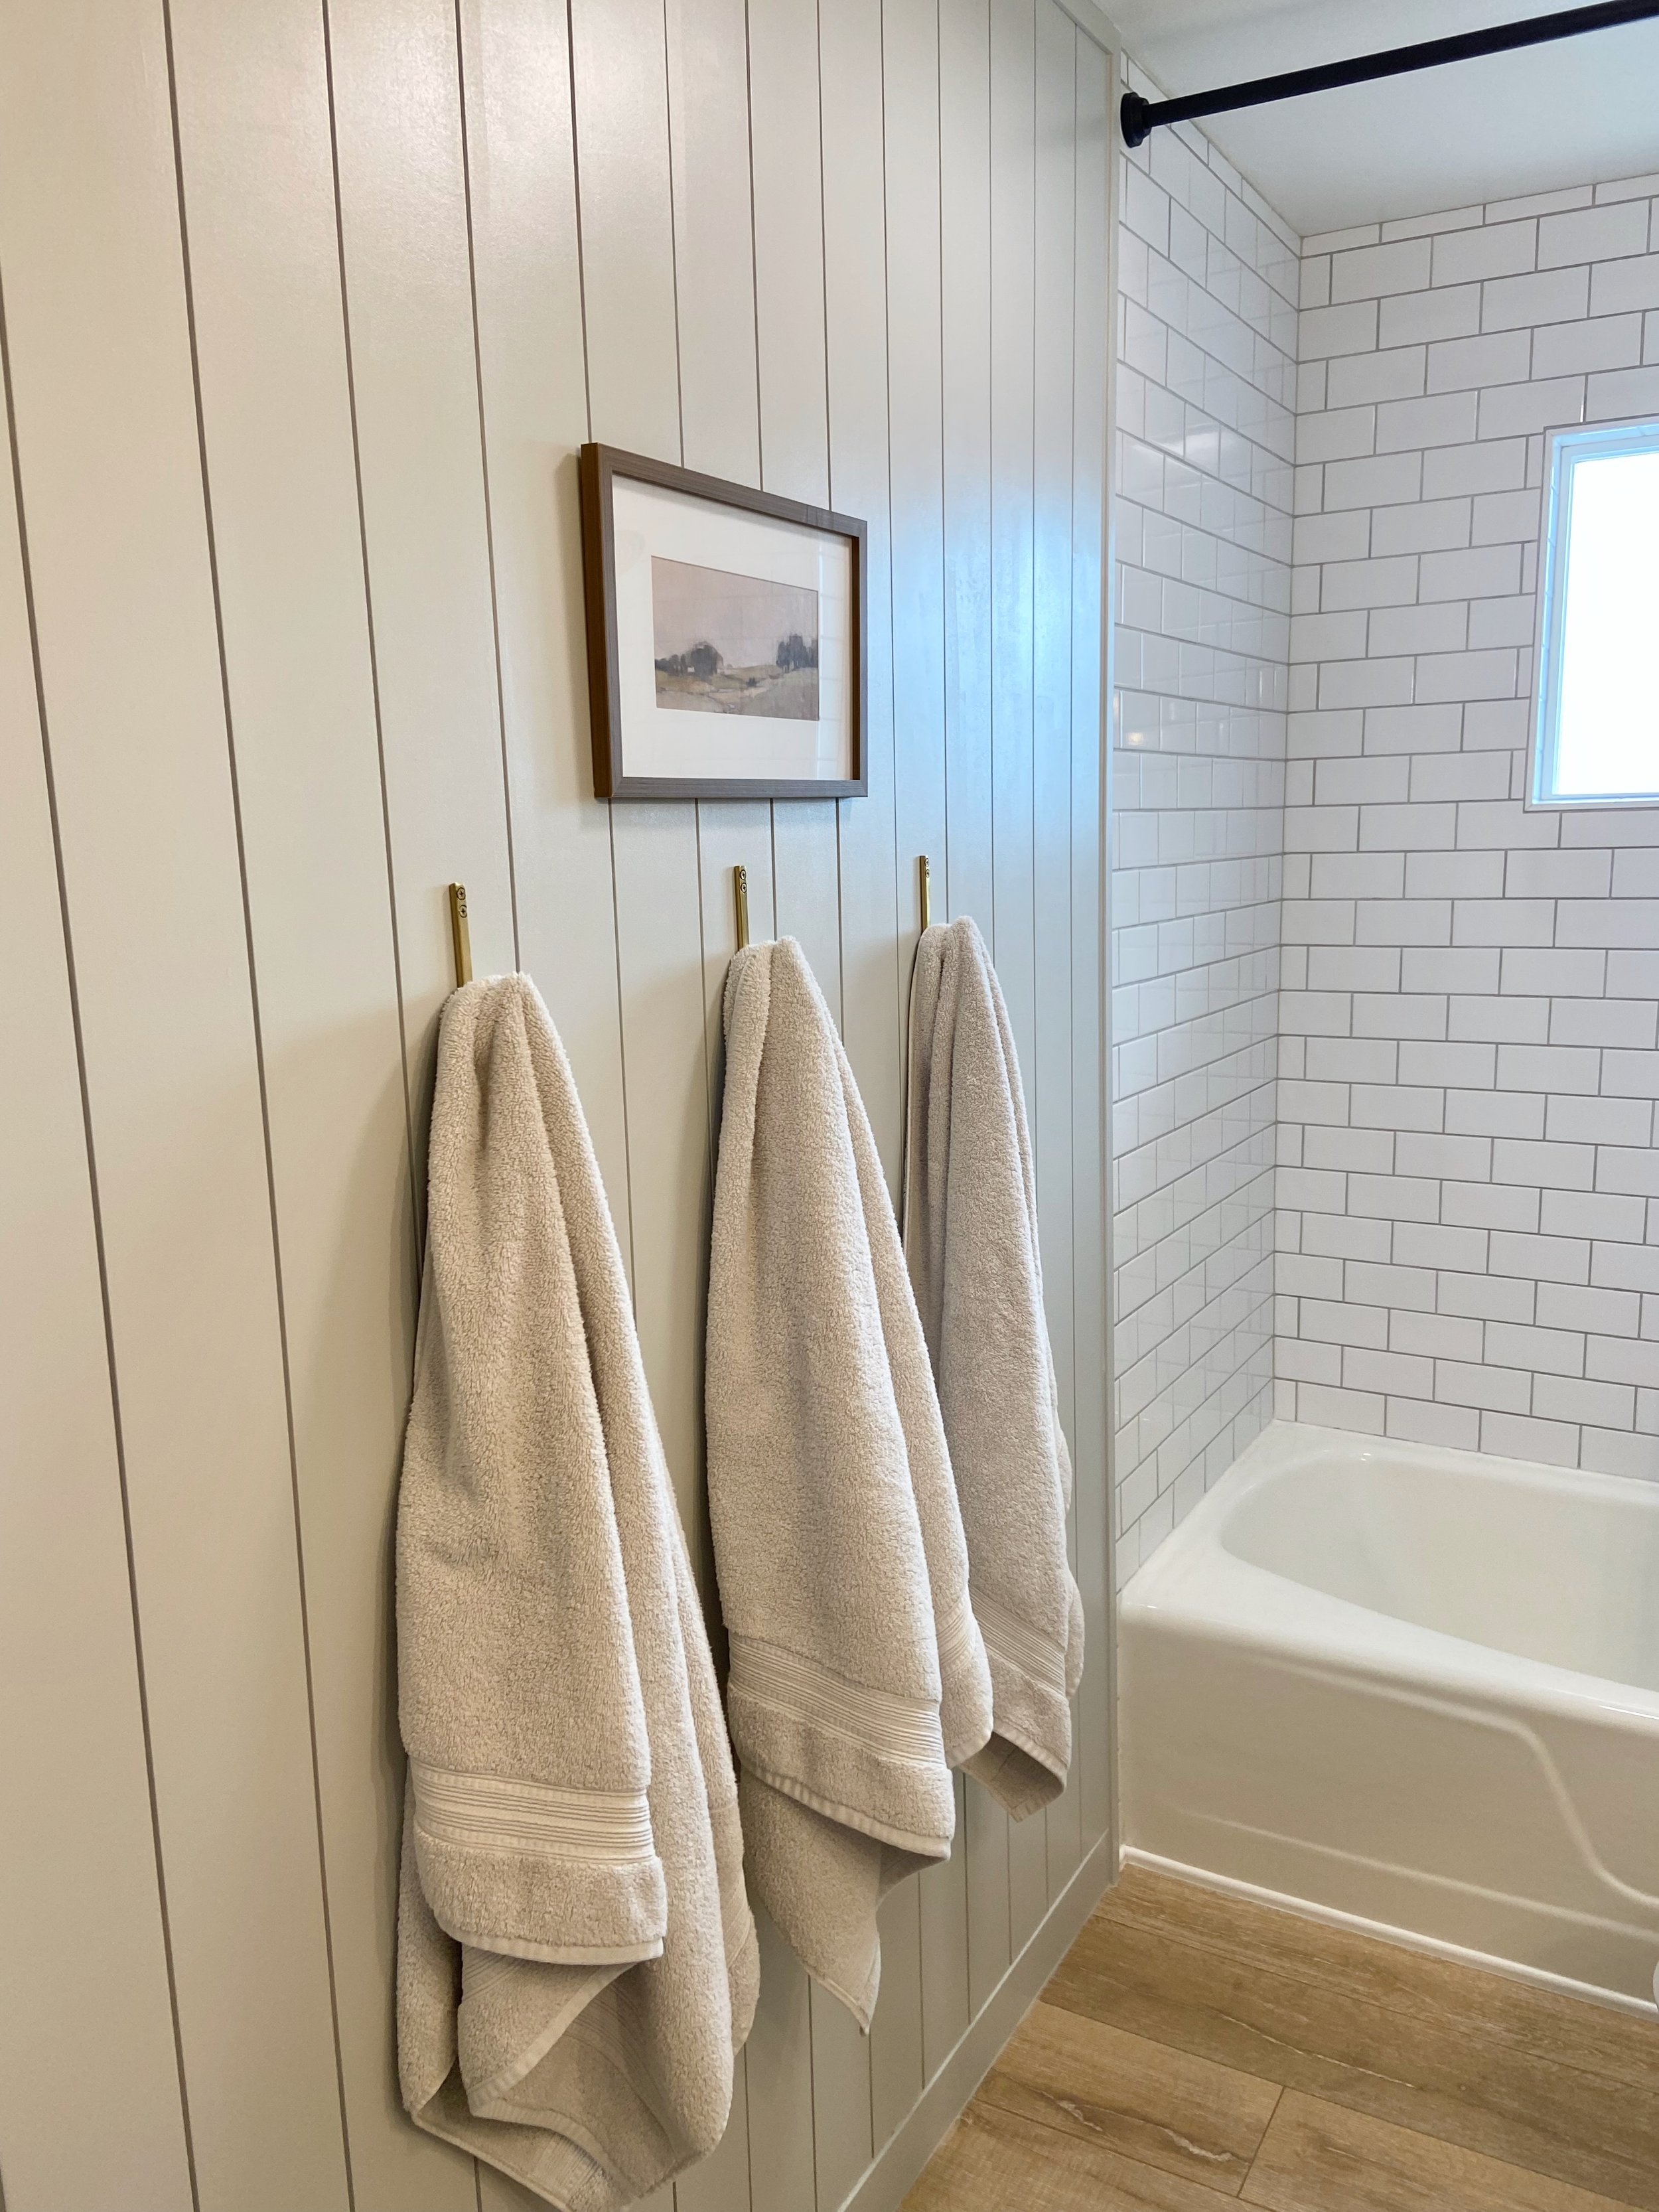
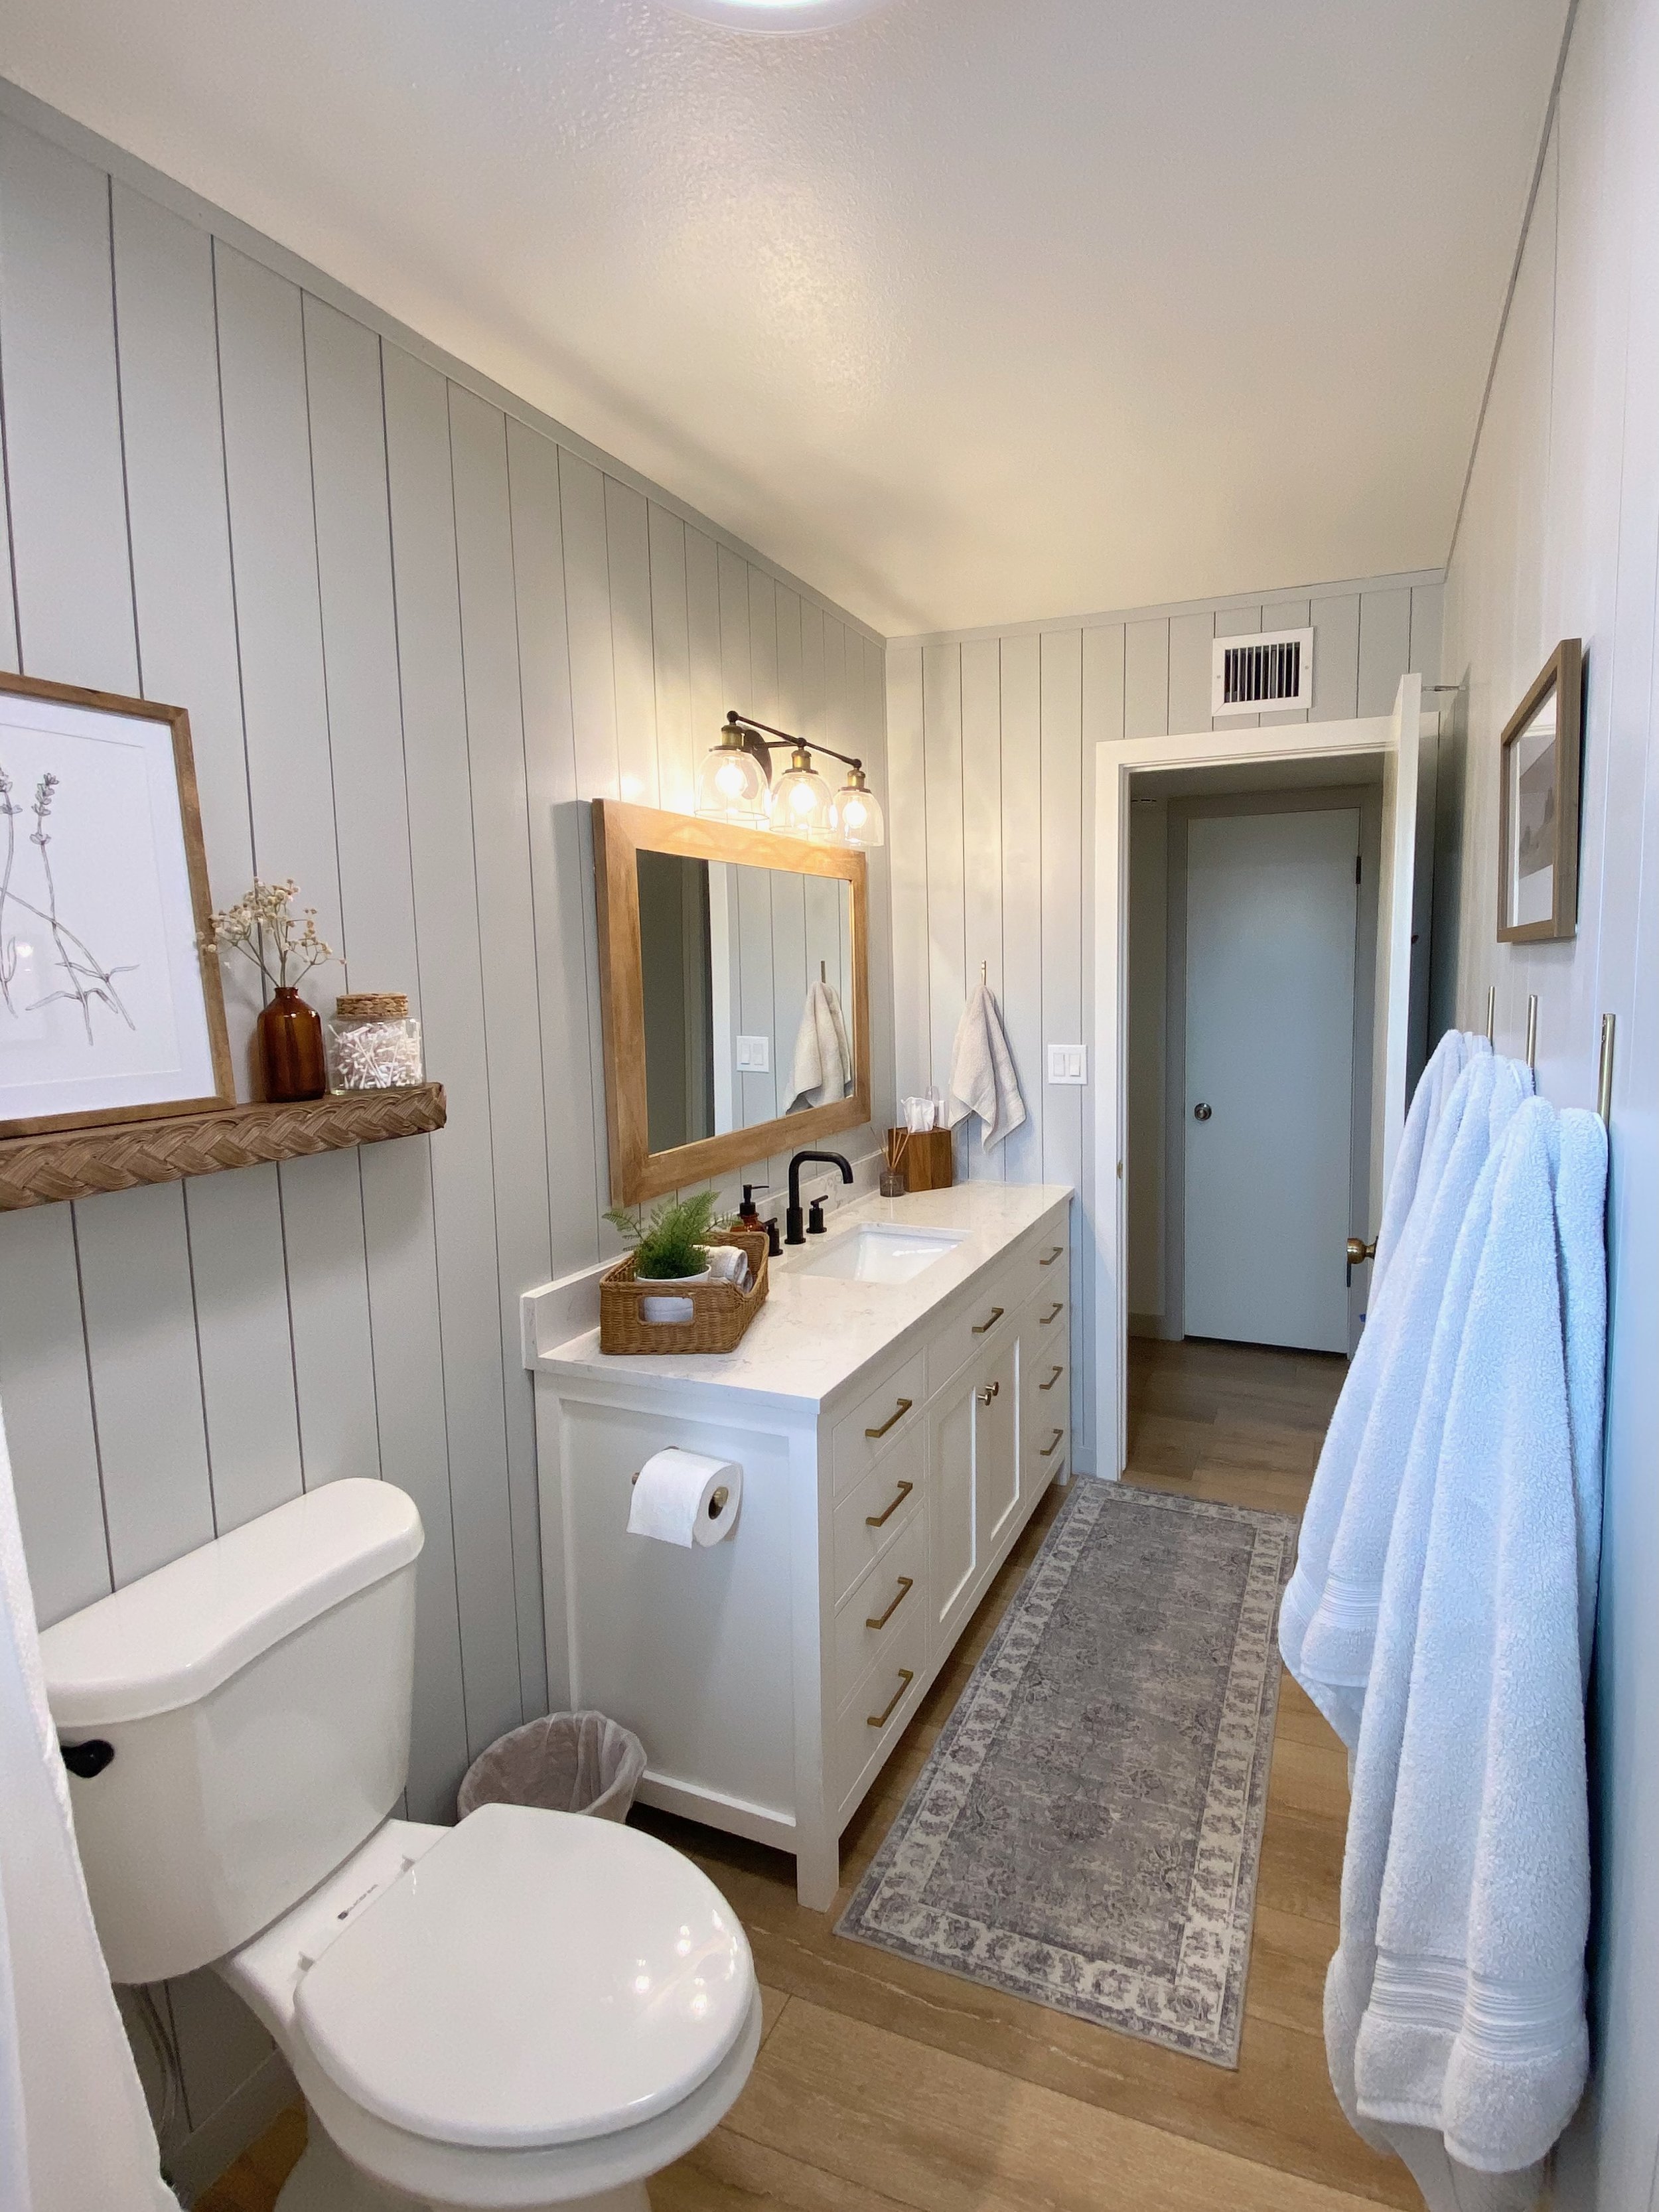
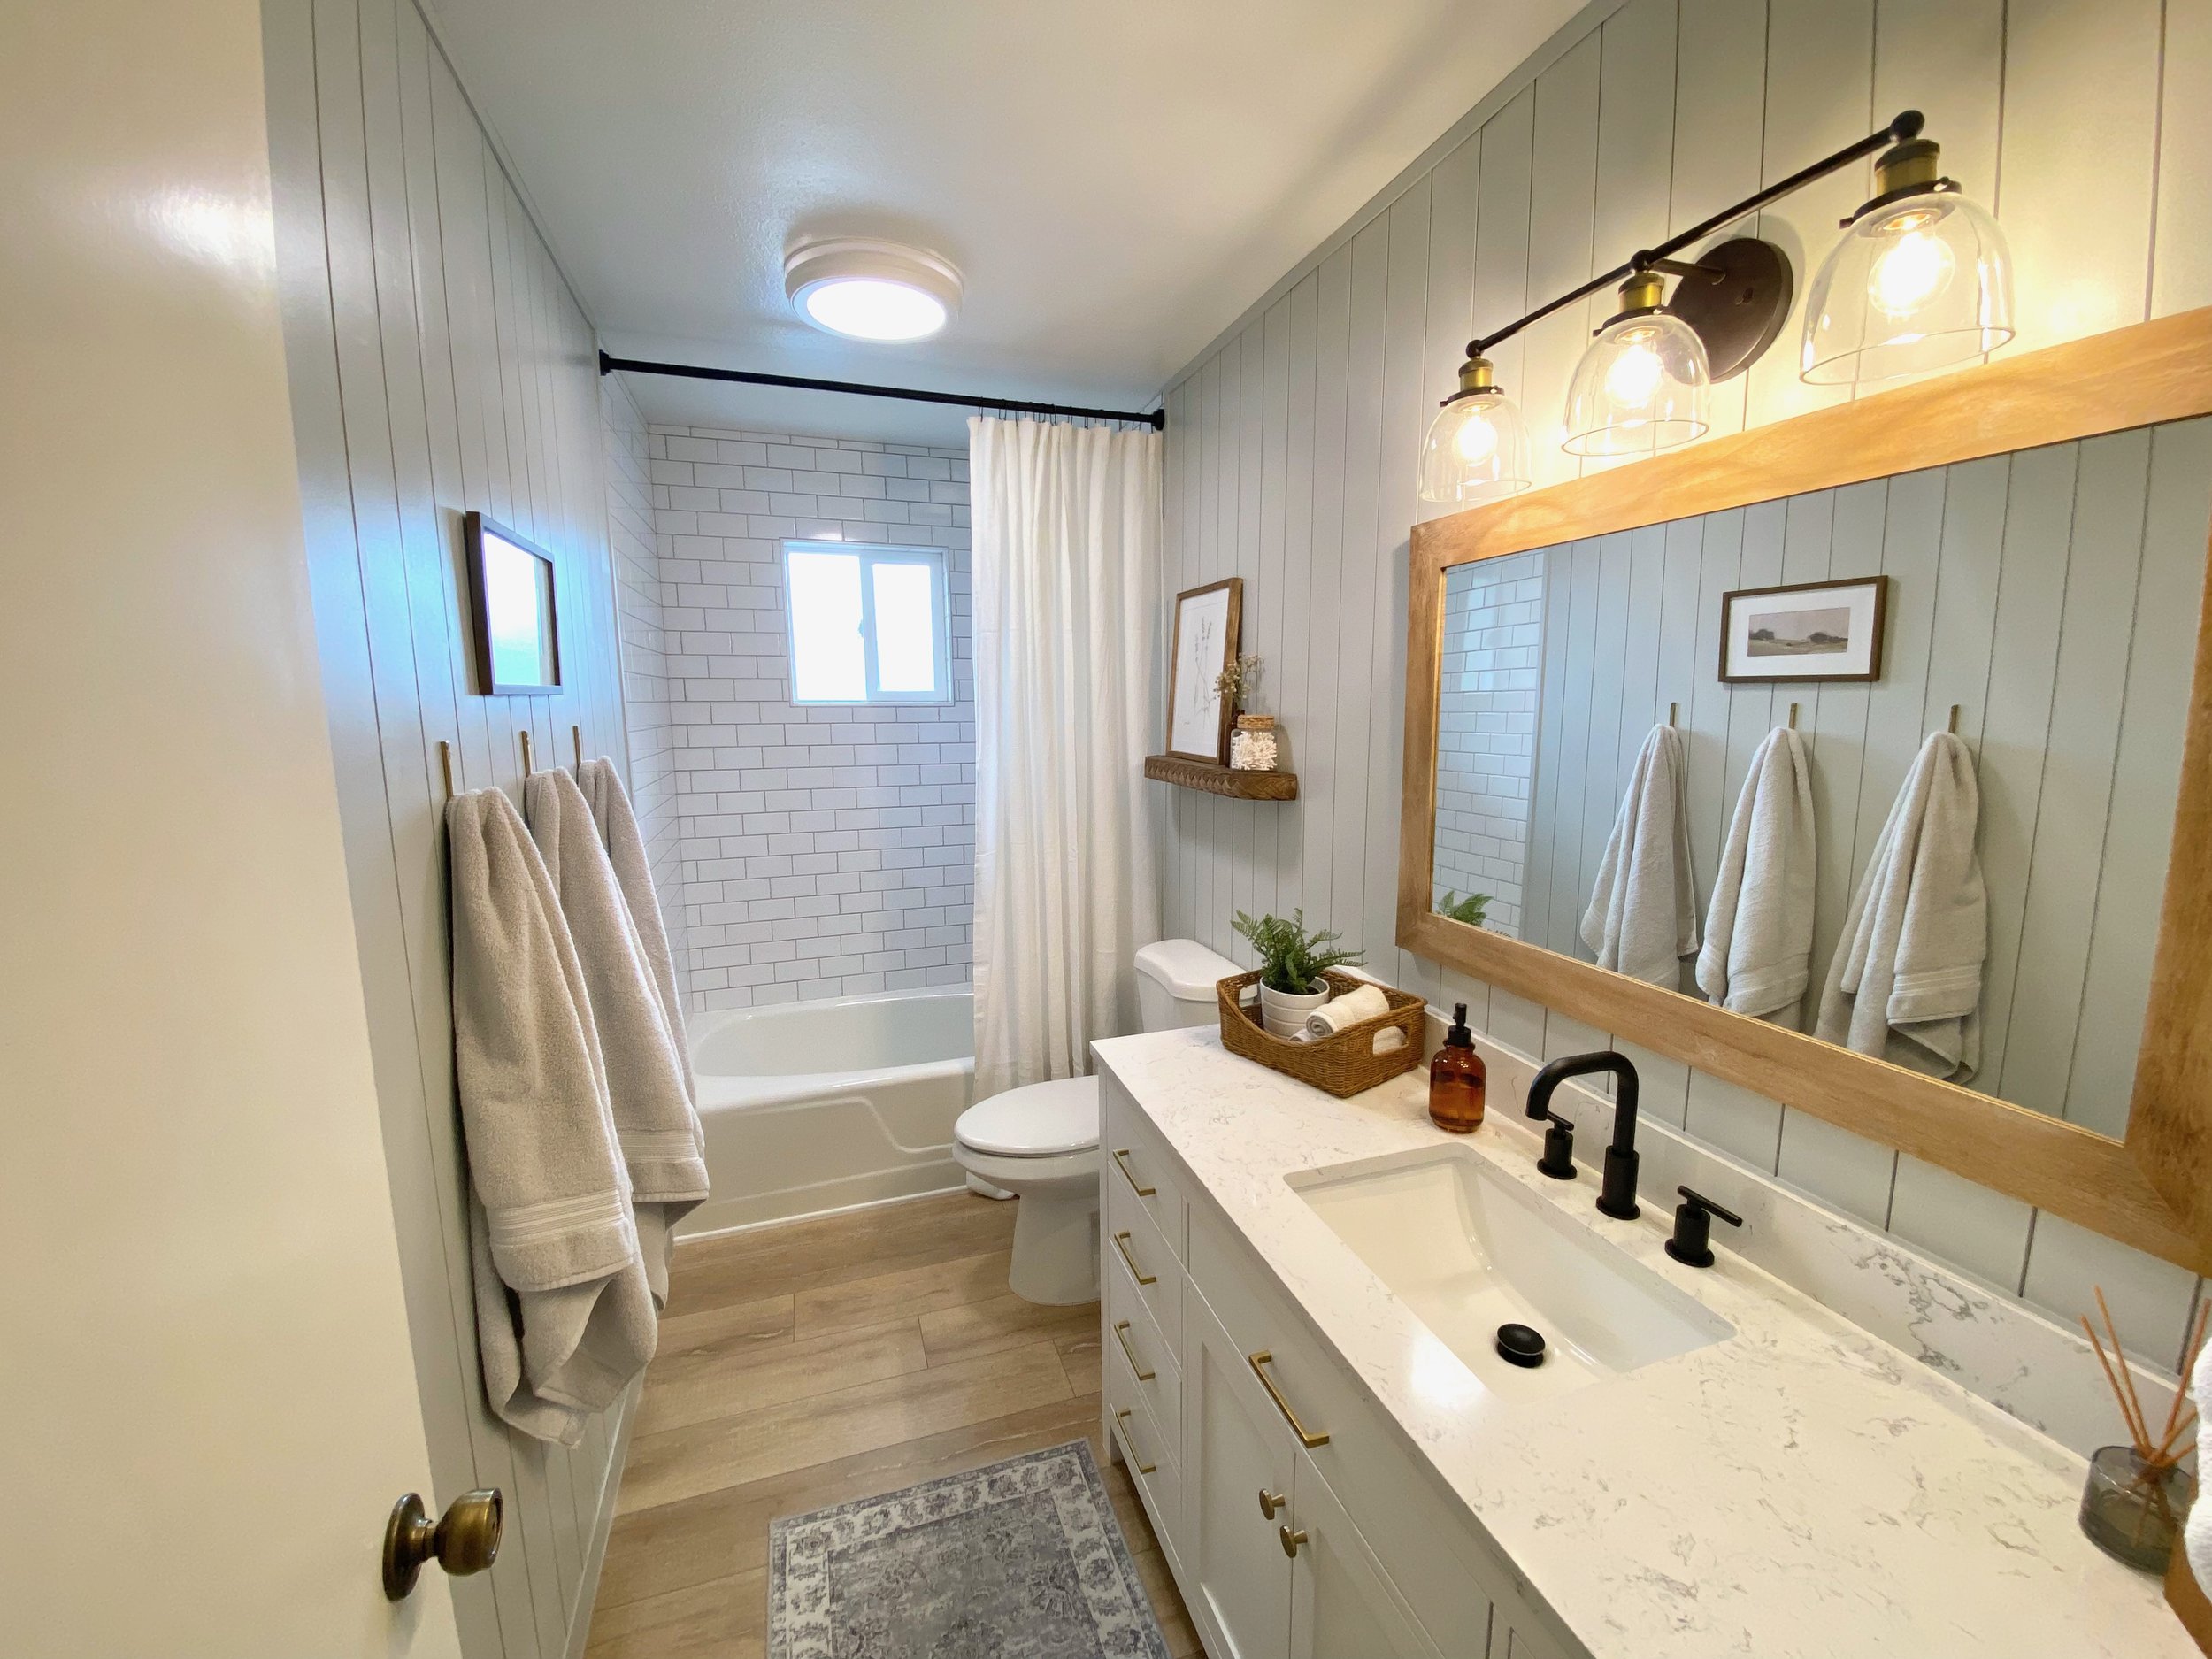
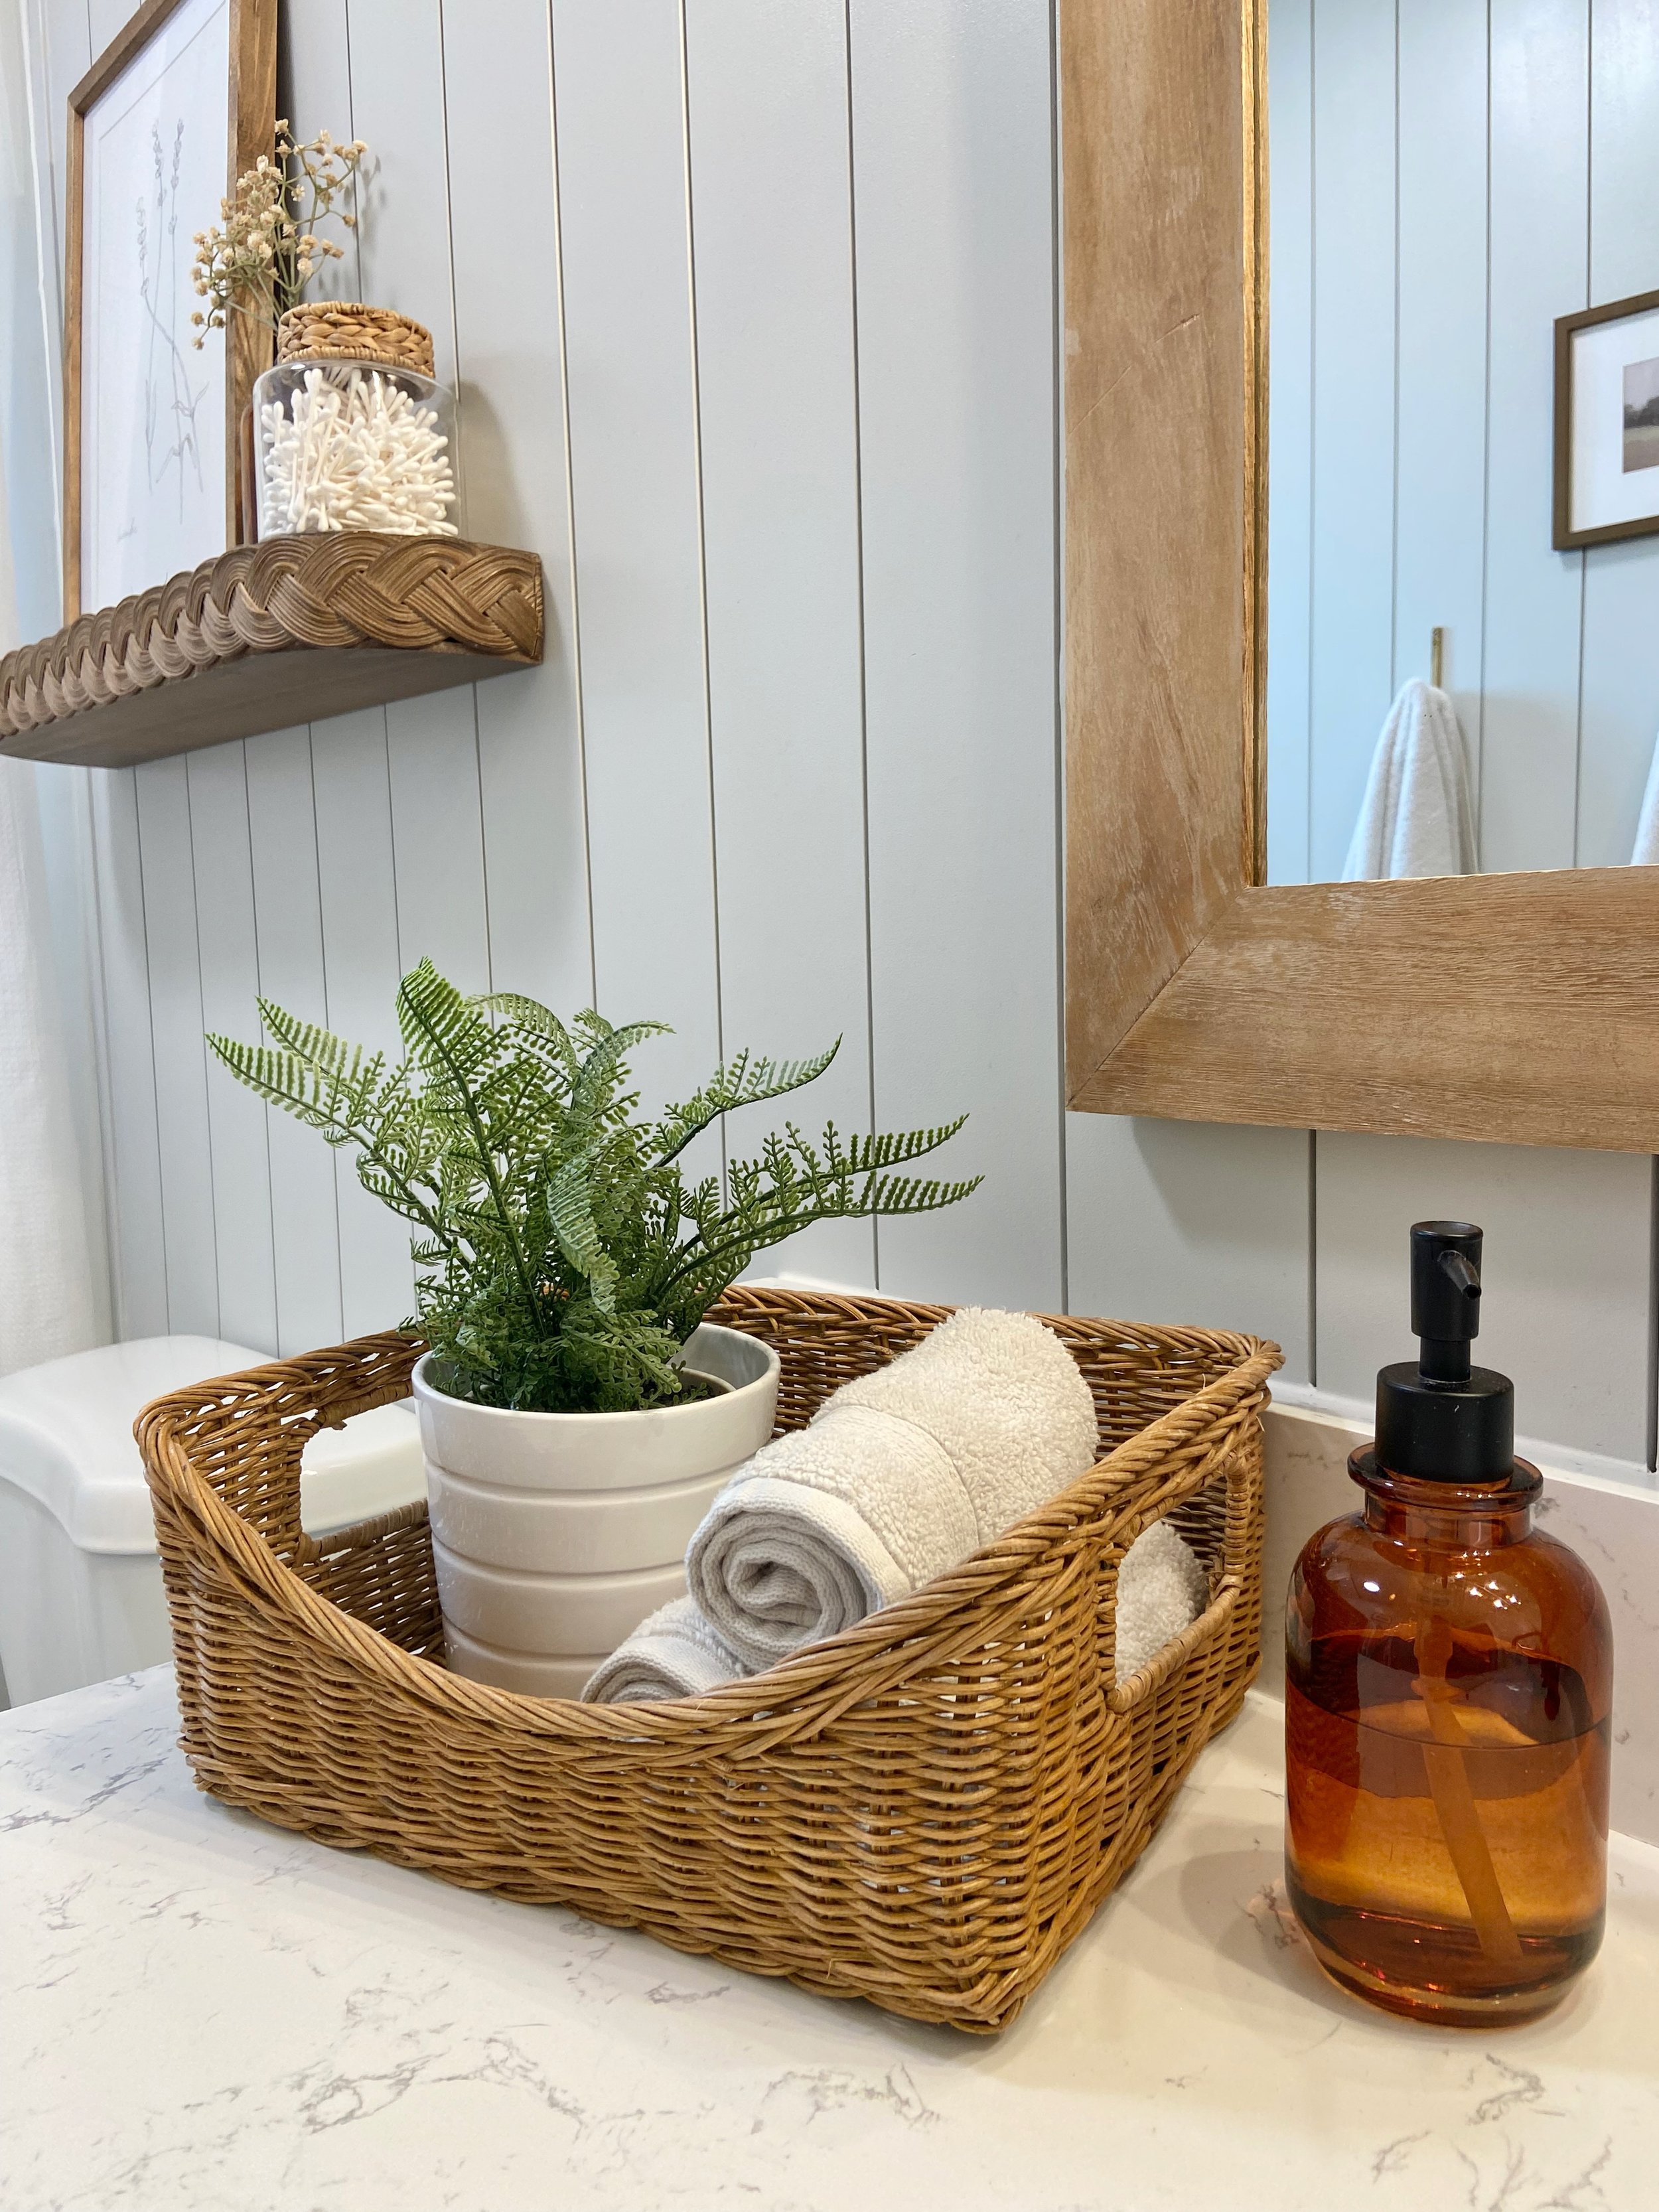

I always love to take a step back and look at a before picture compared to a now picture, and this one doesn't disappoint!


That’s it for the guest bathroom! If you’d like to know the source of anything, see below 😊
Next up in the Reno Recap series we’ll take a look at some exterior updates that we’ve made. Thanks for following along!

Guest Bathroom Sources:
Wall color: Passive by Sherwin Williams
Ceiling color: Pure White by Sherwin Williams
Vanity door knobs / drawer pulls
Mirror: Hobby Lobby
Extra long shower curtain / liner
Art: Hobby Lobby
All other decor is thrifted 😊
Missed previous posts in the Reno Recap series? Check them all out here!