
Reno Recap: The Kitchen - Cabinets & Countertops
In my last post, I shared about how we planned out the kitchen renovation and fully demoed it. Today, we’ll pick back up with putting it all back together!
By the time we got to this point, it was mid November and Josh and I both took a week off of work to get it all put back together before we hosted family for Thanksgiving. I’m not sure why, but on a few of our different projects, we’ve started them knowing we have family arriving within a few weeks. From when demo was finished, we had about 2 weeks to get everything wrapped up so that the kitchen would be usable for Thanksgiving. Apparently we like to work under pressure 😅
Once we removed the soffits and bumped the wall back in the kitchen, we had quite a bit of drywall repair to do. Josh patched all the areas that needed new drywall and we hired out the finishing part to a pro.
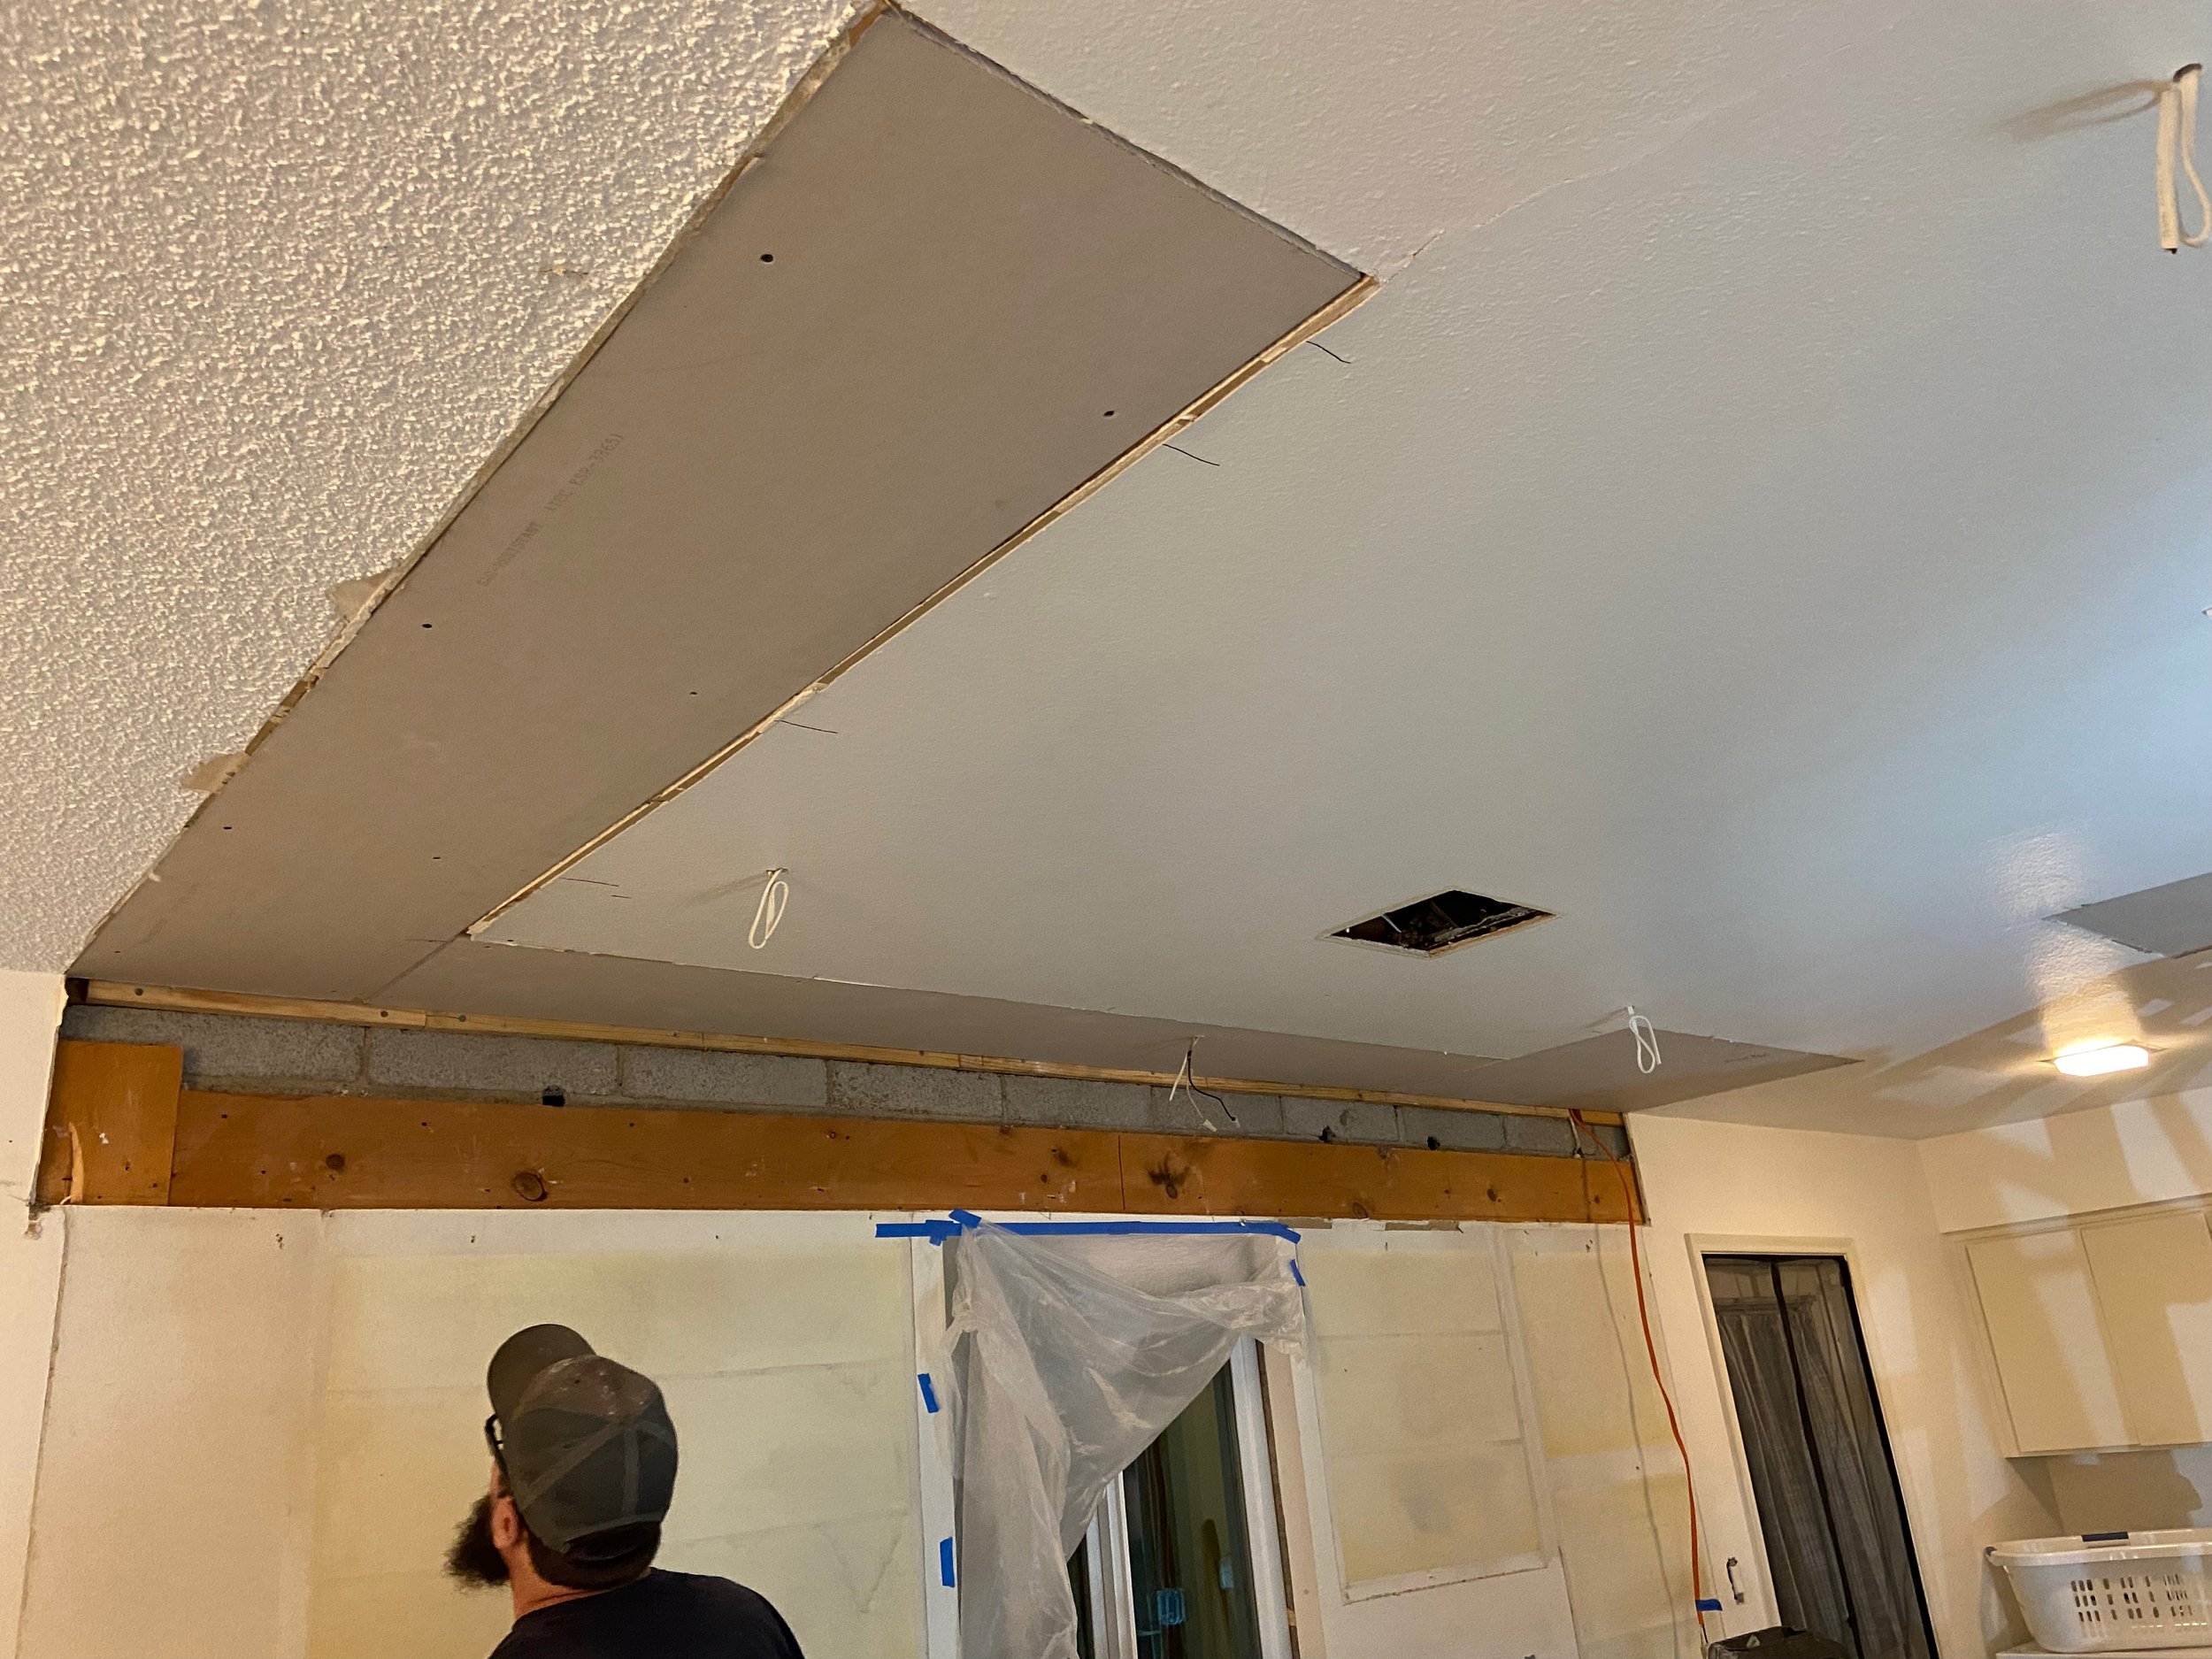
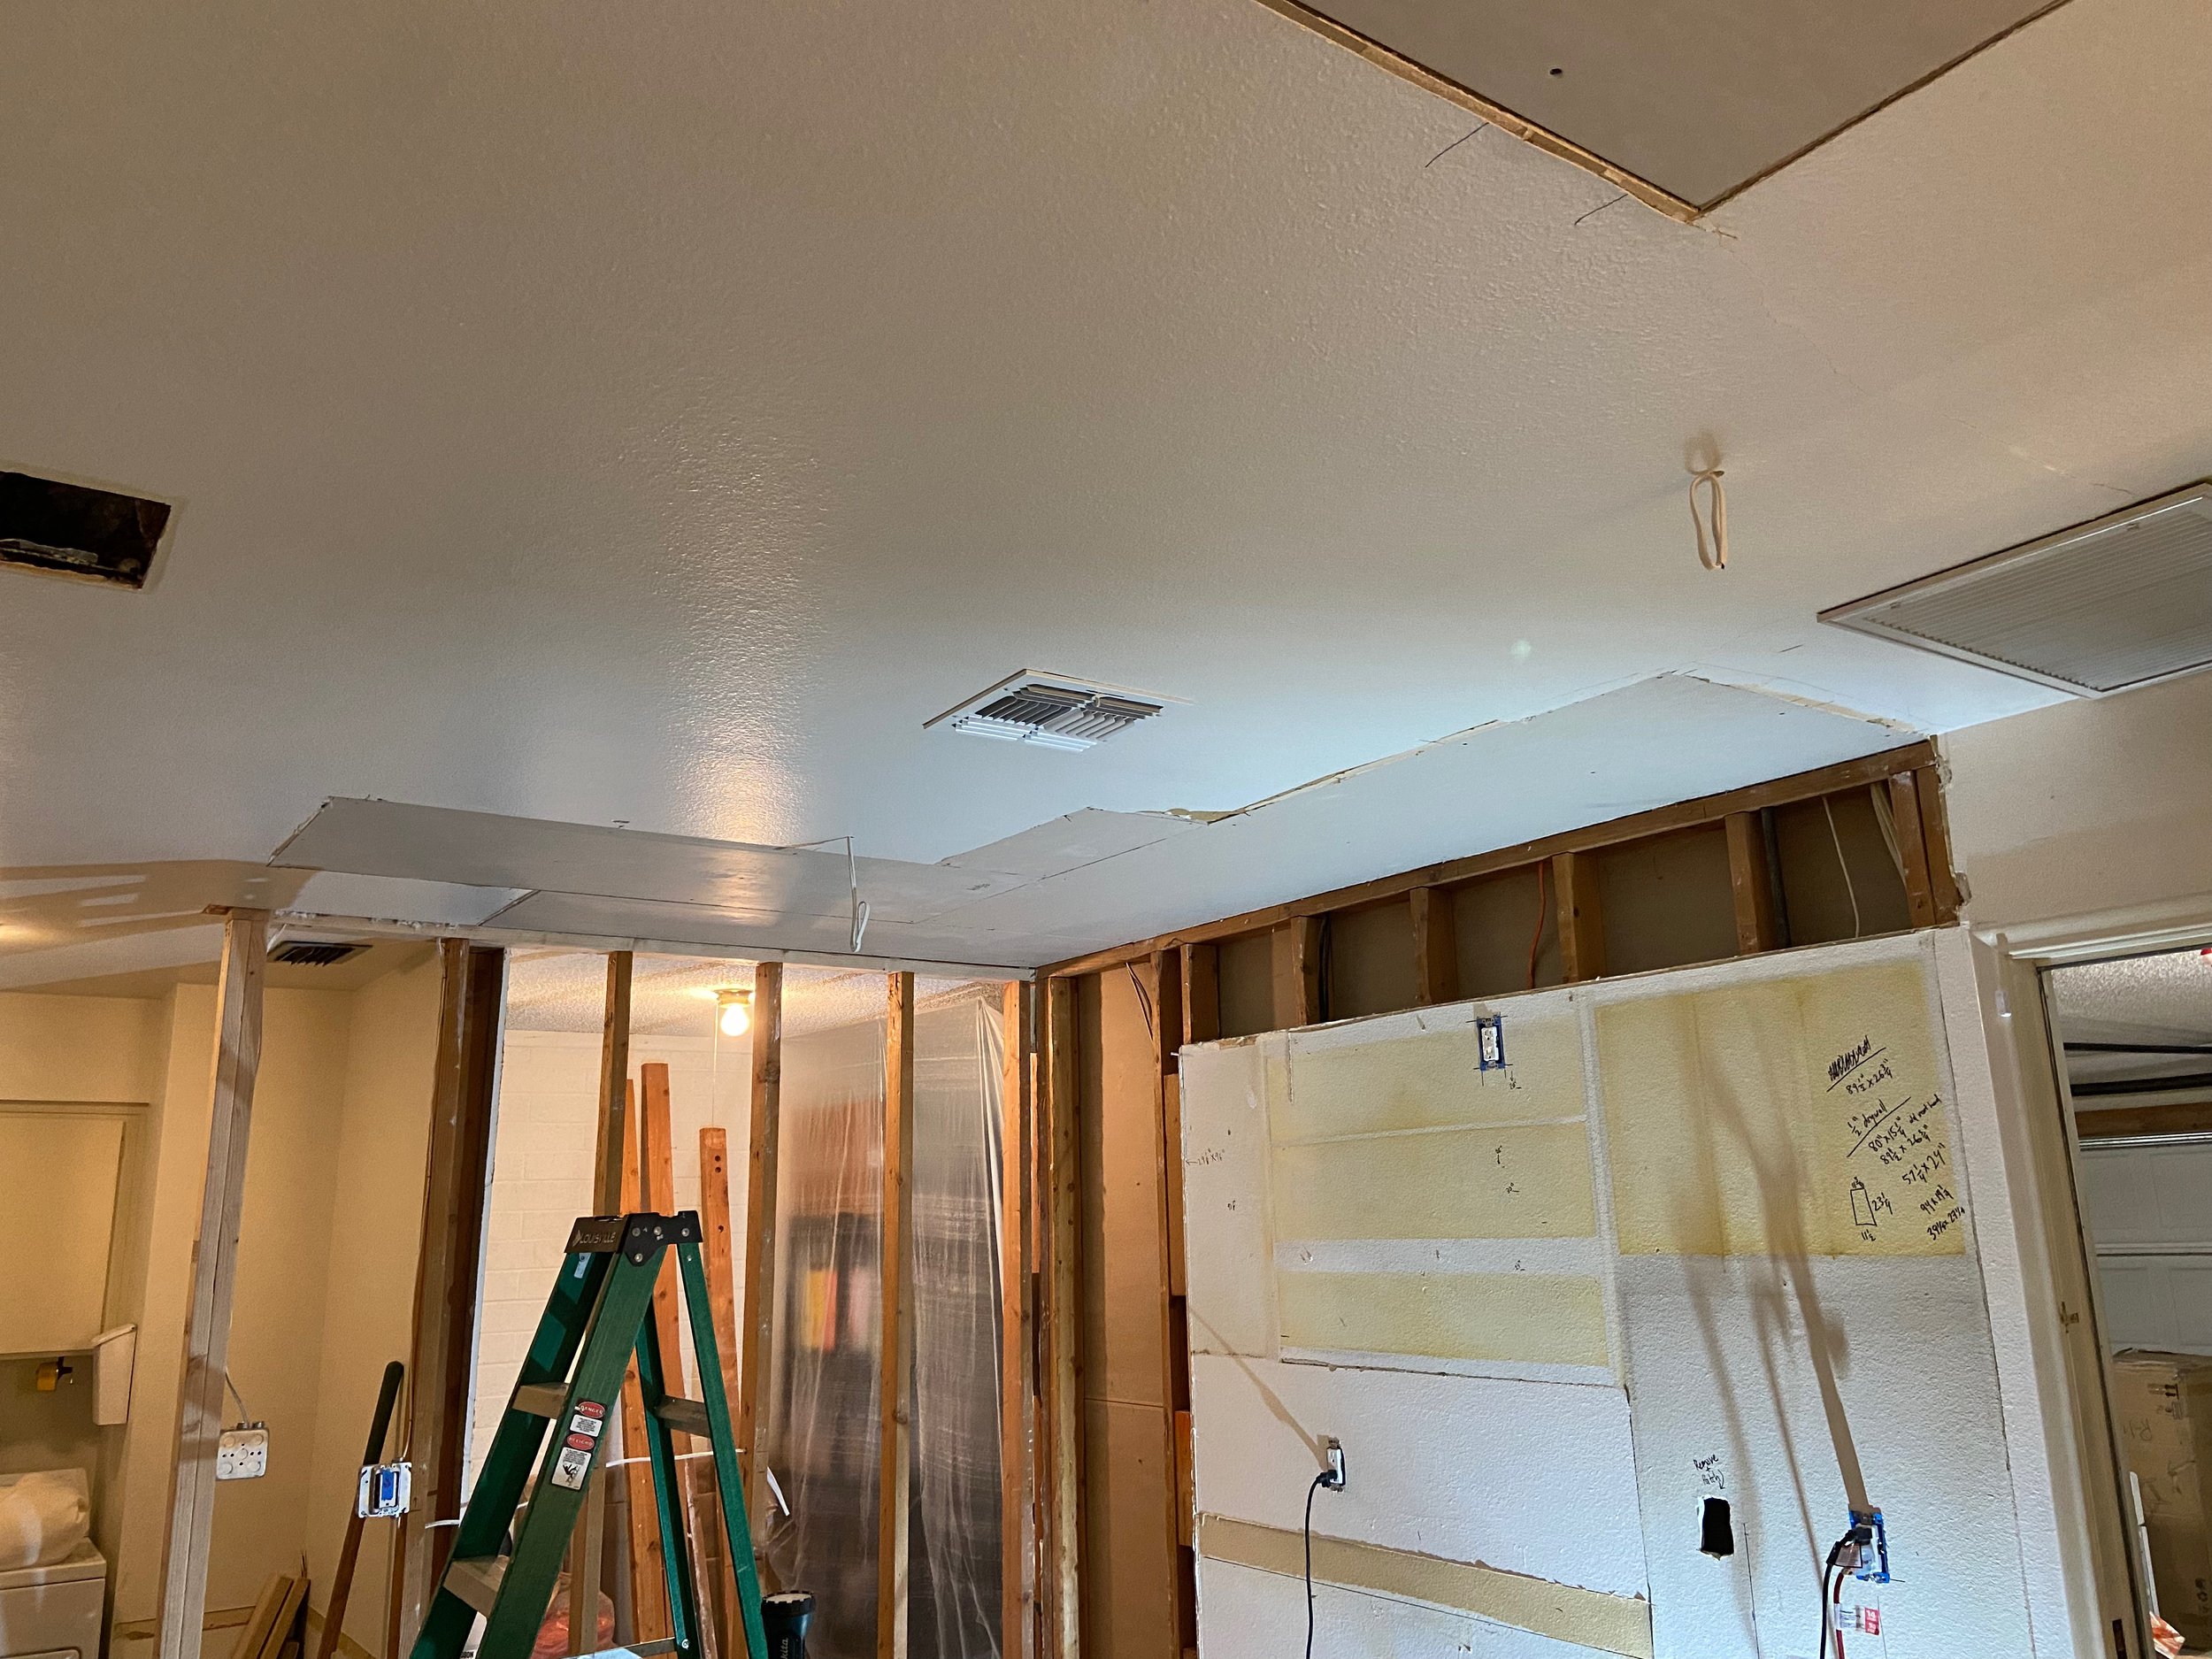
Throughout this renovation, we’ve only hired out a handful of things that we’re either not qualified to do or have no desire to learn—like pouring new concrete in the living room. Drywall finishing falls into something we knew a professional would do much better than us. Yes, we could definitely learn to do it, and maybe do it well…but with the timeline we were working with, it was well worth it to hire this project out! Here’s a shot of the ceilings after one coat of mud and you can see where Josh added the new drywall to that back wall (sorry for the poor quality, it’s screenshot from a video!)

After another coat of mud on the ceiling and quite a bit of sanding, the ceilings were ready for primer. Our drywall guy did a fantastic job of smoothing everything out and you can’t even tell where the new drywall was installed. We also taped, mudded, and primed all of the new drywall on the walls, although it would all be covered with cabinets or tile.
The ceilings in the kitchen and laundry room had orange peel texture while the living room and dining room had popcorn texture. A few months later, after we scraped the popcorn texture, our drywall guy would come back to retexture all four rooms to match and flow seamlessly (I’ll share more about that in a future post!)
Once the walls were prepped, it was finally time to get started on the cabinets! Assembly of the cabinets was actually quite easy, just a bit time consuming. I assembled the bases while Josh assembled the uppers. We learned that using a baking sheet to contain all of the hardware and small tools was the only way to stay organized!


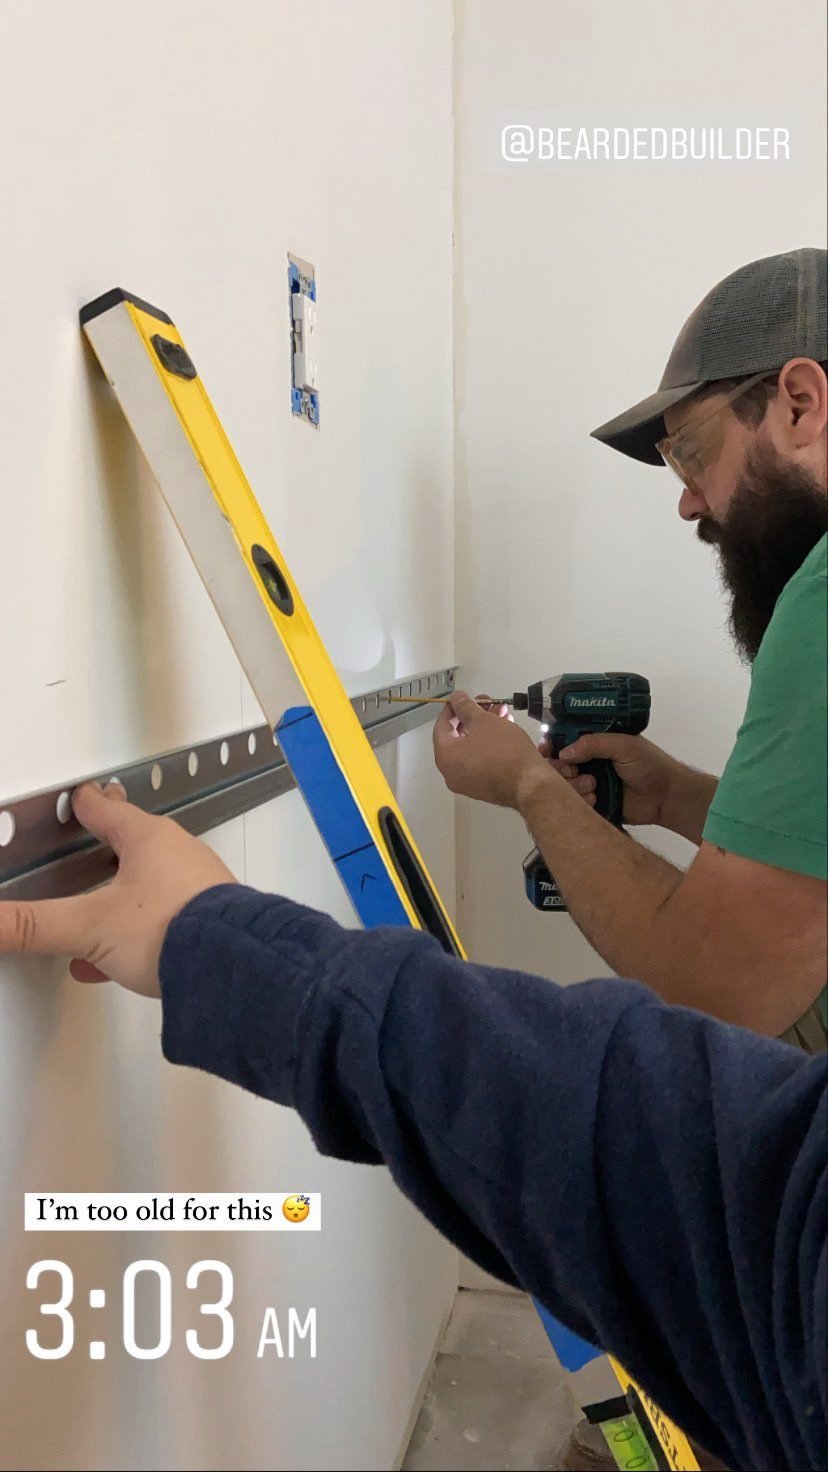
After we assembled all of the cabinets, we could get them hung up! IKEA cabinets are hung using a really neat rail system, where you attach metal rails to the studs in the walls and then the cabinets essentially lock into place on that. The key is getting your measurements 100% accurate, and I’m so glad that Josh was in charge of that part! He’s much more patient and better at math than I am 😅 We also wouldn’t have been able to do any of this without our trusty laser level. This is the exact one we have (Amazon link) and it’s been great for so many projects!

Since we were on a deadline, we had a few really late nights working on this project. I remember watching the sun come up as we were finishing up one night (morning?!) and realizing what dummies we were to give ourselves such a tight turnaround 🫠.
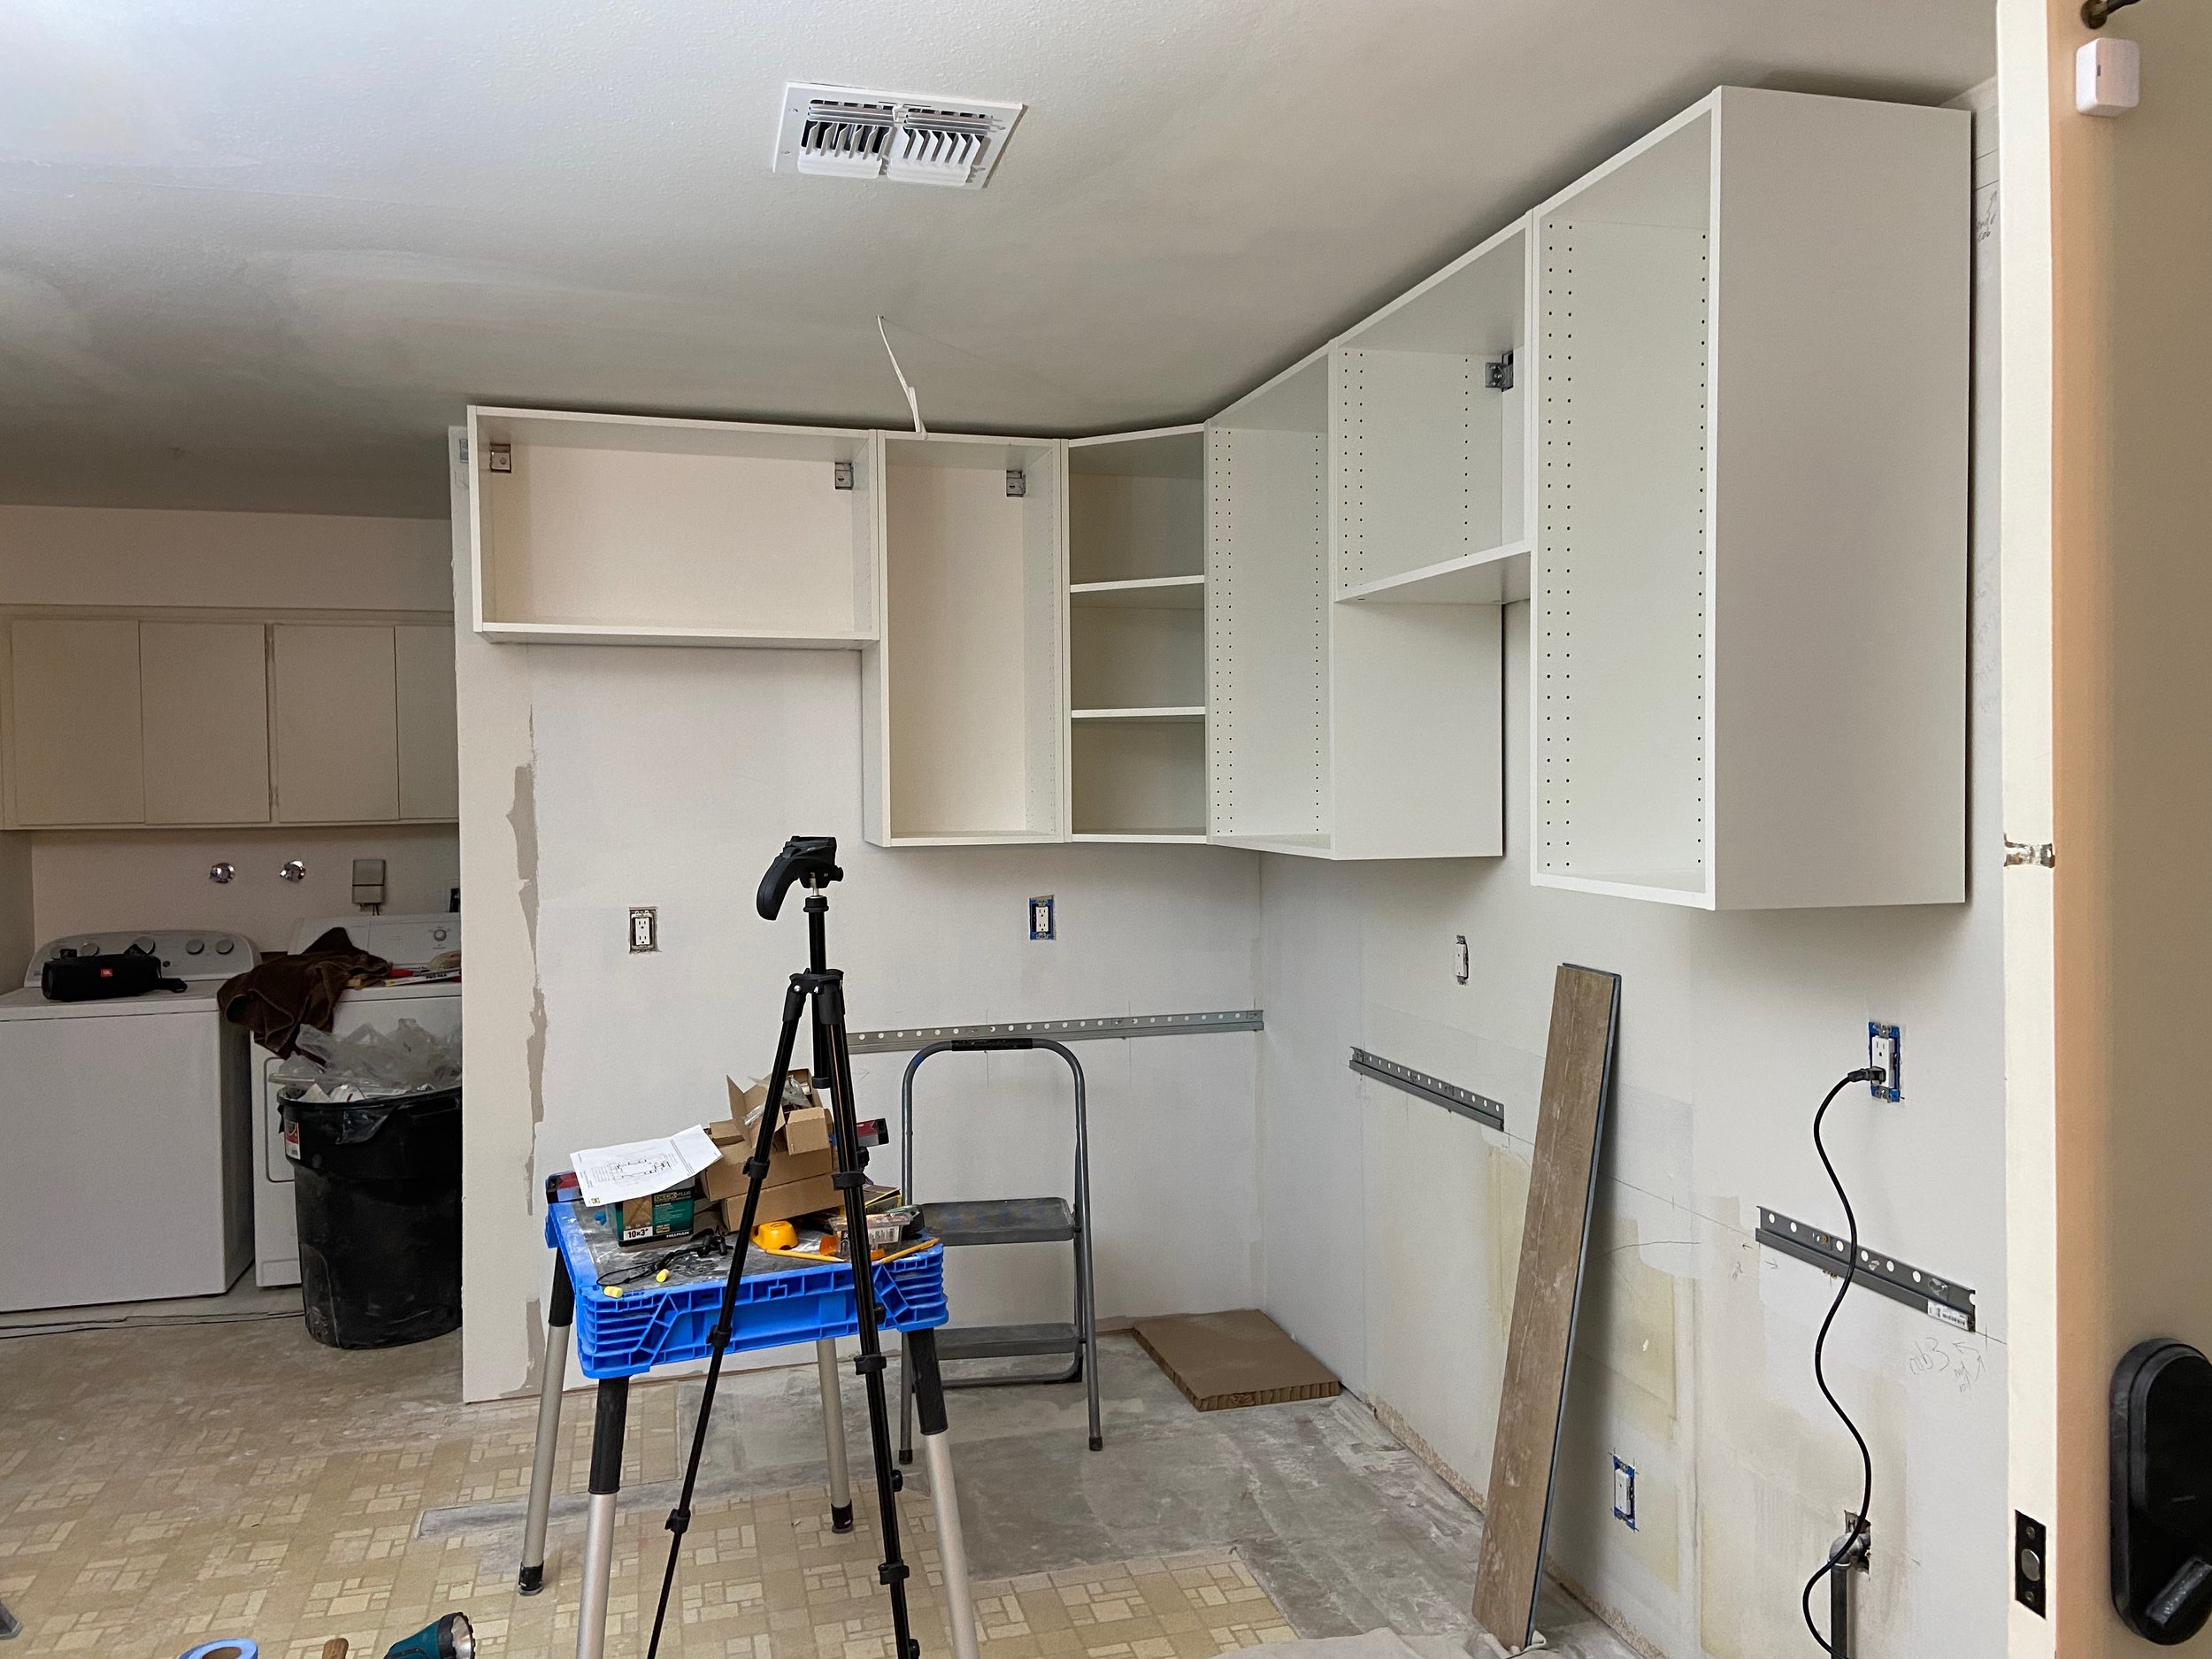
It was SO satisfying to see it all come together. Even though I had triple checked measurements in the planning process, I was still nervous that somewhere along the way I got something wrong. Thankfully we didn’t have any big issues when it came to installation! Installation took about 2 days for us to complete.
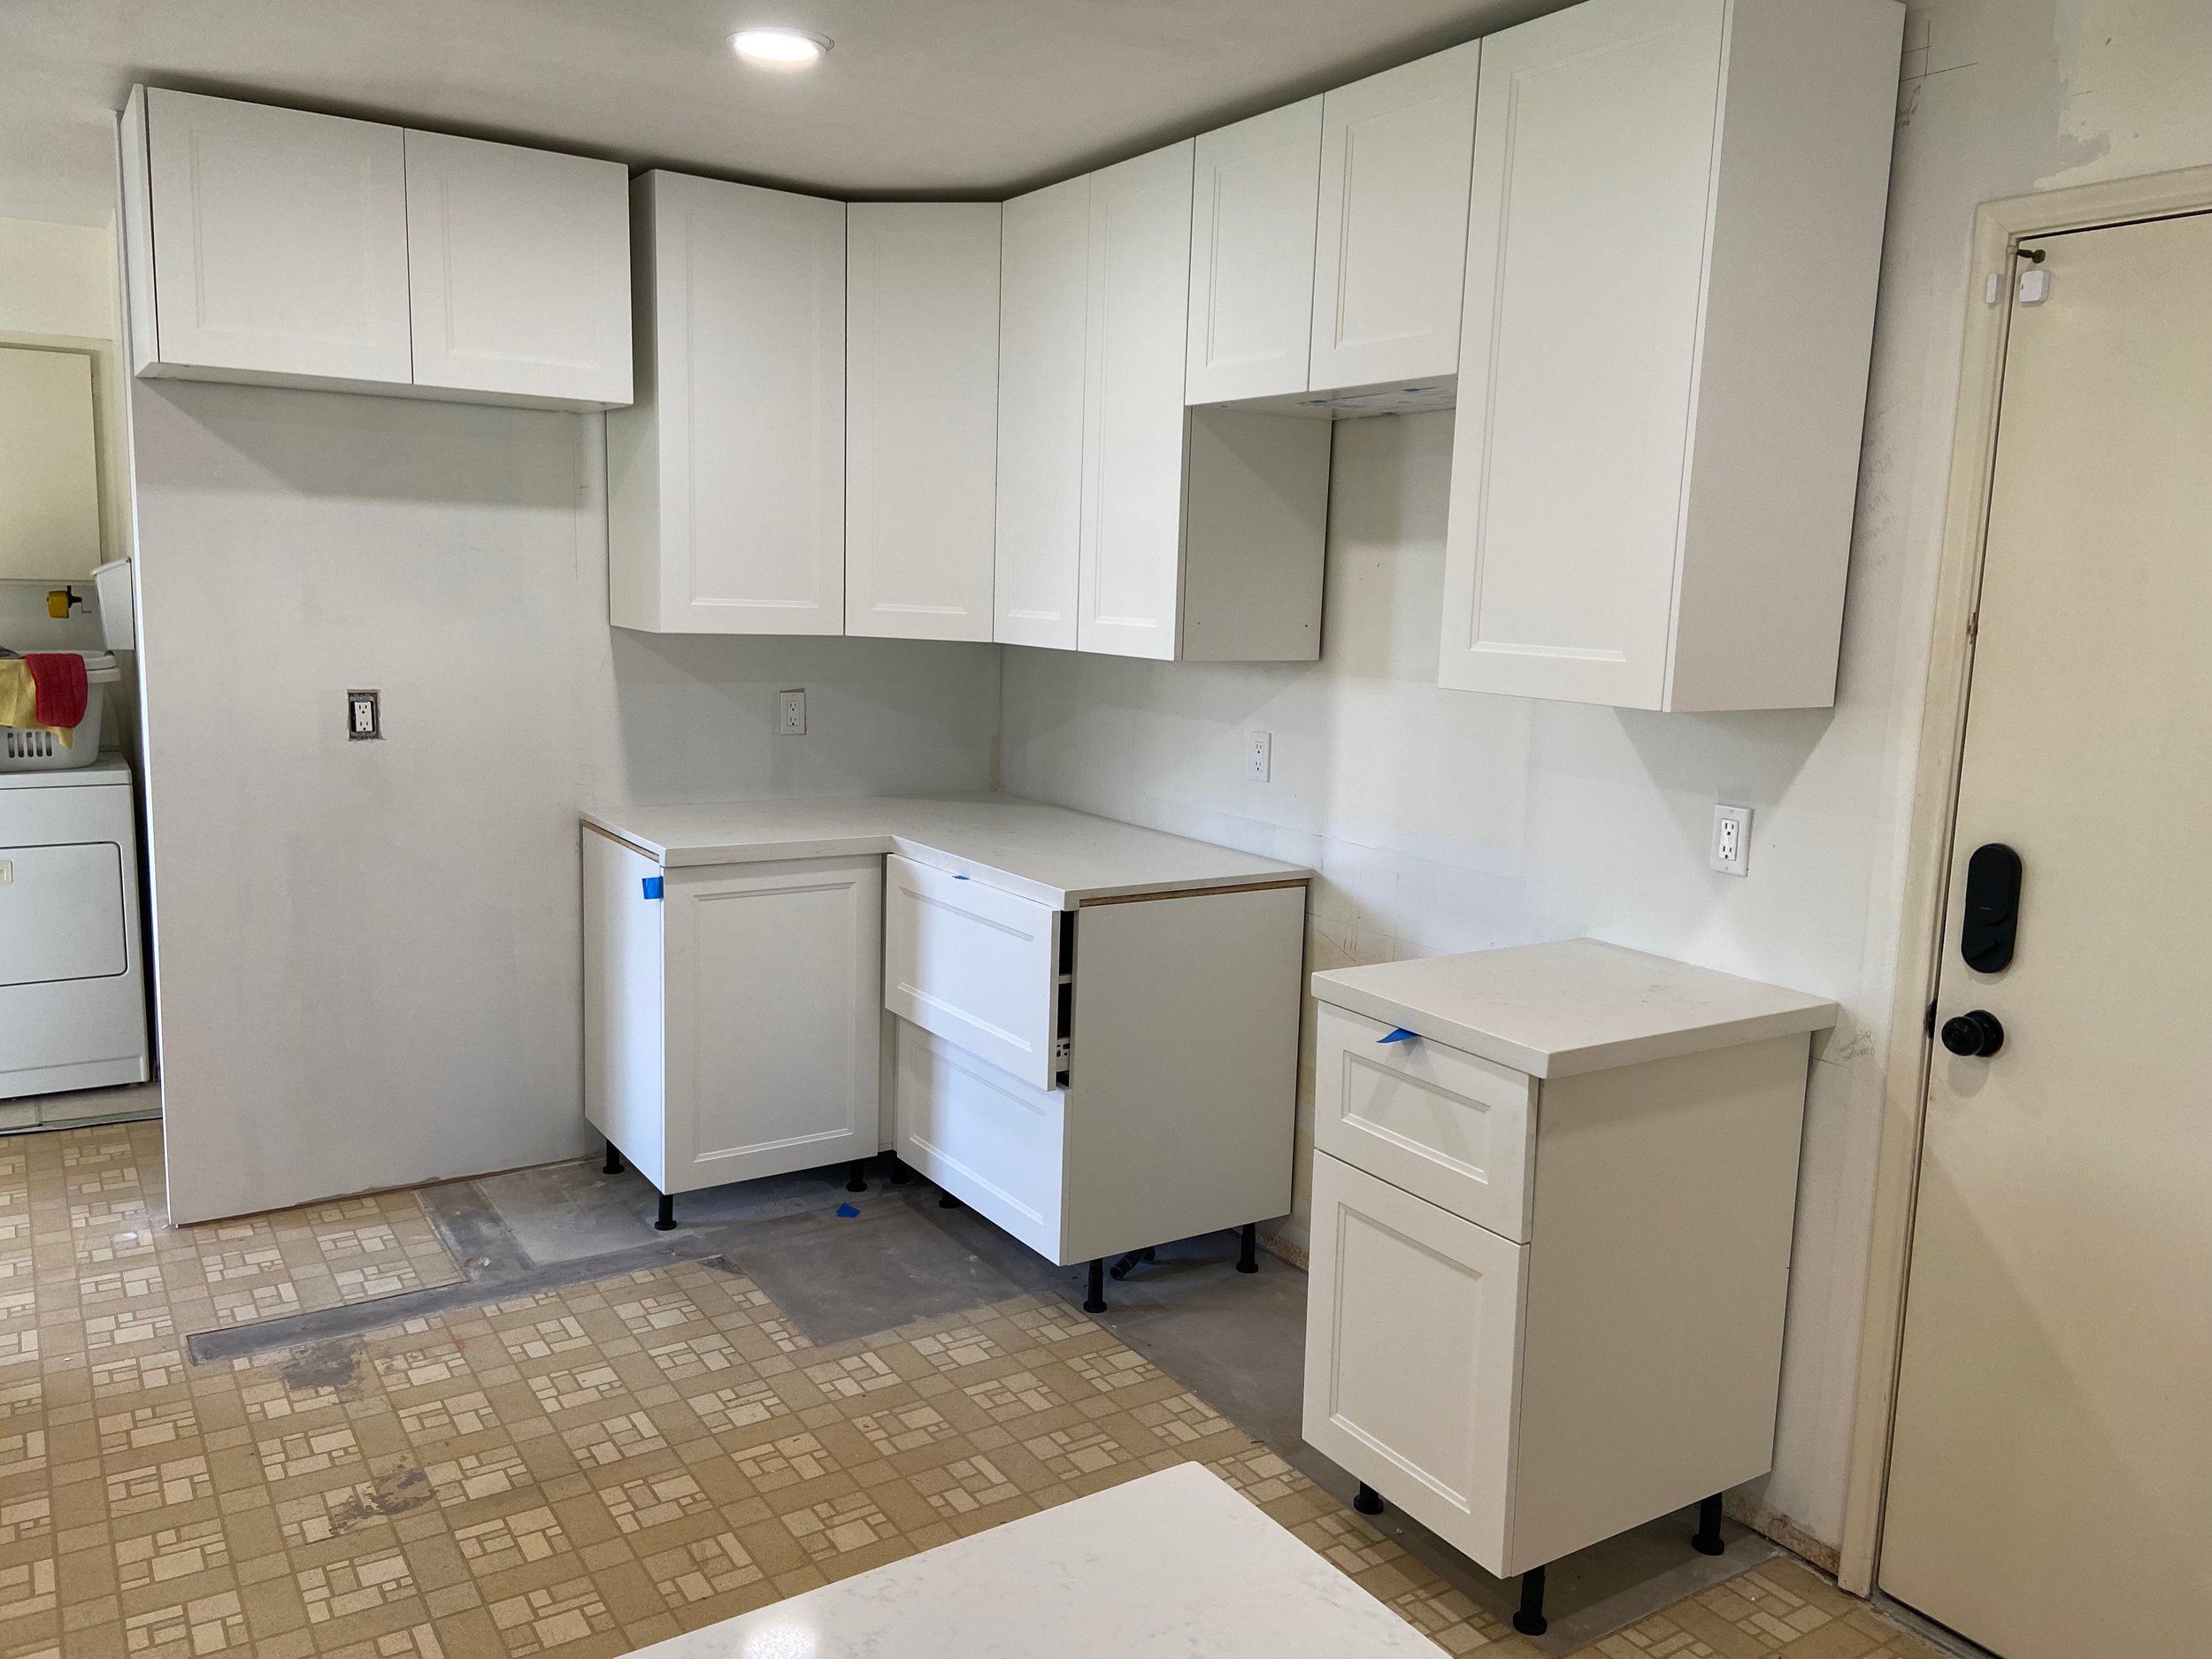
IKEA does a great job of packaging everything and each of the doors and drawer fronts come with a blue plastic covering. The image directly below is with that covering on, and then you can see what the cabinets actually look like without the covering (RIP to my fingertips, that blue plastic was a beast to remove).
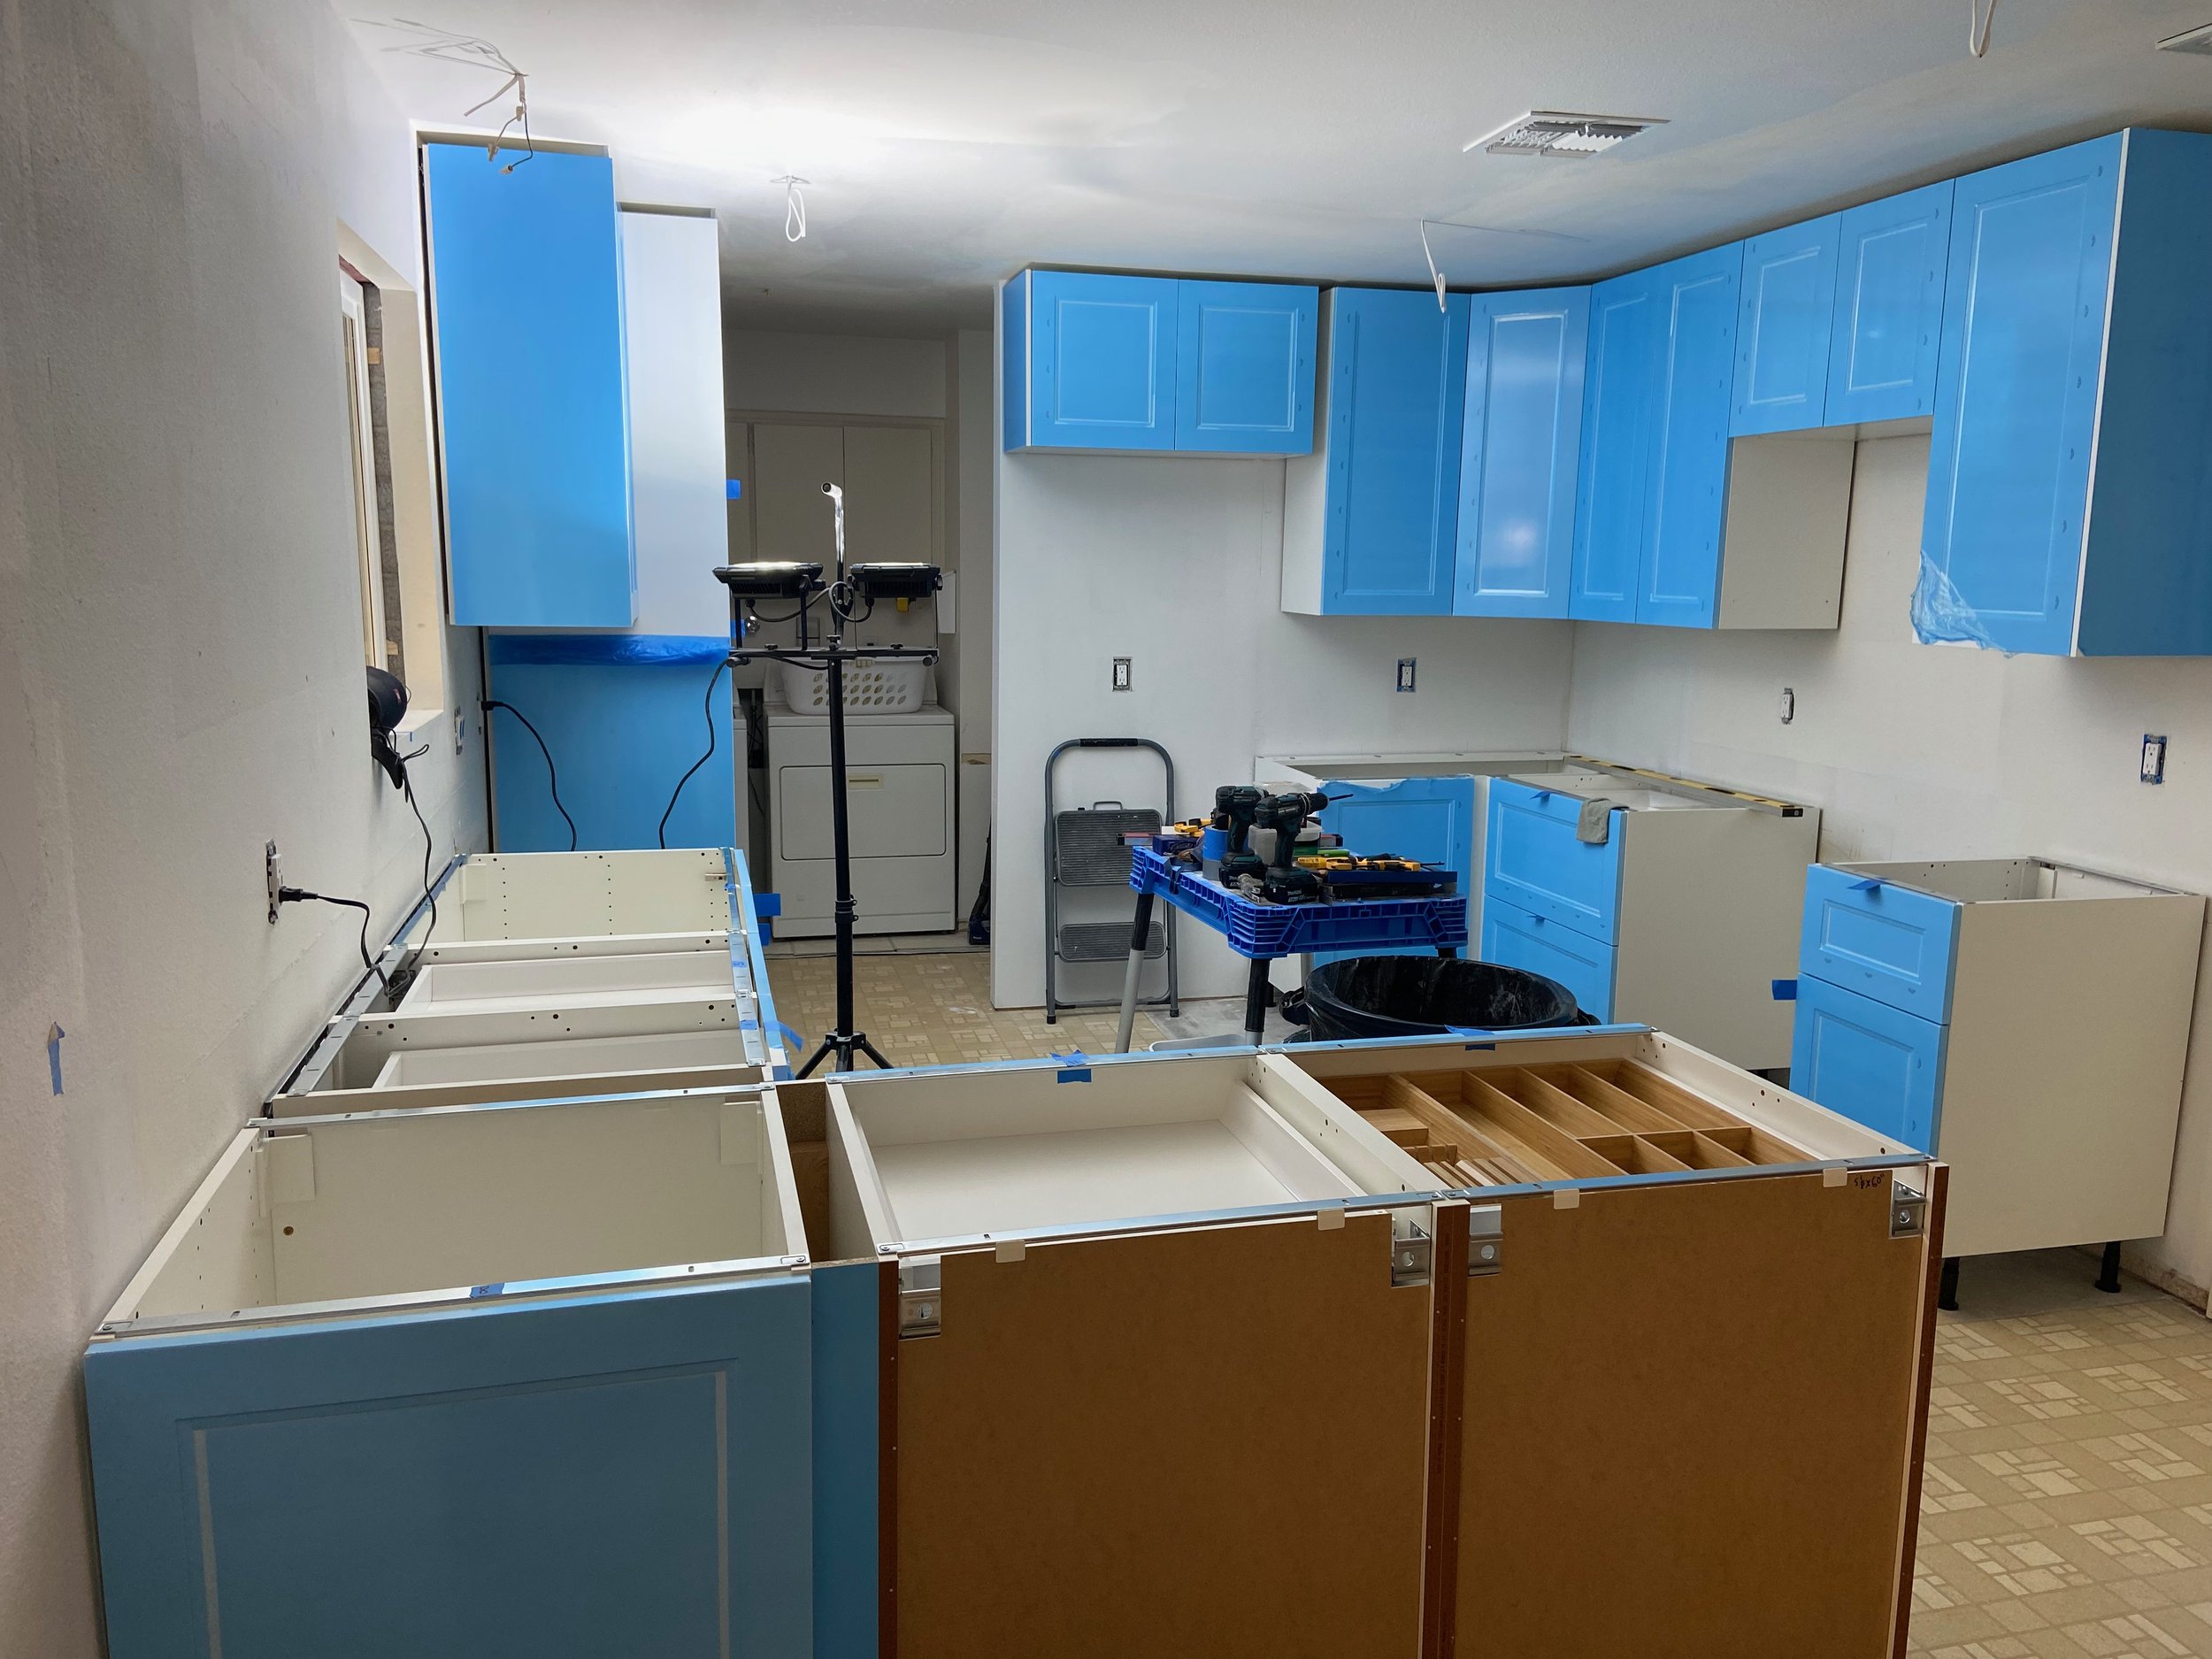
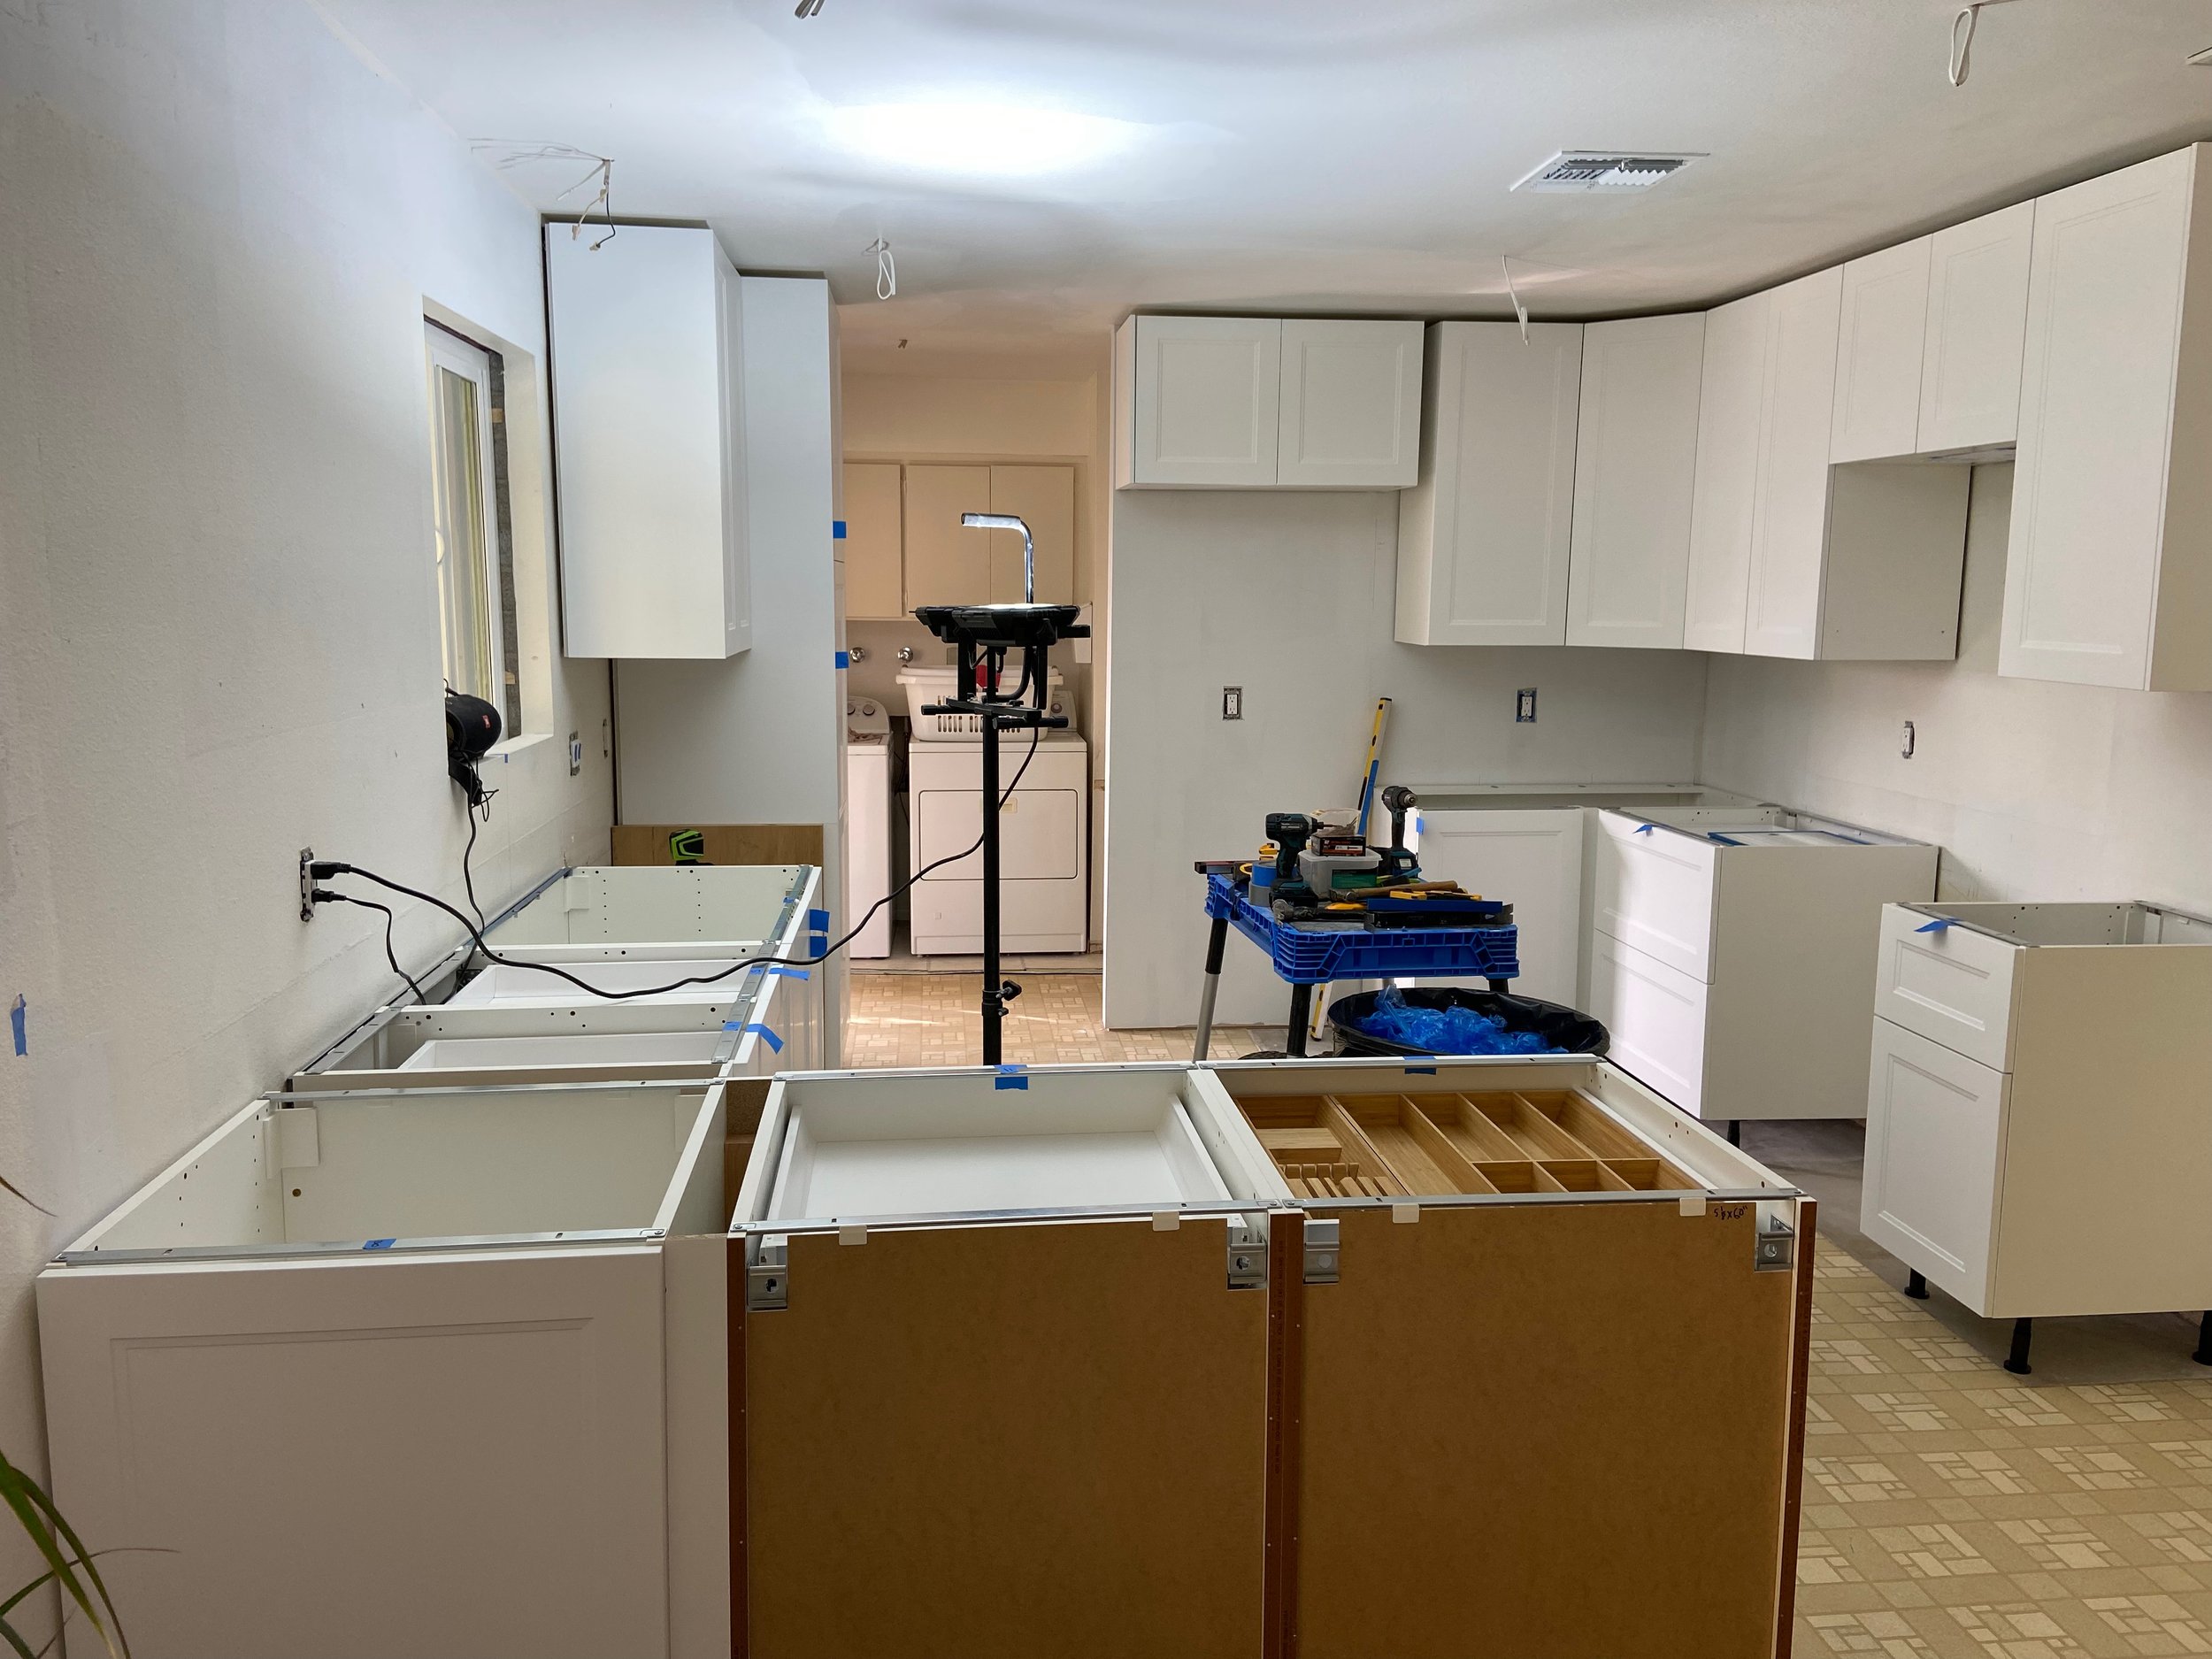
You can see in the image above how we made the most of the corner space on the peninsula using one cabinet facing towards the dining room. That would have otherwise been dead space and I love that we were able to squeeze more storage in there! The exposed backs of the other cabinets would be covered by faux door panels. Below, you can see that the kitchen-facing cabinets in the peninsula are drawers (just like I wanted!)

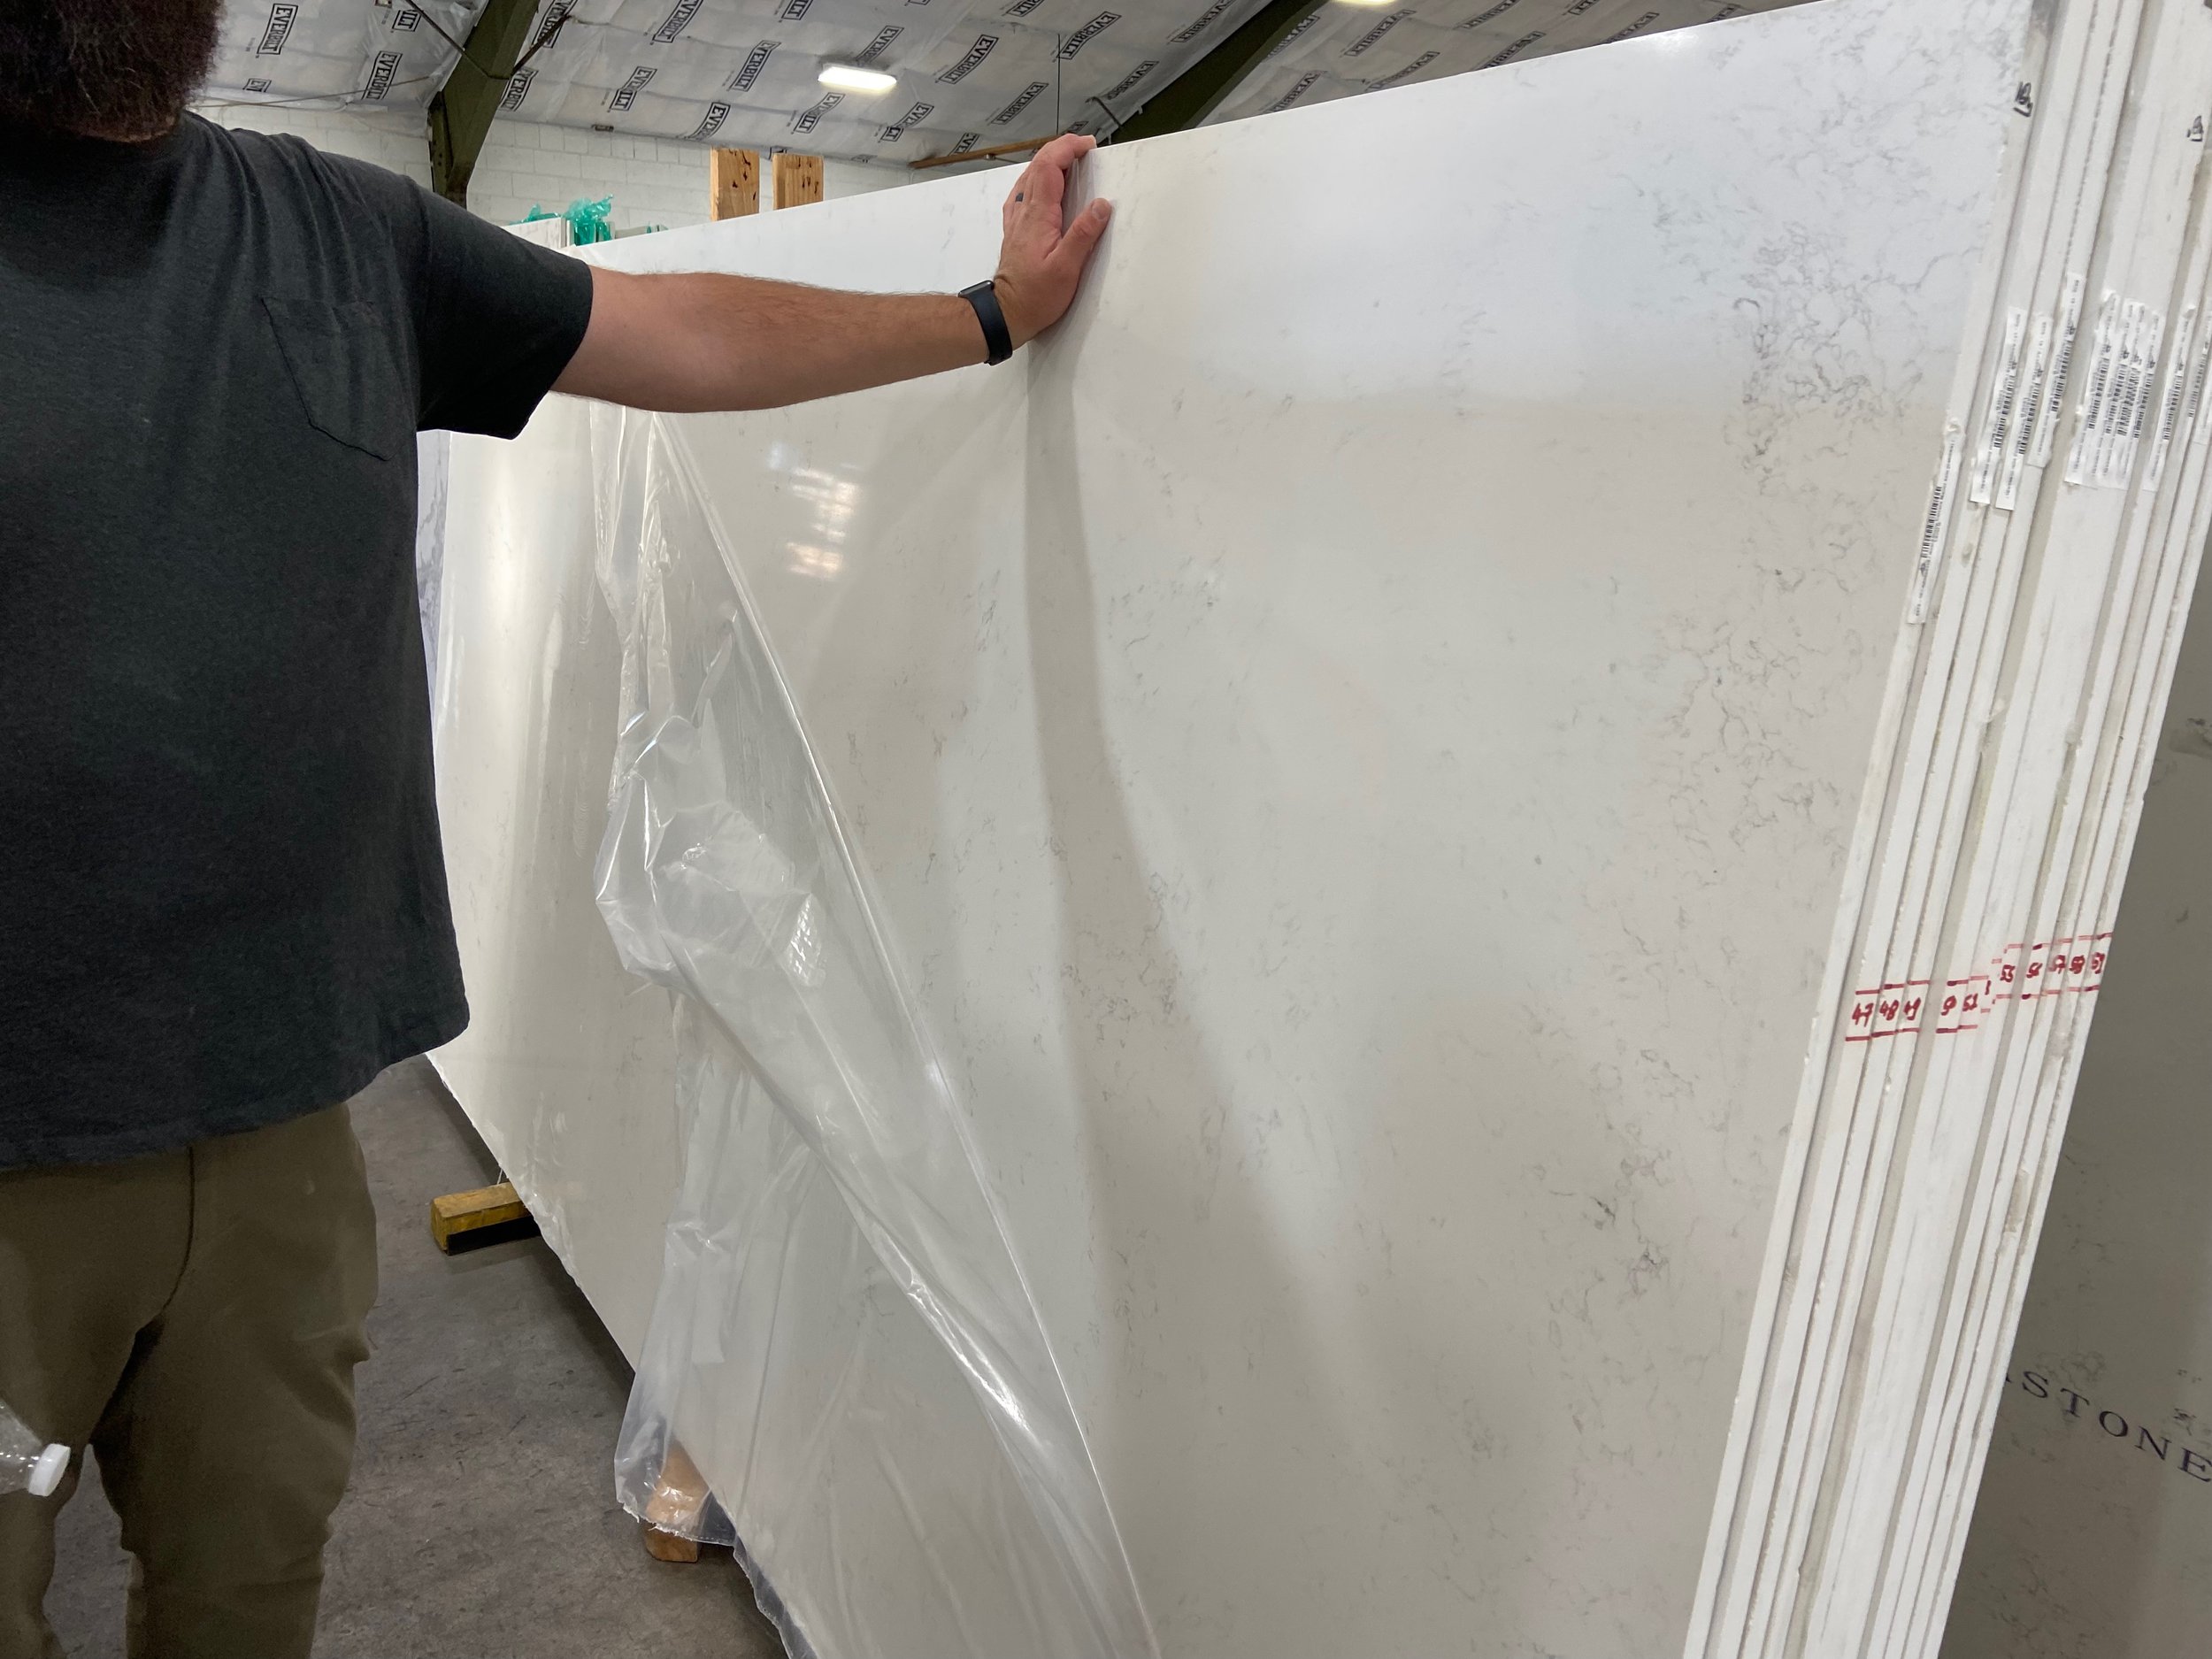
Once we had cabinets installed, it was time for countertops! A week or so earlier we visited the stone yard to choose our countertops. We decided to go with quartz as it’s quite durable and fairly affordable as an engineered material. I’d love to do marble or soapstone in a home someday, but quartz is the right fit for this kitchen.
We had actually picked out two other options prior to settling on the slabs we purchased. The other options had more pronounced veining, but we found out that all of the pieces in both lots we chose were warped from sunlight and heat (Phoenix, amiright). Our third pick ended up being the right fit though and we LOVE the marble look. We went with the Carrara Marmi in the 2cm thickness.
There was no guarantee that our installer would be able to get them installed before Thanksgiving, but by some absolute stroke of luck, they were able to squeeze us in! They measured on a Monday and were able to fabricate them and get everything installed for us by Friday, the week before Thanksgiving and just a couple days before family arrived.
When I tell you I cried tears of joy, I’m not exaggerating! Maybe it was the sleep deprivation, but getting the countertops installed felt like such an accomplishment. It was the cherry on top of about six weeks of hard, hard work. We still had quite a bit to do in order to call this project done, but we could actually use and enjoy the space as is for a bit!
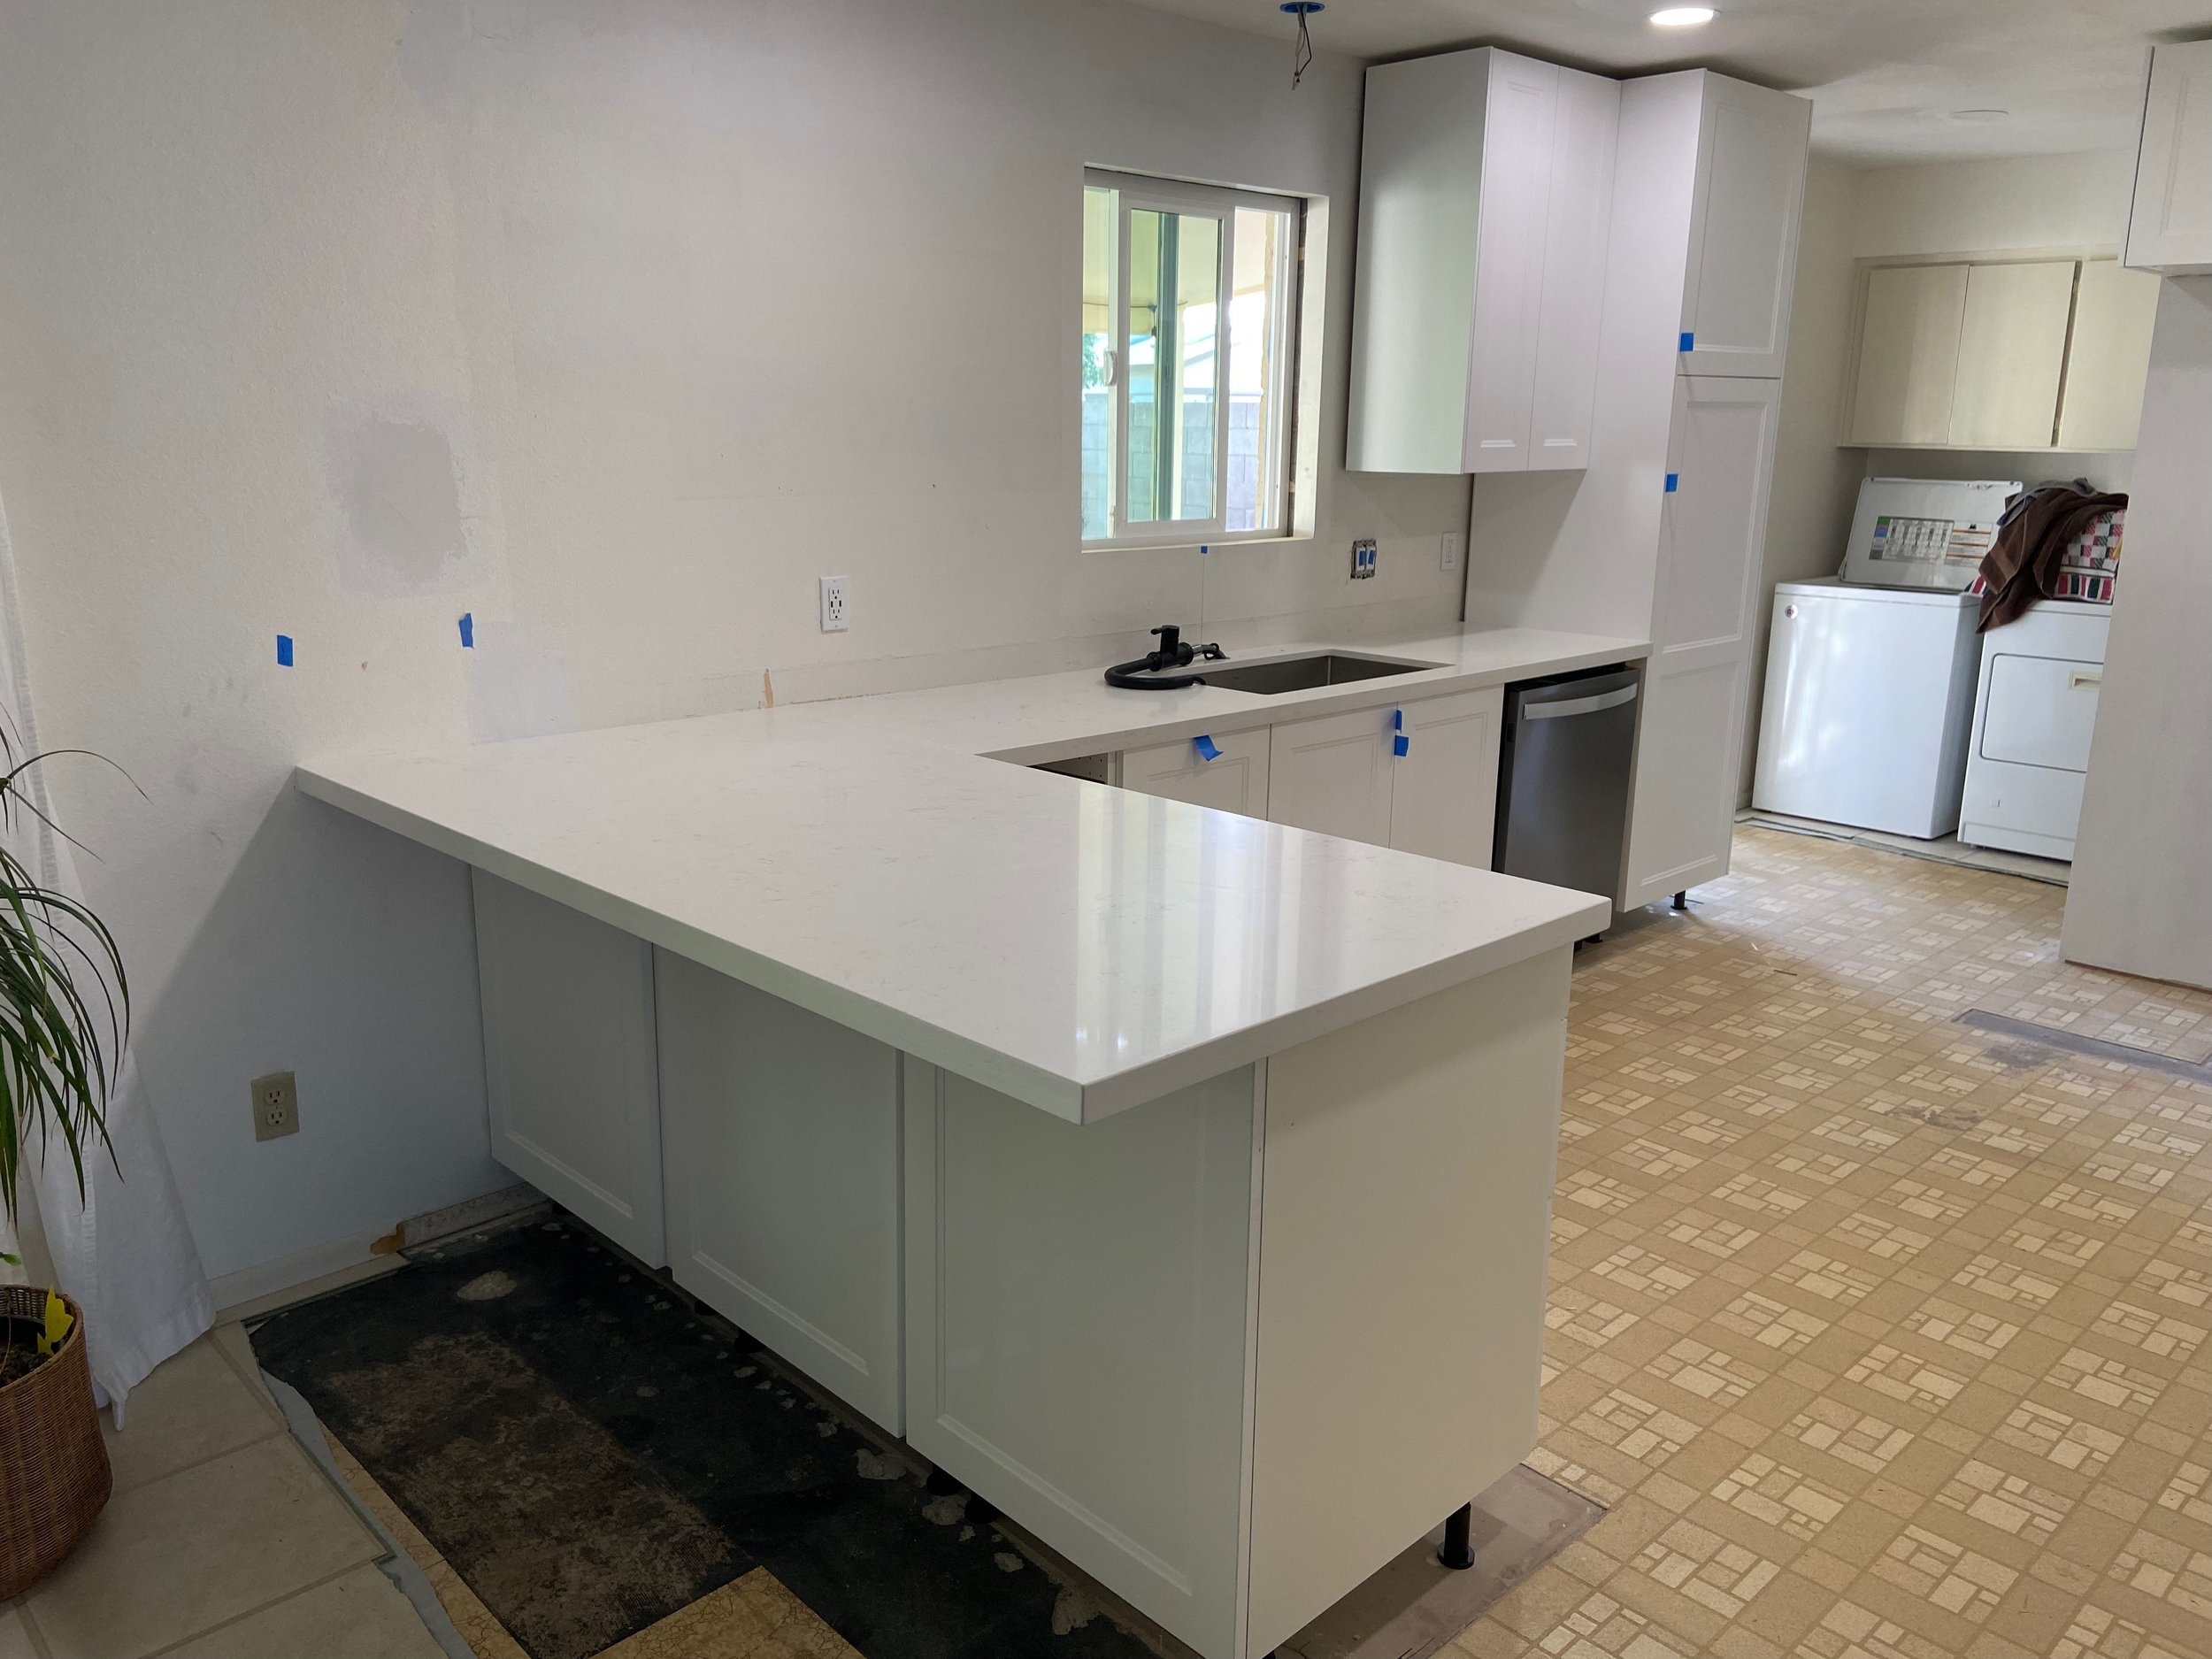
As you can see, we still needed to do quite a bit of trim work, install toe kicks, add backsplash, and generally get the room looking finished. In my next post I’ll cover all of that and show you some pictures of the space as it looks today!

Missed previous posts in the Reno Recap series? Check them all out here!